Last updated: Apr 19, 2026
Peyton sits on the exposed plains in eastern El Paso County, where spring and summer hail and wind events can affect large subdivisions and acreages at the same time. When hail hits, every roof becomes a potential claim, and the clock starts ticking on documentation. In this climate, insurers expect you to assemble clear photo documentation, damage diagrams, and material matching questions right after the storm passes. If you delay, you risk questions about dwell time and original materials that can stall your claim. Have a dedicated storm folder ready: photos of damaged shingles, gutters, vents, and siding; a simple map showing which houses on your block were hit; and notes on wind directions and hail sizes if you observed them.
Colorado's hail-heavy insurance environment means homeowners in Peyton should expect claim files to rely on photo documentation, damage diagrams, and material matching questions after storms. Take wide shots of the roof from ground level and closer shots of bruised shingles or dented metal, but also grab interior photos if leaks are visible. Create a simple damage diagram: mark rafters or valleys with obvious impact marks, and note any granule loss in gutters or downspouts. If you have metal details, record whether panels or trim show denting or bending. Be prepared to identify the exact shingles or metal profile you had before the storm so adjusters can verify the match. The more precise your documentation, the smoother the assessment and the faster you move toward restoration.
Storm demand spikes after regional hail events can compress contractor availability in Peyton and nearby Colorado Springs, affecting inspection speed and replacement scheduling. When dozens of roofs are affected at once, the local market swells with requests to inspect, estimate, and order materials. Your plan should anticipate possible delays and keep backup contacts ready. If you can, arrange a pre-storm contact list of reputable local roofers and establish a preferred callback workflow with your insurer. After a storm, inspectors may be booked days out; you'll want to have photos and diagrams ready to share so a preliminary assessment can begin even if a full on-site inspection has to wait. In practice, rapid, organized submissions-photos, diagram, and material identifiers-often translate into closer inspection windows and fewer back-and-forth questions.
The exposure of Peyton's plains means that many homes endure a combination of hail damage and wind-driven debris, accelerating wear on underlayment and flashings. Insurers frequently request color-matching checks when a roof is replaced, so keep a record of the exact material, color, and profile you choose. If the storm season is peaking, understand that supply chains and crews may constrain scheduling for weeks. Build a realistic timeline with your contractor that accounts for potential backlog, and communicate any weather-driven delays to your insurer early. In short, solid, punctual documentation paired with a prepared replacement plan reduces the risk of protracted downtime between claim approval and a completed roof.
MD Roofing & Solar
(719) 591-2142 www.md360roofing.com
11685 Owl Pl, Peyton, Colorado
4.9 from 243 reviews
MD Roofing and Solar is a locally owned and operated business. We specialize in roofing, solar, gutters, stucco, painting, windows and more.
Raptor Roofing of Falcon
8833 Oakmont Rd, Peyton, Colorado
5.0 from 47 reviews
Raptor Roofing & Restoration, located in Falcon, CO, specializes in providing top-quality roofing solutions to homeowners and businesses. With services including roof repair, roof installation and replacement, hail damage roof repair, solar panel installation, and comprehensive gutter services, they ensure your property is protected and energy-efficient. Whether you're dealing with storm damage or planning a roof upgrade, Raptor Roofing & Restoration delivers reliable, expert craftsmanship and uses durable materials designed to withstand Colorado's weather. Dedicated to customer satisfaction, they offer tailored solutions to meet your specific needs. Contact them today for a free consultation!
All The Above Roofing & Exteriors
12226 Crystal Downs Rd, Peyton, Colorado
5.0 from 44 reviews
Roof replacements, repairs and maintenance. All roof types in low and steep slopes. Gutter replacements, repairs, and maintenance. Fascia repairs and replacements. From commercial to residential we do it all. With 20+ years in the industry.
Highland Contracting
(719) 510-4658 www.facebook.com
20605 Oasis Ave, Peyton, Colorado
5.0 from 4 reviews
We offer custom 24 gauge Standing Seam roof installs. Standing seam roofs withstand the harsh Colorado weather better than asphalt shingles and will give you insurance discounts on top of that!. Our prices are extremely competitive. We are experienced post & beam home builders. Let us help you get connected with a rep today! Need a carport or barn? We can provide them in steel or wood! Erecting large steel buildings is another specialty we provide. We can help design and erect a steel building kit from one of our vendors.
Mega Roofing
(719) 680-6500 www.themegaroofs.com
11950 Garrett Rd, Peyton, Colorado
4.4 from 7 reviews
Mega Roofing specializing in storm and hail damage . Servicing most areas in Colorado.
Rocky Top Roofing & Construction
(719) 494-6225 www.rockytoproofingco.com
Serving
5.0 from 21 reviews
Protect your home with confidence! Rocky Top Roofing & Construction delivers beautiful, long-lasting roofing solutions backed by over 15 years of expertise. Serving Colorado Springs since 2010, we offer a stunning array of roofing options, including asphalt, metal, and tile, perfectly tailored to your style and needs. As a locally owned and operated company, we understand the unique challenges of Colorado weather and are committed to providing expert installation and unparalleled protection. Navigating insurance claims? Our specialists will work tirelessly to maximize your coverage and ensure a smooth, stress-free experience.

Tither Roofing & Construction
(719) 487-4591 titherconstruction.com
Serving
4.9 from 51 reviews
For all your roofing and siding needs, trust Tither Roofing & Construction. Established in 2017, they have quickly become renowned for their commitment to quality craftsmanship and customer satisfaction. Their team of experts is dedicated to delivering exceptional results, ensuring your property looks its best while protecting it from the elements. You'll rest easy knowing that your roof and siding are in good hands with Tither Roofing & Construction.

All Things New Roofing & Restoration
(719) 325-6949 allthingsnewroofing.com
Serving
4.6 from 90 reviews
At All Things New Roofing & Restoration we are extensively trained to work for you. We provide top-notch service, timely and quality workmanship, knowledgeable people who are ready and willing to help in all aspects of your restoration, and roof material that comes with a lifetime guaranty! Establishing trust with our Colorado Springs customers is vital for good business and our number one priority at All Things New Roofing and Restoration. Trust the local, reliable roofing contractors at All Things New Roofing & Restoration!

Viking Roofing
(720) 698-7891 www.vikingroofingco.com
Serving
4.9 from 31 reviews
At VIKING ROOFING, we are your premier roofing contractor committed to providing top-notch roofing services, including expert roof replacement for both residential and commercial properties. As a leading local roofing company, our skilled team offers unparalleled craftsmanship and reliability, ensuring your home or business is well-protected. With a focus on quality and customer satisfaction, we are the go-to roofers near you for all your roofing needs. Trust VIKING ROOFING for professional and efficient roof solutions that stand the test of time. Contact us today to experience the best in roofing services.
Colorado Custom Roofing
(719) 499-7885 www.coloradocustomroofing.com
Serving
5.0 from 10 reviews
We are a residential roofing contractor which provides the homeowner with a full consultation to explain all of your available options, so that you can choose the roofing plan that’s right for your home. We provide the "Good", "Better", and "Best" roofing options.
Rocky mountain roofing & construction
(719) 375-8581 rockymountainrac.com
Serving
4.8 from 72 reviews
Roofing, Gutters, Windows, Painting, Roof Replacement, Roof Install, Insurance claims, Roofing Company, Roofing Contractor, Reroof, Gutter Replacement, Exterior, Interior, Exterior Painting, Interior Painting, Estimate, Estimates, Inspections, Inspection, Atlas, GAF, Tamko, Owens Corning, Malarkey, IKO, CertainTeed, Tile, Slate, Modified Bitumen, Clay, EPDM, Commercial, Residential, Commercial Roofing, Commercial Roofing, Commercial Painting, Commercial Gutters, Commercial Windows, Residential Roofing, Residential Gutters, Residential Painting, Residential Windows, Remodel, Finish, Professional, Reliable, Dependable, Licensed, Insured, Roofing Crew, Gutter Crew, Painting Crew, Window Crew, Warranty, Warranties, Lifetime Warranty, Hail, H...
CCP Roofing & Restoration
Serving
5.0 from 29 reviews
Since 1992, CCP Roofing & Restoration has been a trusted local roofing company serving Colorado Springs, Monument, Larkspur and surrounding areas. We specialize in high-quality roofing solutions, including metal roofing, roof repairs, gutters, stucco repairs and insurance claim assistance.
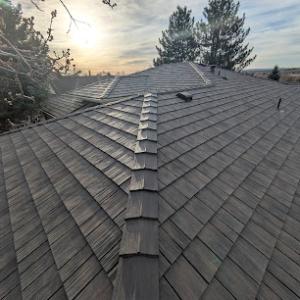
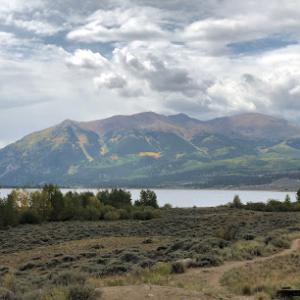
Peyton's semi-arid climate blends strong sun exposure, low humidity, and large day-night temperature swings, all of which speed up aging on common residential roofs. Granule loss on asphalt shingles or coated surfaces happens faster under intense UV, while thermal movement can cause minor misalignments at edge details and ridge caps. Surface drying after sunny days makes surface debris and micro-cracks more noticeable and can push small leaks along flashing lines. The open terrain around town means solar exposure is consistent and unshaded, so a roof that looks fine at a glance can be quietly deteriorating under the surface.
A Peyton roof endures more frequent hail chatter than you'd expect for a quiet afternoon up on the ridge. As hail stomps across the surface, granules loosen and can accelerate aging of the shingle surface. Open terrain also invites gusts that press against exposed planes, intensifying uplift stress on edges, ridges, and any southern or western exposure. If you've noticed curling, cupping, or missing granules after a storm, that's a sign the roof is aging in a high-wind, high-UV environment. Pay particular attention to the drip edge and fascia, where wind-driven moisture can find a path if those components show gaps or corrosion.
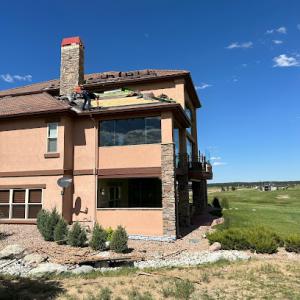
Winter snow is intermittent rather than constant, but Peyton's cycles of sun, melt, and refreeze create sharp temperature swings. Freeze-thaw cycles after sunny days push water into any gaps around penetrations or flashing. Over time, that pressure can widen gaps at chimney flashing, vent boots, skylights, and roof-to-wall transitions. Look for hairline cracks in sealant, rust around metal flashings, or stained areas along penetrations after the first warm-up spell following a cold night. These are typical trouble spots that can become actual leaks if left unchecked.
Make a simple yearly walk-around part of your routine. Start with the perimeter edge and visually inspect for lifted shingles, curled tabs, or missing granules. Check the ridge caps for cracks or gaps and run a hand along flashing seams to feel for looseness or grit accumulation. After hail events or strong winds, document any new damage with notes and dated photos, focusing on granule loss, exposed felt edge, and any lifted sections. If you see shinier or bald spots on the surface, or if a shingle looks pale or brittle compared to neighbors, plan for a closer inspection.
When you suspect aging is turning into a broader issue, schedule a professional roof assessment that prioritizes storm damage documentation. A contractor familiar with our high-UV, high-stress conditions will assess granule retention, flashing integrity, vent and chimney interfaces, and the effectiveness of edge restraints. If repairs are needed, prioritize those that address flashing gaps and edge uplift first, since rain and wind can accelerate deterioration along those lines. For a replacement decision, consider how much the roof has aged versus how much it has resisted repeated storm cycles, and align timing with the typical storm season trajectory to minimize additional downtime and risk.
Asphalt shingles remain common in Peyton because they fit mainstream subdivision housing stock and are often the baseline material in hail-related replacements. In this area, the practical choice comes down to how well the shingle family you pick holds up under fast weather swings and intense hail. Look for newer, laminated or architectural designs that offer better impact resistance and a longer residual life when paired with a proactive maintenance plan. In high-plains exposure, attic ventilation and proper underlayment become more critical to prevent heat-related aging and moisture intrusion after a severe hail event. When evaluating color and granule loss over the years, note that lighter tones can reflect sun a bit better, but you still want a shingle that can endure Peyton's bright UV days without curling prematurely. Because many Peyton homes use traditional roof lines, asphalt can be a straightforward, compatible option that mirrors the original aesthetics while improving performance through upgraded layering and installation details. Regular inspections after hail seasons help capture early wear, reducing the risk of sudden leaks and ensuring the warranty claims process stays smooth if hail damage occurs.
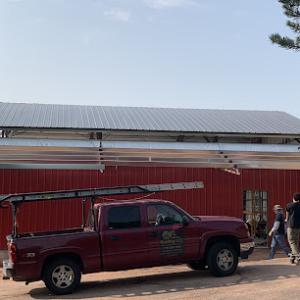
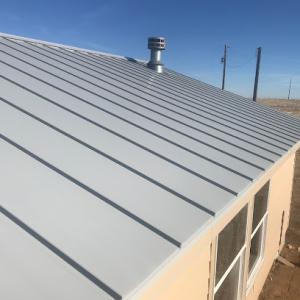
Metal roofing is relevant in Peyton for homeowners prioritizing impact resistance and sun durability, but detailing matters on wind-exposed sites common in the area. Metal panels tend to shed hail better than many residential shingles, and their reflective surface can lessen heat buildup on attic spaces during warm stretches. The key here is choosing a profile and gauge suited to Colorado wind loads and ensuring trim, fasteners, and seam connections are rated for blistering sun and potential ice-bridge scenarios. On exposed roofs, edge protection, valley detailing, and proper installation of eave overhangs become critical for long-term performance. Metal roofs can present aesthetic flexibility, especially for rural properties that lean toward a modern or industrial look, but the supporting deck and framing must be able to handle the weight and expansion characteristics of metal systems. If hail remains a primary concern, metal can offer a meaningful reduction in debris-related punctures and interior risk when installed with appropriate underlayment and corrosion-resistant coatings.
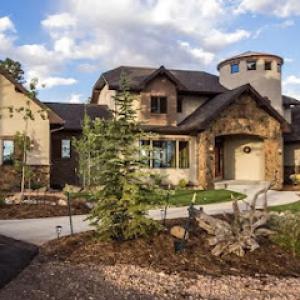
Tile and synthetic products need evaluation for structural load, breakage risk from hail or foot traffic, and compatibility with the roof framing found on local homes and rural properties. Clay and concrete tiles provide strong wind and UV resistance but are heavier and require a solid structural assessment to avoid sagging on older or lighter frames. On Peyton's harsher climate, breakage from hail can occur, so consider impact-rated variants and protective verdicts from local roofing pros. Synthetic shingles and composites offer hail resistance and weight savings relative to traditional tile, yet performance depends on the specific product's formulation and installation method. For rural settings with varying roof pitches and occasional snow or hail loads, confirm that the chosen system aligns with existing framing, drainage, and the ability to withstand periodic foot traffic during maintenance.
For Peyton, storm-driven demand in El Paso County can raise labor lead times and pricing pressure after major hail events. When a big hail day hits, crews surge to the most exposed addresses first, and travel time from outside the area adds to the bottom line. Expect longer wait times for inspections and fewer crews available in the first two to four weeks after a hail storm. This translates into higher bids and tighter scheduling windows when you're aiming to replace quickly to avoid further leaks or UV damage.
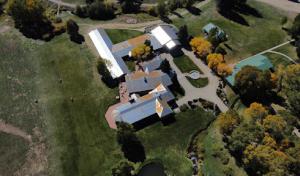
Rural and semi-rural properties around Peyton may see cost variation from travel time, access, detached structures, and larger roof footprints than denser urban lots. If your home sits on acreage with a long driveway, or the roof lines extend over a barn or storage shed, the crew will bill more for mobilization and safety setups. Larger roof footprints mean more square footage to cover, which directly pushes material and labor totals higher. In practice, this can be a meaningful portion of the total cost, even when material prices are steady.
Material choice in Peyton is often influenced by balancing upfront cost against hail exposure, sun aging, and the likelihood of future insurance claims. Asphalt shingles remain the most modest option per square, but metal, concrete tile, or synthetic shingles can offer better hail resistance and longer service life in this climate. A metal roof ranges from roughly 600 to 1,100 USD per square, while clay tile sits higher, and concrete tile sits between those extremes. If the goal is to minimize claim-related work and future roof failures after severe weather, you may lean toward more impact-resistant options, recognizing the initial premium can be offset by fewer claims and longer intervals between replacements.
In the weeks after a hail event, having a precise, well-documented record helps with insurance adjustments and a smoother replacement. Document hail damage with dated photos from multiple angles, keep all contractor assessments, and track any temporary fixes you implement to protect interior spaces. When reviewing estimates, ask how each material choice performs under continued UV exposure, wind, and potential future hail, and compare not only the sticker price but the expected lifecycle costs. In seasons with heavy storm activity, expect estimates to reflect both material costs and the surge in local labor demand.
Budget with a clear eye on your roof's footprint and access realities. Ask for a breakdown by material type (with per-square costs) and a separate line for mobilization/travel if the project touches detached structures. Hail-focused projects often carry a premium for expedited scheduling; if timing isn't urgent, you may shave some cost by choosing a slightly longer revival window. Finally, keep a rain plan for the replacement week; a sudden rain event can disrupt a tightly scheduled crew and push the project into additional days, adding money to labor and potential storage costs for materials.
Don't let upfront costs delay a critical repair - these contractors offer payment plans to fit your budget.
MD Roofing & Solar
(719) 591-2142 www.md360roofing.com
11685 Owl Pl, Peyton, Colorado
4.9 from 243 reviews
For Peyton properties under county jurisdiction, a full roof replacement typically requires permit review through the local building department rather than informal over-the-counter work alone. This matters because the weather-exposed roofs in this area age quickly, and a rushed or unpermitted replacement can create long-term headaches when you try to sell or refinance. Before any shingle or tile pry-up begins, check with the county to confirm whether the parcel falls under the unincorporated county rules or some other local overlay. If the project is considered substantial, you may be asked for structural details, venting diagrams, and drainage proposals as part of the permit package.
Inspection focus commonly includes verification of roofing material type and installation, proper venting, and correct drainage details. In this climate, where hail, UV exposure, and fast weather swings drive rapid aging, inspectors will look for adequate attic ventilation to prevent moisture buildup and heat-related failures. Drainage verification helps prevent ice damming and pooling that can accelerate roof deterioration in the spring thaw. A final inspection after completion is the usual checkpoint, ensuring that every detail aligns with county code and the chosen system's installation standards. Delays or rework often stem from missing vent specifications, improper underlayment, or misaligned flashing around chimneys and vents.
Because Peyton is an unincorporated community setting for many homes, homeowners should confirm whether county jurisdiction applies to their parcel before work starts. Failing to verify can lead to enforceable stop-work orders, required undoing of non-permitted work, or penalties that complicate a timely replacement. If the parcel sits outside a formal town boundary, the county office is the right first stop to determine the correct permitting path, occupancy compliance, and what documentation you'll need for the final sign-off. Taking a few minutes to confirm upfront can prevent costly delays when storm season urgency is highest.
Peyton homeowners operate in one of the nation's most hail-claim-active states, so insurers often scrutinize prior claim history and the date of loss closely. When a storm hits and roof damage is suspected, the first call to the carrier isn't just to get a check-it's to establish a documented timeline. Delays or gaps in reporting can complicate coverage decisions and push a replacement further into the season when matches become harder to find. Early, honest communication about when hail was observed, what areas were damaged, and how long the roof has shown signs of wear helps prevent disputes later.
Adjusters may request close-up and slope-by-slope evidence of hail and wind damage, especially when replacement decisions depend on matching existing materials. Photographs should be precise: show individual shingles, granule loss, and any denting on metal vents or flashing. For slope-by-slope work, include a clear map or notes indicating which sections received the most impact. If a roof uses multiple materials, document each portion separately. Having a dated, professional-looking inspection report ready can keep the process moving and reduce back-and-forth requests.
Warranty and material documentation matter after replacement because insurers and future buyers may ask how a storm-damaged roof was rebuilt. Save every receipt, warranty card, and installation spec sheet, along with photos of the finished roof from different angles. If color-matching is required, keep a record of the exact shingle batch numbers or tile types used during installation. When the paperwork trail is complete and organized, it strengthens the case for a smooth claim and a confident sale later on.
Peyton's mix of subdivision homes and larger rural properties means leak investigations may involve house roofs, detached garages, barns, and other accessory structures on the same parcel. When a rainstorm hits, a single failed seam on a barn cupola or a shed roof can cascade into interior damage miles away from the main home. If a structure sits on exposed ground, wind-driven rain can blow through the most hopeful-looking ridge line and overwhelm a once-dry attic quickly. Plan for the possibility that a leak originates somewhere other than the primary residence and that multiple roof penetrations share a single storm's pressure.
Wind-driven rain on exposed sites can reveal weaknesses at skylights, chimneys, and other penetrations even when field shingles still look serviceable from the ground. A small pool of water near a skylight or a damp ceiling seam in a converted garage can signal an ongoing breach. In Peyton, these spots tend to worsen fast during sudden temperature swings. Inspect after every major storm, focusing on seals, flashing, and the transition from roof to wall. If the sealant looks aged or cracked, treat it as a red flag for immediate, targeted resealing or flashing replacement before interior damage spreads.
Emergency response matters more in a spread-out setting because active leaks can affect interiors before full replacement crews are available after a storm. If a ceiling starts to sag or water shows through light fixtures, act quickly: place buckets, cover with waterproof tarp if safe, and isolate the area to minimize further intrusion. Notify your insurer early with storm documentation and staged photos from multiple angles-this can smooth a rapid assessment and prevent prolonged exposure to interior systems while waiting for a contractor.
Find contractors experienced in skylight installation, flashing, and leak repairs to bring natural light into your home.
All The Above Roofing & Exteriors
12226 Crystal Downs Rd, Peyton, Colorado
5.0 from 44 reviews

JJ Construction & Roofing
(719) 694-9008 www.jjconstructionandroofing.com
Serving
5.0 from 92 reviews

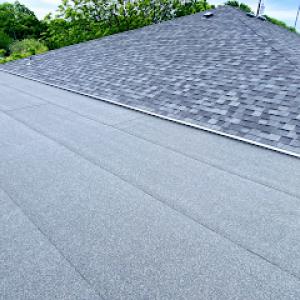
While pitched residential roofs dominate Peyton, some homes, additions, porches, and outbuildings use low-slope sections that need different drainage and membrane detailing than the main roof. On these surfaces, ensure proper transitions to steeper roof planes so water flow remains uninterrupted during intense hail and sudden storms. Look for adequate slope (even a modest 1/4:12 or greater) and confirm that waterproofing membranes extend into adjacent flashings without creating flat spots that hold runoff. In weather swings, membrane seams and edge detailing become the first places to age, so prioritize robust seam tapes, sealant integrity, and edge termination that resist UV degradation from the strong sun.
Peyton's strong sun exposure makes solar appealing, but reroof timing matters because panel removal and reinstallation can complicate storm repairs. When a roof nearing replacement also hosts a roof-integrated or mounted solar system, coordinate the sequence: typical practice is to remove panels before a re-cover or full replacement to protect solar hardware and keep the underlayment clean and dry. If the panels stay on for a full tear-off, ensure the contractor has a plan to shield electrical components and to re-seal penetrations after panel work. In homes with mixed roof geometries, consider how solar racking interfaces with low-slope sections so mounting rails do not create shadowed drainage paths or overlooked edge conditions.
Mixed roof geometries on newer homes east of Colorado Springs can create transition details where low-slope sections meet steeper shingle or tile areas. Pay special attention to how water transitions from a flat or gently pitched surface into a higher perimeter, where differential movement and thermal cycling can stress flashings. Heavier hail exposure can nick or compress edge membranes near these junctions, so inspect and reinforce transition zones with compatible sealants and compatible membrane materials. Properly detailing these interfaces reduces the risk of premature leaks after hail events and during spring storm cycles.
Find specialists in TPO, EPDM, and built-up flat roofing systems for residential and commercial properties.
All The Above Roofing & Exteriors
12226 Crystal Downs Rd, Peyton, Colorado
5.0 from 44 reviews
Rocky mountain roofing & construction
(719) 375-8581 rockymountainrac.com
Serving
4.8 from 72 reviews