Last updated: Apr 19, 2026
Spring thunderstorms in this area routinely trigger adjuster inspections and documentation-heavy claim reviews. Lisle sits in the Chicagoland hail and wind claim environment, where a single severe storm can set off a wave of home inspections, multiple claim submissions, and back-to-back contractor inquiries. That means after a hail event, you're likely to see an uptick in phone calls, emails, and on-site visits from adjusters and roofers within days. If a storm hits during early spring or late winter thaws, the paperwork pile can feel overwhelming. Being proactive with timely documentation-photos timestamped during daylight, receipts for any temporary repairs, and a clear storm date-is your best defense against delays or denial later in the process.
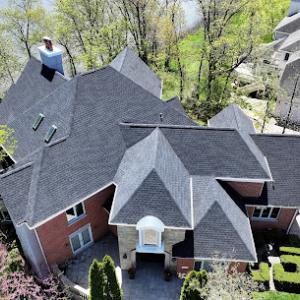
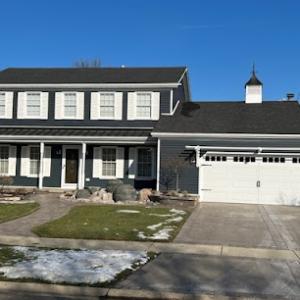
Winter snow and ice can mask prior impact damage, and many Lisle homeowners discover storm-related roof problems only during the spring thaw or after the first heavy warm-season rain. Those hidden issues can include compromised shingles, punctured underlayment, or edge wrapping that later cascades into leaks. The spring season amplifies this risk: days of melting snow reveal water stains in attics, ceilings, and walls, while spring winds can loosen unsecured shingles or vents. If your roof looks fine from the ground but feels damp after a rain, don't assume it's nothing. A thorough inspection by a knowledgeable, local professional-ideally someone who understands how Lisle's freeze-thaw cycles interact with hail damage-can uncover what the snow hid.
The city's roofing demand spikes after regional storm events, which can compress contractor availability and delay both repair scheduling and municipal inspection timing. In practical terms, that means after a major hailstorm, you'll likely face backlogs for assessments, permits (handled separately in this guide), and even temporary protection work. When time is critical-like after a storm with large hail-the window to document damage before roofs are exposed to fresh weather can close quickly. Seek out a contractor who can commit to a prompt inspection, provide a written assessment, and outline the next steps in a storm-season timeline. If meters run hot for inspections, ask about priority scheduling and whether they offer storm-response crews that regularly handle Lisle-area claims.
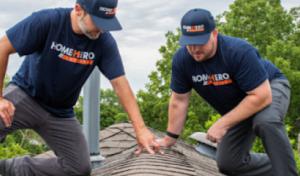
After a storm, walk the roof as soon as safely possible and document with clear, dated photos from multiple angles-edge damage, missing shingles, gouges, and granule loss. Capture attic signs of water intrusion, such as dark spots or mold, and note whether upturned flashing or damaged vents exist. Schedule a same-week roof inspection with a local roofer who understands the quirks of this climate. When you receive an adjuster visit, keep a detailed log of who visited, what was documented, and any deviations from your independent findings. If wind or hail damage is confirmed, move quickly to coordinate a plan that aligns with the insurance review timeline, because delays can increase exposure to weather-related further damage and may complicate the replacement path later in spring.
Allmax Roofing
(331) 452-4050 allmaxroofing.com
650 Warrenville Rd Suite 100, Lisle, Illinois
4.9 from 69 reviews
Allmax Roofing – Trusted Roofing Contractor in Illinois With over 30 years of experience, Allmax Roofing provides high-quality residential and commercial roofing services you can trust. We are GAF Certified and fully licensed, bonded, and insured in Illinois. Our services include: Roof repairs (leaks, storm damage, skylights) New roof installations Roof replacements Routine maintenance Skylight repairs and replacements We pride ourselves on quality workmanship, honest pricing, and a friendly, professional team. Whether it’s a small repair or a full roof replacement, we work hard to make the process smooth and stress-free from start to finish. 📍 Serving [Insert Key Service Areas or Cities] 📞 Call or text for a free, no-obligation
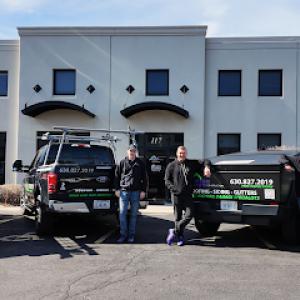
Wise Guys Roofing
(630) 827-2019 www.wiseguysroofing.com
5401 Patton Dr Ste 117, Lisle, Illinois
4.8 from 90 reviews
Wise Guys Construction is a Chicagoland-based company focused on exterior home construction projects. We have been in business for over 20 years, helping Chicagoland homeowners and commercial property owners beautify their properties with quality building products that are properly installed. We are committed to ensuring that your next exterior home construction project is completed in a timely manner, using the best products, at the lowest possible cost.
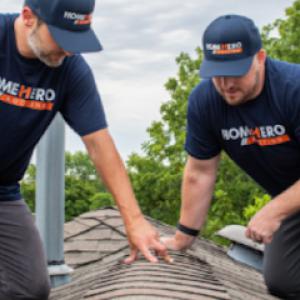
HomeHero Roofing
(630) 827-8732 homeheroroofing.com
Serving
5.0 from 128 reviews
HomeHero Roofing is a locally owned residential roofing company in Downers Grove, IL, serving Naperville, Hinsdale, La Grange, Elmhurst, La Grange, Oak Brook, Lisle, Woodridge, and 20+ western Chicago suburbs. We offer free, no-obligation roof inspections with a repair-first approach: if you only need a repair, that's what we'll recommend. Zero deposit required. Transparent, itemized estimates with no hidden fees. You pay nothing until the job is complete. We specialize in asphalt shingle roof replacement and repairs using Owens Corning materials, backed by a 10-year workmanship warranty and Owens Corning's Lifetime Warranty. Licensed IL roofer (No. 104.019924), BBB A+ rated, fully bonded and insured. 273+ projects completed.

Royal Craft - Roofing, Siding, Windows & Exteriors
(630) 725-1000 royalcraftremodelers.com
Serving
5.0 from 78 reviews
Royal Craft - Roofing, Siding, Windows and Exteriors in Downers Grove has been the trusted choice for exterior remodeling since 1973, offering top-quality services for windows, siding, roofing, commercial flat roofs, doors, gutters, and more. With decades of expertise and a commitment to excellence, our professional team delivers innovative designs and cutting-edge products to meet your unique needs. Whether you're upgrading your home's curb appeal or improving energy efficiency, we provide reliable solutions tailored to you. We specializes in roofing, windows, siding, commercial flat roofs, doors, and gutters, offering comprehensive exterior remodeling services.
Roberts Restorations
(630) 915-0280 robertsrestorations.com
Serving
5.0 from 46 reviews
The leader in home exterior improvement and restoration in Northern Illinois and Southern Wisconsin, the team at Roberts Restorations has been providing exceptional service to clients for more than 15 years. We offer both residential and commercial roofing, gutter and siding installation, and free roof inspections. We offer free estimates and convenient financing is available. We pride ourselves on client communication, making things as easy as possible during the insurance claim process, and providing premier services from design to installation.

Frontline Services
(844) 766-3748 frontlinegc.com
Serving
4.9 from 65 reviews
From roof inspections to complete replacements, Frontline Services is equipped to handle all your roofing needs. We take pride in delivering exceptional customer service, using only the highest quality materials, and ensuring that each job is completed to our exacting standards. Say goodbye to roofing headaches and hello to peace of mind. Trust the professionals at Frontline Services for all your roofing needs. Contact Frontline Services today to schedule your roof inspection and experience the difference in quality and affordability.
A&D Exteriors
(800) 557-1398 www.andexteriors.com
Serving
5.0 from 152 reviews
A&D Exteriors is your premier roofing contractor located at 50 S. Main St, Suite 200-5, known for delivering exceptional roofing solutions. Specializing in roof repair, installation, and maintenance, we ensure top-quality craftsmanship for both residential and commercial properties. Our experienced team is committed to using high-grade materials and innovative techniques to provide durable and aesthetically pleasing roofing services. Trust A&D Exteriors for reliable and efficient service, and experience why we are a preferred choice for roofing needs. Call us today for a free consultation and let us help protect your property with our expert roofing solutions.
Walton Contractors
(708) 303-8055 www.walton-contractors.com
Serving
4.9 from 223 reviews
Your roof is the crowning glory of your property and is responsible for protecting your belongings and loved ones; and at Walton Roofing, we are committed to helping that crown shine! Our experienced, licensed, and highly trained roofing contractors provide a comprehensive array of services to residential, commercial, and industrial properties throughout Naperville, Berwyn, and the Greater Chicagoland area. We know how to tailor our approach to the aesthetic and standards of local architecture—delivering the structure, durability, and design you expect…and then some.
Happy Roofing
(630) 234-8331 happyroofing.com
Serving
4.9 from 172 reviews
Happy Roofing is the top Naperville, IL roofing company. Our roofers specialize in Malarkey rubberized asphalt shingle installation and roof repair services. Whether your home needs a full roof replacement, a roof repair, shingle repair, roof leak repair, gutter installation, as one of the best roofing contractors we would be honored to help. Because we are local Naperville roofers people in the community trust us with their roofing needs. We're based in Naperville but service nearby communities, including Downers Grove, Lisle, Wheaton, Glen Ellyn, Elmhurst, Darien, Winfield, Burr Ridge, Warrenville, and Willowbrook. We also work in LaGrange, Brookfield, Oak Park, Western Springs, Orland Park, Lemont, Homer Glen, Indian Head Park, and more.

Odyssey Home Remodeling
(773) 313-3399 odysseyremodeling.com
Serving
5.0 from 79 reviews
Protect your largest investment with our affordable roof replacement, siding replacement, and window replacement services. At Odyssey we take pride in installing quality products that are manufactured with the latest technologies, installed by certified professionals, and customized to meet both your needs and your budget. We have taken the time to narrow down the type of materials – and manufacturers of those materials – that provide the best value to our customers. Whether you are looking for architectural or designer shingles, DaVinci composite and metal roofing, or modern energy efficient windows and beautiful, long lasting siding – Odyssey Home Remodeling has partnered with the best to provide you with the best.
RP Roofing
(331) 249-3029 woodridgeroofing.com
Serving
5.0 from 22 reviews
Our roofing company is your trusted partner for top-quality residential roofing solutions. Specializing in both shingle and metal roofing, we provide durable, aesthetically pleasing options tailored to protect and enhance your home. Our team of skilled roofing contractors is committed to delivering exceptional craftsmanship and unparalleled customer service. We understand the importance of a safe, reliable roof and are dedicated to ensuring your satisfaction with every project. For a roof that stands the test of time, choose our roofing company Woodridge, IL based. Contact us today to discuss your roofing needs or to schedule a consultation with one of our expert roofers. Let us help you achieve the perfect roof for your home.
Greater Chicago Roofing
(630) 864-6586 www.greaterchicagoroofing.com
Serving
5.0 from 42 reviews
Greater Chicago Roofing - Naperville is an experienced and well-established roofing company. If you need an installation, repair, or a complete replacement of your roof, gutter, or skylight, you’ll be satisfied with our work. We offer these services for both residential and commercial properties within the Chicago Metropolitan Area. Our team has more than over 4 decades of combined experience in roofing and construction work. Our quality of work is second to none, and our commitment to our customers is what makes us the best choice.
In this climate, snow on the roof doesn't simply melt away. Heat escaping from an attic warms the underside of the shingles, and in cold snaps that melted layer refreezes along the eaves. That cycle-melt, refreeze, melt again-creates ice dams that clog gutters and trap meltwater behind them. When you've got attic heat loss, these dams can form more reliably, threading through roof edges where temperatures stay a touch warmer or where roofing substrate is thinner. The result is not just a snowy scare; it's a concrete pathway for water to find its way under shingles and fascia, especially if flashing has any weakness or compromised sealant from prior seasons.
DuPage County winters are unforgiving to small flaws. A minor gap in step or valley flashing, a shingle seam that's seen better days, or a vent boot that's lost its bend can become a leak channel once ice pushes against it. In late winter and early spring, when outdoor temperatures swing above and below freezing, interior leaks can emerge even if the surface looks fine. The danger is gradual: a slow drip or damp spot behind walls that wasn't easy to spot during fall inspections may become more noticeable after a thaw. This is not a single-event hazard; it's a cumulative stress test on roofing details that may have held up for years.
Snow accumulation adds weight and concentrates ice buildup in roof valleys and along eaves. For homeowners planning replacement work, that combination of snow load and ice formation matters. It's entirely practical to factor in the timing of a roof replacement not just by the calendar, but by how much snow remains, how saturated the roof deck is, and how well attic insulation and ventilation are performing. Late spring and early fall typically offer clearer working conditions, more predictable access, and a safer window for major repairs or full replacement. Peak winter work can be slowed by weather, and the risk of re-freezing cycles during installation can compromise new or refreshed flashing and edge details if the temp swings are abrupt.
If you notice damp spots near ceilings after a thaw, staining along interior walls, or a persistent melt-water odor during warm days, treat these as signs that ice dam activity may be ongoing or recurring. Look for granular shingle edges, lifted tabs, or darkened, wet-looking spots on the roof surface after a windy period or a heavy thaw. Inspect exposed flashing around chimneys, vent stacks, and any skylight penetrations for loose sealant or lifted metal. Even small weaknesses can become larger issues under the DuPage freeze-thaw cycle, so addressing them sooner rather than later reduces the chance of interior damage that compounds during a spring melt.
Keep attic heat in check with insulation and proper venting to slow the dam-building process. If ice dams form, carefully remove the snow from the roof with a roof rake from ground level, avoiding personal risk on the roof itself. Do not chisel ice from the roof or gutters, which can damage shingles and flashing. When the weather cooperates, schedule a pro inspection focused on flashing details, edge integrity, and attic ventilation. A careful, targeted repair now can prevent the more extensive-and costlier-work that a spring thaw can reveal. In Lisle, the combination of cold winters and late-winter thaws means attention to these details is not optional; it's a practical part of protecting the roof's structure and the interior that sits just beneath it.
Late spring and early fall are the most favorable windows for a roof replacement project. In this town, those periods dodge the harshest winter conditions and sidestep the installation slowdowns that come with peak summer heat and humidity. When planning, target a stretch where you can move installers through a dry, milder schedule - not peak heat or deep freeze. If the schedule slips, aim for a window right after a long stretch of good weather, and coordinate with your crew to lock in a start date before the next weather lull.
Autumn in Lisle can still bring wind and precipitation that disrupt tear-off schedules. If finishing before winter matters, book earlier than you expect and communicate a firm deadline with your contractor. A proactive plan helps ensure crews can sequence tear-off, roof install, and insulation work without last-minute changes. Consider aligning with a forecasted trend of drier weeks in late September or early October, and have a contingency plan for weather days so work can resume promptly when a window opens.
Spring scheduling is often affected by storm-repair backlog and permit/inspection coordination with the local Building Department. If the season brings a backlog, act quickly to secure a start date and confirm any required inspections early in the process. Having a single point of contact with your contractor who can track storm-related delays and permit queues helps keep the project on track. Expect a few back-and-forth days around inspections, and prepare for potential re-sequencing of days if a major hail event shifts priorities for nearby homes.
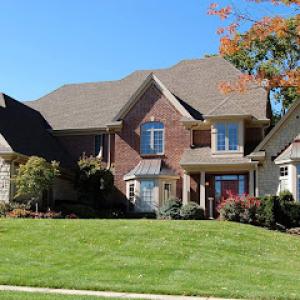
Residential roofs in this area commonly feature standard asphalt, metal, or tile options over conventional attic layouts. When selecting materials, consider how late-spring storms or early-fall winds could impact temporary cover and debris management. Confirm that the chosen installation crew has a plan for keeping yards clean during heavy wind days and for safely handling any existing ice dam remnants carried over from winter. If your home uses nearby trees, map out fall leaf accumulation and how it may affect access and cleanup during the replacement window.
As the project approaches, synchronize with neighbors and utility or HOA guidelines if applicable, and verify that the work window avoids peak community activity. Prepare a clear stop-start plan for any lingering structural concerns uncovered during tear-off, and designate a sheltered area for materials if late-season weather turns quickly. A well-communicated schedule with your contractor reduces surprises, keeps the project moving, and helps ensure the new roof is integrated smoothly with nearby homes in the neighborhood.
Get a clear picture of your project costs upfront - no commitment required.
Wise Guys Roofing
(630) 827-2019 www.wiseguysroofing.com
5401 Patton Dr Ste 117, Lisle, Illinois
4.8 from 90 reviews
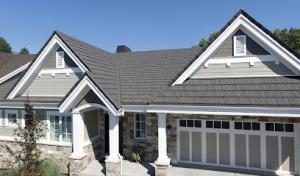
Asphalt shingles are the dominant practical choice for homes with the typical Lisle roofline and roof pitch. They align with the mainstream residential stock and are well-suited for the frequent spring hail and wind events that push many homeowners into repairs or re-roof decisions. A key advantage is their balanced performance in the DuPage County freeze-thaw cycle, where minor cracking or granule loss from winter conditions can be mitigated with a solid, professionally installed underlayment and proper attic ventilation. For most Lisle neighborhoods, standard asphalt systems deliver reliable weather resistance, straightforward maintenance, and a serviceable lifespan when paired with impact-resistant shingles and appropriate attic insulation against ice dam risk.
Metal roofing exists in the Lisle market, but it requires careful evaluation before installation. Snow-shedding behavior should be considered for Midwest winters, where rapid temperature shifts can create heavy, compact snow loads on steeper slopes. The same profiles that shed snow efficiently can also translate to louder thunderstorms and rainfall events, which may surprise homeowners who expect quiet roofing materials. If choosing metal, pay close attention to fastening patterns, panel coatings, and wind uplift ratings to stand up to spring wind-driven hail. A thoughtful installation with a sound-deadening underlayment and appropriate insulation can help balance the advantages of metal with comfort expectations for a suburban neighborhood.
Tile and cedar products exist in this market but carry distinct installation and maintenance requirements. Clay or concrete tiles add aesthetic variety and excellent longevity, yet they demand robust structural support to handle freeze-thaw cycles and potential ice dam scenarios that can intensify water infiltration if not properly vented and flashed. Cedar brings natural insulation benefits but is sensitive to moisture and may require protective finishes and more frequent maintenance in the presence of hail impacts. Synthetic and composite shingles offer a middle ground, combining some tile-like durability with easier installation and lighter weight. In Lisle, these options should be paired with a careful assessment of attic ventilation, insulation levels, and a sense for how local hail and wind patterns influence long-term performance.
Spring hail and wind events in the Chicagoland area can push Lisle homeowners into urgent decisions, and post-storm demand surges tend to tighten labor availability. That dynamic often extends lead times for materials and crews, especially for higher-demand profiles like metal, tile, or synthetic systems. When a claim or estimate lands during a peak window, expect a noticeable bump in scheduling and mobilization time. Planning with a cushion in both timing and budget helps avoid rushed choices that later need remediation.
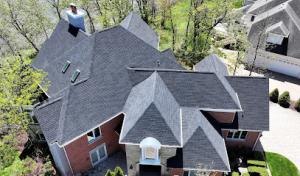
Homes in established DuPage County neighborhoods frequently feature steeper suburban rooflines, multiple penetrations, chimneys, skylights, and detached-garage tie-ins. Those details complicate tear-off and flashing work, driving up both the labor hours and the risk of misflashing if a contractor is pressed to move quickly. A careful approach includes allowing extra time for safe removal of older underlayment and a thorough inspection of penetrations. Expect higher costs in Lisle for tear-off and flash work compared to simpler, single-slope homes, even when the new material is similar.
The local market supports a broad spectrum of materials, from standard asphalt to metal, cedar, tile, and synthetic systems. Each option has its own labor specialization needs: asphalt stays relatively straightforward, while metal requires skilled seaming and sealing, and tile demands careful pitch, underlayment, and fastener planning. In Lisle, material-related cost differentials can be pronounced because crews with the right specialty are in steady demand after a storm. When choosing material, weigh not only the installed price per square but the likely crew availability and the quality of flashing and underlayment install for that system.
Residential projects in the area typically span from the lower to the upper end of the local ranges, with asphalt shingles commonly priced in the mid-to-low range and metal or tile piloting toward the higher end. In this market, a comprehensive replacement-especially with a steeper roof or multiple penetrations-can push the project beyond a simple dimension-based estimate. Prepare for a more accurate projection by getting a detailed line-by-line bid that includes tear-off, disposal, underlayment, flashing, and a precise material schedule tailored to the chosen system. Remember that steep pitches and complex details not only affect the price but also lengthen the calendar for completion.
Don't let upfront costs delay a critical repair - these contractors offer payment plans to fit your budget.

When a full roof replacement happens in this area, a permit is typically required. The common practice is for the roofing contractor to submit the permit application to the Lisle Building Department. This ensures the project plans, materials, and installation methods meet local codes and weather-related considerations that are common to DuPage County winters. If a homeowner is coordinating the project themselves, be prepared to provide contractor contact information and a clear scope of work so the filing goes smoothly. Having the permit filed early can help prevent delays caused by weather or scheduling backlogs.
Inspections are a built-in part of the process. As the roof comes off, new decking, underlayment, and any ventilation improvements are reviewed on-site to confirm code compliance with Lisle standards. The inspector checks that the ventilation, attic access, and water barriers align with local expectations, especially important after harsh winters when structural integrity is a concern. Timely inspections help avoid backtracking and rework, so coordinate with the contractor to accommodate inspection windows as weather allows.
After the tear-off, dry-in, and completion of the roof covering, a final inspection is conducted to confirm everything meets code before the job is fully closed out. This final step is what allows the permit to be finalized and the project to be officially considered complete. Planning for the final inspection alongside weather forecasts and any anticipated spring wind or hail activity can reduce the risk of delays into the post-storm season.
Weather interruptions and local scheduling backlogs can influence when inspections occur. In Lisle, a rain, ice, or wind delay can push the inspection window, affecting the sequence from tear-off to dry-in to final approval. It helps to coordinate with the contractor for a realistic timeline and to confirm availability with the Building Department ahead of major milestones. If a storm hits, anticipate a staged timeline rather than a single day, and communicate promptly with the inspector and contractor to keep the project moving.
Have all documentation handy: permit number, contractor contact, approved plans, and any warranty or product certifications. Clear the work area so inspectors can access eaves, ridges, and decking easily. Keeping communication open among homeowner, contractor, and the Lisle Building Department reduces surprises and supports smooth close-out.
In this market, hail and wind losses routinely trigger adjuster reviews and requests for detailed photo documentation. Storms that sweep through the DuPage County edge often expose shingles, flashing, and underlayment vulnerabilities that might fly under the radar in calmer years. When an adjuster arrives, they'll be looking for clear evidence of damage, how long a problem has existed, and whether prior repairs have addressed the root cause. You'll want to be ready with a candid narrative of the roof's history, including observed leaks, growing granule loss, and any previous patchwork. If you don't have solid photos from before a storm, you may face questions you hadn't anticipated.
Some insurers serving the region have tightened underwriting in prior years, so homeowners replacing a roof should expect closer scrutiny of age, condition, and repair history. Start collecting documentation early: recent inspection notes, maintenance records, and dated photos that show the roof's condition from multiple angles and seasons. Include images of hips, valleys, flashing around chimneys, and any signs of ice-dam activity that appeared during winter. A concise, labeled diary of observed issues keeps conversations grounded when adjusters or roofers discuss scope and necessity. In this climate, the more organized your file, the less you risk delays caused by ambiguous or missing information.
Multiple bid comparisons are often useful in Lisle not as a generic shopping tactic but because carriers may ask for scope support when storm damage and replacement necessity are disputed. Gather at least three reputable opinions that document the same core findings: what damage is present, what removal and replacement steps are required, and how your proposed scope addresses ongoing risk. Ask each prospective contractor to provide a similar scope of work and to annotate photos with detailed notes. This alignment helps you avoid surprised adjustments, and it gives your insurer a clearer path to a decision that reflects the actual condition and needs of the roof.
Low-slope sections on additions, porches, and attached garages create a distinct leak path compared with the main shingle roof. In practice, the membrane, flashing, and edge details on these areas demand the same care you apply to the primary roof, but with a narrower set of components and a tighter intersection with home systems. Expect more specialized attention to seams, terminations, and transitions where the low-slope surface meets vertical walls or apron flashings.
Freeze-thaw conditions in Lisle make drainage details on low-slope areas especially important because standing water and ice can expose membrane and flashing weaknesses. Prioritize a clearly defined slope toward a proper drainage outlet, with clean, debris-free gutters and downspouts feeding the system. Check parapet walls and edge flashings for wind-driven water paths, and ensure terminations at doors or windows are protected with adequately integrated flashing and drainage planes. Consider scheduled testing for membrane integrity after heavy winter cycles, since small capillaries can become larger problems over time.
Contractor specialization matters more on these Lisle roof sections because many firms focus on standard re-roofing while fewer actively advertise flat-roof capability. When selecting a contractor, verify portfolio examples that include low-slope additions, porch roofs, or garage interfaces. Ask for detailed drawings of edge detailing, flashing transitions, and drainage plan locations. A local team with documented flat-roof experience will spot misaligned fasteners, inadequate ballast, or improper termination details that a general roofer might miss.
Look for signs of membrane wear at corners where the low-slope surface meets vertical walls, perimeter edge failures, and poor transition flashing. Water staining near interior ceiling corners or around penetrations can indicate hidden seepage. Preventive checks should include periodic inspection after spring storms, then after summer heat cycles, to catch early seam separation or flashing lifting. If you see loose flashing or pooling water during startup checks, address it before heavy spring rains.
Emphasize consistent edge detailing where the low-slope section meets the main house, with continuous drainage planes and properly sealed terminations at door thresholds. For porches and garages, ensure a dedicated downspout path and a clean, debond-resistant seam between the low-slope roof and any streamlined wall assemblies. Insist on a tested installation sequence that prioritizes membrane integrity, seamless flashing, and robust attachment methods tailored to the added foot traffic and expansion joints typical of these spaces.
Find specialists in TPO, EPDM, and built-up flat roofing systems for residential and commercial properties.
Allmax Roofing
(331) 452-4050 allmaxroofing.com
650 Warrenville Rd Suite 100, Lisle, Illinois
4.9 from 69 reviews

Royal Craft - Roofing, Siding, Windows & Exteriors
(630) 725-1000 royalcraftremodelers.com
Serving
5.0 from 78 reviews
In Lisle's crowded contractor market, you'll notice quick responsiveness after a hail or wind event is a real differentiator. Look for a company that can commit to a clear return call window, shows up for on-site inspections promptly, and prioritizes thorough cleanup after every visit. A contractor who handles residential re-roofing regularly, not just general exterior work, will have dedicated crews and a structured process you can count on when the weather turns nasty.
Long-established, family-owned firms stand out in the Lisle area because they tend to offer continuity for warranty follow-up after a storm-season install. When the roof needs attention years down the line, you'll value having a familiar point of contact who understands your home's history and the neighborhood's typical wear. Check how long the company has served the local market and whether they maintain stable, in-house crews rather than relying on one-off subcontractors.
Chimney work, attic insulation, and drone inspections appear in the local service mix, and that matters. Homeowners benefit from contractors who can diagnose the whole roof system instead of replacing shingles in isolation. Ask for a comprehensive assessment that includes attic venting, insulation gaps, flashing around chimneys, and evidence of ice-dam risk. A contractor with this broad view is more likely to prevent recurring issues after a replacement.
Request a written plan covering inspection scope, phased work steps, and how weather delays will be managed. Confirm that the contractor can document storm damage with photos, coordinate any insurance-related milestones, and provide ongoing communication until the project is complete. A clear, transparent process helps ensure a smooth experience through Lisle's spring hail and wind cycles.