Last updated: Apr 19, 2026
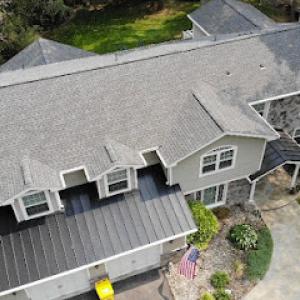
Annapolis sits on the Chesapeake Bay, so roofs endure humid marine air and wind-driven rain that can keep assemblies damp longer than inland Maryland roofs. That persistent moisture accelerates wear on underlayment, fascia, and flashing, and it amplifies rot risk for wood decks, rafter tails, and backing boards. In practical terms, a roof that looks sound from the top can hide a slow, bay-driven decay at the eaves and penetrations. Look for dark streaks, spongy feeling sheathing, and paint that bubbles where water sits against the flashing. In this climate, even modest elevations of humidity near the attic can translate into accelerated aging if venting and insulation aren't doing their job.
Late-summer tropical systems and coastal storms are a practical roofing concern in Annapolis because access, tarping, and scheduling can change quickly when Bay weather shifts. A sudden squall can strand crews mid-repair or force emergency drips while a storm line moves up the bay. Plan projects with the Bay's temperamental calendar in mind: dry windows can vanish in hours, and a compromised roof during a near-term storm creates cascading damage inside the home. If a storm is forecast, reinforce vulnerable flashing and fasteners, and coordinate temporary protections to minimize leak paths. Quick, decisive tarping and secure staging zones matter more here than in inland regions.
The city's mix of waterfront exposure and older housing stock means flashing, fasteners, and roof penetrations often fail before the field of the roof does. Seams around chimneys, skylights, vent pipes, solar mounts, and apron flashings are frequent trouble spots. Salt-laden air accelerates corrosion on metal pieces and can loosen fasteners that were installed decades ago. When you inspect, focus on loose step and counter-flashing, rusted pipe collars, and worn valley metal. A failing flash line can push water under shingles or tiles in no time, even if the surface looks intact after a storm. In short, the problem often isn't the visible surface-it's what lies where the eye cannot easily see.
Prioritize a thorough inspection after any heavy rain or storm event, with attention paid to eave wrap, flashing joints, and valley intersections. Ensure attic ventilation is balanced with insulation to keep the deck from sweating in warm, humid periods. If you notice mold or mildew growth in the attic, or damp rafters near penetrations, treat those areas promptly and re-seal vulnerable joints before the next Bay-driven swell arrives. When choosing materials and methods, favor system designs that minimize exposed fasteners and incorporate corrosion-resistant components in high- salt exposure zones. Regular, targeted maintenance beats reactive, storm-driven repairs when the Bay sets its weather agenda.
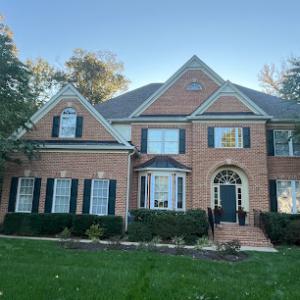
Downtown Annapolis and nearby historic areas carry roofs that tell stories of centuries past, where slate and copper aren't just materials but architectural voices. When you live among Colonial-era homes, the roofscape is part of the streetscape, and every repair or repaint has to respect the building's character. The consequence of moisture, humidity, and coastal salt is not abstract here: it accelerates deterioration in ways that modern shingles wouldn't endure, and it presses the need for repairs that retain the roof's historic silhouette and detailing.
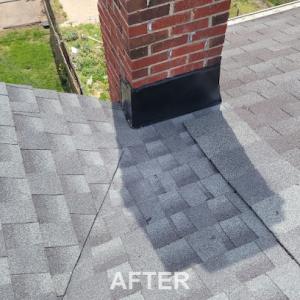
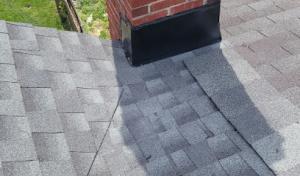
Older Annapolis roofs often rely on masonry chimneys, step flashing, built-in gutters, and soldered metal details. These elements behave differently than standard suburban shingle systems. Step flashing around a brick chimney may have developed hairline gaps over decades, inviting moisture into the attic but more critically into the wood and plaster of the interior bays. Built-in gutters, if still functioning, can trap moisture at the roof edge, leading to wood rot and rust where copper fittings meet tin or lead sealant. Soldered copper and lead-tinned joints can become brittle or corroded after repeated exposures to salty spray and freeze-thaw cycles, requiring careful dismantling and re-soldering that preserves the original profiles rather than disguising them with modern, bulkier alternatives. When a copper or slate roof is damaged, the repair path is rarely a simple patch; it's a careful restoration that preserves line, hue, patina, and the roof's overall poetic age.
On historic homes, replacement decisions sit on a narrow ridge between preserving material history and ensuring long-term protection. Matching existing materials and detailing isn't a cosmetic choice; it determines whether the roof maintains its architectural language after decades of exposure. In practice, this means fabricating or sourcing slate and copper with the same visual grain, thickness, and edge detailing, and sometimes recreating historic dormers, copper valleys, or decorative cresting. A modern replacement that mimics the appearance of the original can still fail to capture the way water behaves at a coped edge or a copper seam over a century of coastal moisture. The risk of rushing to a visually pleasing but functionally mismatched system is high here, where a careful, period-appropriate approach pays dividends in appearance, durability, and the sense of place that makes these homes stand out.

Black Anchor Roofing
(410) 205-9562 blackanchorroofing.com
1993 Moreland Pkwy # 202, Annapolis, Maryland
5.0 from 206 reviews
When it comes to roofing, no one compares to Black Anchor! With years of combined experience, Black Anchor Roofing has worked hard to build the trust of our clients in Annapolis and surrounding areas. Visit our website to learn more or better yet, call us today!
Benchmark Roofers
(443) 454-1293 www.benchmarkroofers.com
500 Giddings Ave, Annapolis, Maryland
5.0 from 111 reviews
Benchmark Roofers is the leading Roofing Company in Annapolis, MD & the surrounding areas. We proudly offer Roof Repair & Installation in Annapolis and throughout all of Maryland! We are commercial and residential Asphalt Shingles, Metal Roof, and Flat Roof Roofing Contractor. Hardie and vinyl siding certified contractors. At Benchmark Roofers, our core values drive the essence of who we are as a roofing company. Our commitment to professional roofing and excellent customer service sets us apart. Contact us if you are looking for a "Roofer near me". For a free estimate please reach out to us. We offer the best in service, Lifetime warranties, GAF certified, and offer cost effective solutions. We offer financing and payment options as well
Roof Right
1910 Towne Centre Blvd Suite 228, Annapolis, Maryland
4.9 from 103 reviews
Welcome to Roof Right, A Family-Owned Roofing Company with offices in Hampstead, Rockville, and Annapolis, Maryland. We service Anne Arundel County, Baltimore City, Baltimore County, Carroll County, Harford County, Howard County, and Montgomery County. We provide service for all types of residential roofing repairs. Roof Right also offers insulation, gutters, windows, doors, siding, and decks. In addition to our excellent roof repairs, we also provide commercial roofing services.
Wells Home Improvements
(443) 313-7764 www.wellshomeimprovements.net
1712 Crownsville Rd, Annapolis, Maryland
4.9 from 353 reviews
We've been in Roofing, Gutters and Siding since 1961 in the Annapolis, Anne Arundel county. Our Service area includes central Maryland including but not limited to towns like Annapolis, Severna Park, Arnold, Bowie and Crofton Maryland. Family values and personal service has built our reputation and numerous reviews. High quality materials and craftsmanship goes with our way of doing business.
Superior Restorations & Construction
(443) 223-7197 www.superiorrestorations.com
1997 Annapolis Exchange Ste 300, Annapolis, Maryland
5.0 from 64 reviews
Since 2010, Superior Restorations & Construction has been the Annapolis area's trusted expert in comprehensive exterior home solutions. We specialize in superior roofing, siding, and gutter services, from expert installations to meticulous repairs. Our commitment to excellence is evident in every project, ensuring your home or business not only looks its best but is also protected with top-tier craftsmanship and unwavering reliability. Choose Superior Restorations for all your exterior construction needs.
Odyssey Remodeling
(667) 646-0220 www.odyssey-remodeling.com
8 Lincoln Ct, Annapolis, Maryland
4.8 from 53 reviews
Odyssey Remodeling, located in Annapolis, Maryland, is the go-to exterior home remodeling company for the entire state. With a range of services including roofing, siding, insulation, and window installation, they offer unparalleled expertise and emergency services 24/7. Known for their commitment to excellence and dedication to customer satisfaction, Odyssey Remodeling has established itself as the premier choice for homeowners seeking top-of-the-line exterior remodeling solutions.
Exterior Renovations
(301) 956-7303 www.exteriorreno.com
931 Boucher Ave, Annapolis, Maryland
5.0 from 16 reviews
Our team of professionals has years of experience when it comes to customer service, roofing, siding, and window installations in Annapolis, Maryland. Exterior Renovations is a licensed and insured company, and all of our installers have been trained and certified to offer you a team of experienced exterior home renovators to get the job done right the first time. Our professional contractors use only quality materials and are experienced installing asphalt shingles, cedar wood shingle, metal and flat roof systems. We expertly install James Hardie, vinyl siding, cedar siding, and seamless gutter systems. We’ll come out to do a comprehensive inspection of your roof and provide you with a free estimate.
Valor Home Roofing
1907 West St, Annapolis, Maryland
4.5 from 127 reviews
For over three decades, Valor Home has been transforming the exterior of homes in the greater Annapolis, MD area. Born from humble, veteran and family-owned beginnings, we've grown into a trusted leader in exterior remodeling. From complete roof replacements to beautiful window installations and energy-efficient siding solutions, Valor Home provides comprehensive services to enhance your home's beauty and value. We believe in delivering quality products and expert craftsmanship, ensuring your vision becomes a reality.

Blue Horizon Renovations
(410) 897-7601 www.bluehorizonreno.com
1994 Moreland Pkwy Suite 3A, Annapolis, Maryland
4.7 from 30 reviews
Are you looking for a roof installation company in Annapolis? If yes, Blue Horizon Renovations is the company you have been looking for. Our company offers roof installation services for different roofs ranging from asphalt shingles to metal roofs. Additionally, we offer roof replacement, repair, and maintenance services. We also offer home remodeling services. Our roofing company has highly trained and experienced technicians and builders ready to handle any roofing, renovation or repair work you throw at us. Most importantly, we have invested heavily in the right roofing tools and equipment to ensure the team is more efficient and safe at work. We also use the highest quality roofing and construction materials.
Winfield Builders
(410) 401-5045 www.winfieldbuilders.com
839 Bestgate Rd #400, Annapolis, Maryland
5.0 from 9 reviews
At Winfield Builders, we are a licensed, and insured exterior remodeling company offering certified replacement roofing, gutters, siding, windows, and entry doors.

Admiral Home Improvements
(410) 446-1451 www.admiralhomeimprovementsllc.com
626, 503 Admiral Dr Ste C, Annapolis, MD
4.8 from 15 reviews
Admiral Home Improvements is renowned for its exceptional roofing, siding, brick, and chimney services in Montgomery County and Anne Arundel County, Maryland. With expert carpentry and custom gutter solutions, their experienced craftspeople excel in delivering durable and stylish home improvements tailored to individual client needs. From repairs to installations and maintenance, Admiral Home Improvements offers professional services that preserve the safety, beauty, and efficiency of homes, delivering peace of mind and protection from the elements.
Yellowstone Roofing Pros
(410) 683-9470 yellowstoneroofingpros.com
501 6th St 1st Floor, Annapolis, Maryland
5.0 from 8 reviews
Leading Roofing Contractor in the area with over 50 years experience in roofing replacement and repair
In Annapolis, timing a roof replacement around the bay's weather cycles helps minimize surprises from humidity, salt air, and coastal storms. Shoulder seasons are often preferred for full replacements because mid-summer heat and humidity can complicate installation conditions while winter moisture can slow dry-in and inspection timing. The goal is to pick a window with mild temperatures, solid drying days, and predictable storm patterns that don't interrupt essential steps like underlayment and flashing work. This means that early spring and early fall are usually the best bets, when the bay breeze keeps heat manageable and humidity lower than the peak of summer.
Spring and fall bring a steadier mix of dry days and workable temperatures for roof crews. In Annapolis, those periods also align better with the drying needs of synthetic underlayment and felt, especially on homes with older sheathing. If a project can start in late March or early October, the crew can progress through decking, underlayment, and flashing with fewer weather-related delays. A key benefit in this coastal area is less risk of rapid expansion and contraction of materials, which helps seals and penetrations hold long-term. Scheduling during these months also leaves a buffer for any delays caused by sudden heat waves or lingering heat from late summer.
Spring and summer thunderstorms regularly interrupt tear-off and underlayment sequencing in the Annapolis area, making staging and same-day dry-in especially important. The goal is to anticipate rain gaps by coordinating material deliveries, pre-cut components, and secure staging areas before rain events. A practical approach is to plan a flexible sequence: remove and strip on days forecasted dry, install a quick-dry underlayment system when feasible, and have fasteners, flashing, and membranes ready for immediate progress after a shower passes. Crew phones and on-site weather trackers become part of the toolkit to keep the project moving while minimizing water exposure to the interior.
Winter freezes and occasional snow can delay decking evaluation and create moisture concerns that are less manageable than in milder coastal shoulder months. Evaluate roof conditions during a dry spell, and avoid scheduling when sleet or snow is likely to accumulate on both the deck and exposed framing. If winter work is unavoidable, plan for shorter daily windows, enhanced moisture management on the deck, and a robust inspection pass once temperatures rise. Delays in decking inspection can push moisture issues into the interior if left unchecked.
Coordinate with weather forecasts that emphasize multi-day dry spells, and build a flexible calendar that accommodates mid-project weather shifts. Prioritize staging and dry-in readiness-tarps, temporary barriers, and rapid-seal approaches can make a big difference when a storm rolls through. For historic homes or slate and copper accents, align timing with gradual removal and careful handling to protect delicate features during peak Bay humidity months. Keep communication tight with the crew about expected windows, and set a clear plan for quick re-seaming and insulation checks if a sudden downpour interrupts work.
Get a clear picture of your project costs upfront - no commitment required.

Benchmark Roofers
(443) 454-1293 www.benchmarkroofers.com
500 Giddings Ave, Annapolis, Maryland
5.0 from 111 reviews
Roof Right
1910 Towne Centre Blvd Suite 228, Annapolis, Maryland
4.9 from 103 reviews
Exterior Renovations
(301) 956-7303 www.exteriorreno.com
931 Boucher Ave, Annapolis, Maryland
5.0 from 16 reviews
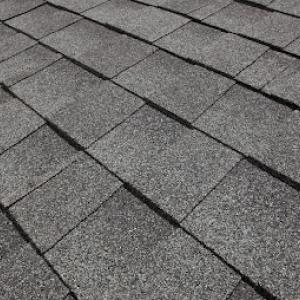
A distinctive feature of this city's roofscape is the unusually visible mix of materials that reflect both history and coastal realities. Asphalt shingles dominate many re-roofs, favored for their balance of performance and value in a harbor climate that cycles from humidity to salt spray. Yet the downtown core still carries Colonial-era slate and copper roofs that tell a story of longstanding craftsmanship. In surrounding neighborhoods, modern shingle re-roofs sit alongside clay and concrete tile, reflecting a desire to blend durability with architectural authenticity. This blend means you'll often see a neighborhood where roof material choices aren't just about weatherproofing, but about preserving character and neighborhood scale.
Slate and copper matter beyond premium aesthetics because they represent how older homes were built to last. If your home sports slate or copper, expect specialized maintenance needs. Slate can crack from freezing cycles and salt-laden winds, so periodic inspections of individual tiles and flashing are critical. Copper, prized for its longevity and patina, can develop green oxidation that some homeowners love and others want to manage-yet copper also requires attention to joints and fasteners as storms push salt and moisture into vulnerable seams. When repairs are needed, matching old material can be a challenge; partial replacement with compatible materials or careful replication is often necessary to preserve the roof's historic integrity.
For those who want the aesthetic of slate or tile without the heavy structural load, synthetic or composite products offer a compelling compromise. These materials can imitate slate or tile precisely while keeping weight manageable and installation logistics simpler. In practice, this means less reinforcement work in attic spaces and fewer concerns about long-term structural impact after storm seasons. Synthetic products also tend to weather coastal humidity with less risk of warping or moisture-driven degradation, which matters when salt air penetrates attic ventilation paths.
Older homes with existing slate or copper may benefit from targeted repairs rather than full overlays, preserving architectural line and curb appeal while upgrading underlayment, flashing, and ventilation to cope with humidity and storm exposure. For modern rebuilds or re-roofs on mixed stock, consider how the roof's visual message-whether a historic silhouette or a contemporary profile-interacts with the home's masonry, trim, and surrounding streetscape. In all cases, plan for robust moisture defenses, reliable attic ventilation, and materials that can gracefully handle salt and humidity without sacrificing the home's character or value.
In this climate, a full roof replacement is typically handled through the City of Annapolis Permits and Inspections, not just the county. Any project that replaces the roof deck or significantly changes the roof system should trigger a city-issued permit. If a contractor tells you county records alone suffice, verify before work begins. The city process is designed to address deck integrity, flashing transitions, and ventilation-critical factors given the Chesapeake Bay humidity and coastal exposure.
Begin by gathering basic project details: proposed materials, roof slope, ventilation strategy, and any changes to skylights, chimneys, or vents. The permitting office will want a scope of work, plan drawings or roof layout, and, for complex projects, product data for underlayment and flashing details. Submitting these early helps avoid delays once work starts. Expect a review window that may require revisions; having a contractor who can provide clear, compliant documentation speeds the path to approval.
Inspections are not a one-and-done step. The process typically involves at least one inspection during the work to verify decking and framing condition before covering, another during key flashing and vent installations, and a final inspection after the project is complete. Coordinate closely with the contractor to align workmanship milestones with the city's inspection calendar. On a coastal-marine site, decking condition and flashing details are common focus areas, so schedule extra attention for sections around chimneys, dormers, and vent penetrations.
Expect reviewers to pay particular attention to decking condition, flashing at eaves and valleys, and the adequacy of ventilation under the new roof. The presence of salt spray, humidity, and storm-driven moisture makes proper decking support and moisture management essential. The city inspectors may request additional repair work to decking boards, underlayment, or flashing surfaces if any signs of rot, gaps, or improper step-flashing details are found. Contractors should be ready to address these findings promptly to keep the project on track.
A final inspection confirms that everything is installed to code and that the roof system works as intended with proper ventilation and flashing integrity. Once the final seal is granted, keep the permit closure documentation in a readily accessible place. If future maintenance or a retrofit becomes necessary, refer back to the approved plans and wall-to-roof details that the city review ensured were in place.
For asphalt shingles, typical ranges sit from about 450 to 900 per square, while clay tile runs roughly 900 to 1800 per square. Concrete tile is commonly in the 700 to 1200 bracket, and synthetic or composite shingles are typically 600 to 900 per square. If slate is on the roof or copper is being considered, expect a substantial premium-slate commonly falls between 1400 and 2800 per square, and copper roofing can range from 2000 to 6000 per square. These figures reflect the mix you find across town, from older downtown homes to more modern neighborhoods.
Costs in Annapolis can rise on older homes where tear-off reveals deteriorated decking, complex flashing, chimney work, or historic detailing that is uncommon on standard tract housing. When the structure under the roof shows signs of age, the project quickly leaves the realm of a simple re-cover and becomes a full decking and flashing overhaul. Historic detailing, like copper gutters or decorative cornices, can also push upgrades from "normal" to "special order" in both materials and labor.
Storm-driven demand spikes after coastal wind and rain events can tighten scheduling in Annapolis and push pricing higher for emergency dry-in, repairs, and full replacements. After a storm, you'll often see a rush to secure dry-in and start repairs, which can squeeze timelines and raise costs. If a roof is compromised by wind or hail, your material choice might shift toward options with greater longevity in a salt-logged environment, influencing both the upfront price and long-term cost of ownership.
Don't let upfront costs delay a critical repair - these contractors offer payment plans to fit your budget.
Benchmark Roofers
(443) 454-1293 www.benchmarkroofers.com
500 Giddings Ave, Annapolis, Maryland
5.0 from 111 reviews
Coastal humidity, wind-driven rain, and salt-laden storms create a very particular claim landscape for homeowners who have lived through a few summers here. Maryland's coastal storm and wind claim environment affects Annapolis homeowners because insurers often look closely at roof age, maintenance history, and whether damage is truly storm-related. If shingles or panels show wear that predates a storm, adjusters may question the link to the event itself. The stakes rise when a roof has older flashing or visible surface wear that could be used to argue preexisting conditions.
In Annapolis, adjusters commonly expect photo documentation and written condition evidence before and after storms, especially when wind-driven rain or repeated coastal events are involved. Take clear, dated photos of the roof from ground level and from a ladder vantage that shows flashing, ridges, penetrations, and any granule loss. Keep a simple log of observed issues-cracked sealant, lifted flashing, rusting metal, and curb-appeal damage on the soffit-as this helps link what you see to a specific event rather than to gradual aging.
Because prior wear can be mistaken for new storm damage on older roofs, homeowners benefit from documenting flashing, ridge, and penetration conditions before hurricane season. Note any areas where metal around vent pipes or chimneys shows corrosion or lift, and where shingles appear loose or blistered. If you can, arrange a professional inspection that focuses on the seams and joints most vulnerable to salt air and heavy rain. This pre-season record becomes a practical baseline when a storm hits.
When you file, isolate what is genuinely storm-related by showing contemporaneous signs of new damage-shingle lift after a gust event, freshly struck granules in gutters, or torn drip edges. Insurers may request reproducible evidence of post-storm changes, so the more precise and dated your images and notes, the clearer the pathway to a fair outcome.
Connect with contractors who help homeowners navigate the claims process from damage assessment to final approval.
Black Anchor Roofing
(410) 205-9562 blackanchorroofing.com
1993 Moreland Pkwy # 202, Annapolis, Maryland
5.0 from 206 reviews
Benchmark Roofers
(443) 454-1293 www.benchmarkroofers.com
500 Giddings Ave, Annapolis, Maryland
5.0 from 111 reviews
Wells Home Improvements
(443) 313-7764 www.wellshomeimprovements.net
1712 Crownsville Rd, Annapolis, Maryland
4.9 from 353 reviews
Older Annapolis homes frequently show leak-prone transitions around chimneys and dormers rather than simple open-field shingle failures. Look for degraded flashing where the chimney meets the roof, or where a dormer's framing creates a shoulder that traps moisture. Flashing should be continuous, with sealed joints at step-and counter-flash, and the boot around vent pipes should be tight and rust-free. When you see peeling sealant or dark staining along the chimney base, expect moisture intrusion to follow the shared masonry and roof interface rather than rain alone.
Sidewalls and the long edges of roofing planes often harbor stubborn leaks, especially on older homes with irregular roof lines. Inspect the transition from wall to roof, focusing on metal flashing that may have warped, split, or corroded over time. Bay humidity amplifies these defects, so even small gaps can show up as interior dampness after a wet spell. Pay attention to any gaps where shingles meet vertical siding, and to flashing that has pulled away from the wall or soffit. A tight, continuous seal and a properly seated flashing leg are critical.
Skylights are a meaningful local service category, suggesting many leak calls involve curb flashing, seals, or surrounding roof integration rather than just glass issues. Inspect the curb for deflection, cracked sealant, or misaligned flashing. The weathered curb edge can allow water to bypass the glass if the sealant has aged or shrunk. Ensure the flashing around the skylight is integrated with the surrounding shingles and that any drip edge directs water away from the interior.
Bay humidity and repeated wetting can make small flashing defects in Annapolis show up as persistent interior moisture problems instead of one-time dramatic leaks. Track staining to its source, then verify whether multiple minor flaws-like a cracked step-flashing or loose sealant-coalesce into a larger issue. In damp summers, occasional indoor condensation can mimic leaks, so confirm with a moisture meter and an infrared scan if leaks persist after dry spells.
Find contractors experienced in skylight installation, flashing, and leak repairs to bring natural light into your home.
Black Anchor Roofing
(410) 205-9562 blackanchorroofing.com
1993 Moreland Pkwy # 202, Annapolis, Maryland
5.0 from 206 reviews
Benchmark Roofers
(443) 454-1293 www.benchmarkroofers.com
500 Giddings Ave, Annapolis, Maryland
5.0 from 111 reviews
Roof Right
1910 Towne Centre Blvd Suite 228, Annapolis, Maryland
4.9 from 103 reviews
The rhythm of additions, porches, and mixed rooflines in this historic harbor area creates many low-slope or flat sections that behave differently from steep main roofs. Coastal humidity and salt air can accelerate corrosion and membrane aging, so a flat or low-slope roof in this locale must be evaluated for moisture intrusion and seam wear as a primary concern, not just surface appearance. In downtown neighborhoods with Colonial-era slate or copper accents nearby, crews must be careful to preserve character while ensuring modern performance, since mismatched materials can trap moisture at transitions.
On low-slope sections in humid coastal conditions, drainage details and seam integrity matter more than cosmetic surface aging alone. Pay close attention to roof edge terminations, scuppers, and internal drains, which are common failure points when backed up by salt-laden air and seasonal storms. Flashings around penetrations-such as chimneys, vents, and skylights-need close inspection for flexibility and sealant degradation. A well-sealed seam system that accommodates thermal movement will outperform a glossy surface that cannot shed water effectively after a few seasons.
Homes with both steep main roofs and low-slope rear sections often need split-scope estimates because the failure patterns and materials differ across the same property. The low-slope portion may use membranes or built-up systems optimized for drainage, while the steep main roof continues to demand high-performance underlayment and venting strategies suited to heavier wind and snow loads. When planning work, ensure the contractor can assess each section on its own terms and coordinate flashing transitions so that water flows from one system to the next without creating new vulnerabilities.
Find specialists in TPO, EPDM, and built-up flat roofing systems for residential and commercial properties.
Benchmark Roofers
(443) 454-1293 www.benchmarkroofers.com
500 Giddings Ave, Annapolis, Maryland
5.0 from 111 reviews
Exterior Renovations
(301) 956-7303 www.exteriorreno.com
931 Boucher Ave, Annapolis, Maryland
5.0 from 16 reviews