Last updated: Apr 19, 2026
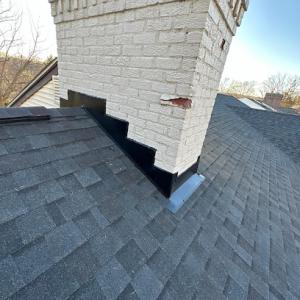
Storm season in this area brings a volatile mix: summer thunderstorms, heavy downpours, and fall nor'easter impacts that can escalate small shingle failures into active leaks within minutes of a burst wind. A single weakened seam or lifted edge can let rain track along sheathing and into attic spaces, threatening insulation, drywall, and personal belongings. In real neighborhoods lining major corridors near BWI, roofs age unevenly and weathered flashings, vent stacks, and skylights can fail suddenly. Acting fast to stabilize a leak is not a luxury - it's a practical safeguard against in-home damage and extended moisture problems.
First, prioritize safety and containment. If you can safely access the attic, locate the highest point of active seepage, note the direction of any water traveling, and keep occupants away from electrical outlets and fixtures. Next, document everything with date-stamped photographs: the exposed sheathing, any sagging gutters, lifted shingles, and the progression of the leak as it enters the ceiling. Insurers commonly review roof age, shingle type, ventilation, and photo evidence, so this documentation matters for a claim. Do not delay: photo evidence should be captured immediately after wind or rain events, before any temporary repairs begin.
Tarping is time-sensitive. If you have access to a durable, weatherproof tarp and fasteners, lay it over the most affected area, letting the material extend well beyond the leak boundary to shed water off the roof edge. Secure edges with roofing nails or screws, ensuring the tarp sits flat against the roof surface to minimize wind lift. Clear gutters of debris to prevent damming and further water backup. If any flashing or vent penetrations are visibly lifting, place a temporary seal using roofing tape or a waterproof, exterior-grade caulk to reduce immediate infiltration. Keep clear access for technicians and avoid heavy snow or wind loading on the tarp.
Given the local demand for emergency repair, response times can be tight. When you schedule a visit, share the date-stamped photos and your storm timeline, including when the leak first appeared and any subsequent rainfall. Provide the contractor with a straightforward summary: specific room or attic location affected, suspected source (shingles, flashing, vent stack), and any prior roof work or age concerns. A responsive professional will perform a rapid assessment, prioritize stabilization, and outline a plan that minimizes further interior damage while coordinating an invoicing path that aligns with the insurer's review criteria.
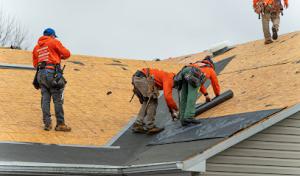
After initial stabilization, anticipate a quick-onset assessment by a licensed roofer familiar with the local mix of shingles and ventilation setups common here. Expect the process to address storm-damaged shingles, vent penetrations, and the ventilation balance that Maryland's four-season climate demands. The right crew will document roof age, verify shingle type, and photograph ventilation and flashing details to support a straightforward claim review, then present a clear path from quick stabilization to permanent restoration.
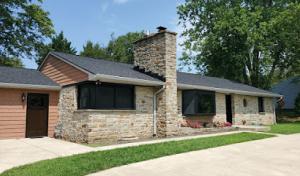
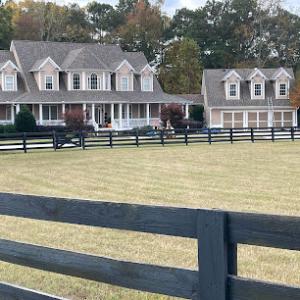
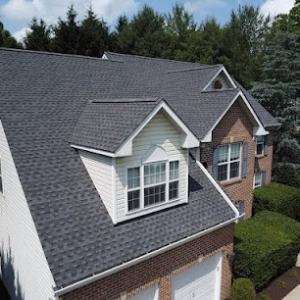
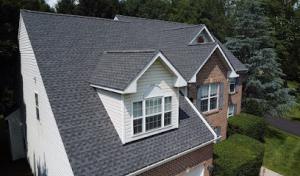
Asphalt shingles are the backbone of roofing in this community, matching the area's large stock of suburban single-family homes and shaping the typical conversation around shingle aging, granule loss, and wind-lift. You'll notice most two-story ranches and compact colonials sports a simple, uniform look with asphalt shingles that weather more quickly than premium options. In Hanover's mix of humid summers and windy Nor'easter events, it's common to see granule loss after a tough season and to hear about lifted edges after strong gusts. The practical path to longevity starts with choosing a shingle class that balances durability and wind resistance for this climate, and committing to regular inspection after storms. Pay attention to missing or cupped granules, exposed nails, and delicate sealant strips along perimeters and chimneys, which are telltale signs a roof needs attention before a leak forms.
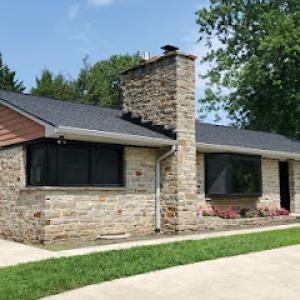
Metal roofing is present but more specialized in this market, typically considered by homeowners looking for longer service life and better performance through hot humid summers and cold winters. In this area, metal often arrives on homes that aim to upgrade beyond typical asphalt while preserving a clean appearance and improved wind resistance. If you're weighing metal, expect a higher upfront effort and a longer service interval between major repairs. Metal shines in storm scenarios where high winds or hail have the potential to puncture other materials, but it requires precise installation-especially around penetrations, dormers, and vent stacks-to prevent leaks and ice damming in winter months. When inspecting metal, check for loose fasteners, corrosion at edges, and protruding seams after a heavy rain. If you live near commercial corridors or trees that shed heavy debris, the clean look of metal can also help shed debris more efficiently, reducing debris-backed moisture concerns.
Tile, cedar, and synthetic options exist in this market but are far less common than asphalt, so homeowners need to confirm installer experience rather than assume every local roofer handles those systems regularly. If you encounter a tile or cedar project, verify the crew's recent reference work and confirm drainage compatibility with the home's roofline. Clay and concrete tile bring standout curb appeal and solid long-term durability, but they demand a strong roof deck and careful flashing details to handle Maryland's wet stretches. Cedar offers natural resistance to some weather conditions but requires diligent maintenance to prevent rot and insect damage, particularly where shade and moisture linger. Synthetic shingles provide a middle ground between weight, lifespan, and cost, yet installation nuances matter-work with a contractor who can demonstrate recent, local installations and a clear plan for underlayment, ventilation, and sealing around vent pipes and chimneys. In this city, where choices are abundant but expertise varies, insist on seeing recent local job photos and a performance-focused warranty.
Maintenance for Hanover roofs hinges on timely storm response and robust ventilation. After a heavy rain or wind event, start with a careful attic check for signs of poor ventilation that can accelerate condensation and rot, then move to the roof, looking for lifted shingles, curling edges, or exposed fasteners. A proactive program-seasonal inspections, prompt repair of loose flashing, and attention to gutters and downspouts-goes a long way toward extending the life of any material. For asphalt, prioritize sealing and edge repair; for metal, monitor seams and fasteners; for tile or cedar, ensure the underlayment remains intact and that you're not letting moisture linger around penetrations. In the end, choosing the right material for this climate means balancing wind resilience, moisture management, and the local installer's demonstrated experience with your chosen system.
In this climate, spring and fall are the preferred seasons for replacement windows because Maryland's hottest summer stretches can complicate installation conditions while winter freeze-thaw stresses exposed roof components. Plan a project to avoid the peak heat and the deep cold, and coordinate with installers who keep HVAC and attic circulation in mind so that new coverings don't trap moisture. When spring arrives, aim for calmer stretches between rain events and pollen surges; in fall, target windows before the first Nor'easter patterns tighten the schedule. Because the local pattern includes frequent precipitation, you should build in buffers for weather delays and late-start days. A tight sequence-weather windows, material delivery, and crew availability-helps prevent work stoppages that leave roofers exposed mid-project.
Frequent precipitation in central Maryland means Hanover projects can lose workdays to rain, so scheduling buffers matter more here than in drier markets. Coordinate with the crew to secure a window that avoids back-to-back rainy spells, especially during late spring and early autumn when showers can pop up with little warning. If a storm system moves through, have a contingency plan for tarping and temporary protection to minimize interior exposure. For asphalt and synthetic shingles, you'll notice quicker progress in dry, moderate days; metal, tile, and shake systems can tolerate slightly cooler temps, but installation details still hinge on dry surfaces and stable temperatures that won't shock materials.
Before ordering windows, do a through roof-side inspection to identify damaged underlayment, flashing, or vent boot issues that could complicate a window replacement near the ridge line or over the eave. In Hanover, the roofline often integrates with tightly spaced homes and occasional shared walls, so ensure ventilation paths and soffit intake are clear to avoid trapping moisture around newly installed materials. Prepare the attic by staging a clean, dry workspace for installers to work from the interior side when needed. Make sure weatherproof sealing can be completed in a single, continuous pass to minimize the risk of leaks after the job.
Storm events in Maryland can tax insurance documentation after wind or rain damage, so keep a concise log of the window swap, noting the exact dates, materials installed, and any preexisting issues found during the project. Take before-and-after photos focusing on roof-to-wall transitions, flashing details, and the perimeter seal. If a leak is found during or after installation, document the area with time-stamped photos and note any storm-related indicators such as wind-driven rain patterns or hail impact marks. Hang onto manufacturer care guides and a simple maintenance plan for the long-term performance of the new windows, emphasizing proper drip edge alignment and flashing continuity around corners and vents.
The right window choice also respects the roof's surrounding architecture and the local wind and rain behavior. In regions with heavy rain, look for weather-resistant seals, corrosion-resistant hardware, and joints that resist ice formation around valleys. For most Hanover homes, select products with proven performance in humid four-season climates, ensuring that installation contours align with the existing roof geometry and flashing lines to prevent overlooked gaps. Prioritize a trustworthy crew that can coordinate flashing detail with window headers and roof deck wrap, so the new installation remains airtight and watertight across the seasonal transitions.
Get a clear picture of your project costs upfront - no commitment required.

DreamHome
(410) 834-4291 www.dhremodeling.com
7255 Standard Dr suite e, Hanover, Maryland
4.9 from 29 reviews
5 Star Roofing & Restoration
(833) 578-2707 www.5starroofingandrestoration.com
Serving
4.8 from 193 reviews
DreamHome
(410) 834-4291 www.dhremodeling.com
7255 Standard Dr suite e, Hanover, Maryland
4.9 from 29 reviews
As a BBB Accredited Roofer and the first choice for roofing and exterior renovation throughout Virginia and Maryland, you can rely on the professionals at DreamHome, Inc. to provide the innovative products and guaranteed service you need to keep your property in top shape. To learn more about our company and the impressive selection of services we offer, just give us a call today. You can also fill out our online form on our site and we'll get you started with a free quote and consultation
5 Star Roofing & Restoration
(833) 578-2707 www.5starroofingandrestoration.com
Serving
4.8 from 193 reviews
5 STAR Roofing and Restoration provides top-notch service for all home improvement and emergency mitigation needs. We specialize in helping homeowners get approvals on their storm damage roof repair or replacements. Our team of experienced roofers are dedicated to your satisfaction and will provide you with a quality job that is built to last. Contact us today for a free quote and let us help you restore the value of your home. Thank you for choosing 5 STAR Roofing and Restoration -
Blusky Roofing & Restoration
Serving
5.0 from 33 reviews
Blusky Roofing and Restoration is a versatile company specializing in Residential and Commercial roofing services. Our expertise extends to state and federal roofing and restoration projects, ensuring top-notch quality and compliance with regulatory standards. Trust us for comprehensive solutions in the roofing and restoration industry.
American Remodeling
(410) 799-9600 americanremodelingcorp.com
Serving
4.7 from 127 reviews
Since 2000, we’ve built our reputation by offering honest pricing, quality craftsmanship and a team dedicated to treating every project as our only project. Everyone at American Remodeling is keenly aware of the trust we have earned when we are hired to take on a project. On many occasions, we come in to help dreams of a new exterior look become reality. Sometimes, we are hired after damage has been done; when a storm or calamity makes remodeling an unexpected project. Big or small, we start every project by considering the unique details of each home.

RoofPRO
(410) 705-7552 www.marylandroofers.com
Serving
4.8 from 260 reviews
RoofPRO, located at 8137 Telegraph Road, is your leading roofing contractor dedicated to providing top-tier roofing and siding services. As a trusted roofing company, we specialize in expert roof repair, roof replacement, and commercial roofing solutions tailored to meet your needs. Our experienced team ensures every project is completed with precision and excellence, making us the go-to choice for your roofing and siding needs. Whether you're seeking a reliable siding company or a professional roofing contractor, RoofPRO guarantees exceptional craftsmanship and customer satisfaction. Choose RoofPRO for unparalleled service in roofing and siding in your area.
Walter Brown Services
(410) 796-4322 walterbrownservices.com
Serving
5.0 from 74 reviews
Walter Brown Services provides roofing and gutters, windows, skylights, doors, and more to Halethorpe, MD and surrounding areas.
Kangaroof
Serving
4.9 from 130 reviews
A1 Roofing's Kangaroof is one of the top-tier Maryland Roofing Companies serving the Columbia Md, Ellicott City Md, and Elkridge Md markets. Our roofers specialize in asphalt architectural shingles for pitched roofs, natural white single ply PVC membrane for metal and flat roofs. We are a roofing contractor that is proficient at dealing with storm damage, roof repair, and roof replacements as well as installing or upgrading gutters and downspouts. We also provide services for various kinds of siding projects. We are A Veteran -Owned and operated roofing company with high standards and dedication to the roofing industry. We are members of the Better Business Bureau, Roofers Success Intl, and Roofing Insights.
Fichtner Home Exteriors
(410) 519-1900 fichtnerservices.com
Serving
4.9 from 288 reviews
Fichtner Home Exteriors has been a leading Maryland roofing and exterior home improvement contractor for over two decades. Based in Odenton, Maryland, we offer award-winning roofing and exterior home improvement services for builders and homeowners.
Long Home
Serving
4.7 from 4464 reviews
For over 8 decades, Long Home has helped families throughout the East Coast enjoy safer, more beautiful homes. From durable roofs to stunning baths, our quality products, outstanding craftsmanship, and dedication to customer satisfaction are at the core of our philosophy. We work with customers to make home improvement projects more affordable through competitive loan rates and flexible payment plans that fit your budget.
The Durable Slate Company
(410) 235-7500 www.durableslate.com
Serving
5.0 from 28 reviews
Established 1986, The Durable Slate Company provides expert historic and specialty roof services, including slate roof repair, clay tile roof installation, and custom copper gutters. Our Mid-Atlantic branch services Washington D.C., Baltimore, Maryland, Virginia, Pennsylvania, Delaware, New Jersey, and beyond. Historic roofing is our passion and we strive to treat every job, from minor slate roof repairs to comprehensive copper steeple restorations, with the same level of respect and attention. Our estimators never work on commission, so you can be confident that their recommendations are for the good of your roof. And with the best craftsmen in the industry, your slate, clay tile, or copper roof is in the best possible hands.
Elvis General Construction
(410) 694-1731 www.elvisgeneralconstructionllc.com
Serving
4.8 from 39 reviews
At Elvis General Construction, our dedication lies in delivering top-notch roofing services that stand the test of time. As a locally owned and family-operated enterprise with all in house crews, we boast an impressive collective experience of over 70 years in the roofing industry. Our unwavering commitment to excellence ensures that we never outsource any of our work. Every task is handled by our proficient in-house team, allowing us to maintain the highest standards of service. To demonstrate our confidence in our craftsmanship, we provide a comprehensive 10-year workmanship warranty for all our projects.
Nu Look Roofing, Siding, & Windows
(443) 806-8086 nulookhomedesign.com
Serving
4.6 from 586 reviews
Nu Look Roofing, Siding, and Windows provides dependable roof replacement in Columbia. For over 20 years, we’ve helped more than 50,000 homeowners with roofing projects, offering free estimates, 3D renderings, and clear, upfront pricing. Our 13-step production process ensures every job meets your expectations, and our lifetime transferable warranty gives you lasting peace of mind. You won’t pay until the work is finished to your satisfaction—guaranteed. From personalized product options to flexible financing, we’re here to make your roofing project straightforward. Call us today to get started with professional roof replacement in Columbia for your home.
For Hanover-area full re-roofs, a permit is typically required through the county building department rather than handled informally at the neighborhood level. This means that the project should be planned with the local code office in mind from the outset, not as a quick pickup after the building is already torn off. The permit process helps ensure that the work adheres to current moisture control standards, proper ventilation, and safe installation practices that stand up to Maryland's four-season climate.
Inspections commonly occur after tear-off and again after completion, with attention to proper installation details and roof ventilation rather than only the finished shingle appearance. A first inspection confirms the deck and underlayment are sound, that any necessary baffles or soffit vents are in place, and that fasteners and flashing meet code. The final inspection focuses on the finished roof system's integration with attic ventilation and drainage, not merely the exterior look of the shingles. If issues are found, corrections must be made before the permit can be closed, which can delay a project and complicate insurance documentation after a storm.
Local process quirks can include posting the permit on-site and ensuring licensed contractor participation, which matters for homeowners hiring lower-cost crews. Expect the permit to be visible at the job site, often near the entry point or utility area, so inspectors can verify it's active. Licensed contractors are typically required to perform significant portions of the work or supervise unlicensed crews; this serves as a safeguard against shoddy installations that can fail under Maryland rain and wind events. If a crew arrives without proper licensing or documentation, pause to verify credentials and contact the county to confirm the approval status.
Because storms and heavy rain are common, timing your permit and inspection schedule around weather windows reduces the risk of leaks during tear-off. Ensure the contractor coordinates ventilation and deck preparation in tandem with shingle installation, so that the roof remains protected during the interim. Poorly documented projects or rushed, unpermitted work can complicate insurance claims after damage, making the permit and inspection steps more than just paperwork-they are essential for long-term performance.
In Hanover, cost planning should start with the provided per-square ranges, but final pricing is often pushed by permit requirements, tear-off scope, ventilation corrections, and storm-driven scheduling pressure. For common materials, asphalt shingles run roughly 450 to 750 USD per square, metal 800 to 1200 USD per square, clay tile 1500 to 3000 USD per square, concrete tile 1200 to 2600 USD per square, wood shingles or shakes 520 to 900 USD per square, and synthetic or composite shingles 600 to 1100 USD per square. Use these as your starting point when you begin discussing bids with local crews who understand the terrain-humid four-season weather, storm cycles, and robust nearby competition all shape the final number.
Because the Baltimore-Washington labor market tightens and loosens with regional demand, homeowners can see pricing influenced by who's bidding nearby and how busy crews are after a significant rain or wind event. Even two houses with similar roof sizes can diverge in cost if one needs a full tear-off and venting overhaul while the other only requires a straightforward overlay. In practice, expect a larger swing from needed ventilation corrections and the scope of tear-off than from materials alone. Proximity to commercial roofing work also means some crews have to balance residential urgency with larger, faster-paced projects, which can shift scheduling and pricing windows.
Material choice matters sharply in this market because asphalt is common and competitively bid, while metal, tile, cedar, and synthetic systems depend more on finding crews with proven local installation experience. If you're weighing options, you'll often find the most favorable pricing on asphalt shingles when a project competes for local bids. For higher-end materials, confirm the contractor's track record on Hanover homes: roof lines, attic ventilation routines, and chimney or skylight penetrations all demand skilled detailing to prevent later leaks.
After a major rain or wind event, secure a rapid inspection to assess hidden damage, then align your bid timing with the storm recovery cycle so you're not paying premium rush rates. Ask bidders to itemize tear-off allowances, ventilation upgrades, and any necessary reinforcing in the attic or soffit systems. Have a clear list for the insurer, including the scope change if the roof needs more extensive venting or structural checks to withstand the next weather event.
Don't let upfront costs delay a critical repair - these contractors offer payment plans to fit your budget.

Recovery Home Improvement
(410) 288-1633 www.recoveryhomeimprovement.com
Serving
4.5 from 23 reviews
Maryland homeowners insurance commonly covers weather-related roof damage in Hanover, but adjusters typically want photos, storm timing, roof age, and evidence that leaks were mitigated promptly. Prepare a quick, dated log of when you first noticed the issue, when you contacted your insurer, and any temporary fixes you applied to slow leaks. Clear, well-lit photos of the damaged area from multiple angles help prevent back-and-forth, especially when shingle granules are missing or flashing shows wear. If the storm came through during a busy week, expect the file to be reviewed against other claims, so timely documentation matters.
You may encounter wind or hail deductibles or endorsements that change out-of-pocket costs, making policy review important before authorizing full replacement. Review your declarations page for any special deductibles tied to named storms or separate coverage riders. If the roof is older or shows preexisting issues, an adjuster may scrutinize whether prior-condition defects contributed to the damage. In practice, getting a clear, written explanation of any deductible, depreciation holdbacks, or endorsements helps avoid surprises when a payout is issued.
Ventilation and prior-condition questions can affect claim outcomes in this market, so homeowners should keep records of past repairs, attic conditions, and any prior inspection findings. Collect attic photos showing moisture, mold signs, or tray ventilation blockages, and note any attic heat build-up that could indicate insufficient ventilation. If previous roof work was completed within the last few years, pull out receipts or warranties. Detailed notes on attic moisture, insulation condition, and vent placement can steer the claim toward a fair evaluation rather than a dispute later.
After a storm, limit further damage by tarping or covering exposed areas when safe, but avoid making permanent repairs without insurer approval. Contact your insurer promptly, then coordinate with a reputable local contractor who understands the typical Hanover storm patterns, so estimates reflect common materials and installation practices for this area. Keep all correspondence and clock the timeline from the initial weather event to the insurer's final determination to protect your claim trajectory.
Connect with contractors who help homeowners navigate the claims process from damage assessment to final approval.
5 Star Roofing & Restoration
(833) 578-2707 www.5starroofingandrestoration.com
Serving
4.8 from 193 reviews
Hanover's mix of suburban homes and nearby commercial-style buildings means some properties have low-slope sections over porches, additions, garages, or multifamily areas that age differently from the main pitched roof. When these transitions exist, those flat or low-slope areas are not afterthoughts but integral parts of the whole roof system. Leaks often show up first where flashing meets shingle fields or where drainage paths converge at a terrace of low-slope decking. Expect more frequent attention to edge details, curb heights, and the way the low-slope plane ties into the higher, steeper sections. A practical approach is to map the roof as two connected systems: a traditional shingle roof and the contiguous low-slope surfaces, then plan replacements or repairs so flashing and terminations are compatible across both.
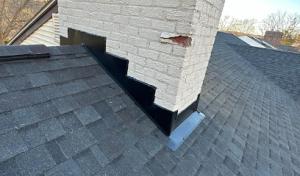
Skylight work is a meaningful specialty in this market, which suggests leak tracing around flashing and curb details is a recurring issue for Hanover homeowners rather than a rare add-on service. When a skylight is involved, the original curb and flashing assembly should be examined for stone-daged, settlement, or aging sealant. Look for failed perimeter sealant, improper flashing pitch, or gaps where the curb meets the roof deck. Prioritize accurate removal and reinstallation practices that preserve the curb integrity and maintain correct drainage away from interior spaces. In many homes, the best outcomes come from replacing aging skylight hardware with units sized to match the existing curb, while ensuring new flashing integrates cleanly with adjacent shingles or low-slope materials. If a skylight is paired with nearby low-slope transitions, drainage routing and flashing continuity become essential to prevent hidden leaks from creeping along the edge of the curb.
When a Hanover home has both shingle fields and low-slope transitions, replacement planning needs to address drainage and tie-in details instead of treating the roof as one uniform system. The goal is to maintain a continuous runoff path that keeps water away from interior joints, while allowing the low-slope areas to shed moisture without creating standing water near skylights or curb details. During replacement planning, ensure the edge details where the shingles meet the low-slope plane are sealed with compatible materials and that the transition zones maintain proper pitch and flashing overlap. A coordinated approach reduces the risk of mismatched substrates and helps ensure long-term performance across the entire roof envelope.
Find contractors experienced in skylight installation, flashing, and leak repairs to bring natural light into your home.