Last updated: Apr 19, 2026
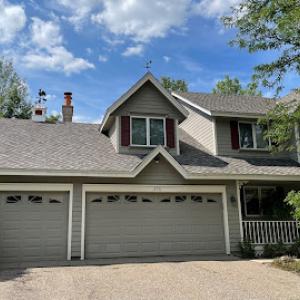
Spring in this area brings quick, sharp hail with storm lines that sweep across the bluffs and river flats, and it hits roofs more often than people expect. The risk is practical: hail damage can start as small bruises that weaken shingles, or it can create visible pockmarks and exposed underlayment after a quick storm pass. In Hastings, claim activity spikes as snow and ice finally retreat, but the most visible damage often comes into focus only when the last round of frost fades and the roof is exposed to sun again. This means you may not realize the true scope of damage until late spring or early summer, after long winters have stressed flashings, valleys, and edge shingles. The practical consequence is a delayed decision window where a timely inspection matters for both assessment accuracy and claim filing alignment.
Winter weather compounds the risk. Snow loads, ice dams, and freeze-thaw cycles can push shingles up, loosen sealant, or cause subtle leaks that surface with a thaw. Damage from winter often hides beneath a thick layer of compacted snow, and once that snow melts, residual leaks become more evident. In this market, that pattern means a cautious homeowner should anticipate a window where winter-driven issues may emerge gradually as the calendar turns to spring. Delays in noticing or reporting winter damage can complicate claim timing and blame attribution if nearby seasonal storms overlapped with the same roof area. The takeaway: inspect after the snow clears, not just after the first big spring hail.
Insurers in this market commonly ask for photo documentation of pre-existing damage. Start with a clear, timestamped record of the roof's condition just before the most recent hail season or winter event if that's possible. Keep a dated gallery of the roof from multiple angles: attic insulation and decking where accessible, look for lifted shingles, granule loss, rust on metal components, and any staining or soft spots in the interior ceiling. When hail is reported, photos should show both the general roof surface and close-ups of damaged edges, valleys, and ridge caps. If a prior claim exists, gather the claim history and any settlement documentation; insurers will review prior activity to determine replacement eligibility or depreciation specifics. A well-organized file speeds the process and reduces back-and-forth during assessment.
As storms ramp up in late spring and early summer, scheduling an inspection during a lull in storm intensity is strategic. A trained eyes-on-roof assessment can distinguish new damage from minor pre-existing wear, and it helps prepare a precise, claim-ready report for the insurer. Target a two-step approach: first, a rapid exterior assessment focused on hail impact indicators and wind-driven edge damage; second, a follow-up interior inspection to locate any signs of water intrusion that might not be immediately visible from above. The timing matters: if the insurer requests documentation quickly, having a detailed, timestamped record from a reputable local roofer can reduce delays and give you leverage in the claim decision.
If a storm just passed, get eyes on the roof within days or a couple of weeks, weather permitting. Photograph every angle, focusing on damaged shingles, granule loss, and flashing around chimneys, vents, and skylights. Compile a simple, chronological narrative describing when storms hit, how often you've noticed leaks, and any attic or ceiling staining patterns. Share this with your insurer alongside your roofers' assessment. If a claim is approved, act quickly but carefully: coordinate repair or replacement in a manner that preserves the roof's long-term performance, ensuring the chosen materials and installation method match the existing system and local weather realities. This is how you reduce the risk of patchwork damage and preserve home value through the delayed, demanding Hastings repair season.

Connell's Custom Exteriors
(651) 505-6656 www.ccexteriors.com
1317 S Frontage Rd, Hastings, Minnesota
4.9 from 152 reviews
For over 25 years, Connell’s Custom Exteriors has been a trusted leader in exterior remodeling throughout Greater Minneapolis. Since 1999, we’ve combined expert craftsmanship with exceptional service to deliver premium roofing, siding, window installations, and more. As a proud BBB-accredited business, our promise is simple: “Relax, we’re professionals.” It’s a reflection of the pride we take in providing reliable, high-quality results for every project. Call today for a free inspection or quote and discover the difference with Connell’s Custom Exteriors.

DKieffer Roofing & Construction
(651) 303-8150 www.dkiefferconstruction.com
11861 Lofton Ave S, Hastings, Minnesota
5.0 from 2 reviews
DKieffer Roofing & Construction, a family-owned Minnesota company, leverages over 3 decades of experience to deliver superior roofing solutions for Twin Cities metro area residents. Their commitment to provide white glove service and provide top-tier materials and personalized service ensures your home is protected against harsh Minnesota weather conditions.
Bold North Exteriors
(507) 581-2557 www.boldnorthexteriors.com
Serving
5.0 from 39 reviews
Roof replacement for remodeling or new construction. Call/text for a FREE inspection.
Level Edge Construction & Roofing
(651) 374-9768 leveledgeco.com
Serving
4.9 from 181 reviews
Level Edge Construction is a residential roofing and exterior contractor in the Twin Cities. We provide high quality labor, installation and excellent customer service.

True North Roofing
(651) 758-7663 www.truenorth-roofing.com
Serving
4.5 from 90 reviews
True North Roofing is a woman-owned and operated residential contractor specializing in exterior renovations in the Twin Cities metro area. We are here for your home: Roofing, Siding, Gutters, Windows, Storm Repair and Restoration. Our experienced installation teams take pride in providing top notch service and products for your home. We look forward to servicing your home. 651-758-ROOF BC778332
SPS Contracting
(612) 702-8083 www.farmingtonroofingcompany.com
Serving
5.0 from 125 reviews
When you plan your project with SPS contracting you’re working directly with the owner Shae and he is also hands on each and every step. At SPS we take pride in handling every step in the process from the original drawing to the final nail. Shae and his team work hard to make every customer feel like they’re number one…..because to Shae and SPS each customers satisfaction is number one priority. I really enjoy guiding a project through the various step required for successful completion. From simple repairs to total roof replacements to complete remodels I’m always excited to problem solve for the clients I’m working with.

Northern Exteriors MN
(651) 230-5103 northernexteriorsmn.com
Serving
4.9 from 59 reviews
Northern Exteriors - A trusted roofing contractor and siding contractor since 2001. Specializing in outstanding roofing and siding solutions, ensuring durability and curb appeal. As hail claim experts, we streamline the process, making it hassle-free. Exceptional service, top-tier craftsmanship, and an A+ BBB rating attest to our commitment to excellence. When searching for reliable roofing companies near me, look no further. Experience matters. Our roofing and siding crews have been part of our company family for over 18 years. You can trust them to bring care, craftsmanship, and pride to every job—just like they would for their own homes.

Anchor Roofing & Exteriors
(612) 363-7443 www.anchorroofingmn.com
Serving
5.0 from 100 reviews
Anchor Roofing & Exteriors provides expert residential roofing, siding, gutters, and storm damage repair services to South St. Paul and the Twin Cities metro area. With over 20 years of experience, we are fully licensed and insured, A+ rated by the BBB, and certified by top brands including GAF, Owens Corning, and Brava Roof Tile. From roof replacements to exterior upgrades, homeowners trust our craftsmanship, clear communication, and high-performance solutions to keep their homes protected and looking their best.
Archcraft Exteriors | South St. Paul
(651) 493-4156 goarchcraft.com
Serving
5.0 from 243 reviews
Archcraft Exteriors, established in 2019 and located in South St. Paul, Minnesota, is your one-stop solution for enhancing the vitality of your property's exterior. As a distinguished roofing and siding contractor, Archcraft Exteriors offers a full spectrum of services, specializing in comprehensive roofing, siding, window installation, and storm damage restoration. Their unwavering commitment to quality and durability will ensure your property emerges as a radiant beacon within your neighborhood.
Just Roofs
Serving
5.0 from 51 reviews
Roofing Company - 21+ years installing roofs in this region
Earth Friendly Builders
(651) 661-2929 myearthfriendlybuilders.com
Serving
4.7 from 48 reviews
Earth Friendly Builders is a roofing company in Inner Groves Heights serving the Twin Cities. Combining years of experience with a dedication to client satisfaction, we have established ourselves as the local leader in Roofing Companies, Siding Services, and Gutter Services. As your most trusted Twin Cities roofing company, we give our roofing projects 100% of our attention and make sure the job is perfectly done. Contact your favorite roofers in Twin Cities today for a free estimate!

Homestead Builders
(612) 799-3433 www.homesteadbuildersmn.com
Serving
5.0 from 136 reviews
General contractor specializing in exterior residential and commercial roofing, siding, windows and gutters.
The Mississippi and St. Croix corridor sets up a distinct wind pattern that reaches roof edges and ridges with more bite than a typical cul-de-sac lot. In homes perched on bluff edges or along open river-facing slopes, wind can slam across the peak line and over hips, pulling at shingles and flashing in ways a sheltered neighborhood might not experience. That exposure translates into more frequent edge damage, accelerated wear on ridge vent seams, and faster deterioration of any roof penetrations such as vent stacks or skylights. In practice, you may notice wind-driven shingles curling or lifting after seasonal storms, and those effects accumulate if left unchecked. The practical takeaway is to pay closer attention to the perimeter and ridge line after a major wind event, especially in late fall and early spring when dryness meets cold.
Homes sitting on exposed elevations or near wide-open river-facing areas rarely enjoy uniform snow coverage. Drifting snow can pile up on one side of a roof while leaving others relatively bare, creating uneven loading that stresses overhangs, gutter lines, and valley intersections. That uneven load can lead to localized elongation or separation of shingles and increased risk at flashing transitions where roof meets walls. In Hastings, a drifting pattern isn't just a visual nuisance; it translates into more frequent micro-cracks along the shingle surface and potential water entry points if the drift sits against a vulnerable flashing crest for multiple cycles. The practical approach is to monitor any sagging, creasing, or loose flashing after storms and time inspections to the immediate aftermath of windy snow events.
Winter in this corridor is defined by a courtroom of freeze-thaw cycles: snow cover, daytime melt, then nighttime refreeze. Each cycle pushes shingle granules loose, tests adhesive bonds on tabs, and stresses ridge caps and metal flashing at seams. Over multiple seasons, repeated cycles can create a subtle but persistent edge where ice dams form or where flashing joints begin to weep. On exposed roofs, those cycles can be more pronounced near eaves and along ridgelines where wind dries and cools surfaces fastest. The result is a gradual acceleration of wear around penetrations, underlayment wear at drip edges, and an elevated risk of small leaks that worsen during the next thaw. The practical remedy is proactive inspection after thaw-freeze events, paying careful attention to valley integrity, step flashing at walls, and any sign of lifted shingles along the crown of the roof.
In this setting, small proactive steps can prevent bigger headaches. After significant storms, walk the roof if safely possible, checking for loose or curled shingles along the edges and any detached flashing. Keep an eye on the valley and eaves where melted snow might refreeze into stubborn ice dams. Consider upgrading edge and ridge details where your home shows repeated wear, especially if your roof has been in place through multiple freeze-thaw winters. If a strong storm coincides with an ongoing snowpack, plan for a quick inspection window in the days that follow, targeting the most exposed sections first. In this river corridor climate, careful attention to wind exposure, drifting snow, and freeze-thaw cycles is not alarmist-it's a practical strategy to preserve roof integrity year after year.
When a roof and the interior are already dealing with seasonal swings, selecting the right replacement window becomes about durability, performance in cold snaps, and how well it handles the neighborhood's exposure to wind and hail. In this market, the emphasis is on a window that seals reliably after installation, accommodates typical Minnesota temperature shifts, and minimizes long-weather downtime. A practical approach is to map installation to the temperate windows in late spring through early fall, avoiding the heart of winter when installations slow due to cold and snow. If a storm season or a hail event has recently occurred, plan an expedited, short-term plan with your contractor to get temporary sealing and weather protection in place while you finalize the long-term window choice.
In this climate, reinforced vinyl and composite frames with low-conductivity glazing perform best, because they resist expansion and contraction through autumn temperature swings and preserve a tight seal as exterior temperatures flip from warm days to cool nights. Simulated divided lites or grid patterns should be chosen with exterior grids that won't corrode or peel in a high-hail exposure. For accent style, consider a mid-range wood interior with a fiberglass exterior; this gives a traditional look inside while leaning on rugged, weather-ready framing outside. Sloped or slanted sills help with water shedding on bluff-driven windstorms, which helps prevent creep and moisture intrusion around the frame.
Full replacement projects align best with shoulder seasons when crews can work without the rush of a hard freeze or heat wave. Late spring is ideal for installation as roofing crews are already mobilized for exterior work; you can synchronize window work with existing tear-offs if the project timeline permits. If autumn is the chosen window, plan for a slightly extended install window to account for temperature-sensitive sealant cures. Have a contingency plan for rapid weather changes common to Minnesota falls: a temporary seal or barrier can keep interior moisture out during short delays without slowing the overall project.
Storm damage and hail events around storm season create the need to document impact precisely. Before work begins, photograph the exterior condition around each opening and any visible leaks or gaps, then compare to the after-install images. This makes it easier to verify workmanship and seal integrity after the contractor finishes. After installation, verify that flashing integrates with existing roof-to-wall transition details to prevent water intrusion during the next spring thaw. Check in the first weeks after installation for any settling gaps or cracks around the window perimeter; autumn's rapid temperature shifts can reveal sealing issues that might not be evident in milder seasons.
Get a clear picture of your project costs upfront - no commitment required.

Connell's Custom Exteriors
(651) 505-6656 www.ccexteriors.com
1317 S Frontage Rd, Hastings, Minnesota
4.9 from 152 reviews
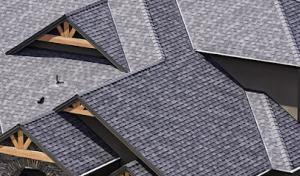
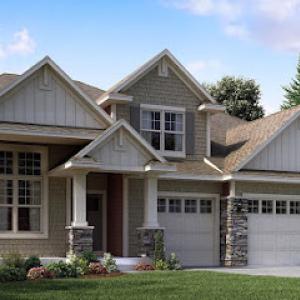
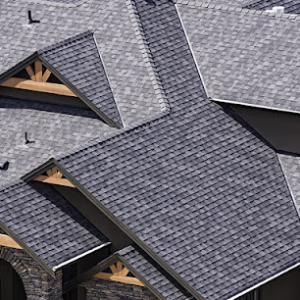
Asphalt shingles remain the dominant choice for homes in this market, and for good reason. The mix of Mississippi and St. Croix river bluff exposure, plus regular freeze-thaw cycles, keeps asphalt relevant, because modern asphalt products tolerate typical Hastings winters while offering straightforward repair paths after hail events. Look for architectural or laminated options for better wind resistance and a thicker fiberglass mat to improve impact performance. In snow- and ice-heavy seasons, a well-sealed shingle with a robust underlayment helps slow water intrusion during rapid freeze-thaw cycles. Consider harsher hit zones around roof edges and porch overhangs where debris can accumulate and moisture may linger before a warm-up.
Metal roofing can shine in this climate thanks to effective snow shedding, which reduces the risk of ice dams and gutter overload. In exposed sites near the river bluffs, fastening and edge detailing become critical, because wind-driven debris and repetitive freeze-thaw cycles stress fasteners and seam systems. Choose a metal profile with a generous overlap and corrosion-resistant coating, and plan for solid concealed or exposed fasteners with appropriate sealants. Pay attention to roof-edge detailing to prevent wind uplift, and ensure flashing transitions at chimneys, skylights, and dormers are durable against snow slide and ice buildup. A properly installed metal roof can pay off in timely snow release and low maintenance when paired with a thoughtful eave detail.
Tile, cedar, and synthetic roofs exist in this market, but their performance hinges on Minnesota snow load considerations and hail exposure. Clay and concrete tiles bring notable weight and can resist hail better than some shingles when properly rated, yet they demand a reinforced structure and careful design at overhangs and transitions. Cedar offers natural durability but relies on solid substrate and regular maintenance to prevent rot, especially in shaded or damp corners where snow lingers. Synthetic options can blend the weight and impact resistance of heavier materials with easier installation, but still must be evaluated for load-bearing capacity and edge detailing under heavy frost and hail exposure. In all cases, verify that the chosen system can handle the region's snow loads and frequent storm cycles while fitting with the existing framing.
Storm-driven demand surges after hail and severe weather push scheduling pressure high in Hastings and nearby Dakota County markets. When a big hail event hits, crews and material suppliers can be tight, which tends to push both labor rates and lead times upward for a few weeks to months. This isn't just a weather hiccup; it directly reshapes the bottom line, especially if your replacement slips into the peak storm window. Pricing you see in standard ranges may move by a few percent during peak demand, and some shingle warranties or product shipments can take longer to secure.
Steeper residential rooflines, common on both older and newer single-family homes, raise labor, staging, and tear-off costs compared with simple low-slope layouts. In Hastings, that means more trips up and down scaffolding, longer installation times, and increased safety precautions. If your home features multiple gables, dormers, or a high pitch, anticipate higher overheads for access equipment and site protection, even before material costs are considered. In short, the slope and complexity of the roof are as decisive as the material choice when budgeting.
Local pricing is affected by storm-driven demand surges after hail and severe weather, when scheduling pressure can tighten labor availability in Hastings and nearby Dakota County markets. For typical shingle options, you'll see ranges tied to material type, plus the added labor for a steeper roof. Asphalt shingles sit in a lower-to-mid range, while metal roofs push toward the higher end due to trim, flashing, and installation specifics. Tile or concrete options bring even more variance because of weight, chassis setup, and crane time for heavy replacements. In practice, use the baseline ranges as a starting point, but expect adjustments during a hail drawdown period.
Asphalt Shingles: roughly 420 to 780 USD per square, depending on brand and underlayment. Metal Roofing: about 700 to 1250 USD per square, reflecting fasteners, seam work, and possible upgrades for underlayment. Clay Tile: 1100 to 2500 USD per square, with added crane and staging needs. Concrete Tile: 900 to 2100 USD per square. Wood Shingles/Shakes: 520 to 1100 USD per square. Synthetic/Composite Shingles: 560 to 1200 USD per square. These anchors help translate a square (10x10 feet) into a project estimate, but the final number will bend with roof slope and storm-driven scheduling realities.
If a hailstorm hits, lock in a response window with your contractor early and align expectations around peak-season availability. Allow for an adjustable timeline that accounts for crane access, material lead times, and potential delays from weather or supply chain quirks. In Hastings, a careful plan that mirrors the storm calendar can save both money and frustration when the next replacement becomes necessary.
Don't let upfront costs delay a critical repair - these contractors offer payment plans to fit your budget.


Slim & Trim Construction / STC Roofing
(952) 228-0006 www.slimandtrimconstruction.com
Serving
4.9 from 79 reviews
When planning a full roof replacement, a permit is typically required in Hastings. The permit process helps ensure the replacement aligns with local code, hurricane-like storms in the region, and winter conditions that shape installation practices. The city's approach emphasizes doing the project with proper drainage, ventilation, and flashing details so a storm-stressed roof holds up through Minnesota winters and spring storms.
The local building department handles the permit application, and the process is designed to keep work organized around the seasonal demands that Hastings homeowners face. Start by confirming the scope with the permit office-nature and heavy snow loads influence flashing and attic ventilation requirements, which the permit reviews carefully. Be prepared to submit project details, including roof pitch, material type, contractor information, and a proposed timeline that accounts for long winters and potential storm-driven delays.
You have options for submitting the permit either online or in person. Online applications can be convenient for gathering documents such as contractor licenses and property records, and they allow you to track status as weather windows open up. In-person visits give you face-to-face guidance on any local nuances, such as preferred flashing details for bluff-exposed roofs along the Mississippi River corridor and the St. Croix bluff approaches. Choose the path that best fits your schedule and comfort with the documentation required.
Final inspection is typically performed after the roof is installed to verify installation quality, flashing, ventilation, and overall code compliance. The inspector will check that eaves and soffits are properly vented, flashing around chimneys and skylines is secured, and roof penetrations meet Hastings standards for wind and impact resistance. Having a clean, accessible workspace and ready documentation (warranties, material specs, and contractor information) speeds the process.
Plan around winter and storm-season demand spikes by coordinating with both the contractor and the building department early. Confirm that the project timeline aligns with required inspection windows and any curbside debris or disposal logistics. Failing to obtain an approved permit before starting work can stall inspections and extend your project, so align the timeline carefully with the city process.
Hastings sits in a higher-claim environment because hailstorms and severe winter storms are common loss drivers in southeastern Minnesota. That means when a storm hits, insurers scrutinize roof-related damage more closely and you may wait longer for a settlement during season. Understanding how this system tends to move in your favor requires documentation and timely communication with your adjuster. If weather turns rough again before a claim is resolved, the file can become tangled in evidence about what happened when, which can slow repairs and leave you exposed to leaks or damaged shingles.
Homeowners here should document damage with date-stamped photos before temporary repairs because adjusters may distinguish new storm damage from older wear. Take photos from multiple angles, include closeups of hail impact on shingles, gutters, and vents, and note the exact date. Keep a simple log of when leaks or drips appeared and when tarps or temporary fixes were placed. When you file, submit the best-organized bundle you have: the photos, a map of the roof's visible damage, and a succinct description of storm timing.
Prior claim history can affect how a new roof replacement is evaluated, so keeping records of earlier repairs and inspections is especially important in this market. Gather previous inspection reports, work orders, and any warranty information. Share this history with your adjuster and your contractor to help them determine the extent of new damage versus prior wear. If a contractor notes discrepancies between what is documented and what the roof shows now, ask for a re-inspection before finalizing a settlement to protect your replacement options today.
Connect with contractors who help homeowners navigate the claims process from damage assessment to final approval.

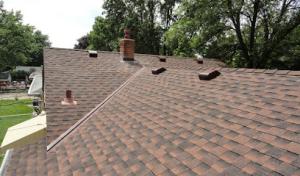
In Hastings, flashing and ventilation are emphasized in final inspections, reflecting how often these details become failure points after winter weather. You may not notice a small step in a roof-to-wall transition until a thaw reveals moisture wicking under shingles or a glimpse of rusted metal at a valley. The consequence is interior surprises-stains, warped boards, or musty corners-that feel like they appeared overnight. Regular checks after heavy snows and thaws matter, especially around dormers, skylights, and chimney penetrations. If flashing sits under decades of snow, it can freeze, twist, and lose its seal, inviting slow leaks that only shout during a spring rainstorm. Prioritize venting and flashing with proper feathering and corrosion-resistant materials, then verify sealant integrity during milder days before the next storm cycle.
Spring hail can leave latent bruising or granule loss that is not always obvious until a replacement estimate or insurance inspection is underway. In Hastings, gusty spring episodes can pummel softer shingles or composite layers, microwaving under heat and snowpack can accelerate deterioration where impact points are hidden by ash or moss. Bruised shingles may look fine from the curb yet fail sooner than expected once sun and warmth resume. The telltale sign is micro-delamination along ridges or granule loss that reveals lighter underlayment beneath. Document every suspected impact with clear photos, and note changes in color or texture after storms so an insurer can assess actual damage rather than assuming age or average wear.
Snow load and repeated freeze-thaw movement can expose weaknesses around penetrations, valleys, and roof-to-wall transitions over time. In Hastings, where winter pressure lingers and melt cycles reappear, these weak points are the first to show hairline cracks, loose shingles, or edge separation. Valleys that appear solid in summer may reveal minor gaps after a cold snap, letting moisture creep into deck boards or underlayment. Pay particular attention to sealants around vents and the edges of dormers, and inspect to ensure there's no ice dam buildup that forces water toward delicate joints. Consistent, proactive checks after notable storms help catch issues before they compound into costly repairs.
Find contractors experienced in skylight installation, flashing, and leak repairs to bring natural light into your home.