Last updated: Apr 19, 2026
Southern Minnesota hail and wind events drive frequent roof claim activity in this area, and that means adjuster involvement after spring and summer storms is the norm rather than the exception. When a storm rolls through, the clock starts ticking on documentation, inspection, and decision-making. The risk is real: delayed reporting can blur lines between new storm damage and preexisting wear, complicating settlements and leaving legitimate damage underpaid or overlooked. You need to act with precision, not patience, once the skies clear.
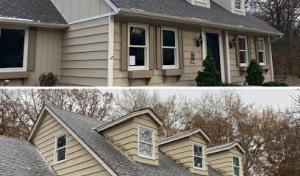
Spring hailstorms and high winds are a stated local seasonal risk, so many homeowners are balancing active damage assessment with replacement scheduling in the same season. Start with a rapid, thorough walk around the roof with a flashlight at dawn or dusk when hail impact appears as tiny dents or granule loss on shingles. Look for lifted edges, bruising on metal panels, and any unusual granule accumulation in gutters. Note attic signs too: condensation or warmth in spots that align with roof lines can signal hidden leaks. The moment you suspect damage, set up a professional inspection while the memory of the storm is fresh in the adjuster's mind and the damage is most visible from above.
Insurers in this market often want clear documentation separating new storm damage from preexisting wear, which makes dated photos, permit records, and a precise scope of work especially important in Lakeville. You must collect dated photos showing the roof's condition before and after the storm, preferably with a trusted neighbor or relative who can attest to the pre-storm state. Create a simple damage map: evergreen lines (valleys, rakes, hips) and any protrusions (chimneys, vents) with marked evidence of impact. Keep a written log of all communications with the insurer, contractor, and adjuster, including dates, times, and topics discussed. If a contractor identifies a single area as susceptible to future leaks, request a written note tying that risk to a defined repair or replacement scope, rather than vague concerns.
Timing around Lakeville's cycle matters. The window after a spring or summer storm is prime for a quick assessment, but you must balance urgency with accuracy. If the roof shows widespread damage, expedite a full replacement plan to reduce the risk of intermittent leaks through winter. If the damage is localized, pursue a targeted repair to minimize disruption and cost, while still documenting the surrounding wear. In any case, obtain a detailed scope of work that distinguishes new storm damage from aging underlayment, flashing wear, or deck issues. The goal is a clean, auditable file that an adjuster can align with your roof's actual needs rather than a best-guess estimate.
When the adjuster arrives, walk them through your damage map, dated photos, and the scope of work with clear accountability. Emphasize the storm's timing, the affected roof sections, and evidence that ties new findings directly to the recent hail or wind event. If the adjuster questions preexisting wear, present your dated images and notes that establish the storm as the primary cause of current damage. If delays or scheduling conflicts emerge, request a written plan with milestones to avoid long gaps that leave your roof exposed to weather and ice dam risk during freeze-thaw cycles. You want a documented path to repairs that minimizes back-and-forth and protects your home through the coming season.
Winter adds its own pressure: freeze-thaw cycles can exacerbate minor issues into costly leaks. Maintain a proactive stance by confirming that the insurer's scope addresses ice protection, ventilation considerations, and approved materials compatible with your existing roof system. Revisit the timeline if a second storm arrives; adjust the plan to prevent a cascade of small, unresolved damages that accumulate into a major claim later. Staying organized now reduces the likelihood of a rushed, suboptimal replacement when the next hail event hits.
Platinum Builders
(952) 683-1066 platinum-builders.com
20830 Holt Ave, Lakeville, Minnesota
5.0 from 48 reviews
Since 2012, excellence in Roofing, Siding, Windows & Exteriors. Platinum Builders LLP is one of Minnesota’s most experienced exterior companies, trusted by countless homeowners and many of Minnesota’s premier home builders. LAKEVILLE | BURNSVILLE | APPLE VALLEY | EAGAN | BLOOMINGTON | RICHFIELD | MINNEAPOLIS We offer a variety of quality products. The products are installed by highly qualified, experienced installers, and backed by the best warranties in the business. Platinum Builders is a full service construction company, serving residential, commercial, and storm damaged properties. We have the experience and knowledge to complete projects with 100% satisfaction.
Kinmount Exteriors
(952) 209-0930 kinmountexteriors.com
17769 Juniper Path, Lakeville, Minnesota
5.0 from 29 reviews
We started Kinmount Exteriors because Twin Cities homeowners deserved better from their contractors. Based in Lakeville and serving the entire metro, we specialize in residential & commercial roofing, windows, siding, gutters, and doors – with honest pricing and no games. Our 5-star reviews speak to what makes us different: we're not pushy or salesy, we give you one clear price upfront, and we actually stick to it. Whether it's storm damage repair, full exterior remodels, or a single window replacement, we're here to help. Our team guides you through insurance claims when needed and treats your home the way we'd want contractors to treat ours. No job too big or small. Contact us for a free inspection and honest estimate.
Roof Time
(952) 592-2292 www.rooftime.com
18928 Katrine Ct, Lakeville, Minnesota
4.8 from 47 reviews
Roof Time, Inc. in Lakeville provides expert roofing replacement, roof repair, siding, and window services tailored to Minnesota homes. Our team understands local challenges like harsh winters, storm damage, and aging shingles, delivering solutions that protect your home long-term. We’re known for our personal service — we stay involved throughout the project, inspecting the roof as we work to ensure quality craftsmanship and your full satisfaction. Recognized by the BBB and Angie’s List for our commitment to excellence, Roof Time, Inc. remains a trusted choice for experienced, reliable roofing contractors.
All Sons Exteriors
20765 Holyoke Ave, Lakeville, Minnesota
4.8 from 33 reviews
All Sons' Exteriors is a Roofing and Siding contracting company servicing the Twin Cities Metro Area. We have provided premium materials and expert installation since 2011. Our professional team strives for excellence and precision on each and every project. At All Sons' Exteriors we are dedicated to providing Minnesota homeowners with the most modern exterior options for your home in 2023.

TR Exteriors
(612) 240-1310 trexteriors.com
17595 Kenwood Trail, Lakeville, Minnesota
4.7 from 7 reviews
🏠 Minnesota’s premier exterior contractor, specializing in roofing, siding, windows, and gutters for your home. 🏠
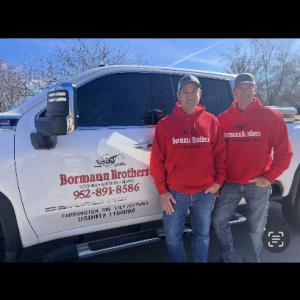
Bormann Brothers Contracting
(952) 891-8586 bormannbros.com
Serving
5.0 from 31 reviews
At Bormann Brothers Contracting, we provide top-quality Roof Replacement, Roof Repair, and Emergency Roof Repair services in Lakeville, Minnesota and surrounding areas. Our team specializes in Asphalt Shingle Roofing ensuring long-lasting protection for your home or business. We also offer expert Storm Damage Roof Repair, assisting homeowners with insurance claims and fast restoration. In addition to roofing, we provide Gutter Installation and Siding Contractor services, improving both function and curb appeal. If you need residential roofing solutions, our skilled team is here to help. Trust Bormann Brothers Contracting for durable, high-quality
Solaris Companies - Roofing
Serving
5.0 from 94 reviews
At Solaris Roofing, we have established a strong reputation for delivering high-quality exterior restorations and interior remodeling services. Our team of skilled professionals is a source of pride for us. We ensure that our technicians are well-informed about the latest industry standards and equipped with top-notch tools, allowing us to provide every customer with dependable service at a competitive price. When it comes to protecting your home, Solaris Companies is here to always deliver a result you can rely on for years to come.
Apex Roofing & Siding
(952) 891-1919 apexroofingandsiding.net
Serving
5.0 from 20 reviews
Apex Roofing and Siding Company Serving Dakota County and surrounding areas for over 25 years! Locally owned, years to come we will be here for you. We are licensed and insured in the state of Minnesota. MN Building Contractor #BC633682
All Craftsmen Exteriors
(952) 898-4680 allcraftsmenexteriors.com
Serving
5.0 from 63 reviews
Since 2005, All Craftsmen Exteriors has helped property owners tackle complex roofing projects. From damage repair to full roof replacements, each of our projects presents unique challenges and requires a customized approach. Thanks to extensive experience within the industry and knowledge of available products and installation best practices, our team of roofing experts is up to the task of tackling even the most complex projects.
Maus Construction
(952) 977-9746 www.mausconstructioninc.com
Serving
4.9 from 39 reviews
Maus Construction is a locally owned company that Specializes in roofing, siding, and windows. We service the Twin Cities and surrounding areas. We are are an Owens Corning Certified Preferred Contractor, GAF Certified Installer, and Certainteed Certified Shingle Master.

Omega Exteriors
(651) 998-8500 omega-exteriors.com
Serving
4.9 from 157 reviews
Omega Exteriors is proud to be an independently-owned home exterior business in Farmington, Minnesota. Since our inception, Omega Exteriors has established its mission on three basic principles – honesty, quality craftsmanship, and exemplary customer service. As the fastest growing roofing company in the state of Minnesota, we aim to be the last exterior company you will ever need to take care of your home's roofing, siding, gutters, windows and doors.

Homestead Builders
(612) 799-3433 www.homesteadbuildersmn.com
Serving
5.0 from 136 reviews
General contractor specializing in exterior residential and commercial roofing, siding, windows and gutters.
Repeated freeze-thaw cycles push and pull at shingles, flashing transitions, and roof penetrations. When ice forms along edges or in valleys and then thaws, water can seep into tiny gaps and refreeze, widening those gaps over time. This isn't just about a few damaged shingles; it's about a system-wide stress pattern that can undermine edge flashings, pipe boots, and fastener seals. In this market, where homes frequently move from cold snaps to quick thaws, the roof endures a steady, minute-by-minute battle against moisture intrusion that may not be obvious until a leak appears.
Winter and early spring thaw are specifically noted as complicating access and installation timelines in Lakeville, so leak diagnosis and permanent replacement often happen on different schedules. Cold spells can ground crews, and sudden thaws can create slick surfaces or muddy driveways that slow or delay work. If an inspection reveals moisture in the attic or a roof with suspect flashing, expect a staggered plan: quick interim repairs to dry and seal vulnerable spots, followed by a more complete replacement when weather and logistics cooperate. The timing reality is that diagnosis may precede the full fix by weeks or even a month, depending on weather windows and contractor availability.
Heavy snowfall is a local seasonal risk that increases roof load and can delay both inspections and contractor scheduling during peak winter periods. The added weight compounds existing stress from freeze-thaw cycles and can press through weaker areas, potentially accelerating visible warning signs like sagging decking or ice dams. When the snowpack is heavy, access to the roof becomes riskier for both occupants and crews, making proactive roof-health checks a prudent step before storms pile up. If a leak emerges while snow is on the ground, expect a conservative approach: protect interior spaces first, then coordinate a plan for a measured, staged repair or replacement once conditions improve.
Leak diagnosis during Lakeville's winter requires patience and a clear plan. Moisture often travels along framing and underside surfaces, not just where a drip is visible. Look for signs of condensation or frost patterns inside attic spaces, stray water marks on ceilings, and irregular shingle edges that hint at flashing movement. Because frost and ice can mask the true extent of damage, temporary shoring and drying become important steps before any permanent fix. A careful assessment notes not just the obvious roof failures, but the surrounding system-the attic ventilation, insulation, and the integrity of vent pipes and chimney clearances.
The combination of cold winters and thaw cycles means a durable fix should address more than just the surface. When replacement becomes necessary, the choice of materials matters-especially in a climate with frequent freeze-thaw exposure and wind-driven hail. Proper installation details matter, including secure flashing transitions, watertight penetrations for vents and pipes, and adequate ventilation to minimize indoor condensation build-up during warm spells. Acknowledge that, in practice, the path from diagnosis to a long-lasting solution may require staggered work and a season-adjusted schedule, guided by the weather and the storm-season history that shapes Lakeville's roofing rhythm.
When you can't wait, these contractors offer fast response times to stop leaks and prevent further damage.
Kinmount Exteriors
(952) 209-0930 kinmountexteriors.com
17769 Juniper Path, Lakeville, Minnesota
5.0 from 29 reviews

The preferred replacement window in Lakeville is late spring through early fall to reduce weather-related installation risk. That stretch captures the return of milder temperatures and more predictable humidity levels, helping shingles or panels seal properly and underlayment to behave as intended. If a storm hits early in spring, the window can still be workable, but aim to wrap up the project before heavy summer heat or late-fall freezes complicate crews' schedules. Planning with a reputable local contractor who tracks local weather patterns makes the most of that window.
Summer heat and humidity are a stated local concern because they can affect underlayment handling and material performance during installation. In practical terms, that means scheduling daytime work for cooler periods when possible, keeping underlayment and asphalt products out of direct sun when unloading, and allowing for longer drying times on adhesive or sealant products if humidity spikes. A trusted Lakeville crew will acclimate materials on-site, store them under shade when feasible, and stagger heavy work during the hottest hours. Expect longer sessions on very hot days if crews are aiming for a tight, weatherproof roof without premature material aging.
Lakeville homeowners often have to choose between replacing soon after spring storm damage and waiting for more stable installation conditions before winter returns. If a hail or wind event has compromised the roof structure, the immediate concern is securing the roof to prevent leaks and further damage. In that case, a temporary cover or rapid repair may be appropriate to buy time, paired with a schedule for full replacement when the late-spring to early-fall window next opens. When damage is not urgent, delaying until the mildest months reduces the risk of blow-off, nail pull-through, or underlayment failure caused by rapid temperature swings.
Winter-related stresses influence decisions about ventilation and ice protection even if the actual work happens in the optimal window. A Lakeville project should include a plan for proper attic ventilation and an ice-and-water shield at eaves and penetrations, especially on steeper roofs or homes with higher snow loads. If work spills over into shoulder months, ensure the ventilation strategy remains appropriate for the shifting temperatures. The aim is a roof that breathes well in summer heat and remains secure as treacherous freeze-thaw cycles begin to bite.
Given the fast-growing housing stock in the south metro area, crews in Lakeville often juggle multiple projects. A practical approach is to lock in an installation window during late spring through early fall, with a contingency plan for early winter work if a squeeze happens due to storm recovery timelines. Communicate clearly about how weather delays could affect material handling and sequencing, and confirm that the chosen crew has a plan for winter readiness-including proper sealing of edges and thorough cleanup-so the roof remains protected as temperatures drop.
Get a clear picture of your project costs upfront - no commitment required.


Exteriors Plus Roofing, Siding & Windows
(952) 260-0305 exteriorsplusmn.com
Serving
4.9 from 308 reviews
Asphalt shingles are a dominant material in Lakeville and align with the city's large re-roofing market, making them the baseline option for many suburban homes. They pair well with the cold snaps and mid-winter freeze-thaw cycles because manufactured bundles and underlayment systems have matured around these storms. For most homeowners, asphalt offers straightforward installation timelines, proven hail performance, and broad familiarity among local crews. When you survey neighborhoods, you'll notice the familiar serrated rooflines, the quick attic ventilation checks, and the practical, mid-range curb appeal that asphalt provides year after year.
Metal roofing is present but less prevalent than asphalt in the local contractor signal mix, suggesting it is a specialist upgrade rather than the default choice in Lakeville. If a hail-prone roof or a desire for long-term energy performance drives the decision, metal can deliver. The material's longer lifespan and superior wind resistance can help with seasonal stress, particularly on high-profile ridges or southeastern exposures that collect wind-driven debris. However, installation tends to rely on a subset of crews with metal-specific know-how, and lead times for detailing, flashing, and insulation can be more exacting. If a contractor suggests metal, expect a plan that emphasizes precision sealing around penetrations and a stepped approach to attic ventilation with a focus on moisture control during winter.
Wood shakes, tile, synthetic products, and slate exist in the market but appear as narrower specialties, so material choice in Lakeville is partly constrained by which crews regularly install and service those systems. Wood shakes and slate bring distinctive textures and long-term durability, but their weight, fastening methods, and maintenance needs require careful assessment of attic structure, ventilation, and attic temperature management. Tile and synthetic options offer aesthetic variety and different weather resistance profiles, yet their availability hinges on local crews who regularly handle the specific fasteners, underlayment, and leak-spotting strategies those materials demand. In practice, your selection should align not only with stylistic goals but with the installation team's demonstrated scope and a plan for reliable ice and water protection in winter.
Typical cost ranges in this area run from 350 to 700 USD per square for asphalt shingles, 800 to 1500 for metal, 1000 to 2300 for clay tile, 700 to 1200 for wood shingles or shakes, 600 to 1100 for synthetic or composite shingles, and 1200 to 2400 for slate. These figures assume standard decking, basic ventilation, and no major structural repairs. When the project is straightforward re-roofing, you'll stay near the lower end of each band; adding attic ventilation corrections or inspection-driven fixes before final approval tends to push prices higher.
Storm-driven demand spikes in the south-metro can push scheduling pressure and pricing after hail and wind events, especially when many homeowners are filing claims at once. If a hail day clusters with wind events, contractors may book out weeks or months and material suppliers tighten availability. In that rhythm, you'll want to confirm a start window and build in a weather buffer for freeze-thaw swings. Your insurance adjuster may request temporary protection sooner than a full deck replacement, so plan accordingly.
Costs in Lakeville can also move based on whether the project is a straightforward re-roof or includes ventilation corrections and inspection-driven fixes before final approval. Ventilation upgrades, ridge vents, and code-driven attic sealing can add to the bottom line but save long-term energy and ice dam risk. If the inspection reveals damaged decking or rotten plywood, that adds cost and time but avoids later leaks. Expect a per-square increment if uphill access or steep pitches require special equipment.
Winter freeze-thaw stress makes ventilation, ice protection, and documentation key around Lakeville's typical weather cycle. Scheduling a replacement to avoid the heart of winter can reduce risk of weather-related delays and warranty disputes. If your plan spans spring, summer, and fall, set milestones: permit-free quote, inspection-driven fixes, material lead times, and a final sign-off. Keep the plan flexible to accommodate carrier delivery delays and seasonal price bumps.
In Lakeville, bids can bounce when storm claims surge, so compare apples to apples: same scope, same ventilation plan, same decking checks, and the same warranty terms. Ask for a breakdown by material, a separate line for attic ventilation work, and a realistic timeline from teardown to final inspection. Some roofs sit on steep pitches or have limited driveway access, which can raise crew time and per-square costs. If a claim is involved, the insurer may authorize temporary protection steps, but full replacement typically follows after scope endorsement. Choose a contractor with recent local references and photos of hail-damaged projects to support your claim file. Ask about warranty coverage.
In this fast-growing area, a building permit is typically required for a full roof replacement. The permit ensures the project aligns with local zoning, fire codes, and neighborhood drainage. You should plan for a timing window that matches late summer to early fall, when weather is more predictable for tear-off and re-shingle, but be mindful of freeze-thaw risk that can complicate unsealed roof work. The permit process in this city is straightforward: the contractor or homeowner generally submits the permit application with project scope and roofing materials. Having a clear scope that lists underlayment type, ventilation upgrades, and ice/water protection helps avoid delays after a mid-project inspection.
When submitting, include site plans or roof diagrams, access routes for equipment, and a written method for protecting landscaping and siding. If an insurance claim is involved after storm damage, keep all documentation with the permit package so adjusters can see approved repairs. This city encourages proactive communication with the building department; if weather windows shift, you may need to adjust the permit scope, so keep an updated contact person and contractor authorization on file.
City inspections in Lakeville usually include a rough inspection during installation and a final inspection after completion to verify proper installation and ventilation. During the rough, inspectors check nailing patterns, underlayment, and boot flashings, ensuring attic ventilation is not obstructed. The final inspection confirms venting is balanced, attic insulation details meet code, and roof penetrations are sealed. Have your project records handy, including permit numbers, approved spec sheets, and any change orders. A smooth inspection timeline often hinges on coordinating access with the contractor, clearing frost damage, and addressing snow or ice on the roof that could impact safety and compliance.
In this market, roofs endure frequent hail and wind events that leave telltale damage even when the surface looks okay from the ground. Insurers scrutinize damage claims carefully, especially when a long stretch of weather has produced multiple storm reports. You need clear, date-stamped evidence that distinguishes storm-created harm from preexisting wear. Photos taken from ground level and up close, before any temporary protection or repairs are installed, help create a credible timeline. Save every repair ticket, material order, and contractor note that speaks to when work began and what was addressed.
A common hurdle in Lakeville is proving what happened during the storm versus what existed beforehand. If a claim is filed after a cold snap or freeze-thaw cycle, insurers will want a solid record showing the origin of each issue. Organize inspection photos by date, include a concise summary from any prior roof work, and keep the final scope of work approved by the city or an authority-friendly body. The goal is to present a clean trail: preexisting conditions documented, new damage clearly tied to the event, and a final plan that reflects the actual work needed.
Winter pushback and spring melt can complicate claims timing. If a hail event is recent, act quickly to schedule a professional assessment and obtain a formal inspection report. Having a complete dossier ready-photos, repair records, and a detailed scope-speeds up the adjustment process and reduces back-and-forth. In a high-claim environment, the reviewer may rely on precise documentation to determine coverage, so completeness matters as much as clarity.
When neighbors report similar issues after a storm, insurers may view the cluster of claims as corroborating evidence. Encourage a neighbor-friendly, consistent approach to documenting damage, while keeping your own files organized and dated. This local pattern can help support your case without triggering unnecessary disputes.
The local contractor market shows meaningful demand for skylight work in Lakeville, so leak-prone penetrations are a recurring homeowner concern. Inspect skylights after winter thaws and hail events, paying close attention to flashing and sealant wear around mounting hardware. Replace degraded or failed seals promptly and verify that the curb flashing is properly integrated with the shingles to prevent capillary leaks.
Chimney-related work also appears in the local market character signals, which fits the need to watch flashing transitions during freeze-thaw conditions. Look for cracked or loose step and counter-flashing where the chimney meets the roof line, especially after heavy snows or rapid warming. Freeze-thaw cycles can lift shingles at the transition; re-flashing and resealing may be necessary to prevent water intrusion below the mortar joints.
Flat and low-slope roofing is present but not dominant in Lakeville, so these systems matter mainly on select residential sections and commercial buildings rather than as the citywide default. For those areas, inspect for blisters, ponding water, and edge detail wear. Ensure proper drainage and confirm that any flashings or membrane laps are sealed to resist Minnesota moisture migration during winter.
Ventilation and attic sealing drive performance in freeze-thaw cycles. Ensure ridge vents and soffit intake are clear, and check for ice dams along eaves that can force water under shingles. In roof valleys and around attic penetrations, verify that baffles and ventilation paths remain unobstructed to minimize moisture buildup and interior condensation.
Storm damage and insurance-related timing matter in practice. Track damage from hail strikes, diagonal cracking, and shingle delamination near penetrations, then document with close-up photos of skylight and chimney surrounds. Early, well-recorded estimates help align timing with repair windows while winter conditions still favor safe access.
Find contractors experienced in skylight installation, flashing, and leak repairs to bring natural light into your home.
Roof Time
(952) 592-2292 www.rooftime.com
18928 Katrine Ct, Lakeville, Minnesota
4.8 from 47 reviews