Last updated: Apr 19, 2026
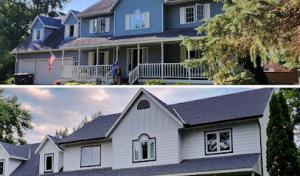
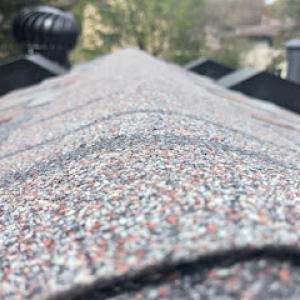
Minnesota's frequent hail and wind events leave a mark on roofs that may not be obvious at first glance. In Saint Paul, shingles can look intact after a storm but suffer hidden granule loss, micro-cracks, or loose flashing that lets water creep in during the next freeze-thaw cycle. A quick visual check after a storm is essential: inspect for bruised or discolored shingles, lifted tabs, and wind-driven debris along the edges and at the valleys. When hail hits, it can create tiny fractures that propagate under pressure and heat, which means your roof may fail during a cold snap long after the event. If you notice any sudden increases in attic condensation, ceiling stains, or musty odors, treat it as urgent. Leaks often start at vulnerable seams, vents, and boot connections-areas that bear the brunt of wind uplift and hail impact. In this climate, proactive attention to these hotspots prevents costly damage later in the season.
Spring thaw cycles in this market turn minor winter weaknesses into active leaks as ice dams release and refreeze along eaves. The combination of lingering snow, fluctuating temperatures, and insulating gaps can force meltwater backward under shingles or fascia. If freeze-thaw stress is present, there's a real risk of water migrating into soffits and attic spaces, even when you can't see active dripping from the ceiling. Pay special attention to eave lines, rakes, and skylight perimeters during the first warm days of thaw. An rapid freeze overnight after a thaw can re-lock moisture into the decking and roofing underlayment, delaying the arrival of damage until the next cold snap. Establish a simple winter-to-spring inspection routine: light up at dusk with a flashlight along the roofline to spot lifted shingles or irregular flashing, and listen for dripping indoors after a warm rain. Addressing these weak points promptly minimizes the cascading damage that iced-over eaves can produce.
Local contractor signals show storm damage and insurance claims are the most prevalent specialties in this market, indicating homeowners commonly hire for post-storm assessment and claim support. After a damaging event, expect a high volume of requests for scope documentation, photos of impact zones, and a careful inventory of damaged components. A trusted local contractor will confirm hail impact zones, wind uplift indicators, and signs of hidden decay that insurers sometimes overlook. Documentation should be precise: note the condition of shingles, underlayment, flashing, vents, and fascia; capture edge displacements, granule loss patterns, and any staining or soft decking. Your best move is to secure a thorough, on-site assessment within days of a storm, then align those findings with a detailed, itemized claim package. If an adjuster visits, your contractor can accompany you to interpret findings, translate repairs into replacements by area, and advocate for proper mitigation. In this market, being prepared with professional documentation and clear photo evidence makes the difference between a claim that covers the needed repairs and one that leaves critical vulnerabilities exposed to another freeze-thaw cycle.
Seek a contractor with a proven track record in heavy snow loads, hail damage, and the nuances of older housing stock. Prioritize clear communication, transparent scope of work, and a plan that prioritizes leak prevention in vulnerable eave and valley zones. The right local team will offer thorough storm-damage assessments, robust documentation, and support through the insurance claim process, so you can move from damage discovery to durable, weather-resilient repairs with confidence.
Find local contractors experienced in assessing and restoring roofs after hail, wind, and severe weather events.


Top Shelf Exteriors
(651) 302-0031 topshelfext.com
Saint Paul, Minnesota
5.0 from 26 reviews
Top Shelf Exteriors, LLC, an owners-involved home enhancement company, provides expert services in all aspects of residential exteriors. With expertise in roofing, siding, window installation, and soffit/fascia/gutter solutions, they strive to keep Twin Cities metro and Western Wisconsin homes looking their absolute best. They take pride in offering superior craftsmanship and exceptional customer care to ensure each project is completed with precision and quality. Top Shelf Exteriors is committed to going above and beyond, leaving customers with beautiful and durable exteriors that exceed expectations and last for years to come.

Morning Star Remodeling
www.morningstar-remodeling.com
Saint Paul, Minnesota
4.8 from 34 reviews
Morning Star Remodeling strives for excellence in all we do. From the beginning to the final touch of each project, we walk with you every step of the way to ensure quality craftsmanship. We know your home is your life, so if you can dream it we can make it real. Licensed Contractor BC751359

Galvin Home Renovations
(612) 518-9876 www.galvinhr.com
Serving
4.9 from 110 reviews
Galvin Renovations is a full service insurance restoration company. Our high quality company holds an A+ rating with the Better Business Bureau. For more than a decade, our restoration professionals have worked to ensure that your work is completed on time and to the highest quality. Whether you need assistance with your hail damage, wind damage, fire damage or water damage, call the professionals at Galvin Renovations today! We service Cottage Grove, Eagan, Grant, Lake Elmo, Lakeland, Little Canada, Mahtomedi, Maplewood, Mendota Heights, Shoreview, South St. Paul, Stillwater, St. Paul Park, Inver Grove Heights, White Bear Lake, West St. Paul, Woodbury, and other surrounding areas with high quality roofing, siding, window & door services.
Sterling Concepts LLC - Roofing Contractor
(651) 214-3712 www.sterlingconcepts.net
Serving
5.0 from 69 reviews
Book a Free Estimate through our website today! With 17+ years of experience, the Sterling Concepts Experience is sure to provide the comprehensive service you need to fit your project.
Twin City Roofing Construction Specialists
(651) 371-4117 www.twincityroofing.com
Serving
4.4 from 244 reviews
Twin City Roofing Construction Specialists, Inc. in St. Paul provides expert roof replacement and full exterior services across the Twin Cities. As a 3rd-generation, family-owned contractor, we help homeowners protect their properties from Minnesota’s harsh winters, heavy snow, and seasonal storms. Our team delivers reliable roofing, siding, window, and gutter solutions designed for long-lasting performance in the local climate. Choose our trusted roofing contractors for proven experience, professional service, and a commitment to quality craftsmanship on every project.

New Beginning Exteriors
(612) 741-5569 www.newbeginningexteriors.com
Serving
4.9 from 43 reviews
We are a Construction Company located in the Twin Cities that focuses entirely on residential storm, hail and wind damage restoration. Roofing, Siding, Windows, Doors, Gutters, Tree Removal and more. We are experts familiar in navigating the insurance claim process with our customers to ensure they receive the compensation and repairs that are deserved.

Archcraft Exteriors | South St. Paul
(651) 493-4156 goarchcraft.com
Serving
5.0 from 243 reviews
Archcraft Exteriors, established in 2019 and located in South St. Paul, Minnesota, is your one-stop solution for enhancing the vitality of your property's exterior. As a distinguished roofing and siding contractor, Archcraft Exteriors offers a full spectrum of services, specializing in comprehensive roofing, siding, window installation, and storm damage restoration. Their unwavering commitment to quality and durability will ensure your property emerges as a radiant beacon within your neighborhood.
Mnsota Construction
(651) 968-2005 mnsotaconstruction.com
Serving
5.0 from 69 reviews
MNSOTA CONSTRUCTION was founded with a vision to provide homeowners with a sense of peace and assurance during the aftermath of a storm. At MNSOTA CONSTRUCTION, we are committed to supporting homeowners through every step of the process, ensuring that they receive high-quality services and peace of mind every step of the way.
North End Contracting
Serving
5.0 from 42 reviews
If your looking for a trusted and experienced roofing contractor in Roseville MN look no further than North End Contracting. Since 1987 our team is proud to specialize in Roofing Repairs, Residential Asphalt Shingles, Flat Roof Repair, Scheduled Maintenance, including Hail & Wind damage repairs. We provide comprehensive roofing solutions that meet your specific needs and budget. From Roof Repairs to Roof Installation let trusted experts at North End Contracting take care of your home.https://neroof.com/
Repair King
(612) 354-7677 myrepairking.com
Serving
4.8 from 52 reviews
Storm damage? Ice dam removal? Frozen pipes? Water damage? Handled. Repair King is the team Twin Cities homeowners call when winter weather, storms, or emergencies threaten their home. For over 15 years, our family-owned company has delivered expert roofing, siding, windows, and safe, professional ice dam removal done the right way. We specialize in insurance-related repairs and provide clear, thorough documentation so claims move faster and repairs meet code. From frozen pipe water losses to storm, fire/water, and exterior damage, we don’t cut corners or use damaging methods. Quality workmanship, strong warranties, and 24/7 emergency support come standard. When it matters most, give the King a ring.
Sellers Roofing Company
(651) 703-2336 www.roofingexpertsstpaul.com
Serving
4.8 from 50 reviews
Sellers Roofing Company is a trusted roofing contractor in Saint Paul providing commercial and residential roofing, storm damage restoration, and roof repair. Serving neighborhoods like Midway, Macalester-Groveland, Highland Park, Como, and Merriam Park, we take pride in craftsmanship, integrity, and clear communication. Since our founding, our mission has been to protect homes and businesses through durable, professionally installed roofs. Every project reflects our commitment to quality materials, skilled workmanship, and long-term customer satisfaction. From small repairs to full roof replacements, we deliver dependable service that stands the test of time.

Anchor Roofing & Exteriors
(612) 363-7443 www.anchorroofingmn.com
Serving
5.0 from 100 reviews
Anchor Roofing & Exteriors provides expert residential roofing, siding, gutters, and storm damage repair services to South St. Paul and the Twin Cities metro area. With over 20 years of experience, we are fully licensed and insured, A+ rated by the BBB, and certified by top brands including GAF, Owens Corning, and Brava Roof Tile. From roof replacements to exterior upgrades, homeowners trust our craftsmanship, clear communication, and high-performance solutions to keep their homes protected and looking their best.
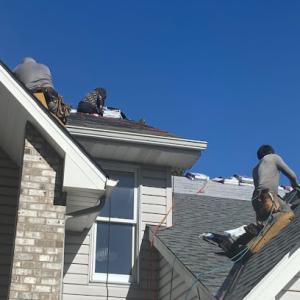
When a storm dumps heavy snow and nighttime temperatures plunge, full roof repairs slow to a crawl. Snow cover can shield damaged shingles, lifted edges, and flashing flaws, while freezing conditions make decking and underlayment stiff and fragile. This means you can spot interior staining only after melt events begin, even if damage is obvious from the attic or ceiling. In this climate, the window to get a permanent fix lined up is short; waiting for a sunny stretch can push you into the next thaw, and then you're dealing with more interior damage from a delayed leak.
Snow acts like a blanket that hides much of the roof's trouble. Punctures from hail, lifted edges, and flashing failures may not show until the melt runs off. By the time staining appears on ceilings or walls, the leak has had time to penetrate insulation and create mold risk. In a market where storm debris and insurance pressure push quick, temporary fixes aside from a proper dry-in aren't a luxury-they're a necessity. You need a plan for rapid tarping, leak containment, and a temporary protective layer that holds up to wind-driven sleet and freezing temps.
Emergency response is a local prioritizer because access to a roof can vanish after autumn wind events or early snow. Roofers can be overwhelmed when a storm hits, and the situation tightens whenever temperatures drop and crews can't safely work for long hours. If a leak is actively dripping, you should seek immediate tarping to limit interior water intrusion, then stabilize the roof with a dry-in that protects rough openings, vents, and penetrations. Ask for a crew that can mobilize quickly, bring sturdy tarps and weighted edges, and secure a temporary seal that stands up to freeze-thaw cycles.
Document the damage with photos from inside and outside, focusing on any new staining, damp insulation, or ceiling bulges. If safe access is possible, place temporary tarps over the most vulnerable areas, especially along valleys, chimneys, and adjacent vents. Maintain a ready-to-activate plan with a list of trusted local emergency responders or roofing pros who offer 24/7 tarping and temporary dry-in services. Communicate clearly about wind exposure, accessibility for trucks and large equipment, and the necessity for a prompt dry-in that will hold through the season's freeze-thaw cycles. When a storm hits, you want a crew that can arrive with tarps, fasteners, and heat-resistant materials to start containment within hours, not days.
When you can't wait, these contractors offer fast response times to stop leaks and prevent further damage.
Sterling Concepts LLC - Roofing Contractor
(651) 214-3712 www.sterlingconcepts.net
Serving
5.0 from 69 reviews

Late winter into early spring in this city often brings a hard reality: repairs must compete with lingering snow piles, frozen gutters, and stubborn ice dams. If a leak becomes obvious during late winter, the window to get a dry-in before the thaw is tight. Scheduling during this period means a contingency plan for cold-weather start-up, potential delays from residual snow, and limited daylight hours. If hail damage was identified the prior season, spring thaw can amplify demand as homeowners seek to address compromised shingles, punctures, or torn sealants before new moisture penetrates the attic. Expect longer lead times for materials and for crews that juggle multiple emergency calls across neighborhoods with similar roof ages and loading.
Spring hail events can create sudden spikes in needed reroofs. In this city, that translates to crowded calendars and compressed windows for material delivery and on-site staging. Shoulder-season temperatures swing widely, which stresses sealants and newly installed materials during curing. You should plan for a staged approach if the roof is complex or if the attic ventilation is marginal. A practical strategy is to identify a single, reliable crew early in the season and lock in a preferred date range once the weather forecast shows a stretch of days with moderate temperatures. If the roof is tied to an insurance claim, align expectations with the adjuster about a possible sequence: mitigation, roof replacement, and any required inspections to verify the work meets the standard for a hail-damaged roof in this market.
Summer provides the best combination of daylight and pavement temperatures for sustained demolition and installation. When heat is moderate, asphalt and metal systems can lay down more predictably, and crews can keep seals and underlayment at their best during curing. In most years, a clear stretch in late June through August helps minimize weather-related disruption. However, occasional heat spikes demand hydration planning and midday pauses to protect adhesive products and synthetic underlayments. If a roof has multiple elevations or complex transitions, summer work can also help avoid the structural stress that comes with rapid temperature shifts observed in the shoulder seasons.
Early fall is a practical time to complete a reroof, as the days stay long enough for full installation and progressive curing before the first frosts. The main caveat is the potential for early-season storms and falling leaves to complicate drainage and gutter clearance. Scheduling should account for back-to-back weather fronts and the possibility of a quick temperature drop as nights sharpen. If the project hinges on a prior hail assessment, ensure the contractor has a plan to protect new materials from sudden arctic air ingress and to re-seal flashing where warm days give way to cool nights. By mid-to-late fall, crews may begin to wind down, so confirm a feasible end date and access to any warranty documentation before winter setups.
In all seasons, aim for a dry-in window that minimizes exposed decking to wind-driven moisture. Prioritize crews with established Saint Paul work histories and a proven track record handling hail and freeze-thaw cycles common to this market. Consider staging the work with interim repairs to address urgent leaks while waiting for optimal weather for the full replacement. Finally, keep communication tight with the homeowner's insurer or adjuster to align expectations on scheduling, documentation, and any post-install inspection needs.
Asphalt shingles dominate the local roofscape, and for good reason: they're familiar to installers, relatively quick to fix, and forgiving in a market that sees hail and heavy snows. In this climate, the underlayment and attic conditions matter as much as the shingle layer itself. Freeze-thaw cycles push water into small gaps, and when it refreezes, it can lift edges or reveal flashing gaps. You want an underlayment that stands up to cold temperatures and a ventilation strategy that keeps the attic from sweating on winter nights. Proper sealing at penetrations-pipes, vents, chimneys-helps minimize ice dam risks where meltwater can back up under shingles. If you're replacing, consider a shingle with a thicker, more hail-tolerant callout and a roof design that directs snow to melt zones rather than create pockets where ice dams form.
Metal roofing is particularly appealing if snow shedding and long-term resilience are priorities. In snowy periods, metal panels shed snow more predictably than many other options, reducing the load and minimizing ice dam opportunities along eave lines. From a maintenance perspective, you'll want solid flashing at transitions and around dormers or skylights, plus careful attention to fastener corrosion resistance in exposed faces. A well-sealed ridge vent and a solid attic air barrier help prevent interior condensation during quick thaws. For reroofs in homes with historic mass and limited attic access, evaluate whether structural support can accommodate the installation weight and whether the existing deck can handle a metal profile without creating adhesion or seam challenges in freeze-thaw cycles.
Wood shakes and certain tile products appear on local roofs, but their performance under winter stress is nuanced. Wood products demand regular maintenance to guard against moisture infiltration during melt cycles, and they can be more sensitive to ice dam exposure at eave lines. Tile options-clay or concrete-bring durability in dry, sunny stretches but can be vulnerable to freeze-thaw damage if cracks form or flashing isn't fully integrated. Synthetic or composite shingles offer some hail resistance and lighter weight, yet long-term performance hinges on attic ventilation and appropriate insulation to limit condensation. When considering these materials, assess snow load compatibility, winter maintenance needs, and how older Saint Paul homes' structural realities-like sag-prone framing or limited attic space-will accommodate installation and ongoing care.
The most popular roofing material in the US. Find pros who install, repair, and replace asphalt shingles.


Homeguard Roofing & Siding
(651) 756-9389 www.homeguardroofingandsiding.com
Serving
5.0 from 48 reviews
In Saint Paul, asphalt shingles sit in the 350 to 700 USD per square ballpark, with metal roofs ranging from 650 to 1100 USD per square. If clay tile is on the table, expect 900 to 1800 USD per square, and concrete tile from 800 to 1400 USD per square. Wood shingles or shakes typically run 600 to 1100 USD per square, while synthetic or composite shingles come in around 400 to 750 USD per square. These ranges reflect the mix of storm-driven demand, aging housing stock, and the metro's repair-focused market after hail events.
Pricing moves when hail, wind, or a harsh winter season hits and reroof demand surges across the metro. Contractors tighten schedules, and suppliers scramble to restock materials, which can push average project costs higher for a time. In practice, you'll see bids cluster around the high end of the local ranges during a heavy storm year, with timing and crew availability pushing dates out and tempting rush premiums.
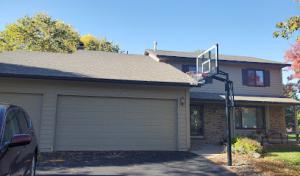
Older homes with existing tear-off work and steeper rooflines common in established neighborhoods add practical complexity. The requirement to remove old layers or deal with venting and insulation upgrades can tilt bids toward the upper end of the material bands, especially if access is tight or weather windows shorten. Weather-related staging delays-ice and snow in late fall or early spring-can extend project timelines, influencing labor charges and scheduling stability. In short, the combination of storm-driven demand, older construction, steep slopes, and shorter work windows all shape the final price seen on Saint Paul roofs.
Get a clear picture of your project costs upfront - no commitment required.
Sterling Concepts LLC - Roofing Contractor
(651) 214-3712 www.sterlingconcepts.net
Serving
5.0 from 69 reviews

A full reroof commonly requires a permit in Saint Paul through the City of Saint Paul Building and Construction Services. This is not a file-it-and-forget-it step; the process tracks plans, material choices, and installation method so the project aligns with City standards and the region's freeze-thaw realities. If you start without a permit, you risk delays, fines, and the need to pull back work that's already done. Talk with your contractor about expected timelines and what documents the city will want to see, especially if your roof lines or eave details are older than the house.
Saint Paul inspections are scheduled during and after installation to verify items such as underlayment, fasteners, and flashing compliance. Inspections are not a courtesy; they're a mandatory checkpoint that guards against leaky valleys and wind-damage vulnerability that snow and hail can exploit. If an inspection flag arises, it can halt progress and push the schedule back, which in turn affects downstream issues like ice dam potential and warranty validity. Plan for a few workday buffers around inspection windows.
Homeowners in Saint Paul should expect city involvement not just at permit issuance but during the installation sequence before final signoff. That means crews may pause for an on-site review of roof penetrations, vent placements, and flashing transitions. Communicate openly with the contractor about these checks, and keep an accessible contact list for the inspector. A cooperative cadence helps prevent surprises and supports a safer, longer-lasting roof in this climate.
In this market, carriers expect a clear trail of photos and professional assessments that show the roof before and after any event. You'll find that the best claim outcomes come from documentation that maps the exact extent of hail hits, wind scars, and freeze-thaw damage. Keep a routine of capturing high-quality images on sunny days as well as in the first week after a storm.
Adjusters often request dated comparisons to separate storm-related damage from age-related wear. That makes it essential to keep dated records of your roof's condition over time. If you have prior inspections or contractor notes, store them in a dedicated weather folder so you can present a tight narrative when a claim is opened.
Photos alone rarely tell the full story. In Saint Paul, a licensed roofer's written assessment carries weight, especially when the document ties observed damage to a specific storm event. An insurer-friendly report will describe the material condition, identify active leaks, and note any secondary damage to decking or underlayment that could affect a claim outcome.
Because claims are common in this insurance-heavy environment, decisions about replacements often hinge on whether damage is attributed to a storm or to accumulated wear. Be prepared for questions about recent impacts, wind-driven debris, and whether the roofing system was near the end of its expected life. A clear, well-dated file helps you navigate those conversations with less friction.
Create a simple filing habit: photograph after every notable storm, save vendor invoices, and log dates of correspondence with your insurer. When a claim is imminent, gather all history in one folder so the adjuster can see a continuous, well-documented narrative rather than scattered snapshots. This approach reduces back-and-forth and aligns expectations quickly.
In Saint Paul's snow climate, flashing details around chimneys and skylights are common leak points when ice and meltwater back up at transitions. Start with a careful inspection of step flashing where the roof meets the masonry or metal base. Look for loose or missing pieces, and verify that counterflashing sits over the joint properly. During dry spells, apply a compatible sealant to small gaps, but plan for a durable metal counterflashing solution rather than relying on caulk alone. If clay or concrete chimneys show spalled brick or deteriorated mortar, coordinate with a trusted roofer to address the interior of the chase as well as the exterior flashing. For skylights, ensure the curb flashing is integrated with roof flashing and that the skylight flange sits flush. In winter, remove nearby snow before applying any sealant and avoid over-tightening; overcompression can crack flashing in cold weather. A well-sealed transition reduces meltwater backup and ice dam formation at these vertical penetrations.
Local contractor signals show meaningful demand for skylight work and flat-roof expertise, indicating these details are active homeowner concerns in this market. Low-slope sections on porches, additions, and mixed-roof homes require different drainage and waterproofing approaches than the main steep-slope roof. Ensure a continuous watertight sheet or membrane across the transition from steep to low slope, with dedicated edge drains or scuppers directed to interior gutters where possible. Pay attention to drip edges and terminations at parapets; mismatched or undersized edges invite standing water and ice buildup. During snow events, test the membrane seams and perimeter fasteners for coloration changes or frost movement, which can signal micro-leaks. Schedule a mid-winter inspection after a heavy thaw to catch hidden gaps that only reveal themselves when meltwater moves.
In this market, ice dams steadily stress flashing at roof-perimeter joins. Prioritize flashing integrity before the mid-winter thaw, focusing on chimney, skylight, and rake-edge transitions. Keep flashings clean of debris and ensure that any boot or vent terminations are sealed against wind-driven snow. For flat or low-slope areas, confirm that drainage paths do not back up into transitions, and consider additional insulation in attic spaces to reduce freeze-thaw pressure on flashing connections. Regular, targeted checks after storms help isolate problem spots before they escalate.
Find contractors experienced in skylight installation, flashing, and leak repairs to bring natural light into your home.
Twin City Roofing Construction Specialists
(651) 371-4117 www.twincityroofing.com
Serving
4.4 from 244 reviews
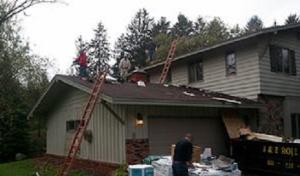
In this market, storm aftermath moves fast. Homeowners expect contractors to show up promptly, secure the site, and remove debris so the street stays passable after a hail event. A yard sweep, tarp placement, and an immediate debris haul-off prove a contractor can manage the first 24 to 72 hours after a storm. Look for a crew that can commit to a concrete cleanup plan and a documented schedule, not just a vague promise.
The local market includes many long-established and family-owned reroofing companies, which matters when follow-up service is needed. Ask how long the firm has been in business, who will be on-site, and whether the same crew will handle any future visits. A company with steady local roots is more likely to return for adjustments or hidden-damage findings that emerge after the first inspection.
Because storm and insurance work are prevalent, verify whether a contractor routinely handles supplements, inspection coordination, and documentation. Ask for a written process detailing how they document damage, coordinate with your insurer, and manage supplements if an extended scope becomes necessary. A thorough firm will provide structured checklists, photos, and stamped notes that align with the claims process, so you're not left chasing missing paperwork.
Ask for a portfolio of recent jobs in your neighborhood and references from customers with similar roof types. A credible local roofer will gladly share before-and-after photos, project timelines, and outcomes. If possible, arrange a quick on-site reference call to confirm responsiveness and the quality of the final installation. Trust is built by visible, repeatable results in nearby blocks where winter storms and freeze-thaw cycles test every roof.
Storm work often shifts as the claim progresses. Choose a contractor who clearly communicates milestones, photos at key stages, and written agreements for extra work. The right choice coordinates inspections, timelines, and any follow-up repairs without leaving you to chase the status. Clear, proactive communication is the best shield against post-storm surprises.