Last updated: Apr 19, 2026
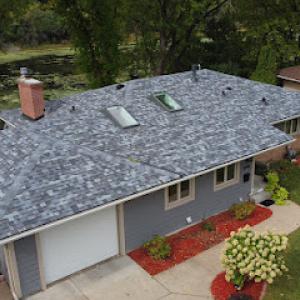
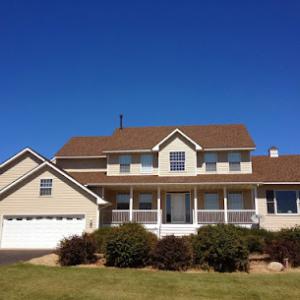
Minnesota is a high hail- and wind-claim environment, and homeowners with older roofs in this market often face decisions driven by storm activity rather than simple age. When a hail event hits, the clock starts ticking on potential damage, but the timing isn't just about whether a roof needs replacement - it's about aligning with weather windows, insurance timelines, and contractor availability. In spring, after long snow seasons, damage isn't always visible from ground level. A quick inspection after a major storm can reveal bruising, granule loss, or hairline cracks that may not be obvious beneath thawing ice. The consequence of delaying a decision is rarely just more wear; it's the risk of more extensive interior damage as ice dams form and wind-driven shingle edges peel with the next thaw.
Spring hailstorms and wet thaw conditions in Minneapolis can create both visible shingle bruising and scheduling backlogs as many roofs are inspected at once. This backlog isn't just an inconvenience - it translates into longer waits for claim decisions, contractor mobilization, and diminished ability to secure preferred dates for repairs before the next weather cycle hits. When storm season peaks, a roof subjected to hail may show random bruising on darker shingles long after the event, and wind can lift edges or loosen fasteners on steep pitches and complex rooflines. If you notice granule loss in gutters or black streaks along the eaves after a storm, or if your insurer flags hail or wind as present in the claim notes, treat that as a trigger to start gathering documentation and plan for a potential reroof, even if the roof looks "sound" from the curb.
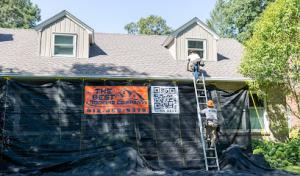
Local contractor signals show storm damage and insurance-claim specialization dominating this market, indicating that storm restoration is a primary homeowner concern in Minneapolis. Insurance-driven timing means you should not wait for the "perfect" sunny day to begin the conversation. Start with an expert roofing contractor who understands how insurance scopes work in this climate: they should be able to assess hail bruising on multiple angles, confirm deterioration under edge flashing and valleys, and document wind-caused shingle displacement. A key step is to request a comprehensive inspection that includes photos from multiple elevations, close-ups of granules, and a written estimate tied to an expected claim path. If a claim is filed, be prepared for a potential triage period where adjusters are dispatched in waves after a large storm, which can affect when decisions are finalized and work can begin.
First, have a qualified roofer perform a storm damage assessment within days of the event, not weeks or months later. In many neighborhoods, scheduling fills quickly after spring hailstorms, so securing a flexible window is essential. Second, gather your home-records: prior roof age, any ice dam history, attic insulation status, and recent interior moisture observations. These packets help an adjuster quickly gauge replacement versus repair needs and can shorten approvals during peak backlogs. Third, map your roof's complexity. Steep or multi-plane roofs, with intricate valleys and dormers, increase the likelihood that damage isn't uniform and may require a phased approach or staged replacement - a nuance a contractor can explain during a storm-response visit. Finally, coordinate with a contractor who prioritizes rapid mobilization and clear communication about claim scopes, timelines, and weather-ready scheduling. In a market dominated by storm-restoration emphasis, the fastest, most reliable path to a durable roof is a plan built around the storm cycle, not the calendar.
Sela Roofing & Remodeling
(612) 482-8213 selaroofing.com
4521 MN-7 Suite A, Minneapolis, Minnesota
4.9 from 644 reviews
As a family-owned company serving the community since 1982, Sela has built its reputation on quality, integrity, and care. From residential homes to commercial projects, we bring expert craftsmanship, clear communication, and a deep commitment to exceptional customer satisfaction to every job. Many of our team members have been with us for decades, and it’s their dedication that truly sets us apart. We’re more than just a company — we’re a family that values long-term relationships with both our clients and our community.
Bold North Roofing & Contracting
(952) 260-2293 boldnorthroofing.com
1620 W 98th St Suite 100, Minneapolis, Minnesota
5.0 from 182 reviews
Fortune Favors the Bold. Let us help protect your home so that you can go boldly into any storm or night. Whether you are looking to upgrade or working through an insurance claim, you trust our local Minnesota team of professionals to provide high-quality work that we stand by with a lifetime guarantee on our work and materials.
Paskar Construction
(763) 233-1124 www.paskarconstruction.com
1281 114th Ave NW, Minneapolis, Minnesota
4.9 from 174 reviews
Roofing, Siding and Windows

Snap Construction
(612) 333-7627 www.snapconstruction.com
951 American Blvd E, Minneapolis, Minnesota
4.9 from 374 reviews
Snap Construction is a full-service residential and commercial construction company locally owned and operated in Bloomington, Minnesota. Snap specializes in roofing, siding, windows, insulation, and decks. We are an A-rated Angie's List Super Service Award winning contractor and have a Lifetime Craftsmanship Warranty.
Goldline Construction
(651) 212-0426 www.goldline-construction.com
5501 Lakeland Ave N, Minneapolis, Minnesota
5.0 from 59 reviews
Gold Line Construction is your reliable ally for all your roofing, siding, gutters and decks projects. We work with insurance, ensuring that each step of the process is simple and efficient. With years of experience, our professional team ensures high quality work, protecting your home and improving its value. Contact us today for a no-obligation quote!
Roof Repair PHD
(612) 418-4240 roofrepairphd.com
3201 N Humboldt Ave, Minneapolis, Minnesota
5.0 from 50 reviews
Roof Repair PHD offers over 30 years of experience in commercial flat roofing, specializing in EPDM and TPO flat roofing systems and commercial asphalt roofing systems. We take pride in our work, our team is highly dedicated, and we are committed to exceeding our customers’ expectations with excellent service and communication. For commercial roof replacements, we offer a 20-year warranty on roofing material and craftsmanship. For a no-obligation estimate, contact us today, we work seamlessly with your insurance.
The Best Roofing Company
(612) 458-9378 www.thebestroofingcompanymn.com
Minneapolis, Minnesota
5.0 from 47 reviews
At The Best Roofing Company, we provide professional, reliable, and affordable roofing services in Inver Grove Heights, MN, and surrounding areas. Our skilled team specializes in roof installation, roof repair, replacement, and maintenance for both residential and commercial properties. We are committed to using high-quality materials and delivering exceptional craftsmanship to ensure your home or business stays safe and protected. Whether you need a minor repair, a complete roof replacement, or emergency roofing services, The Best Roofing Company is your trusted local partner. Customer satisfaction, transparency, and lasting results are at the heart of everything we do. Contact us today for a free estimate.
Midwest Building Exteriors
(612) 750-6051 midwestbuildingexteriors.com
6417 Penn Ave S Suite #8 Unit #270, Minneapolis, Minnesota
5.0 from 39 reviews
Contact us for a free estimate or free inspection! Midwest Building Exteriors specializes in commercial and residential exterior building installation and remodeling. We pride our self on our customer service and craftsmanship. We also assist commercial, as well residential property owners with natural disaster related insurance claims; to provide guidance and direction through their claims process. Our goal is to ensure your needs are met, and to simplify every part your claims process from beginning to end. Services: - Free Estimates - Free Inspections - Asphalt Roofing - Metal Roofing - Cedar Shake Roofing - Vinyl Siding - LP Engineered Wood Siding - Hardie Siding - Windows - Seamless Gutters - Gutter Screens
VALERDI Roofing & Exteriors
(651) 216-4348 valerdi-llc.com
3231 N Morgan Ave, Minneapolis, Minnesota
4.9 from 51 reviews
✅SIDING ✅ROOFING

ReDesign Exteriors
(651) 207-7849 redesignexteriorsmn.com
3017 W 56th St, Minneapolis, Minnesota
5.0 from 28 reviews
ReDesign Exteriors, serving all over Minnesota. Specialized in roofing, siding, gutters & windows. Helping Home owners through the Claims process with ease.
Liberte Construction
(612) 712-6420 www.liberteconstruction.com
1406 W Lake St suite 202-203, Minneapolis, Minnesota
4.7 from 215 reviews
Our mission is to be the premier roofing, window, and siding contractor in the Minneapolis/St Paul area, by providing long-lasting value in our products and services, and long-lasting relationships with all of our clients. This has been achieved through professional project management, prompt customer service, anticipation of any project issues, and high attention to detail. Our core values are built around honesty and integrity. We understand that our reputation and your recommendation are what will carry our company for many more years to come. Give us the opportunity to earn your business, and you will see why we are considered one of the best General Contractors in the Twin Cities in quality craftsmanship and superior service.

Estate Claim Services
(651) 309-1114 www.estateclaimservices.com
6701 Penn Ave S # 201B, Minneapolis, Minnesota
4.7 from 120 reviews
Estate Claim Services is your trusted local general contractor, serving Minneapolis and neighboring Wisconsin for over fifteen years. With almost two decades of experience, we specialize in Roofing, Siding, Windows, Seamless Gutters, and GAF Cutting-Edge Solar Shingles— built to withstand the Midwest climate. Whether you're looking for energy-efficient upgrades or storm damage repairs, we have you covered. As coined by KDWB 101.3 FM, we are "The Honest Roofer" because of our commitment to providing exceptional value and treating every project with respect and efficiency. Experience the ECS difference for all your exterior needs! Reach out today to get started!
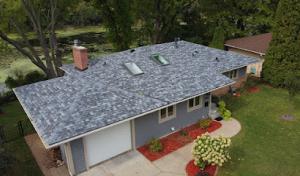
In Minneapolis, winters bring prolonged snow cover followed by freeze-thaw swings that can back water up at eaves and vulnerable valleys. When heat escapes from the living space into the attic and warms the roof deck, the snow melts near the eaves and refreezes further up the slope, creating an ice dam that blocks drainage. The result is a pool of water pressing against shingles, underlayment, and flashing, with a risk of leaks that can travel beyond a single season. This is not just an aesthetic nuisance; ongoing ice buildup can push moisture into roof penetrations, trim, and interior ceilings, especially after a heavy thaw or a rapid warm spell. Honest assessment requires acknowledging that once ice dams establish themselves, they tend to recur unless root causes are addressed.
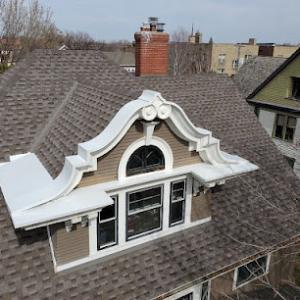
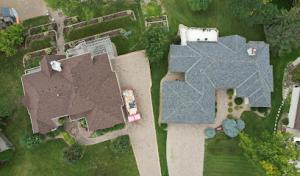
The city's older homes commonly have complex roof geometry, dormers, chimneys, and ventilation challenges that increase ice-dam exposure compared with simpler roof forms. Valleys, dormer intersections, and multi-level transitions are notorious trouble spots where meltwater can pool and refreeze. In homes with steep pitches, the snow tends to slide in unpredictable patterns, leaving hidden pockets of ice at joints and along eaves. The result is a cycle of damage that can show up as stained ceilings, warped sheathing, or stained masonry around chimneys. Replacing or upgrading parts of the roof without considering venting and insulation can leave you with a recurrence, even after a seemingly successful repair.
Attic insulation and ventilation matter more in Minneapolis because heat loss into deep winter snowpack directly affects ice formation and leak patterns. If the attic is under-insulated or poorly ventilated, warm air travels upward and radiates through the roof deck, feeding the very conditions that drive ice dams. Pay attention to baffles, soffit ventilation, and ridge vents, as blocked or undersized pathways can turn a well-sealed attic into a heat source that aggravates dam formation. In practical terms, this means a tight house in winter still needs deliberate air movement through the attic space to keep the roof deck cold enough to discourage meltwater from traveling inland beneath shingles.
Addressing ice dams starts with dialing back heat loss into the attic. Consider upgrading insulation to achieve the recommended level for the space and ensuring the attic is air-sealed where any gaps allow warm air to rise. Review and repair attic vents so that cold air can circulate along the underside of the roof and minimize hot spots. For the roof itself, prioritize proper flashing and valley detailing to direct water toward gutters and away from vulnerable seams. When there are dormers or chimneys, verify that step flashing, kick-out flashing, and any transitions are intact and well-sealed. Regular snow clearing is tempting but risky; it's best done from the ground or with professional safeguards to avoid damaging shingles or injuring yourself. Most importantly, create a plan for post-storm checks that includes looking for damp spots on ceilings, checking for new icicles along eaves, and confirming that attic insulation remains dry and intact.
After a heavy snow event or rapid thaw, inspect roof edges and valleys for fresh ice buildup or moisture staining inside. Listen for dripping noises in the attic during warm spells, which can indicate new leaks. If leaks appear, prioritize addressing missing or damaged flashing and compromised underlayment, as these are common entry points for meltwater once ice dams form. A proactive stance-balancing enhanced insulation, proper ventilation, and careful roof detailing-helps protect the home through repeated hail and wind cycles that often accompany Minneapolis winters.
When you can't wait, these contractors offer fast response times to stop leaks and prevent further damage.
The Best Roofing Company
(612) 458-9378 www.thebestroofingcompanymn.com
Minneapolis, Minnesota
5.0 from 47 reviews
Midwest Building Exteriors
(612) 750-6051 midwestbuildingexteriors.com
6417 Penn Ave S Suite #8 Unit #270, Minneapolis, Minnesota
5.0 from 39 reviews

Central Roofing Company
(763) 572-0660 www.centralroofing.com
4550 Main St NE, Minneapolis, Minnesota
4.5 from 60 reviews
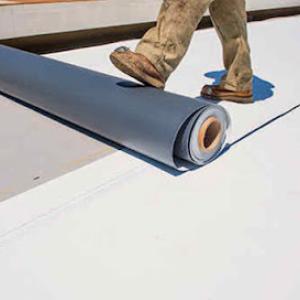
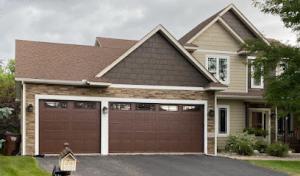
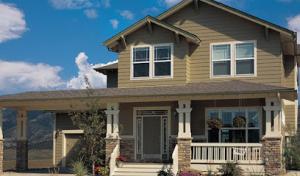
Asphalt shingles dominate Minneapolis reroofing because they fit the city's large stock of detached homes and offer the lowest entry cost in a storm-prone replacement market. This material handles the freeze-thaw cycles and frequent hail events that characterize long winters in the area. When evaluating options, you'll often find the simplest route is a standard asphalt system with a solid underlayment and a well-sealed ridge and hip configuration to minimize wind uplift. Look for features that improve wind resistance and impact tolerances, such as a higher wind rating and a durable, granule-rich surface. In practice, this means a straightforward replacement path that keeps you protected through multiple hail seasons without overcomplicating the roof structure.
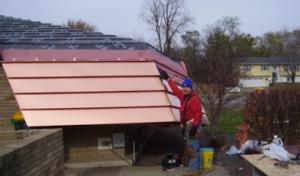
Metal roofing is locally relevant because homeowners weigh snow shedding, ice management, and hail durability against higher upfront cost. In winter, metal sheds snow more predictably, which reduces ice dam risk on steeper profiles and complex rooflines. A metal system with standing seam or concealed fasteners tends to perform well under freeze-thaw stress, provided the installer pays attention to attic ventilation and a continuous ice and water shield at eaves. The material handles wind and impact well, but the installation quality matters as much as the product spec. If the home has a lot of dormers, valleys, or a retrofit scenario with varied pitch, a careful layout and precise flashing around chimneys and vents yield the best long-term results. For a typical Minneapolis layout, metal offers a practical balance between winter performance and durability in hail-prone years.
Wood shakes, tile, and composite products appear in the market but require careful evaluation on older Minneapolis structures where weight, maintenance, and winter performance matter. Wood shakes can bring a traditional look, yet they demand ongoing upkeep to prevent moisture intrusion and decay, especially in shaded areas or where branches brush the roof. Clay and concrete tiles are inherently heavy, and older homes may need structural verification to handle the load, plus attention to proper attic ventilation and drainage to avoid ice dam risk. Composite shingles offer a middle ground, often delivering improved impact resistance and a longer life than basic asphalt, but weight and fastening details still come into play. In neighborhoods with complex rooflines or multiple levels, the installation complexity rises, making a detailed assessment of decking condition and fastener integrity essential before choosing these options.
Begin with a full roof assessment that notes hail damage history, attic ventilation, and any prior ice dam issues. Prioritize products proven to perform in freeze-thaw cycles and in wind events common to the area. For steep or irregular roofs, demand a contractor with proven experience in snow load considerations, ice dam prevention, and thorough flashing details around vents, chimneys, and skylights. If the existing structure shows signs of aging decking or improper channeling for meltwater, plan for deck repair or reinforcement during replacement. Finally, align your choice with your long-term maintenance plan: some systems require more frequent inspections in winter to catch shifting fasteners or damaged seals before a soft failure becomes a big problem.
Provided local ranges run about $350 to $650 per square for asphalt, $600 to $1100 for metal, $900 to $1800 for clay tile, $800 to $1500 for concrete tile, $700 to $1200 for wood shingles or shakes, and $650 to $1100 for synthetic or composite shingles. Those numbers reflect a metro market where demand spikes after hail storms and where crews, inspections, and material timelines tighten up quickly. In practice, the final price you see sits at the intersection of roof size, roof pitch, and the number of features like dormers or chimneys that complicate the job.
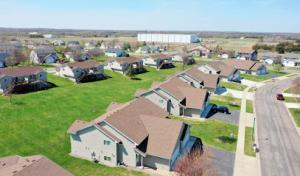
Steep roof pitches, dormers, chimneys, detached garages, and older tear-off layers common in neighborhood housing can add labor time and disposal complexity. A higher pitch means more risk for crews and longer install days, which translates to higher labor costs. If you have to strip and dispose of decades of old material, that waste handling adds to the bill as well. In a city with frequent hail and wind cycles, crews also face tighter schedules after a big event, which can push prices upward for a short window of time.
Costs in Minneapolis often rise after major hail events because demand surges across the metro and crews, materials, and inspection schedules tighten at the same time. If you're buying after a storm, be prepared for shorter lead times and higher bids, but you may also be eligible for insurance-aligning timelines and potential expedited starts. If your roof is due for replacement irrespective of weather, aim to gather bids during calmer months to lock in more stable pricing and workable scheduling.
Material choice affects long-term value as much as upfront cost. Asphalt remains the most economical path, while metal, clay or concrete tiles elevate price but can improve durability in a hail-prone climate. Wood shingles or shakes offer a distinct look but come with higher maintenance and potential fire- rating considerations. Synthetic or composite shingles provide a middle ground between cost and longevity, often balancing performance with practical installation timelines.
Don't let upfront costs delay a critical repair - these contractors offer payment plans to fit your budget.

Snap Construction
(612) 333-7627 www.snapconstruction.com
951 American Blvd E, Minneapolis, Minnesota
4.9 from 374 reviews
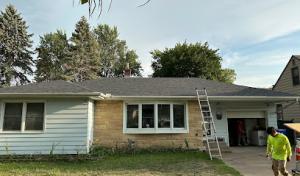
A full reroof typically requires a building permit, and the permit is issued through the city's building department. The process is designed to ensure ductwork, ventilation, and drainage changes meet safety and fire codes, and that curb appeal and structural integrity are maintained with the local climate realities. The permit protects both the homeowner and neighbors from unsafe work and helps the inspector track projects that affect neighborhood stormwater, ice dam risk, and wind exposure. Your contractor will usually initiate the permit, but you should verify that the permit is pulled in your name or properly assigned, and that the scope reflects a full reroof rather than a repair patch. Expect the department to request basic project details, a site plan if necessary, and a timeline that outlines the sequence from tear-off to final installation and clean-up.
Roofing projects in this area typically require inspections at key milestones to verify adherence to code and approved plans. Common checkpoints include the tear-off phase, underneath deck protection and ventilation, proper alignment and fastener patterns for the chosen material, and the final inspection after installation to confirm the roof is sound and weather-tight. The inspector may ride along with the crew or review photos and documentation if scheduling constraints arise. Coordination matters: you or your contractor should schedule inspection appointments in advance within the allowed windows, and ensure access to the attic space and roof edges for a thorough evaluation. If a snowfront or a busy storm season causes a backlog, expect possible adjustments to timelines, but maintain communication with the inspector so delays don't stack unintentionally.
Storm-recovery periods in this area tend to flood the permit system, as many reroofs move through the pipeline at once. During these times, timing can influence weather-related hold-ups and the pace of approvals. Plan ahead by starting the permit process as soon as the contract is signed, rather than waiting for a specific date, and align your project timeline with anticipated inspection windows. Ask the contractor to confirm the inspector's preferred access times and to prepare any required documentation well before inspections. If a hail or wind event has driven a spike in reroofs nearby, expect some congestion and maintain flexibility in scheduling to avoid project delays and ensure the final verification can occur promptly after installation.
Before work starts, confirm that the permit includes the full scope of the reroof and that the approved plans match the chosen material and ventilation details. Track inspection dates and keep the job site accessible for the inspector on the scheduled days. Ensure drop-off areas and debris containment meet local expectations so the crew can progress without repeatedly pausing for compliance checks. After the final inspection, keep a record of the permit approval and any follow-up items the inspector notes, so future maintenance or hail-related claims can reference the documented compliance.
You know that Minnesota carriers commonly require thorough documentation, including before-and-after photos, because hail and wind losses are frequent and closely reviewed. When a storm hits, take clear photos from ground level and from the attic if possible, showing hail marks, missing shingles, and any interior signs of leakage. Keep a dated record of every step, from initial damage discovery to contractor communications. Insurers want a concise trail that proves the condition before and after, not vague memories.
In this market, adjusters may come for an in-person roof review, especially after widespread storm events affecting many properties at once. Be prepared to coordinate access, provide measurements, and point out weak points like ridge vents, valleys, and ice dam risk areas. If the roofer notes issues not visible from the ground, schedule an interior inspection for decking or attic insulation concerns. Delays can happen as carriers triage claims, so you may face faster decisions or sudden deadlines as crews get lined up.
Coverage can vary by material type and roof configuration, so homeowners need to confirm how the specific roof system is treated before authorizing replacement. A steep, complex roofline or an older underlayment may shift coverage expectations or require additional documentation, like deck condition reports. Since losses are reviewed closely, ensure photographs document hardware like flashing, gutters, and drip edges in addition to the shingles. The goal is a transparent file that reduces back-and-forth and helps you avoid gaps if a claim is denied or reduced.
Connect with contractors who help homeowners navigate the claims process from damage assessment to final approval.
Sela Roofing & Remodeling
(612) 482-8213 selaroofing.com
4521 MN-7 Suite A, Minneapolis, Minnesota
4.9 from 644 reviews

Bold North Roofing & Contracting
(952) 260-2293 boldnorthroofing.com
1620 W 98th St Suite 100, Minneapolis, Minnesota
5.0 from 182 reviews
Paskar Construction
(763) 233-1124 www.paskarconstruction.com
1281 114th Ave NW, Minneapolis, Minnesota
4.9 from 174 reviews
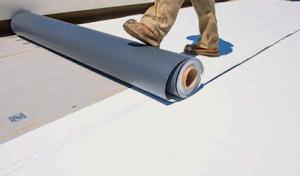
In Minneapolis, flat and low-slope roofs are a meaningful local specialty, common on duplexes, multifamily buildings, porches, additions, and some commercial structures. After a heavy snow followed by thaw, drainage weaknesses on these sections show up quickly. Inspect for ponding, clogged scuppers, and misaligned seams where meltwater can back up and seep under membranes.
Spring wet conditions can delay access and dry-in work on low-slope roof areas where moisture management is critical. Plan for weather windows that allow tarping, membrane curing, and flashing work without prolonged exposure to rain or lingering ice. Coordinate with occupants to minimize foot traffic on vulnerable zones while crews set up temporary weather protection.
Low-slope sections tend to reveal issues first: edge drains that don't shed water, drain-mat blocking debris, and transitions between parapets and roof planes. Hail can bruise or puncture roofing membranes, accelerating deterioration under thaw cycles. Check for fastener backouts, flashing leaks at vent penetrations, and ice dam tracks at eaves that push water under seams.
Keep drainage paths clear during stretches of melting and wet spring days. Remove debris from gutters and scuppers; rinse light layers of grime that could mask membrane damage. Track any new damp spots or soft spots with a simple, repeatable marker system so you can compare week-to-week during thaw cycles.
If ponding persists after a thaw, or you notice crisp edges, lifted seams, or moisture staining near seams, engage a local roofer with flat-roof experience. They will assess membrane integrity, flashing continuity, and whether a proactive dry-in or reseal is warranted to prevent further damage.
Find specialists in TPO, EPDM, and built-up flat roofing systems for residential and commercial properties.
Roof Repair PHD
(612) 418-4240 roofrepairphd.com
3201 N Humboldt Ave, Minneapolis, Minnesota
5.0 from 50 reviews
Bolechowski Construction
(612) 965-1509 bolechowski-construction.com
3031 Croft Dr, Minneapolis, Minnesota
4.8 from 66 reviews
Garlock-French Corporation
(651) 384-7644 garlock-french.com
2301 E 25th St, Minneapolis, Minnesota
4.7 from 138 reviews
Older masonry chimneys and roof penetrations are common on local homes and often become leak points during the freeze-thaw cycles that linger well into spring. When snow sits on roof edges or around a chimney chase, ice can push upward and widen existing gaps. If flashing was never properly integrated with the chimney flashing and the roof plane, suspected gaps become actual leaks. Expect extra attention to the transitions where chimney, vent pipes, and skylights meet the roof.
Skylights are a notable local specialty signal, suggesting homeowners here often need flashing and curb details addressed during reroofing. Improperly flashed skylights invite water intrusion at the hinge of the curb and the roof surface, especially after heavy snow or ice dam formation. During reroofing, you should verify the skylight curb is square, the flashing is continuous, and that the seal between curb, shingles, and flashing is fortified with proper sealants and kickouts. Neglecting this step can turn a bright interior into a moisture problem after a thaw.
Complex intersections around chimneys, dormers, and additions are especially important on Minneapolis homes because snow and ice linger longer at these transitions. Each junction creates a potential ice dam trap if the detailing doesn't shed water cleanly away from the roof edge. As you plan, insist on thorough detailing at every intersection: double-check kick-out flashing, ensure step flashing integrates with any dormer flashing, and confirm that ice barriers extend into these critical zones.
When reroofing, request a full field assessment that highlights all penetrations and the condition of existing flashing, membranes, and joints around skylights and chimneys. Ensure the contractor provides a clear plan for continuous water shedding through the valley and along the chimney chase. Finally, review any added curb work with a focus on durability against freeze-thaw stress to reduce the chance of future leaks during harsh winters.
Find contractors experienced in skylight installation, flashing, and leak repairs to bring natural light into your home.
Bolechowski Construction
(612) 965-1509 bolechowski-construction.com
3031 Croft Dr, Minneapolis, Minnesota
4.8 from 66 reviews
First Impressions Exteriors
(763) 762-8934 firstimpressionsexteriors.com
Serving
4.8 from 118 reviews
The Minneapolis market is heavily reroof-focused after hail and wind events, so you'll hear many contractors advocating full roof replacement rather than minor repairs. That emphasis isn't a trick-it reflects how hail damage, wind blow-off, and long winters stress older roofs and complex rooflines. When a storm hits, you'll likely see crews mobilize quickly, but the best teams plan for a proper, long-term solution rather than a quick patch.
Quick response and thorough cleanup are strong local hiring priorities. Homeowners value fast tarping to protect interiors, solid debris control to keep driveways and yards clear, and coordinated schedules that limit exposure to winter weather windows. Look for a roofer with a documented plan for immediate tarping, safe debris containment, and a clear sequence for removal, replacement, and site protection.
Long-established, family-owned outfits compete alongside manufacturer-certified, national-brand dealers in this market. That mix means homeowners often compare storm expertise and documentation quality as much as price. Ask for proof of prior storm projects, before-and-after photos, and written references from neighbors who experienced hail events. Don't settle for a glossy pitch-verify how they handled permits (where applicable), warranty transfers, and post-storm follow-up.
Start with a short list of firms that demonstrate rapid response, strong cleanup records, and documented storm experience. Request a written scope that details replacement materials, attachment methods for complex rooflines, and a realistic timeline driven by weather and scheduling realities. Prioritize clarity over quick promises, and favor contractors who provide a transparent plan for coordination with insurers, interior protection, and final walk-through.