Last updated: Apr 19, 2026
Central Ohio spring hail and thunderstorms are a primary trigger for roof inspections and replacement scheduling in Blacklick. When those skies turn dark and hail pours down, shingles can crack, granules can shed, and hidden damage can balloon into leaks just as the grass starts turning green. Neighbors notice that attic smells, shingles curling at edges, and shingle granules in gutters often show up sooner than expected after a big storm. If you hear hail rattle on the roof or see new dents on metal flashings, treat it as a warning: inspection should move from possible to probable, and quick action becomes essential to prevent interior water intrusion.
Local contractor activity is heavily concentrated in storm damage, insurance claims, and emergency repair, indicating that post-storm response is a dominant homeowner need here. After a large event, Blacklick crews quickly shift from routine maintenance to rapid assessment mode, and that surge can strain scheduling for weeks. The practical consequence is that a timely claim-based replacement hinges on prompt documentation, clear communication with your adjuster, and a prepared contractor who can mobilize quickly. If a claim is likely, you want a trusted local roofer who can document hail impact, provide a persuasive rationale for expedited processing, and coordinate with storm-response teams that know Franklin County workflows.
Because Blacklick sits in the Columbus-area suburban roofing market, severe weather can create sudden demand spikes that delay scheduling after regional storm events. That dynamic matters: even when damage exists, the window to secure a timely replacement can close as crews reallocate to the next big storm. Your best plan is proactive-before the next thunderstorm season, identify a preferred local contractor, confirm they perform immediate inspections after events, and establish a rapid-response contact method. In practice, that means keeping a trusted roofer on standby, sharing photos of visible damage promptly, and understanding that urgency in spring translates to concrete, action-focused steps rather than waiting for a perfect weather lull.
If a storm has just passed, arrange a storm inspection within 48 hours if possible, especially if there are leaks, curling shingles, or exposed underlayment. Document damage with clear photos from multiple angles and note dates and times of the events. Contact your insurance carrier early to start the claims process, then connect with a local Blacklick roofing pro who has demonstrated experience turning assessments into rapid repair or replacement schedules. Expect a surge in calls after major events, so prioritize contractors who can provide same-day or next-day triage appointments, thorough written estimates, and a concrete plan for emergency tarping or temporary protection if rain is forecast. Act with decisiveness: rapid inspections, clear documentation, and a ready-to-move replacement plan minimize the risk of weather-driven delays.
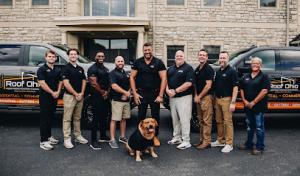
Roof Ohio
6833 Clark State Rd, Blacklick, Ohio
5.0 from 54 reviews
• At Roof Ohio, we take pride in being the premier choice for roofing and exterior services in our community. Our commitment to quality shines through in every project we undertake, as we pair top-notch products with unparalleled service. Trust Roof Ohio for all your roofing and exterior needs, and experience the difference of working with the best.

HomeGuard Roofing & Exteriors
(740) 739-7526 nextlevelroofingohio.com
392 Old Ivory Ct, Blacklick, Ohio
5.0 from 10 reviews
HomeGuard Roofing & Exteriors is dedicated to delivering exceptional roofing services with a focus on quality, reliability, and customer satisfaction. With a team of skilled professionals, they specialize in a range of services, including roof installation, repair, and maintenance for residential and commercial properties. Using premium materials and advanced techniques, they ensure durable and aesthetically pleasing results tailored to each client’s needs. Committed to transparency, they provide detailed estimates and timely project completion, making the process stress-free. Whether addressing storm damage or upgrading an existing roof, HomeGuard Roofing & Exteriors is a trusted partner for protecting and enhancing your property.
Woodring Gutters & Contracting
(614) 425-1005 woodringgcllc.com
Serving
5.0 from 102 reviews
Gutter maintenance can be difficult. Attempting to climb up to your roof to clean or fix them by yourself can be a dangerous and dirty task. Instead, you can relax by hiring Woodring Gutters and Contracting for professional gutter services. Our team has over 16 years of experience, so trust us when you need a gutter company. Call today!
Roof Medic
(614) 557-4215 www.roofmediccolumbusohio.com
Serving
4.9 from 41 reviews
Roof Medic began serving Central Ohio in the Spring of 2008 as Leak Medic “Central Ohio’s Roof Leak Specialist!”. Specializing in Roof Replacement’s and Repairs. Roof Medic has became one of Central Ohio’s most long running and trusted roofing companies. Whether it’s just a leak, potential storm damage claim, or it is just time to replace your roof, Contact us today and “Get the TRUTH. about YOUR ROOF!”

Roof Revivers
(614) 626-0387 www.roofrevivers.com
Serving
4.9 from 459 reviews
Roof Revivers is not your typical roofer because we’ll never try to sell you a new roof. As our name implies, we’re in the business of maximizing the life of your existing roof.

Buckeye Elite Roofing
(614) 301-5245 www.buckeyeeliteroofs.com
Serving
5.0 from 18 reviews
Buckeye Elite Roofing, located in Pataskala, OH, is a trusted roofing contractor specializing in residential and commercial roofing services. With years of experience, our team delivers top-quality roof installations, repairs, and maintenance, ensuring durability and protection for your property. We pride ourselves on our attention to detail, exceptional customer service, and use of high-quality materials. Whether you need a new roof, repairs, or an inspection, Buckeye Elite Roofing is your go-to choice for reliable and efficient roofing solutions in Pataskala and surrounding areas.
Bristlewood Roofing & Siding
(614) 307-5881 www.bristlewoodroofing.com
Serving
5.0 from 212 reviews
Bristlewood Roofing & Siding has combined years of expertise in the construction industry to assist Central Ohio for all your roofing, painting, siding, and gutter needs, while keeping your budget in mind. Since opening our doors in 2017, Bristlewood has added windows, solar panels, and restoration services to our growing list of home improvement services. Bundling them together has great rewards, including huge savings.
The Roofing Guys
(614) 626-7000 www.theroofingguys.com
Serving
5.0 from 161 reviews
The Roofing Guys, a premier roofing and siding contractor in Gahanna, Ohio, stands tall with over 30 years of experience. Our skilled team expertly manages all your business roofing needs, ensuring seamless insurance claims navigation and providing end-to-end solutions, from installation to meticulous maintenance. Committed to delivering excellence, we utilize only premium materials and techniques for roofing, siding, and gutter systems, safeguarding your property and ensuring your operations run smoothly. Trust The Roofing Guys to elevate your business to new heights.
Urban Exterior
(614) 927-7663 www.urbanexteriorco.com
Serving
5.0 from 47 reviews
At Urban Exterior, we work to ensure that our customer service is top of the line. We partner with many leaders in the industry to guarantee that we are providing our clients with the best products on the market. Our commitment is to supply you with high-quality products, outstanding customer service, and to build lifelong relationships with every homeowner we serve.
Dynasty Roofing & Restoration
(614) 567-3003 www.dynastyroofingohio.com
Serving
5.0 from 143 reviews
Dynasty Roofing & Restoration is a trusted provider of exceptional exterior solutions for residential & commercial properties. We transform roofs, siding & gutters to be functional & aesthetically pleasing.

Shift Roofing & Exteriors
(614) 673-8333 shiftexteriors.com
Serving
4.9 from 73 reviews
At Shift Roofing & Exteriors, we are dedicated to transforming your home with exceptional craftsmanship and personalized design solutions. Our mission is to elevate every aspect of your exterior, ensuring durability, beauty, and value in every project we undertake.
Turning Point Construction
Serving
4.6 from 19 reviews
We are a local Ohio-based business specializing in roofing, siding and gutters. We are experienced with storm damage insurance claims and handling all aspects of the insurance claim process for our valued clients. We are so confident in our services that we offer free property inspections and provide our clients with a report of the findings. We are an accredited roofing company by the Better Business Bureau with an A+ rating.
In this market, hail and wind claims are common after spring and summer storms, and the process centers on documentation more than in many neighboring areas. Adjusters often start with quick visual checks, but they'll dive into the roof's history, looking at shingle age, color consistency, and how visible mismatches might be. A full replacement is more likely if the damage intersects with fading or widespread end-of-life shingles, even when a partial repair could seem sufficient on a small patch. Understanding that stance ahead of time helps you set expectations and prepare targeted evidence.
When an adjuster visits, the age and color of existing shingles can matter as much as the actual impact marks. If your shingles are older or show significant weathering, the adjuster may push for a full replacement to avoid repeating claims soon after. Color matching becomes a practical hurdle in this area because Blacklick homes often feature subtly varied batches of shingles installed over years. If a partial repair leaves a noticeable patch or a mismatched seal due to batch differences, the insurance company could reconsider the scope. Being ready to explain past repairs and showing that current damage is weather-related-not wear-and-tear-helps align the outcome with what you're seeking.
Expect insurers to request photos that clearly demonstrate the storm date, the extent of impact, and any subsequent losses that tie directly to the incident. Detailed replacement estimates are also a must, with line items that distinguish new materials, labor, and potential ancillary components like underlayment or flashing where applicable. To keep this process moving, organize a calendar of storm dates, gather before-and-after photos of any prior repairs, and compile a brief narrative tying the damage to the most recent hail event. Presenting a coherent timeline makes it easier for the adjuster to see the direct cause-and-effect.
Before communicating with the insurer, walk the roof with a camera in hand, focusing on granule loss, pitting, curling, and edge damage. Photograph from ground level with clear context shots that show the roof slope, surroundings, and any nearby hail marks on siding or gutters as supplementary evidence. If a contractor has already provided a replacement estimate, request a version that includes a detailed materials list and a comparison to your current shingles. Finally, keep notes of every contact with the insurer: dates, names, and what was discussed. In this market, a well-documented file often shortens the path from claim to agreed scope.
Connect with contractors who help homeowners navigate the claims process from damage assessment to final approval.

HomeGuard Roofing & Exteriors
(740) 739-7526 nextlevelroofingohio.com
392 Old Ivory Ct, Blacklick, Ohio
5.0 from 10 reviews
In Blacklick, asphalt shingles are the dominant practical choice for most suburban homes, offering a familiar installation process, broad color options, and straightforward repairs. The local contractor market also keeps a healthy specialist presence for metal roofing, so there is meaningful competition if you're weighing options. For many homeowners, the blend of cost, ease of repair, and acceptable performance under typical Central Ohio weather makes asphalt a comfortable everyday choice on pitched residential roofs.
Metal roofing is not radical here, but it is visible and increasingly capable on certain homes. Metal can be a good fit when a homeowner anticipates longer-term durability, desire for a distinctive curb appeal, or wants enhanced wind performance on a mid-size pitched roof. In practice, metal systems in this area often come with specialized local installations, including bolt patterns and underlayment strategies that address seasonal swings. The upshot is that you can find skilled local crews who understand the climate-driven needs of metal, which helps when spring storms roll through and a more weather-resilient profile is desirable.
Blacklick experiences cold winters and warm summers with pronounced temperature swings, so material performance hinges on how well the system handles expansion, contraction, and adhesive behavior. Asphalt shingles expand and contract more noticeably with seasonal shifts, which can affect shingle seals and wind uplift tolerances in spring storms. Metal roofs, by contrast, move with less visible expansion but rely on precise panel seams and fastener tolerances to maintain long-term weather tightness. In mixed climates like this, the right underlayment and correct installation detailing become as important as the chosen top layer.
Most housing stock in this area is pitched residential roofing rather than dense urban flat roofs, so the comparisons should reflect suburban performance. Asphalt shingles are well-suited for typical roof pitches, easier to match with existing gutters and venting, and generally more forgiving for DIY-friendly touch-ups or localized repairs after hail events. Metal roofs shine on higher wind days or when a homeowner wants a longer-term replacement horizon; however, their weight, required structural checks, and metal-specific sealant and fastening needs can add a layer of complexity for a standard suburban site. For spring storm scenarios, consider how a given system handles wind-driven debris, hail impacts, and the local insurance considerations that often drive replacement timing in this market.
When planning a roof replacement, the permit path in this area follows Franklin County rules and the village-level process rather than a standalone big-city roofing bureaucracy. That means your project will be checked through the local building department with attention to how the work fits existing structures and streetscape. A common pitfall is starting work without a permit or with incomplete project details. Before any shingle or panel goes on, ensure a complete building permit application is submitted with accurate scope, including roof size, material type, and any venting or flashing changes. If the project stalls for an extended period, permits can expire, and you'll need to refile or renew with updated plans. This is not merely a bureaucratic hurdle; it can pause work and complicate timelines, especially after a spring storm surge when crews are juggling multiple projects in the neighborhood.
Inspections happen at key milestones: a rough-in stage to confirm roof framing, ventilation, and underlayment expectations, and a final inspection to verify the project is complete and up to code. In Blacklick, the building department may ask for disclosures during review, such as where flashing transitions or roof penetrations are located, and whether any ventilation changes have been implemented or need adjustments. If the inspector notes deficiencies, the contractor may need to address them on-site before the final approval. This can add days or weeks to the schedule-especially if a late-stage issue is tied to attic venting, soffit details, or flashing around chimneys and skylights. Having clear, unit-complete submittals helps avoid back-and-forth.
Start with a pre-submittal review: gather site photos, a simple roof plan, and a description of the chosen materials. Confirm that the permit scope aligns with what the contractor plans to install, particularly if any hail damage items or roof-venting retrofits are involved. Prepare for potential disclosures by documenting existing conditions in the attic and around penetrations. When submitting, include a realistic schedule and a contact plan for updates, since delays or changes can trigger permit amendments. After work begins, keep the permit poster visible on the job site and maintain open lines with the building department. Addressing inspectors' notes promptly reduces the risk of re-inspection fees or extended downtime that can complicate spring replacement timelines.
Typical Blacklick material pricing runs about $350 to $550 per square for asphalt shingles, $700 to $1100 for metal, $900 to $1500 for clay tile, $800 to $1400 for concrete tile, $600 to $900 for wood shingles or shakes, and $500 to $900 for synthetic or composite shingles. Those ranges reflect the mix of suburban pitched homes and the region's usual comfort level with mid-range products. When a roof project starts, the first clear delta is material choice, then labor, then any added scope that changes the price. In Blacklick, a straightforward re-roof on a standard two-story home typically tracks toward the lower end of those ranges, while homes with unique roof geometry or premium materials drift higher.
Regional storm surges in the Columbus-area market can push labor availability tighter after hail and wind events, affecting Blacklick replacement pricing and lead times. After a hail event, crews are in high demand, and crews may be redirected to nearby neighborhoods with similar homes. That squeeze tends to push both pricing and scheduling out 1-3 weeks beyond a calm season. If a storm hits during the spring, expect some drywall-on-the-roof fatigue in the local supply chain, which translates to tighter windows for inspection and replacement. Plan for potential minor price adjustments tied to demand, not just material costs.
Costs in Blacklick are often influenced by whether the project is a straightforward re-roof on a suburban pitched home or a more complex replacement involving flashing, ventilation disclosures, or insurer-required scope details. A simple re-roof without added disclosures typically stays near the lower material ranges, but the moment flashing needs to be upgraded or attic ventilation is reconfigured, expect a middle-to-high tier on both materials and labor. Tile roofs (clay or concrete) quickly escalate due to weight, cribbing, and additional fasteners, even when the material itself is within expected ranges.
Spring storms often trigger insurance-driven replacements, with timelines anchored to claim processing and scope confirmation. If insurers require documentation of hail impact, shingle warranties, or upgraded underlayment, the project may shift from a cosmetic refresh to a code-adherent upgrade. You'll want to align the expected window for approval with the contractor's scheduling, and build in a buffer for unexpected scope changes tied to insurer requirements. Communication about comfort level with premium materials and the fallback options if a claim is delayed helps keep the Blacklick project on track.
Get a clear picture of your project costs upfront - no commitment required.


In this climate, roofs endure repeated freeze-thaw cycles that stress shingles, flashing transitions, and older roof penetrations. When water seeps into joints or around vent pipes and then freezes, expansion can widen gaps and loosen sealants. Older penetrations-think chimney flashing, roof vents, and skylight curb seals-are especially vulnerable after a few cycles of thawing and freezing. The result can be hairline leaks that progressively worsen, often showing up after a mid-winter warm spell followed by a late-season freeze. For homeowners, this means closer attention to seemingly minor weather-induced edges and transitions, particularly on pitched roofs where water moves toward eaves and valleys.
Central Ohio summers bring high heat and strong sun that accelerate aging of asphalt and synthetic shingles, weaken sealants, and degrade underlayment over time. In Blacklick, radiant heat can soften asphalt-based products during the peak afternoon hours, increasing the risk of blistering or edge curl if installations were not fully cured or if adhesive-based products were used in marginal temperatures. UV exposure also shortens the effective life of coatings and sealants around flashing transitions, vents, and skylights. When planning repairs or replacements, consider the seasonality of adhesives and sealants: cooler, moderate spring or fall windows often yield more reliable cures and long-term performance than peak-summer installation, especially for roofs with adhesive roofing products that rely on steady temperatures to achieve proper bonding.
Winter snow loads and frozen conditions can narrow installation windows in Blacklick and make temporary repairs more common until weather improves. If a storm-damaged area exists, avoid delaying permanent fixes during prolonged cold snaps, but recognize that crews may have limited access or reduced working efficiency on frozen surfaces. If a patch is necessary, opt for temporary, watertight solutions that protect interior spaces without creating additional puncture points or pressure points on the roof. When temperatures rise and moisture is present, ensure temporary measures transition to a proper repair or full replacement to restore the roof's integrity and reduce the risk of ice dams forming along eaves and in valleys. Keeping an eye on aging flashing and joints in the spring can catch slow leaks before they turn into more extensive damage.
In Blacklick, skylights and chimneys are frequent trouble spots after Central Ohio's storm cycles. Wind-driven rain can whip against flashing and seals, revealing weak detail work sooner than nearby shingles. A quick judgment call after a heavy windstorm is to check around every skylight curb and chimney chase for damp staining inside the attic or attic-vent gaps, and to note any granule loss along the flashing bed. The culprit is often not the shingle field itself but the transitions where metal meets roof deck. If sealant lines look cracked or areas where flashing bends have pulled away, the risk of a small leak turning into a larger soak grows quickly in a home with pitched roofs and frequent spring showers.
Where a roof plane meets a wall, or where vent pipes and chimney bases puncture the deck, transitions become the Achilles' heel of Blacklick homes. The harsh spring winds can lift and curl metal around pipes or edge flashings, leaving gaps that wind-driven rain can exploit. Inspectors in this area tend to focus on step and counter-flashing at these points, not just the visible field shingles. If any flashing pieces appear loose, bent, or corroded, rain can travel along the seam and appear far from the original leak source. Remember that even a seemingly minor nick in a flashing edge can funnel water to the attic during a heavy downpour.
Flashing around penetrations bears the cumulative toll of aging, hail pings, and seasonal temperature swings. In many Blacklick homes, sealants around skylight bases and chimney flashing degrade faster than the surrounding shingles. Look for brittle caulk, hairline cracks, or silicone that has separated from metal. Water entering behind old sealant often travels along the underside of shingles before presenting as a stain or mold in the attic. The warning signs are subtle-discoloration, a musty odor, or damp insulation-and delaying attention invites more invasive damage.
When a roof replacement is planned after storm season, detail work around skylights, chimneys, and other penetrations becomes the decisive factor in long-term performance. Wind and rain do not respect cheap flashing; they exploit gaps and misalignments first. A meticulous hand-off between the new roofing layers and the existing penetrations is essential, with proper flashing integration and counter-flashing, secured fasteners, and compatible sealants. In practice, prioritize inspecting and renewing these details during or immediately after material replacement, so a fresh surface doesn't inherit concealed vulnerabilities.
Find contractors experienced in skylight installation, flashing, and leak repairs to bring natural light into your home.

In Blacklick, homeowners rely on contractors who respond quickly after a storm and include cleanup in the project scope. You can tell a solid candidate by their ability to schedule a site visit within 24 to 48 hours of contact, provide a clear debris removal plan, and outline how damaged sections will be tarped or fenced to protect the yard and landscaping. Expect candid timelines for roof protection, debris containment, and a step-by-step plan for shingle or panel removal, with daily cleanup targets. If a crew seems to treat cleanup as an afterthought, keep looking.
The market includes many long-established and family-owned operators, which matters in a suburb where warranty follow-through and post-storm callbacks are practical concerns. Look for past Blacklick projects that resemble your home's roof type and age-pitched residential roofs with typical Ohio storm wear. Review signs to verify: finishes that align with roof type, documented aftercare on repairs, and a pattern of returning to address minor issues after the job. A contractor with a local track record rarely leaves you in a lurch when unexpected wind or hail comes back for a warranty check.
Manufacturer-certified, licensed, and insured positioning appears in the market but is less prevalent than storm response and cleanup promises. Do not assume credentials are in place. Ask for current licenses, proof of insurance, and manufacturer certifications for the exact roofing system you plan to install. Call references who can confirm the scope of work, adherence to product guidelines, and whether the contractor honored warranty promises after installation. If the paperwork and the references don't align with the job you're proposing, keep shopping.
Choose a contractor that speaks to Central Ohio storm patterns and the timing of Spring repairs. A trusted Blacklick provider will discuss how they protect a home while work is ongoing, how they schedule work around forecasted storms, and how they handle cleanup and yard protection during steep seasonal transitions. If a contractor sounds generic about weather, it's a red flag-seek a team that demonstrates local weather savvy and a plan tailored to your home's exposure.