Last updated: Apr 19, 2026
Spring storms, hail, and strong winds hammer the central Ohio area with surprising frequency, and the pattern directly drives when inspections and replacements happen. In Reynoldsburg and the broader Columbus-area market, those weather events are the primary trigger for action. When a storm hits, the clock starts ticking on your roof's eligibility for claim-driven work, especially if shingle edges lift, granules shed, or flashing shows deformation. The risk becomes operational fast: delays can let damage propagate into structural wood, attic spaces, or ventilation components, complicating a claim later.
Insurers in this market routinely ask for photo documentation and a condition report when hail or wind claims are filed. You need dated evidence before temporary repairs or shingle exclusions obscure the real extent of damage. Take clear, time-stamped photos of all affected areas-edges of shingles, hail impact spots, lifted tabs, visible granule loss, and any interior staining or moisture in the attic. Keep a dated log of observations and events from the storm day, and gather receipts or notes from any temporary coverings or tarps. If contractors advise immediate temporary fixes, insist on documenting the pre-repair condition first, so the record doesn't get unintentionally reset by a fix that hides damage.
Storm-driven claims tend to move quickly, but scheduling pressure builds as crews mobilize after the season but before peak summer slots fill up. The practical effect is a window that leans late spring into early summer. If your roof shows signs of hail impact or wind damage, initiating the claim promptly helps ensure you're in a favorable slot before peak heat, humidity, and project backlogs complicate logistics. Insurance-adjuster availability and local crews align to that post-storm surge, so acting now prevents delays that could shift a replacement into a much tighter calendar later in the summer.
When an adjuster review is scheduled, prepare a concise narrative of the storm events and observed damage, with dates and locations of impact. A professional roof inspection that documents underlayment, flashing, ventilation, and nail patterns provides objective data that supports your claim and aligns with typical inspector expectations. If signs of hidden damage emerge during inspection-such as compromised decking or moisture behind flashing-addressing them early with a transparent, repair-oriented plan helps maintain claim momentum. Communicate clearly with your insurer about any temporary fixes, ensuring they're documented and time-stamped to avoid contention about coverage due to later discoveries.
Coordinate with your roofing contractor to schedule assessments, temporary protections, and potential replacement work in a sequence that keeps the claim path uncluttered. Arrange for early photo evidence, then proceed to an in-depth condition report, followed by a formal estimate that aligns with the insurer's scope of coverage. If a storm was recent, expect a period where multiple homeowners are competing for available crews; securing a priority slot through proactive communication and solid documentation can make the difference between a smooth replacement and a prolonged waiting game.
Dynasty Roofing & Restoration
(614) 567-3003 www.dynastyroofingohio.com
7509 E Main St STE 212, Reynoldsburg, Ohio
5.0 from 143 reviews
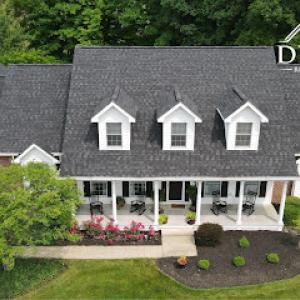
Dynasty Roofing & Restoration is a trusted provider of exceptional exterior solutions for residential & commercial properties. We transform roofs, siding & gutters to be functional & aesthetically pleasing.

Evolve Roofing & Siding
(614) 390-7556 evolvemyhome.com
1600 Brice Rd suite C3, Reynoldsburg, Ohio
5.0 from 140 reviews
We are a family owned company who focuses on excellence in every project we take on. Our name is our mission, as we are constantly striving to Evolve to be better. We believe in using industry leading practices and best rated materials to make sure the very best is on every job we touch. We are the evolution of roofing and siding contractors in Columbus, Ohio. In addition to installing an excellent final product, our focus is excelling in areas other contractors typically leave behind, including communication, timeliness, cleanliness, and professionalism.
Quality Builders of Ohio
(614) 591-7663 www.qualitybuildersofohio.net
6432 E Main St Suite 204, Reynoldsburg, Ohio
4.9 from 298 reviews
Quality Builders of Ohio is a trusted provider of repair or replacement roofs, siding, windows and gutters. Leaky roof? Our roof contractors will provide a free roof inspection to determine if there is any roof storm damage to file a roof insurance claim or if a new roof is needed. We provide roof repair or roof replacement services. Need new siding? We offer quality vinyl siding, aluminum siding, steel siding and fiber cement siding. Need new windows? Our window experts install high-quality, energy-efficient replacement windows. We’ll help you choose the best window styles. Clogged gutters? Our gutter contractors install 5” and 6” seamless gutters. Keep the leaves out with gutter guards!

Everlasting Roofing
(614) 322-7663 www.everlastingroofing.com
6475 E Main St Suite 112, Reynoldsburg, Ohio
4.7 from 32 reviews
Roofing, Siding, Gutters, metal, shingles, slate, box gutters, flashing, flat roofs, rubber and tpo. Roof replacement
Tomlinson's roofing & siding
1116 Dawn Dr #9600, Reynoldsburg, Ohio
5.0 from 12 reviews
We offer Roofing,Siding,Gutter,Exterior trim and trim painting services.
Home Repair Connect
(614) 434-7928 www.homerepairconnect.com
7881 Oldham Dr., Reynoldsburg, Ohio
5.0 from 9 reviews
We provide experienced and skilled professionals dedicated to providing top-notch handyman services to our valued clients. We understand that every home and business has unique needs, and we are committed to tailoring our services to meet those needs. Our contractor extensive experience in a variety of services, including roofing, siding, gutters, plumbing, flooring, framing, drywall , painting, and general repairs. No matter how big or small the job, we take great pride in delivering exceptional results and ensuring our clients are completely satisfied with our work. Contact us today to learn more about our services and how we can assist you with all your handyman needs.
CentiMark Corporation
(614) 536-1960 www.centimark.com
6960 Tussing Rd, Reynoldsburg, Ohio
4.3 from 14 reviews
CentiMark in Reynoldsburg, Ohio, is a leading commercial roofing contractor providing top-tier services to businesses in Columbus and throughout the state. With over 55 years of industry experience, we possess expertise in resolving roofing issues specific to Ohio's weather patterns, from harsh winters to stormy summers. Our dedicated team offers comprehensive services including roof repairs, installations and preventative maintenance, using high-quality materials designed to withstand local conditions. CentiMark's commitment to customer satisfaction and safety has solidified our reputation as Ohio's trusted roofing partner. Your roof is a critical investment - trust it to the experts at CentiMark.
Mighty Dog Roofing of Columbus East
(614) 810-8863 mightydogroofingcolumbus.com
Serving
4.9 from 125 reviews
Mighty Dog Roofing specializes in Roofing, Storm Damage Repair, Gutters, Siding, Windows, Drywall and Plaster repairs, Light Framing, Carpentry and Painting. We can do most any exterior project and can do most interior ones, too. A local Veteran owned and operated company is your choice for serving Central Ohio. We offer state-of-the-art 25 point inspections supported by our Drone Superscan technology. This technology, matched with the highest quality products and superior workmanship, allows you to have peace of mind on the most important investment you have - your home. We'll store your project information for you and our Watchdog Maintenance program helps you avoid big repairs in the future.
GOAT Roofing & Restoration
(614) 647-4628 www.ohioroofgoat.com
Serving
4.8 from 87 reviews
Since 2018, GOAT Roofing and Restoration has provided Pickerington and the surrounding area with dependable and exceptional roofing services. This dedicated team of professionals offers high-quality solutions for residential and commercial properties. They specialize in accurate assessments and permanent repairs, ensuring that every customer receives an exceptional experience from the initial inspection to the final shingle. With a commitment to excellence, they strive to be the greatest of all time in every project they undertake.
Woodring Gutters & Contracting
(614) 425-1005 woodringgcllc.com
Serving
5.0 from 102 reviews
Gutter maintenance can be difficult. Attempting to climb up to your roof to clean or fix them by yourself can be a dangerous and dirty task. Instead, you can relax by hiring Woodring Gutters and Contracting for professional gutter services. Our team has over 16 years of experience, so trust us when you need a gutter company. Call today!
Kase Roofing
(614) 668-8351 www.kaseroofing.com
Serving
5.0 from 32 reviews
Kase Roofing is a veteran-owned roofing company based in Pickerington, Ohio, proudly serving Reynoldsburg, Canal Winchester, Lancaster, Pataskala, and nearby areas. We specialize in roof repairs, replacements, storm damage restoration, and insurance claims, delivering expert roofing, siding, and gutter services backed by over 15 years of experience. Our commitment to integrity, precision, and customer care ensures top-quality results for every home. Contact us today for a free roof inspection and experience the Kase Roofing difference!

Buckeye Elite Roofing
(614) 301-5245 www.buckeyeeliteroofs.com
Serving
5.0 from 18 reviews
Buckeye Elite Roofing, located in Pataskala, OH, is a trusted roofing contractor specializing in residential and commercial roofing services. With years of experience, our team delivers top-quality roof installations, repairs, and maintenance, ensuring durability and protection for your property. We pride ourselves on our attention to detail, exceptional customer service, and use of high-quality materials. Whether you need a new roof, repairs, or an inspection, Buckeye Elite Roofing is your go-to choice for reliable and efficient roofing solutions in Pataskala and surrounding areas.
The winters in this area bring repeated freeze-thaw cycles that quietly wear on a roof. Small shingle cracks can widen year after year, and flashing details that seemed solid after installation can loosen enough to catch a wind gust or a heavy snowmelt. When those micro-cracks open up, even modest drainage issues can become wet patches that find their way into the attic or along the eaves. This isn't drama; it's predictable wear from the granite arms race between cold snaps and sun-warmed afternoons. Acknowledge that the roof acts as a shield under persistent freeze-thaw stress, and plan inspections with that in mind.
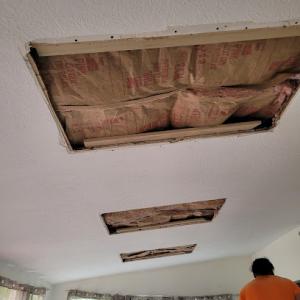
Ice damming is a recurring risk in this climate, especially during cold snaps followed by warmer days. When a roof's snow melts unevenly, meltwater can back up behind it and refreeze at the edges, pushing against underlayment and flashing. In Reynoldsburg, attic ventilation and underlayment details matter more on re-roofs because these areas influence how heat escapes from living spaces and how moisture is managed above the living roof deck. If attic space feels warm in mid-winter or you notice frost patterns on the underside of sheathing after a cold night, treat ventilation as a first-line defense. Ensure soffit vents, ridge vents, and baffles are clear, and that underlayment was installed with a continuous, gap-free approach at penetrations and rakes. On a re-roof, confirm that the underlayment extends up the vertical surfaces and that any valley or chimney flashing has a robust seal to resist ice dam formation.
In this region, roofs swing from subfreezing winter conditions to hot, storm-near-summer days within a single year. That swing forces materials to expand and contract, which stresses fasteners, shingles, and edge metal. Over time, thermal movement can loosen nails, create micro-movement in ridge caps, and embrittle edges that already saw harsh weather exposure from hail and gusty storms. Materials with higher stiffness or lower ductility can suffer more from these shifts, especially on roofs with complex geometry or shallow slopes. The practical consequence is a higher likelihood of minor leaks following a warm afternoon followed by a sharp drop in temperature, and a greater chance that hail and wind will expose already stressed seams. Protect against this by choosing roofing components with appropriate flexibility, coordinating precise nailing patterns, and ensuring a secure, continuous seal at every seam and flashing line.
A realistic approach focuses on early detection and consistent maintenance. Schedule seasonal inspections that look for widening cracks, lifted flashing edges, and any seepage path near vents or skylights. Pay attention to ice dam indicators and verify attic insulation is sufficient to minimize heat transfer upward. On a re-roof, demand layered protection: a high-quality underlayment, well-seated flashing, and ventilation plans designed for Reynoldsburg's temperature range. Treat the roof as a living system that must move with the season, not fight against it, and you'll reduce the risk of small issues becoming costly leaks after a harsh winter or a violent spring storm.
Asphalt shingles dominate Reynoldsburg because they fit the area's common re-roofing market and are widely used on standard residential homes across central Ohio. They're familiar to local crews, easy to source, and typically straightforward to install over existing underlayments and flashing with proper ventilation. For most homes, a solid 20- to 25-year class 3 asphalt shingle aligns with the region's freeze-thaw cycles and mid-Atlantic exposure to spring hail. If you're prioritizing predictable performance, availability of local workmanship, and a balance of cost and durability, asphalt remains the sensible starting point. When choosing asphalt, pay attention to shingle weight, impact resistance, and the warranty terms that cover wind uplift in our area's gusty spring days.
Metal roofing is a meaningful local specialty in Reynoldsburg's contractor market, reflecting homeowner interest in longer service life and better shedding of snow and debris. Metal panels or shingles can offer enhanced wind performance and faster hail shedding, which helps during the region's storm seasons. However, metal requires careful installation-proper nailing, flashing, and attic ventilation are crucial to prevent issues like condensation or leaks around penetrations. If you're weighing replacements or a new build, metal is worth considering when the roof is already tall or complex, or when a longer life expectancy fits your plans. Expect a higher upfront cost, but potentially lower long-term maintenance and better performance in high-wind and heavy snowfall years.
Tile, wood shake, and synthetic options exist in Reynoldsburg, but their performance has to be weighed against central Ohio freeze-thaw stress, wind exposure, and the structural demands of heavier systems. Clay and concrete tiles bring durability and a distinct look, but they require a sturdy deck and precise framing to handle the weight. Wood shakes deliver authentic texture but can suffer from weathered edges, curling, or fire considerations if not properly treated. Synthetic shingles mimic the look of natural products while offering lighter weight and sometimes improved hail resistance, but local wind and uplift expectations still apply. In general, these options are best for homes with the right structural support and a design preference that justifies the added weight and installation complexity.
Any material choice should start with fast-moving spring hail and the winter freeze-thaw pattern that defines Reynoldsburg's climate. Ventilation and attic condition matter just as much as the outer material, because proper airflow helps control condensation and extends roof life across all options. For homes with shallow pitch or roof penetrations-vents, skylights, or chimneys-selecting a material and a detail plan that your contractor can seal against wind-driven rain is key. In this market, a well-chosen material pairings with experienced local installers often yields the most reliable performance year after year.
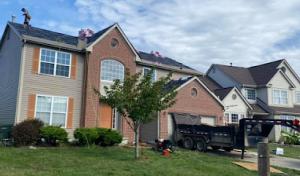
When a hail event or strong winds sweep through the Columbus metro, you'll notice the roof replacement scene tighten up quickly. In Reynoldsburg, cost swings are tied to storm-driven demand: crews, trucks, and materials get booked up, and scheduling slips can push projects by days or weeks. Winter freezes complicate scheduling as well, because underlayment and flashing need careful installation to stand up to March thaw cycles. If you're faced with a sudden replacement, expect a tighter window from first assessment to finished job than you'd see in calmer months, and plan for potential bumps in labor availability.
Material choice matters sharply in this market. Asphalt shingles sit in the 350 to 700 USD per square range, making them a common, reliable option for most homes here. Metal roofing climbs to about 700 to 1100 USD per square and can be a good fit for long-term durability against hail and wind, though upfront costs are higher. Clay tile ranges from 1000 to 1800 USD per square, offering distinct aesthetics and excellent longevity but heavier load considerations. Concrete tile runs roughly 900 to 1500 USD per square and provides strong impact resistance with a different weight profile. Wood shingles or shakes are typically 600 to 1100 USD per square, giving a rustic look but needing more maintenance in the Ohio climate. Synthetic or composite shingles hover around 650 to 1050 USD per square and can blend cost control with decent performance. In Reynoldsburg, your choice will affect not just the price tag but how long the crew can stay on the roof during weather windows and how it performs across freeze-thaw cycles.
Post-storm documentation matters here. After hail or high winds, you'll want clear photos of impacted shingles, flashing seams, and any visible leaks, since insurance-driven replacements peak when storm damage is well-documented. Scheduling a replacement promptly after a claim can help reduce secondary issues from water intrusion and long-term deck or attic damage. Expect the project to be most efficient when the weather cooperates and crews can lock in a solid sequence of teardown, underlayment, flashing, ventilation checks, and final nailing. This city's spring and early summer windows are the most active, so plan for potential delays if storms push demand.
Don't let upfront costs delay a critical repair - these contractors offer payment plans to fit your budget.
Quality Builders of Ohio
(614) 591-7663 www.qualitybuildersofohio.net
6432 E Main St Suite 204, Reynoldsburg, Ohio
4.9 from 298 reviews
The City of Reynoldsburg generally requires a building permit for a full roof replacement. That means planning ahead for the administrative step as you finalize material choices and contractor scheduling. For many standard asphalt and similar re-roofs, plan review is typically not required, which can simplify straightforward replacement projects. Keeping the permit application and any required documentation organized helps avoid delays that could push your project beyond favorable weather windows in spring and fall.
After installation, Reynoldsburg roofing inspections commonly verify underlayment, flashing, ventilation, and nailing patterns. This is especially important in an area with freeze-thaw cycles and spring hail exposure, where proper underlayment and ventilation protect against moisture and heat buildup. A contractor who understands local building code expectations will the verify each detail during a site visit, not just the overall completion. Make sure the attic ventilation rate and exhaust paths are accessible for review, as inspectors will look for unobstructed intakes and adequate exhaust in the eave and ridge lines.
Permit processing is usually a few days to a couple of weeks, depending on the backlog and the complexity of the replacement. In Reynoldsburg, it helps to align the permit timeline with your preferred weather window and any storm-damage repair deadlines that insurance may require. Communicate proactively with both the city inspector and the contractor about anticipated start dates, so the inspection can be scheduled promptly after installation is finished.
Before applying, gather any required documentation such as contractor licenses, project scope, and any material specifications that affect flashing or ventilation details. Inspections will focus on the chosen underlayment type, the continuity of flashing around vents and valleys, and the fastening pattern along the rafter edges. If hail damage has influenced the scope, keeping a clear record of patches or reinforced areas helps the review process and can support timely permit approval.
Coordinate with the contractor to ensure a clean, accessible roof line during the inspection so inspectors can visually confirm nailing patterns and flashing intersections. If a storm-damaged roof is being replaced under an insurance claim, keep all documentation organized and ready for inspection scheduling. And when timelines tighten due to weather or demand, prioritize compliance steps first-proper permits and thorough inspections prevent last-minute penalties and ensure a solid, code-compliant installation.
In this market, insurers generally continue writing standard roof replacement coverage, but claims often hinge on proving hail or wind damage rather than age alone. A sudden impact pattern, granule loss, or wind-lifted shingles can push a claim toward approval, even on an older roof. Documentation that connects damage to a recent storm helps the adjuster see the issue beyond deterioration.
Some central Ohio policies may apply depreciation, which can materially change out-of-pocket costs for older roofs even when a claim is approved. If depreciation is used, the claim payoff may be reduced, and the replacement decision could become more complex. Careful review of your policy language and a dated service report can clarify how depreciation might affect the settlement and what options exist to restore service without overextending the budget.
Updated underlayment and attic ventilation can become part of the claim conversation in Reynoldsburg because adjusters and carriers may want the replacement to meet current installation expectations. If a seasoned contractor notes evidence of inadequate prior ventilation or aging underlayment, it strengthens the case for a full replacement that aligns with today's standards. Be prepared to document attic conditions, including insulation depth and vent placement, and to request a walkthrough that focuses on potential upgrades as part of the claim.
Keep storm date stamps, photos of exterior and interior damage, and a written record of any hail impact or wind events. Match photos to visible roof features-shingles edges, valleys, and flashings-and note any interior signs such as stains or ceiling leaks. Clear, dated evidence helps the adjuster assess damage from a local perspective and speeds the path to a fair resolution.
Although pitched asphalt roofs dominate, the local contractor market shows enough flat-roof demand to justify dedicated low-slope repair expertise for additions, porches, and mixed-roof homes. In Reynoldsburg, a quick assessment often reveals membrane edges that were never fully protected at wall junctures or small ponding areas that worsen after winter cycles. You should plan for careful edge detailing and seamless transitions where a low-slope meets a steeper roof to avoid hidden leaks. When a project touches an addition or a porch, insist on thorough corner sealing, proper counterflashing at wall penetrations, and a lintel-friendly slope that drains toward approved drainage paths rather than toward interior walls. For maintenance, keep debris off the surface, test drainage paths with a light spray after storms, and watch for micro-cracks in the surface coat that can invite water ingress between seasonal cycles.
Skylight-related service is a meaningful specialty in this area, which matters because flashing and curb details are vulnerable during freeze-thaw cycles and wind-driven rain. Expect recurring issues around the curb flashing, membrane laps, and sealant joints where temperatures swing and storms hit hard. Track any staining or damp spots well before they reach the ceiling. When inspecting, examine the sealant around the skylight curb, the integrity of the drip edge where the curb meets the flat roof, and the continuity of the base layer beneath the skylight. If replacement is needed, specify a curb flashing system that is mechanically fastened and sealed at multiple points rather than relying solely on adhesive, and ensure the flashing transitions smoothly to adjacent roofing planes.
Reynoldsburg inspections emphasizing flashing and underlayment make transition areas around skylights and low-slope tie-ins especially important on replacement jobs. When planning a full replacement, ask the crew to verify that the underlayment under the skylight and the surrounding roof plane is continuous and that flashing at the base of each skylight is mechanically fastened and sealed. Document the details of how the new membrane overlaps existing layers and how edge flashings tie into wall flashings. A precise plan for these transitions minimizes the chance of post-install leaks after the first big thaw or gusty storm.
Find specialists in TPO, EPDM, and built-up flat roofing systems for residential and commercial properties.

Everlasting Roofing
(614) 322-7663 www.everlastingroofing.com
6475 E Main St Suite 112, Reynoldsburg, Ohio
4.7 from 32 reviews
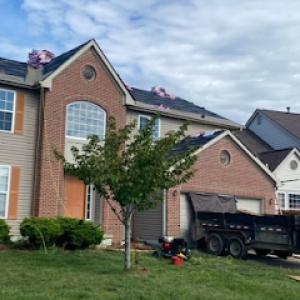
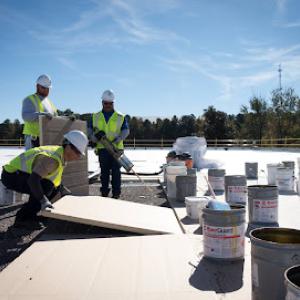
After a severe storm with hail or high winds, the local contractor market shifts toward rapid assessments and quick referrals. You should expect multiple crews offering storm inspections within days. Start with a careful walkaround of the roof and gutters, noting missing shingles, dents on metal flashings, and granules in gutters. Take clear photos from ground level and from ladders if safe. Document dates of the storm, wind speeds if known, and any interior signs of leakage. This documentation becomes the backbone of conversations with any roofer and with your insurer.
Reynoldsburg homeowners often compare responsiveness and how well a company handles insurance paperwork, not just price. When meeting candidates, ask for references from recent storm jobs, especially those with insurance-driven replacements. Inquire about their process for coordinating inspections, underlayment checks, and flashing repairs, since the city typically expects inspection of these elements on full replacements. Notice how quickly the crew can schedule a site visit, how they protect landscaping during debris removal, and whether they bring tarp materials to secure vulnerable areas.
A solid roofer should help translate insurer feedback into actionable steps on the roof. Expect guidance on documenting storm damage in a way that aligns with adjuster expectations. A trustworthy contractor will provide a written assessment of observed damage, proposed scope, and a reasonable timeline that considers weather gaps and crew availability. Clear, ongoing communication about next steps helps prevent overlapping work and misaligned expectations, which is especially important when insurance timing pressures a fast replacement.
Cleanup is a strong local hiring priority, so ask about daily debris removal, safe disposal practices, and nail cleanup. Reputable crews will contain work zones to limit disruption and use magnetized tools to locate stray nails in yards and driveways. If the project requires re-roofing, confirm how tarping is handled for rain gaps, how waste is contained, and how workers protect landscaping and property during rapid turnover. A responsible contractor treats cleanup as as much a safety and neighborhood issue as it is a scheduling concern.