Last updated: Apr 19, 2026
Camp Hill sits in the lower Susquehanna Valley on the West Shore, where winter temperature swings create repeated freeze-thaw stress at eaves, valleys, and flashing transitions. That cycle takes a toll year after year, especially on aging roofs that have seen more winters than new installations. The most vulnerable spots are where two planes meet or where metal flashing runs along roof edges. Over time, the repeated freezing and thawing can cause shingles to lift, sealants to crack, and nails to back out. When you inspect, focus on ridge cap rows, drip edges, fascia mounting points, and any areas where ice or water tends to back up into the eaves. Small, tight gaps around exhaust stacks and vent pipes are telling signs of stress that can grow into leaks if left unattended.
The borough's cold-season ice dam risk is concentrated at roof edges and gutter lines after snow events followed by daytime melting and overnight refreezing. Warmer daytime temperatures can push meltwater toward colder overhangs, where it refreezes behind an ice dam and blocks return flow from the gutter and downspouts. In practice, that means you should pay extra attention to lashings and sealant around eaves, drip edges, and any valley flashings that direct water toward the soffit. Regularly clearing gutters of leaves and debris before a major melt helps, but the key protective step is ensuring that edge details-especially at the eave and overhang junctions-are properly sealed and capable of shedding water without backflow. If you see pealing shingles along the edge or staining on the soffit, those are early signals that ice dam pressure is stressing the edge system.
Warm, humid summers in the Camp Hill area accelerate attic moisture problems when older homes have undersized intake and exhaust ventilation. A tight attic with insufficient airflow traps moisture from daily living and from attic heat, promoting mildew, plywood warping, and shingle deterioration from the inside out. Start by verifying that soffit intake is clear and that an unobstructed path exists for attic air to exit through ridge or major vents. In older homes, add or upgrade bathroom and kitchen venting outlets so they vent to the exterior rather than into the attic. If you notice condensation on the underside of sheathing during humid periods or musty odors rising from the attic, that indicates you may need to recalibrate the ventilation balance to match the roof's needs.
Begin with a careful walk-around after the first major thaw and again after a heavy snow event. Look for loose or missing drip edges and rusted or bent gutter hangers that can trap meltwater at the edge. Check every valley intersection: ice damming often begins at any place where two roof planes meet and water is funneled toward the lower edge. Inspect flashing along chimneys, roof-to-wall transitions, and skylights for cracks or gaps. If flashing shows corrosion, lifting, or obvious gaps, plan to reseal or replace with properly seated metal flashing rated for freeze-thaw cycles. When you see curled shingles at the eaves or along valleys, schedule a closer look-these edges are where the storms and cold snaps do the most damage.
Create a simple seasonal cadence: after the last heavy snowfall, inspect the roof edge and gutter lines for ice buildup and damage; in late spring, check for any signs of water intrusion in the attic or along interior walls after heavy rains. Keep a close eye on areas where the sun warms the roof first in spring, as rapid day-to-night temp swings stress all edge details. If any edge shingle or flashing appears compromised, address it promptly with clean seals and, if needed, professional flashing repair. Regular maintenance focused on edge details, ventilation balance, and valley flashings pays off by reducing the frequency of costly repairs during the more punishing winter months.
Older housing stock in this area often features multiple roof penetrations, masonry intersections, and dormer details that complicate flashing work. When flashing around chimneys, vent stacks, and dormers is compromised, you see small leaks that migrate along rafter tails and into interior ceilings. The consequence is gradual rot at deck edges and insulation degradation in attic spaces, especially after freeze-thaw cycles. In practice, inspect around pipe boot seams and chimney saddles for hairline cracks or buckling, and pay attention to irregular roof-to-wall transitions where cement mortar joints meet shingles. Addressing these details promptly prevents concealed water damage that can escalate into compromised sheathing and costly interior repairs.
Region-wide wind and hail activity means you should routinely check for bruising, lifted tabs, ridge damage, and deformation of metal flashing after stronger storm cells move through Cumberland County. Damaged shingles can fail to shed moisture efficiently, and lifted tabs invite wind-related uplift that propagates across the roof field. Ridge caps, in particular, are vulnerable where old fasteners corrode or where close-quartered ridges expose vulnerable edges. If a storm leaves the roof with uneven lines or loosened flashing, treat it as a warning sign rather than a one-off nuisance. Proactive resealing and re-fastening, followed by a careful inspection of ridge vent integrity, can keep wind-driven water from finding its way into attic plenums and soffit intakes.
Repeated wetting from humid summers and leaf buildup in shaded blocks concentrates moisture at valleys, chimney saddles, and low-slope transitions. Leaves and debris retain moisture longer, accelerating deterioration of valley metal and underlayment. In Camp Hill's older neighborhoods, you may notice coarse granule loss at the valley edges or mottled staining along flashing seams where water pools briefly during heavy downpours. Practically, ensure valleys are kept clean, flashing is continuous, and the underlayment beneath low-slope sections remains intact. Where valleys show corrosion or granular wear, a closer look is warranted, as failure here often signals broader deck exposure that can lead to faster plywood or oriented strand board degradation.
Dormers and masonry intersections concentrate stress at the deck, leading to faster wear around corner details and saddle flashings. When mortar joints crack or flash intersections separate, moisture can wick into the wooden framing and cause localized rot that spreads outward. The result is not merely a small roof leak but a creeping interior issue, since interior walls and ceilings may reveal staining away from the obvious leak spots. A practical approach is to schedule targeted flashing checks around dormers after the winter thaw and again after storms, focusing on the seam where roof meets brick or stone, and on any sealant that has darkened or peeled away.
Look for small, repeated staining along ceilings and walls in rooms directly beneath penetrations and along ridge lines after rain events. Noticeable sagging at soffits or eaves indicates moisture intrusion that should prompt a closer roof assessment. In contrast to a simple shingle wear pattern, these symptoms point to flashing, intersection, or valley failures that demand professional diagnosis. Regular maintenance-clearing debris, resealing around flashings, and reconditioning compromised metal-can lengthen service life and reduce the chance of a sudden, more invasive failure.
Find contractors experienced in skylight installation, flashing, and leak repairs to bring natural light into your home.

Topp Home: Roofing, Solar Panels, Windows & Doors
(717) 895-8893 www.mytopphome.com
1521 Cedar Cliff Dr # 101, Camp Hill, Pennsylvania
5.0 from 122 reviews
Topp Home is one of the fastest growing exterior home improvement contractors in Central PA. They serve Camp Hill, Harrisburg, York, Lancaster, and surrounding areas. Their team specializes in roofing, solar panel installation, windows, doors, siding, gutters, and gutter protection. Topp Home uses high-quality, durable materials designed to withstand the ever-changing Central Pennsylvania climate. They prioritize customer satisfaction and offer flexible financing options.
Summit Roofing PA
(717) 731-3477 summitroofingpa.com
545 Lamp Post Ln, Camp Hill, Pennsylvania
5.0 from 10 reviews
Welcome to Summit Roofing, your premier roofing solution in Pennsylvania! Serving Camp Hill, Harrisburg, and surrounding areas, we specialize in top-quality roof installations and replacements. With years of experience and a commitment to excellence, we ensure each project is completed to perfection. Trust us for expert guidance and exceptional service every step of the way. Contact us today to elevate your roofing experience with Summit Roofing.

Home Genius Exteriors
(717) 905-4844 homegeniusexteriors.com
Serving
4.9 from 247 reviews
Elevate your home with Home Genius Exteriors, setting the standard in Harrisburg by offering full-service solutions for roofing, siding, windows, doors, gutters and insulation. We support our veterans and communities by supporting local and national charitable organizations through our Home Genius Cares initiative. With an Owens Corning® Platinum Preferred designation, we also offer flexible payment options, industry leading warranties and a wide range of premium products tailored for your home. It’s time for a different experience, entrust your next home project to a genius and schedule your free inspection today!
DePalma Roofing
(717) 638-1131 depalmaconstruction.com
Serving
5.0 from 92 reviews
DePalma Roofing, your dependable roofing contractor, is poised at 5241 Simpson Ferry Road in Mechanicsburg, Pennsylvania. With unwavering dedication and expertise, their team stands ready to address any roofing need you may have. From consultations and inspections to repairs, replacements, and installations, our commitment to excellence and customer satisfaction shines through in every project we undertake. Contact us via our website, or give us a call for an unparalleled roofing experience that's tailored just for you.

Dreamworx Roofing
(717) 444-8714 dreamworxexteriors.com
Serving
4.9 from 442 reviews
Servicing the Central Pennsylvania area since 2015, Dreamworx Roofing set out to redefine what people have come to expect from a roofing company. With our commitment to providing the highest quality materials coupled with a customer service experience that is unparalleled in the industry, we believe every customer should feel like family. We have alligned ourselves with top manufacturers like Owens Corning and GAF to give a wide variety of options to suit any style and budget. Being an Owens Corning Platinum Preferred contractor means we are committed to the highest level of quality backed by one of the worlds largest roofing manufacturers.

TKO Roofing & Remodeling
Serving
4.7 from 12 reviews
Take Pride in Your Property SPRUCE IT UP BY HIRING A RELIABLE ROOFING COMPANY IN HARRISBURG, PA Property maintenance requires skill, patience and determination. Fortunately for you, the contractors at TKO Roofing and Remodeling, LLC possess those qualities and more. We’ll complete any size project to your high standards. From roof installation to gutter replacement, you can count on us to do what needs to be done with skill and precision. Entrust your project to a team of dedicated roofing contractors in Harrisburg, Pennsylvania. Call 814-418-1738 now for a free estimate.
Bitner Roofing
(717) 635-9215 www.bitnerroofingllc.com
Serving
4.2 from 6 reviews
Bitner Roofing, is a family owned and operated roofing and siding company. We offer free estimates and quick turn around services. Check out our sister company, Bitner Brothers Construction for your interior remodel needs. Visit our Kitchen and Bath showroom at 820 W. High Street Carlisle, PA 17013

Crain Roofing
(717) 574-2652 www.crainroofing.com
Serving
4.9 from 154 reviews
Crain Roofing, established in 1984, is a trusted roofing and siding contractor based in Mechanicsburg, PA. We specialize in providing top quality roofing and siding solutions tailored to meet the unique needs of our customers. Known for our commitment to excellence, we use premium materials, industry-leading techniques, and a customer-focused approach to ensure every project is completed on time and within budget. Whether you need a roof replacement, repair, or siding upgrade, Crain Roofing delivers durability, style, and peace of mind for your home.
Equity Roofing
(717) 629-0392 equityroofs.com
Serving
4.9 from 115 reviews
Equity Roofing is a trusted residential roofing contractor, located in Harrisburg, and serving the surrounding Central Pennsylvania communities. We specialize in full roof replacements, storm damage roof repairs, roof inspections, and Owens Corning roofing systems backed by industry-leading warranties. Whether you're dealing with a leaking roof, hail damage, or planning a full roofing upgrade, our experienced team delivers reliable, high-quality service from start to finish. If you're searching for a dependable roofing contractor, Equity Roofing is ready to help protect your home or business. We are proudly serving Harrisburg, Marysville, Hummelstown, Camp Hill, Mechanicsburg, Enola, Lemoyne, Carlisle, Hershey, and Middletown, Pa.
TJ's Shingles
Serving
4.9 from 68 reviews
When it comes to ensuring the safety and appearance of your home, look no further than the experienced roofing contractors at TJ’s Shingles. We’ve been providing quality roofing services to Central, PA residents since 2012 and have established a reputation as one of Central PA’s go-to roofing companies. Our team is honored to provide this critical service which ensures local homeowners with both peace of mind and a beautiful home. TJ’s Shingles is also a proud CertainTeed Master Shingle Applicator, Certified Weather Stopper Roofing Contractor for GAF, and holds an A+ rating from the BBB.
Hartz Roofing
(717) 889-6594 www.doughartz.com
Serving
5.0 from 11 reviews
We specialize in all phases of: Tear Off and Replacement of: Shingles, Rubber, Slate, Wooden Shakes, Repairs and all other Roofing needs, We also do Roof Coatings, Install Gutter and Downspouts and Gutter Cleaning. We have been in Business for 35+ years. We guarantee all work we perform.
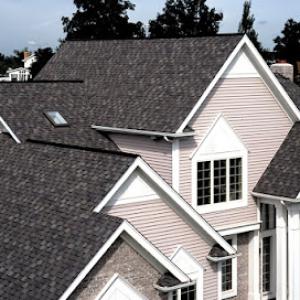
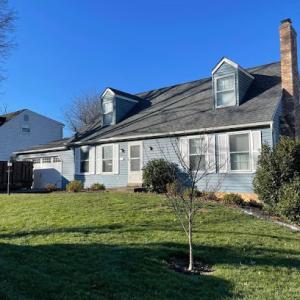
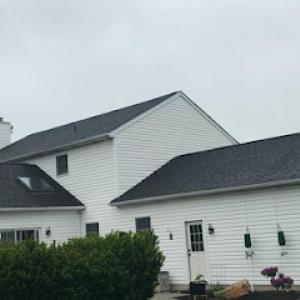
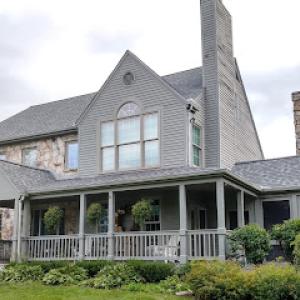
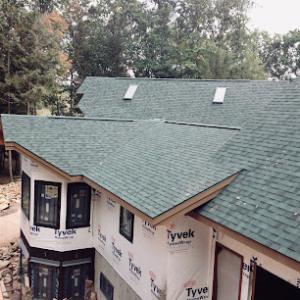
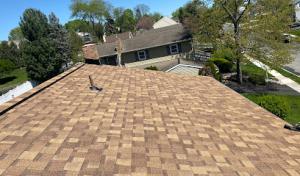
Asphalt shingles dominate the housing mix in this borough, and for good reason. They fit the common detached homes found along the West Shore and align well with neighborhood aesthetics. On aging roofs exposed to freeze-thaw cycles, humidity, and storm-driven winds, asphalt provides reliable sealing at a reasonable replacement cadence. When installed with vented soffits and a solid underlayment, they resist ice damming better than some lighter options, and the overall maintenance footprint remains manageable for typical Camp Hill households. Look for a mid-range bundle of shingles with laminated architecture for improved wind resistance and better performance during winter thaws and rapid temperature swings. In practical terms, this means choosing products with good manufacturer warranties and a sturdy warranty that covers wind uplift and algae resistance, along with proper attic ventilation to minimize condensation under the deck.
Metal stands out as a meaningful upgrade option for homeowners who want superior snow shedding and stronger resistance to recurring wind and hail exposure. In areas where winter storms push heavy, compact snow against eave edges, metal's slick surface helps the ice slide away rather than back up toward the fascia. Metal also tends to maintain performance longer in climate patterns that swing from hot Susquehanna Valley summers to cold, windy seasons. If choosing metal, ensure the roof deck and framing are sound enough to carry the load, and verify that snow guards or diverters are installed where shown to manage drifting. A proper installation-especially around chimneys, skylights, and roof penetrations-prevents leaks that can mimic the kind of storm-related wear that recurs after hail events. This option can be a smart investment for homes facing frequent freeze-thaw cycles and gusty winds, provided the house structure and detailing are ready for a different profile and weight.
Clay and concrete tile do appear in this market, offering distinct curb appeal and long service life when conditions are right. However, these materials demand careful structural and detailing review on older homes that populate the borough. The typical Camp Hill roof in a long-standing neighborhood may not have been designed for the heavier tile loads, and retrofitting may involve reinforcing rafters, upgrading fasteners, and reworking edge details to handle the weight and wind exposure. Before committing to tile, have a qualified roofer assess roof framing, attic ventilation, and the potential for ice damming at eaves and valleys. In homes where the roof structure supports tile, these materials can deliver excellent longevity and a refined texture that ages gracefully alongside mature neighborhoods. For most detached houses with standard framing, asphalt or metal will usually deliver a more predictable balance of performance and ease of maintenance.
Regardless of the primary roofing material, edge details and ventilation drive long-term performance in this market. Proper drip edges, snow guards where necessary, and well-ventilated attics help manage condensation and reduce the risk of ice damming during freeze-thaw cycles. In homes with aging sheathing or older attic space, prioritize improving ventilation to maintain roof integrity through hot summers and cold winters. When planning a replacement, ask for a moisture survey of the deck and a careful assessment of penetrations and flashing around chimneys and skylights. These targeted checks save hassle during storms and late-season freezes, supporting a durable roof that stands up to Camp Hill's distinctive climate and housing stock.
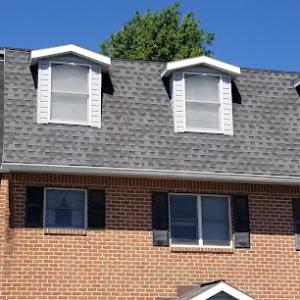
In Camp Hill, your roof replacement plan should account for a mix of older homes with steeper residential rooflines and detail-heavy penetrations that can push labor beyond simple ranch-style tear-offs. Edge details, proper ventilation, and flashing around chimneys, skylights, and dormers often drive crew time and material waste if not prepped properly. The result is a replacement that lasts longer when installation is careful and tailored to historic or semi-custom trim work.
Cost ranges reflect the local mix of materials. Asphalt shingles sit in a practical middle ground, with costs typically around 450 to 750 USD per square, depending on underlayment and attic ventilation needs. Metal roofing runs higher, generally 700 to 1300 USD per square, driven by panel profiles and the extra fastening work needed on steeper slopes. Clay and concrete tiles push higher still, often 1000 to 1800 USD per square for clay and 800 to 1300 USD for concrete, especially when roof geometry or access complicates haul-off and setting. Wood shingles and synthetic/composite shingles fall between the low and high ranges, reflecting labor variation with removal and substrate work.
Spring or fall replacement windows are recommended to avoid the borough's winter freeze-thaw cycles and midsummer heat and humidity that can slow crews. Choosing a windowed season minimizes temperature-related shingle handling problems and reduces the likelihood of weather-driven delays. Scheduling during this quieter shoulder season also increases the chance your preferred crew is available, which helps with edge detail work and penetrations that require meticulous sealing.
Planning should recognize storm-driven demand spikes across the Harrisburg-West Shore. After a regional wind or hail event, scheduling can tighten and pricing can shift higher as crews stretch to accommodate urgent repairs and full replacements. If you must replace after a storm, secure a firm start date and a tight sequence plan to avoid lag in critical edge flashing and attic venting installations.
Budget thoughtfully for an aging West Shore roof. If your home features steep pitches, heavy penetrations, or a heritage-style fascia, expect labor to influence the final cost more than straightforward ranch design. A well-timed, seasonally chosen replacement with careful detailing reduces the risk of early edge failures and ice damming in subsequent winters.
Don't let upfront costs delay a critical repair - these contractors offer payment plans to fit your budget.
Topp Home: Roofing, Solar Panels, Windows & Doors
(717) 895-8893 www.mytopphome.com
1521 Cedar Cliff Dr # 101, Camp Hill, Pennsylvania
5.0 from 122 reviews


A full roof replacement in Camp Hill typically requires a building permit through the borough before work begins. Before scheduling any roof crew, you should contact the borough's building department to confirm the exact documentation needed, which typically includes project plans, contractor disclosures, and the proposed work timeline. Because this area experiences freeze-thaw cycles and storm-driven winds, the permit review may focus on how edge details, venting, flashing, and underlayment will be upgraded to meet current standards. Prepare to provide details about venting improvements and underlayment type to avoid delays once the crew arrives. The permit process is not a box to check and forget; it signals to the borough that the project intends to meet modern performance criteria rather than simply replacing aging materials.
Camp Hill's review may trigger required updates to venting, flashing details, and underlayment standards rather than allowing a like-for-like replacement with outdated assemblies. Expect questions about attic ventilation balance to prevent ice damming and attic moisture buildup, particularly in older homes with limited retrofits. The flashing around chimneys, skylights, valleys, and roof-to-wall intersections should be designed to resist wind-driven rain and ice movement. Underlayment choices should align with local conditions, offering a robust barrier against vapor intrusion and temperature swings. If the borough requests changes, coordinate these details with your contractor and the permit reviewer early to avoid rework later in the project.
Inspections are commonly scheduled during the job and again at completion, with final approval needed before the project is considered cleared by the borough. The mid-project inspection commonly checks material installation accuracy, flashing integration, and ventilation installation, ensuring temporary protections are in place during any remaining work. The final inspection confirms that all permit conditions are satisfied and the roof installation addresses observed weather vulnerabilities-such as proper edge detailing to guard against wind uplift and proper ice dam mitigation measures. Schedule these inspections in collaboration with the contractor, keeping the borough's clock in mind during cold snaps or storm fronts, when contingencies may slow progress. Once the final sign-off is recorded, the project is officially cleared and the new roof can be trusted to perform through Camp Hill's seasonal extremes.
Evidence from local insurer activity shows claims in this area are driven more by wind and hail than by statewide pullbacks or coastal storm exclusions. Storm-driven damage tends to show up first on edge details, in gaps around dormers, and along the eaves where the roof meets the wall. A practical approach is to inspect after each major storm, especially when trees and hailmark reports appear in the neighborhood. That early check helps separate wind-driven damage from latent wear and makes a smoother path for any claim.
Local insurers commonly want project documentation including roof age records and pre- and post-work photos for Camp Hill claims and replacements. Keep a labeled folder of photos that show both the overall roof and close-ups of problem areas, plus dated notes from inspections. Store roofing invoices and any contractor assessments in the same place. A simple, organized record set can shorten approvals and reduce back-and-forth when an adjuster reviews the work.
Adjusters in this region may request inspections before and after installation, so homeowners should document damage immediately after Cumberland County storm events. If a shingle loss or gutter damage is visible, photograph it within 24 hours and note the weather conditions and date. When planning replacement, arrange a pre-install inspection with the insurer if possible, and schedule a post-install review to confirm that all edge details, ventilation, and flashing were completed to endure the freeze-thaw cycle and wind-driven impacts typical of this area.
Connect with contractors who help homeowners navigate the claims process from damage assessment to final approval.

Camp Hill replacements are best timed for milder spring and fall conditions because winter snow and ice complicate tear-offs and summer humidity can affect crew pace and material handling. Opening during these shoulder seasons minimizes the risk of weather-driven delays, keeps underlayment and decking drier, and helps the crew maintain a steady pace without heat- or cold-related slowdowns. Plan ahead for a stretch of dry, moderate weather so you can complete ventilation work, edge detailing, and flashing without rushing.
Heavy rain and high winds during spring and summer storm periods can interrupt installation sequences and leave exposed decking vulnerable if scheduling is too aggressive. If a storm front rolls in mid-project, shingles and underlayment can be damaged or displaced, increasing the chance of leaks before the roof is sealed. Build a weather buffer into your project timeline and coordinate with your contractor to adjust in advance when forecasts show multiple storm days in a row.
Emergency leak response is especially important in winter when ice damming at eaves can quickly turn a minor edge problem into interior ceiling damage. If freezing precipitation is forecast, ensure the crew has a plan to address potential ice dams, manage heated attic ventilation, and secure tarps or temporary coverings to protect living spaces. A winter-tight crew with a clear contingency plan can prevent cascading damage from a small leak turning into a costly interior repair.
When choosing dates, align roofing work with clear forecasts a few weeks out, prioritize milder days for interior protection and attic vent checks, and avoid back-to-back heat spikes or heavy rains. If timing slips, maintain open lines with the contractor for rapid rescheduling to preserve deck integrity and prevent edge failures.
Call ahead to confirm a contingency plan for rain or snow, ensure debris containment is ready, and designate a secure, sheltered staging area for materials. Have a plan for rapid leak mitigation if a sudden thaw or storm brings in melting or wind-driven damage.
When you can't wait, these contractors offer fast response times to stop leaks and prevent further damage.
In this market, quick response isn't enough if the crew doesn't manage the tear-off safely. You want explicit confirmation that the contractor will protect adjacent finishes, protect landscaping, and contain debris during removal, then perform a thorough cleanup and a final inspection closeout. Edge details matter here, where wind-driven rain and hail can loosen shingles and expose vulnerable underlayment. Ask for a concrete plan that names who does the tear-off, who covers drip-edge and ridge-vent protection, and who returns for a final walk-through to confirm everything is sealed and protected after the job.
The Camp Hill scene hosts both long-standing local shops and manufacturer-certified crews. That distinction can matter when warranty support is needed on asphalt or metal systems years down the line. A firm with certified installation credentials tends to align with product-guided ventilation and proper nailing patterns, which helps resist ice damming and freeze-thaw wear typical in West Shore neighborhoods. When you're comparing bids, note whether the contractor references specific manufacturers and their certification requirements, not just general "approved methods."
Because the borough's permit and inspection cadence pushes projects through a predictable process, you benefit from a contractor who routinely works in Camp Hill and can navigate borough approvals, storm documentation, and neighborhood-sensitive cleanup. Ask for a project calendar that shows coordination steps with the borough, a plan for storm-season contingencies, and a neighbor-friendly cleanup approach (hoses, tarps, and street-level protection). A crew that has established routines for driveways and curb appeal reduces the risk of complaints and delays during storm season.
Contract language should clearly spell out milestones: protection setup, tear-off, new material installation, ventilation considerations, edge detailing, and a final inspection with the homeowner present. In older borough blocks, the peak concern is preserving siding and soffits while re-roofing. Ensure your agreement names who conducts the final inspection closeout, how punch-list items are handled, and what constitutes completion in your street-specific context.