Last updated: Apr 19, 2026
Portland's most disruptive roofing risk is spring hail and wind storms that can create sudden shingle loss, lifted flashing, and active leaks. The moment a storm passes, inspect from the ground for missing shingles, lifted edges, or a flashing seam that looks peeled away. If you hear banging, tapping, or see water dripping inside after a storm, treat it as active damage until proven otherwise. Stay off a wet roof, and avoid stepping on soft or creased areas that could fail. These events don't just chip granules; they can expose the underlayment and deck to rapid moisture infiltration, accelerating rot, mold, and interior staining.
After hail or wind, a prompt, thorough inspection is essential. In Portland, the local insurance environment is shaped by Tennessee storm claims, so photo documentation, date-stamped damage records, and quick inspections carry real weight with adjusters. Take wide shots of the roof from multiple angles, then close-ups of damaged shingles, flashing, valleys, vent stacks, and the chimney chase. Capture gutters, downspouts, and any signs of water intrusion on interior ceilings or walls. Create a simple damage scrapbook: date-stamped photos, a list of observed issues, and notes on the weather conditions at the time of the storm. If there are trees or utility lines near the structure, document potential risk those pose to future damage during additional storms. Keep all receipts and appointment confirmations tidy so you can reference them during the claim process.
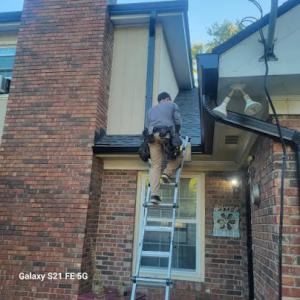
Because quick-response and storm-damage service are highly prevalent among Portland-area contractors, emergency tarping and rapid leak stabilization are a major part of the local roofing market. If there is active leaking or standing rainwater entering living spaces, prioritize tarping to keep water away from interiors. A roof tarp should cover the exposed roof area and extend over the gutter line to shed water away from the home. Secure tarps firmly and periodically recheck their condition during spring storms. If you cannot safely reach the roof, place buckets or containers under leaks indoors and seal interior gaps with towels or plastic sheeting to limit further damage while you arrange professional help. Prompt stabilization buys time for a proper assessment and reduces the risk of secondary damage that can complicate claims.
A trusted Portland-area roofer who understands spring storm patterns will perform a careful inspection for wind lift, hail impact, and flashing integrity. Look for crews who offer rapid response, on-site senior techs, and a documented plan for temporary stabilization followed by a detailed, written assessment. A prompt professional visit helps determine whether a full roof repair or replacement is warranted, and it supports a smoother insurance discussion by providing a clear timeline and observed damage. If decking shows soft spots or there are signs of moisture behind shingles, seek an immediate evaluation to prevent further structural risk.
Once the initial damage is addressed, set a plan to monitor for hidden issues that storms often reveal days or weeks later. Keep an eye on interior ceilings after heavy rains and inspect attic insulation for moisture intrusion. Schedule a follow-up inspection with your roofer to verify that flashing, ventilation, and drainage components remain secure as winds shift in late spring. Maintain a simple, organized file of all storm-related communications, photos, and repair notes so when the next hail event arrives, your documentation is ready to support a swift, accurate claim and an efficient restoration.
Conyer Roofing & Exteriors
(615) 802-1032 www.conyerroofingandexteriors.com
2002 New Deal Potts Rd, Portland, Tennessee
4.9 from 163 reviews
Conyer Roofing and Exteriors is a GAF Master Elite® contractor specializing in residential & commercial roofing, siding, windows, gutters, and custom porches & patio covers.
Ultimate Solution Roofing & Exteriors
(615) 389-7792 www.ultimatesolutionroofing.com
122 Irish Oaks Dr, Portland, Tennessee
4.9 from 8 reviews
Ultimate Solution Roofing and Exteriors wants to help you find the ultimate solution for your home! For over 10 years we have proudly served middle TN. Ultimate Solution Roofing and Exteriors is licensed, bonded, and insured. We have experience in residential and commercial roofing as well as a number of specialty roofing systems, repairs, gutter, and siding solutions.
Permadex
399 Woods Rd, Portland, Tennessee
5.0 from 7 reviews
We specialize in waterproofing rooftop decks and patios and offer a industry leading warranty.

DryTight Roofing
(615) 540-5050 drytightroofing.com
Serving
5.0 from 51 reviews
DryTight Roofing is a licensed & insured Tennessee general contractor proudly serving the Robertson, Sumner, & Davidson counties. We specialize in providing top quality roof replacements, roof repairs, gutters, siding, and attic insulation. We commonly repair and replace roofs from storm damage and regularly work with homeowners insurance companies. Atlas is our trusted shingle and roofing material supplier, however we can offer other materials upon customer requests. 10-Year Workmanship Warranty & 15-Year Material Warranty with all new full roof replacements! Call or check out our website to easily schedule a free inspection including complimentary photos and videos. We look forward to serving you!
Roof Squirrel
(844) 679-7663 roofsquirrel.com
Serving
5.0 from 33 reviews
Over 25 years experience in both commercial roofing / restoration industry, residential roofing/restoration, catastrophic storm adjusting, and a network that extends from coast to coast. We have developed an expert skillset to accurately create multiple assessments, and build reports specificly pertaining to conditions of catastrophic weather losses. Licensed Bonded Insured in multiple states Multiple Certifications are directly tied to Roofing, restoration, mitigation, and. Emergency services. My certifications pertaining to the insurance claims adjusting industry are strictly used for personal knowledge and understanding the policy and procedures.
Right On Roofing & Restoration
(615) 927-0016 www.rightonroofingllc.com
Serving
5.0 from 57 reviews
Protect your largest investment with our reliable roofing services. Right on Roofing And Restoration, LLC is a locally owned and operated roofing company currently serving All Middle Tennessee. We offer roofing services including installation, replacement, and repair. In addition, we also provide free damage assessment, gutter and downspout services, and pressure washing.

4 Square Roofing
(615) 582-1639 4squareroofing.org
Serving
4.8 from 149 reviews
Established in 2018, 4 Square Roofing is a top-rated Gallatin roofing contractor servicing the Greater Nashville area. Specializing in residential and commercial roofing we provide a comprehensive range of roofing services that include; new roof installation, roof replacement, roof repair, roof inspection, flat roof coatings, and metal roof installation. Committed to providing the highest-quality roofing solutions, 4 Square Roofing guarantees its work to last a lifetime.
4 Elements Renovations
(615) 855-7240 4elementsrenovations.com
Serving
5.0 from 162 reviews
At 4 Elements Renovations, we deliver professional roofing you can rely on. We specialize in full roof replacements, roof repairs, storm damage restoration, and free roof inspections — all with honest pricing, clear communication, and a lifetime workmanship warranty on our labor. We are a licensed, bonded, and insured roofing contractor, and we work directly with homeowners to make the process simple, including support with insurance claims for storm-related roof damage. Why homeowners choose 4 Elements Renovations: -BBB accredited, local, and trusted -Licensed, bonded, and insured roofing company -Fast, professional roof repairs and full roof replacements -Storm and insurance claim specialists — we guide you through the claim process -P...
Red Letter Roofing
(615) 733-9487 redletterroofers.com
Serving
5.0 from 82 reviews
We are a full service, locally and family owned roofing and gutter company operating throughout Middle Tennessee. We specialize in storm damage repair and replacement and we look forward to serving you

Grace Roofing Group
(615) 927-0703 www.graceroofinggroup.com
Serving
5.0 from 4 reviews
Grace Roofing Group is a 5 star and A+ BBB rating company. We are locally owned but also service Georgia. As a company we strive to hold to our standards, by offering excellent service, products and loyalty. We look forward to helping you with any of your roofing needs.
Rainwater Roofing & Exteriors
Serving
5.0 from 6 reviews
Rainwater Roofing is a licensed, insured and bonded general contractor located in Sumner County and servicing the greater Nashville area. Rainwater Roofing has experience installing, repairing and maintaining all types of roofs and roofing materials. We are able to help customers navigate roof damage insurance claims as well as any property damage resulting from roof damage. We also have crews who specialize in gutter, window, and siding installation and repairs. Rainwater Roofing is your one stop shop for all things exterior!
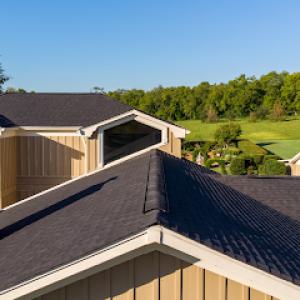
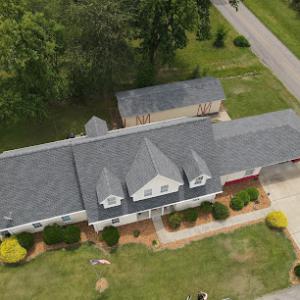
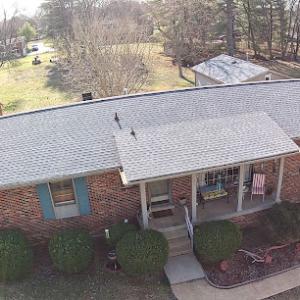
In Portland, spring storms and hot summers shape roof performance. Asphalt shingles are common on many local homes, but the combination of heat, humidity, and spring hail can accelerate granule loss, curling, and underlayment aging. When you're assessing shingles after a storm, look for lifted tabs, exposed nails, and granules in gutters. If you spot minor curling along the eaves, schedule a closer inspection before winter winds pick up. A practical approach is to pair shingles with a well-sealed, ventilation-friendly attic and a solid underlayment to buy time against moisture intrusion. Consistent maintenance after heavy rain or hail helps catch edge damage before it becomes a water entry point.
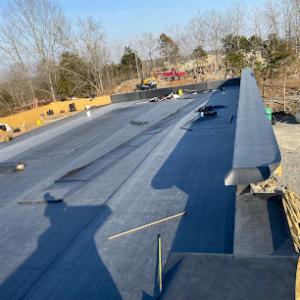
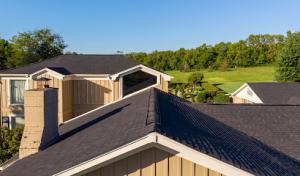
Metal roofing has strong local relevance in the contractor market and is often considered for better performance against repeated thunderstorm exposure. If you're weighing metal, you'll notice quicker shedding of rain and hail compared to composition shingles, which helps with quick drying and reduced interior moisture risk. Look for a standing-seam profile or concealed fasteners, and confirm that fasteners are properly sealed to prevent leaks during quick, heavy downpours. In this climate, the color choice can influence heat reflection and attic load, so pick a finish that minimizes cooling demand without sacrificing longevity. Regular inspections after storms should focus on edge details where panels meet flashing and where tree debris can trap moisture.
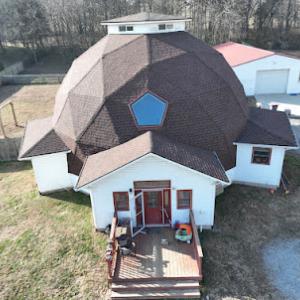
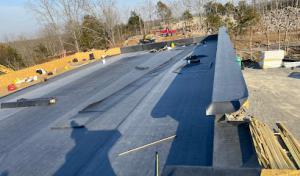
Heavy materials listed for the market such as clay tile, concrete tile, and slate require attention to structure, flashing, and drainage because inspections review those details closely. These materials demand a sturdy deck and accurate rafter spacing to resist wind uplift, especially during strong spring winds. Pay attention to install details around chimneys, vents, and dormers, where misalignment or inadequate flashing can hide water intrusion. Drainage must be deliberate: ensure proper slope, unobstructed gutters, and clean outlets to avoid ponding that can undermine the roof's edge over time. If your home has a stucco or masonry facade, coordinate flashing with exterior walls to prevent moisture from migrating behind the coping or eaves. Regular checkups after hail events are crucial, since any impact damage on heavy tiles can propagate cracks under freeze-thaw cycles.
Explore specialists in steel, aluminum, and standing seam metal roofs built to last 50 years or more.
Conyer Roofing & Exteriors
(615) 802-1032 www.conyerroofingandexteriors.com
2002 New Deal Potts Rd, Portland, Tennessee
4.9 from 163 reviews

When you price a replacement, compare the local ranges directly: asphalt shingles from 350 to 650 USD per square, metal from 700 to 1100, clay tile from 900 to 1500, concrete tile from 800 to 1400, wood shingles or shakes from 500 to 900, and slate from 1200 to 2000 per square. These numbers reflect a Portland spring pattern that blends hail risk with the need for careful flashing, ventilation, and drainage work. If your home has a steeper pitch, complex ridge lines, or an older deck and fascia, expect the upper end of these bands to show up more often. Use these brackets to sanity-check bids and avoid sticker shock after a storm.
Spring hail and high-wind events in this area routinely compress scheduling windows. After a heavy hail day, crews swing from routine maintenance to urgent replacement work, and prices for rush jobs can climb. If you're weighing options, plan for a few weeks of variability in availability and be ready with a preferred contractor and a backup. Storm spikes don't just affect timing; they can ripple into labor pricing and the ability to secure materials in a timely fashion. Knowing this in advance helps you avoid last-minute decisions that might force you into higher-cost choices or lower-quality components.
After a wind or hail event, insurance claims often hinge on clearly documented damage and a thorough scope of work. Expect to collect photos of hail impacts, wind-damaged areas, and any interior leaks that prompted the claim. When bidding, ask contractors to itemize flashing, ventilation, and drainage corrections as separate line items. The price bands above assume that the project includes proper flashing replacement, vent flashing adjustments, and verified drainage improvements. If a bid omits these details, you may see a lower quote that won't cover the necessary corrective work. Remember to compare not just the bottom line, but the completeness and clarity of each proposal.
Start with a marker of your roof's square count and pitch to translate bids into per-square costs consistently. Request at least three written, itemized bids and verify each one covers material choice, underlayment, fasteners, flashing, venting, and drainage corrections. If you've had a recent storm, ask for a storm-response timeline and a contingency for temporary protection if weather delays are expected. Finally, keep a weather eye on material availability; Portland's storm season can tighten supply chains quickly, nudging both timelines and prices upward.
A full roof replacement in Portland typically requires a permit rather than being treated as informal maintenance. That permit signals a city check on work scope, structural impact, and safety steps, especially after a spring storm season when damage can mask itself behind old underlayment. If a contractor suggests "just a quick patch," pause and verify whether a complete reroof is truly needed or if the project crosses the threshold into new construction for code purposes. The permit is not a nuisance-it's a guardrail that helps ensure flashing, ventilation, and drainage systems are installed to withstand the local spring hail and high-wind events. Manage expectations early, because a permit triggers timeframes and documentation that ripple into insurance and scheduling.
Portland requires inspections at key milestones, with the inspector reviewing flashing, ventilation, and drainage rather than only the finished surface. The first milestone typically happens before shingles or metal are set, to confirm deck integrity, underlayment, and proper roof-to-wall connections. A mid-process inspection may verify the placement and attachment of new flashing around chimneys, vents, and skylights, as well as attic ventilation rates and intake/exhaust balance. A final inspection confirms the completed surface and drainage adequacy, ensuring gutters, downspouts, and scuppers are aligned to handle heavy spring runoff. Skipping a milestone can delay permits and complicate insurance claims after a storm event, so coordinate with the contractor to schedule these checks promptly.
Plans and elevations may be reviewed in Portland for code compliance, which matters more when the project changes roof geometry or uses heavier systems. If a roof replacement involves changing pitch, adding a dormer, or upgrading to a heavier metal or tile system, expect the plans to be scrutinized for load paths, fascia support, and edge details. This step protects against surprises that could derail a claim after wind or hail damage, and it ensures that the new geometry will drain properly and work with existing drainage routes. Work with a licensed contractor who understands how local setbacks, vent locations, and flashing details interact with permit review and insurance documentation.
In a Tennessee storm-claim environment, hail and wind losses are common enough to affect underwriting, roof-age scrutiny, and claim handling. When spring hail thunders across the region, insurers pay closer attention to how a roof was prepared, how old it is, and whether prior repairs or patches align with expected durability. A roof that looks weathered or patched in ways that don't meet typical installation standards can drive closer inspection and higher scrutiny during a claim. The consequence is that the timing and success of an insurance resolution may hinge on how thoroughly damage is documented and how clearly the roof's condition is portrayed at the moment of loss.
Insurers serving homeowners in Portland often want detailed damage documentation and may question older roofs or installations that do not appear code-compliant. After a storm, your file should tell a straightforward, photo-supported story: hail impact, wind-driven lifting, granule loss, and any leaks. Include dates, the scope of visible damage, and contrast with prior photos when possible. If a roof has newer flashings, ventilation components, or drainage improvements, those details can influence assessments, so keep a clear record of what was installed and when. A well-organized dossier helps prevent delays caused by ambiguity or assumptions about the roof's age and condition.
Because local inspections emphasize flashing, ventilation, and drainage, homeowners should keep permit and inspection records to support future claims. Photos of flashing seams, vent boot repairs, underlayment exposure, and gutter connections matter, especially if a claim hinges on a premium feature or a recent upgrade. When a storm damages the roof, insurer reviewers will look for evidence that drainage paths are intact and that ventilation remains adequate to prevent moisture buildup. Maintaining a file of professional assessments and any corrective work related to these components can streamline the claim process.
After a storm, you should not delay a careful assessment of both the visible surface and the roof's key systems. Photograph all sides, note date and weather conditions, and capture close-ups of potential leaks and damaged flashings. Schedule a prompt, skilled inspection, prioritizing areas around hips, valleys, and eaves where damage often appears first. If damage is found, document it with dated notes and keep every related receipt or report. When communicating with the insurer, present a concise timeline of events, linked photos, and notes on any pre-existing issues that might affect the claim. This approach protects the claim narrative and supports how the roof was managed through the storm cycle.
Connect with contractors who help homeowners navigate the claims process from damage assessment to final approval.
Conyer Roofing & Exteriors
(615) 802-1032 www.conyerroofingandexteriors.com
2002 New Deal Potts Rd, Portland, Tennessee
4.9 from 163 reviews
Here in Portland, hot summers can speed up aging in shingles and underlayment, which means you'll notice wear or creeping leaks sooner than you expect if a roof sits through peak heat. The sun's glare on a dark roof can push surface temperatures well above comfort levels, accelerating granule loss on asphalt and softening underlayment where ages already show. In practical terms, expect more early-morning or late-evening inspections to confirm the roof's condition after a heat spike, and plan for ventilation checks that specifically test for adequate airflow to keep attic temperatures from compounding existing damage. If summer weather triggers complaints, address them promptly to prevent small issues from becoming widespread leaks.
Humidity in Portland can worsen moisture-related roof and attic issues when ventilation is weak, which is especially relevant because city inspections review ventilation. A drying-wet cycle in the attic can lead to a musty smell, condensation on sheathing, or rust on metal components even if the exterior looks intact. Prioritize attic ventilation that moves air effectively: ensure soffit intake and ridge or roof vents are unobstructed, and consider upgrading to balanced ventilation if you notice persistent humidity. Regular checks after rain events help identify whether condensation or damp spots are occurring near penetrations or along the eaves, where humidity tends to linger. Clear, unobstructed paths for air can make a surprising difference in the roof's long-term health.
Fall rainfall in Portland can delay tear-off and dry-in schedules, so homeowners planning non-emergency replacement should account for weather-related rescheduling. The transition from warm, dry days to gray, wet weeks often compresses crews' calendars and increases the risk of projects getting bogged down mid-canopy. Build contingencies into your planning for days when rain is forecast or when the wind shifts and gusts approach your area. Proactively coordinating with your contractor about interior protection, tarping, and temporary leaks can reduce stress once the wet season begins, and ensures the project resumes smoothly when drier days return.
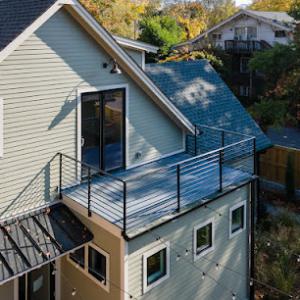
Metal roofing is one of the clearest specialty concentrations in the Portland market, making it a realistic upgrade path rather than a niche option. In this climate, metal panels or standing-seam systems stand up to spring hail, summer heat, and storm-driven wind better than many alternatives. You can expect longer service life, predictable performance with proper installation, and a look that suits both newer and older homes in town. When weighing profiles, focus on panel type, color-fast coatings, and how the system integrates with existing flashing and drainage where a retrofit is most common.
Warranty messaging has meaningful presence among Portland contractors, which matters in a market where storm exposure and heat can test both materials and workmanship. Read the fine print for material, finish, and workmanship coverage, and note any exclusions tied to installation technique or chronic exposure to heat. The best warranties specify both roof material and installation labor, with clearly defined claim paths for leaks or coating degradation after hail events or high-wind episodes. In this market, a warranty that survives weathered flashings and thermal cycling is the most practical.
Homeowners should compare warranty promises against installation quality on flashing, ventilation, and drainage because those are inspection-reviewed details locally. A metal roof that protects the interior only if the underlayment and flashing are correctly vented and sealed will perform as intended. Ask for documentation showing how flashing transitions were sealed at penetrations, how vents are coordinated with the metal system, and how the drainage plan accommodates heavy spring storms. In Portland, the durability of the roof hinges on attention to these integration points during installation.
Start by verifying a contractor's track record with metal and standing-seam systems, including recent storm-repair work. Request sample warranty language and the installer's workmanship guarantee. Have the installer walk you through the flashing, ventilation, and drainage plan, highlighting inspection checkpoints for the first year. This approach helps ensure the upgrade delivers both real protection and solid long-term coverage.
Explore specialists in steel, aluminum, and standing seam metal roofs built to last 50 years or more.
Conyer Roofing & Exteriors
(615) 802-1032 www.conyerroofingandexteriors.com
2002 New Deal Potts Rd, Portland, Tennessee
4.9 from 163 reviews