Last updated: Apr 19, 2026
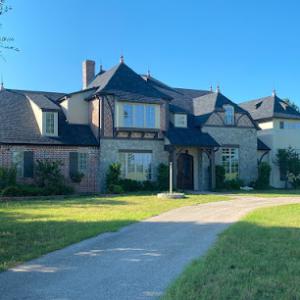
Spring hail slams the North Texas corridor, and the local roofing market in this area sees a sharp spike in storm-damage and insurance-claim work after each round. Shingle granules fill gutters, hail dents on vents and edge metal accumulate, and the blue sky can quickly turn to a pressure-packed roof-repair window. When a major storm rolls through, properties in the neighborhood can face rapid deterioration from wind-driven hail exposure, and the need to move quickly becomes not just about saving cosmetic damage but protecting structural integrity and attic dryness. If a storm just hit, you are likely looking at a narrow window to validate damage, document it, and begin a claim-based repair to avoid delay-driven compromises.
The demand surge after a major hail event means local crews get booked fast, and scheduling delays can cascade through the project timeline. Temporary dry-in-especially during spring and early summer when heat and wind stress roofs-matters as much as the replacement itself. In this market, inspections often happen in the wake of the same storm events, so multiple homes on the same block chase the same contractor slots. As a result, even a roof with clear hail dents can stall if an insurer's adjuster isn't aligned with the contractor's production schedule. Understanding this rhythm and planning ahead-book early after a storm, confirm the dry-in materials and color selection, and lock in a replacement window-can prevent long exposure to sun and rain that accelerates interior damage.
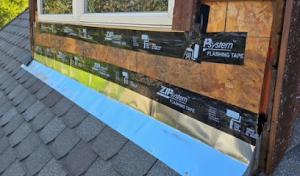
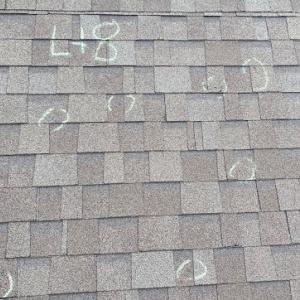
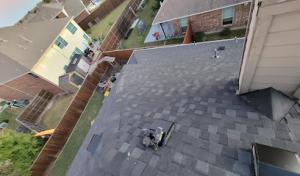
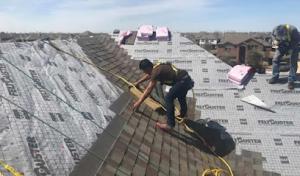
After a hail event, the first action is a careful, methodical assessment. Look for dented asphalt shingles, cracked or curled edges, and disturbed flashing around chimneys and vents. Metal components such as gutters and vent caps often suffer high-impact damage that isn't immediately obvious from ground level. Photograph everything at multiple angles, including close-ups of damaged shingles and wide shots of the entire roof. Create a simple, dated damage log and keep it accessible for the claim process. When chasing restoration, avoid accepting the first offer or settling for a rushed replacement. A thorough assessment now can prevent backtracking later when temporary dry-in conditions shift or material lead times stretch.
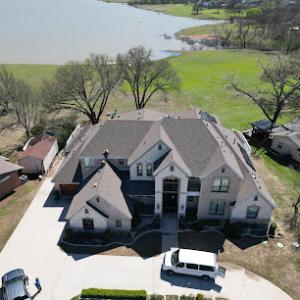
In Little Elm, where many homes share similar roof types and ages, a storm can trigger a neighborhood-wide surge in claim activity. Coordination matters: align your communication channels with your insurer, your preferred roofing contractor, and the adjuster's schedule. If a storm arrives during spring, expect the fastest turnaround when you have clear documentation ready, a pre-arranged dry-in plan, and a credited contractor prepared to move quickly from inspection to replacement. Delays in one step ripple across the project, affecting not just your roof but the attic and insulation as well, so maintain steady follow-up and concrete milestones with all parties involved.
If hail damage is suspected, initiate a documented inspection within days of the storm, capture clear photos, and keep a running log of decisions. Schedule a coordination call with your insurer and a licensed contractor to align on dry-in timing, material readiness, and the sequencing of steps to completion. In this high-demand environment, proactive, organized action reduces risk, shortens exposure to the elements, and helps ensure a smoother, faster path from damage acknowledgment to full roof replacement.
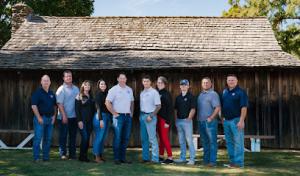
Invictus Roofing & Construction
(469) 649-0288 www.invictusroofing.com
2103 E Eldorado Pkwy #200, Little Elm, Texas
4.9 from 134 reviews
Protect Your Investment with the Best in Commercial, Multifamily and Residential Roofing. Choose Invictus Roofing and Construction for unmatched quality and reliability. As the leading commercial roofing company in Dallas and nationwide, we are committed to excellence in every project. Whether you need a free assessment or an annual maintenance program, our team of experts is here to provide the solutions you need. Serving Commercial and Multifamily nationwide. Serving residential in the DFW area.
Uptown Roofing Systems & Construction
(940) 279-2451 myuptownroof.com
1012 W Eldorado Pkwy #891, Little Elm, Texas
5.0 from 85 reviews
Uptown Roofing Systems & Construction is a locally owned Commercial and Residential Roofing & Remodeling company serving Dallas, Houston, San Antonio, Austin & surrounding communities. We offer Affordable & Reliable Roofing, Remodeling & Construction Services. At Uptown Roofing Systems & Construction, our number one priority is to go the extra mile to make sure that our clients are completely satisfied. We are fully prepared to tackle your most complex projects by offering an installation team with extensive residential and commercial roofing & construction experience. Our goal is to become your preferred Roofing & Construction Company in the DFW area & surrounding communities.
Szott's Roofing
2701 Little Elm Pkwy Ste 100-431, Little Elm, Texas
5.0 from 85 reviews
ONLINE ESTIMATES at Szott's Roofing Little Elm, TX specializes in the best local residential roofing and full insurance claim restoration. From full roofing claims to retail roofing we are serving Frisco, Prosper, Aubrey, Crossroads, Providence Village, Sanger, Celina, Little Elm and all of Denton County. Szott's Roofing is fully insured, family-owned, registered, factory certified, warrantied, Google & Yelp guaranteed. Owens Corning Preferred, CertainTeed Shingle Masters, Atlas Pro+. Residential roofing, free roof inspection, roof repairs, temporary tarps, or complete roofing systems. Total home restoration services. Insurance claim navigation, Roofing, ventilation, gutters, fence, pergola, drywall, window repair and installation services.
JaM Roofing & Construction
Little Elm, Texas
5.0 from 35 reviews
We stand for quality, and we'll never settle for anything less than the absolute best when it comes to taking care of your roof and home. We approach every project with this exact mindset because Jam Roofing & Construction believes that "good enough" doesn't cut it. Our team is trained in the latest technologies and techniques and is equipped with the best products on the market. Whether you need a brand new roof system installed, or you simply need repairs and general maintenance because of daily wear-and-tear or due to a storm, you can count on Jam Roofing & Construction every time!
Royalty Roofing
(214) 449-6299 www.royaltyroofingtx.com
533 Calliopsis St, Little Elm, Texas
4.9 from 17 reviews
Welcome to Royalty Roofing, where every roof is crowned with quality and precision. With a legacy of exceptional service, we're more than just roofing experts – we're your partners in protecting and enhancing your home. Our team is dedicated to delivering top-tier solutions that combine beauty and durability, ensuring your peace of mind for years to come. 🔨 From meticulous installations to expert repairs, we take pride in our attention to detail and commitment to excellence. 💼 Our customer-focused approach goes beyond roofs – it's about creating a regal experience for every client we serve. Royalty Roofing - Protecting Your Castle
New View Roofing - James Cornhoff
1600 Serra Dr, Little Elm, Texas
4.8 from 13 reviews
Locally owned and operated, 10+ years of roofing and insurance claim experience. Trust James Cornhoff with replacing the roof over your head, managing your insurance claim, and quickly resolving your roofing needs. Available to help 24/7.

VIP General Contractors
Serving
4.9 from 62 reviews
VIP General Contractors is a top-rated local provider of roofing services, custom home builds, home remodeling, and storm restoration. Specializing in both residential roofing and commercial roofing, we handle everything from roof repairs to complete roof replacements with high-quality materials. Our team also excels in general contracting, offering comprehensive services such as kitchen and bathroom remodels, custom home construction, and storm damage restoration. With a reputation for superior craftsmanship and customer satisfaction, we’re your trusted partner for all roofing and construction needs. Contact us today for a free consultation or roof inspection! Available 24 hours for emergency response: roof, mitigation, water, fire
Clear Vision Construction
(972) 839-0407 www.clearvisionroofing.com
Serving
5.0 from 109 reviews
At Clear Vision Construction we are: - Specialized: We have an insurance claims specialist on staff. - Family owned and operated: We'll treat you like you're part of the family. - Highly experienced: We have more than 20 years of experience. - Reliable: We back up all our work with lifetime labor warranties. - Dedicated: We automatically upgrade all shingles and replace all soft metals. Discover why residents in the DFW Metroplex prefer working with our roofing company.

Elevated Roofing
(469) 305-0010 elevatedroofing.com
Serving
4.9 from 1058 reviews
Elevated Roofing is a premier Frisco roofing contractor and that provides residential and commercial roofing services to the Dallas and Fort Worth areas. We provide roof inspections, maintenance, roof repairs, hail and storm damage repairs and roof replacements. Our roof projects are completed using the finest materials available in the industry and are backed by our warranty. We also work with major insurance companies and can assist you with the insurance claims process. With over 20 years experience, we proudly deliver quality, reliable and cost-effective roofing and solar roofing services to protect your property and investment. Request a free, no-obligation roof inspection today: (469) 804-6910. Building the Kingdom One Roof at a Time.
Rowley Roofing & Construction
(972) 668-0919 rowleyroofing.com
Serving
4.9 from 28 reviews
Rowley Roofing & Construction was established in 2009 to provide dependable services for your residential and commercial roofing in the DFW Metroplex. Our veteran-owned roofing company is fully insured for your safety and peace of mind regarding your home and business. We specialize in high-quality roofing materials and craftsmanship for an affordable price. We have proudly served our clients with an A+ rating with the BBB for over a decade. Whether you have sustained storm damage, have a new construction project or your property is in need of a facelift, our team is ready to meet your needs. Call us today for a free estimate!
Freeman Roofing & Construction/ Freeman Patio & Fence
(972) 632-6182 www.natefreemanconstruction.com
Serving
4.9 from 46 reviews
Over 35 Years & 2nd Generation Experienced!

Status Roofing
(469) 424-4623 www.statusroofingllc.com
Serving
5.0 from 194 reviews
Status Roofing, located in Frisco, TX, is a trusted residential and commercial roofing contractor specializing in roof installations, repairs, and replacements. Our team of experienced professionals offers free roof estimates and expert services, including roof leak repairs, inspections, and shingle replacements. They are an A-rated, accredited business with the Better Business Bureau (BBB) and a member of the Roofing Contractors Association of Texas, and licensed in Oklahoma with a focus on quality workmanship, superior customer service, and competitive pricing. Status Roofing is your go-to for all your roofing needs. Elevate the status of your property with us today.
In this market, claims happen fast after spring hail and summer wind events, and adjusters are accustomed to North Texas storms stacking up. Insurers commonly expect before-and-after photos, contractor estimates, and detailed storm damage descriptions to support the loss claim. The goal is to present a clear, multi-angle record so the recovery timeline stays closer to actual roof condition rather than an estimate based on memory. Since claim volume can slow response times, having collateral indicators documented around the property right after severe weather helps keep the process moving.
Take time-stamped photos from multiple angles for the roof, gutters, attic, and exterior walls. Start with wide shots of the entire roof and gradually zoom into suspect areas such as hail impact marks on shingles, dented metal fasteners, and granule loss in gutters. Capture close-ups of any dented vent stacks, skylights, or flashing. If there is interior water intrusion, photograph ceiling stains, attic insulation condition, and visible moisture near vents or penetrations. Establish a consistent sequence so an adjuster can follow the progression from intact to damaged. In Little Elm, this evidence is especially valuable when the storm produced a mix of hail and wind damage, which adjusters scrutinize for topology and wind-driven misalignment.
Create concise, objective damage notes that reference exact locations (e.g., "south-facing 3-tab asphalt shingle with hail pitting near the ridge line," or "aluminum fascia shows compression dents"). Note material types and visible wear that might affect coverage decisions. Include dates of the weather event, approximate wind speeds if known, and any prior repairs observed during the inspection. A well-documented narrative helps an adjuster separate cosmetic wear from warrantable hail damage and sets a baseline for estimating the scope of repair or replacement.
Collect a written estimate from a licensed contractor that details scope, materials, and labor. The estimate should reference the same damage indicators shown in the photos and correspond to the observed roof area. If possible, obtain estimates from at least two local roofers who understand common Little Elm roofing assemblies and weather-related vulnerabilities. Ensure each estimate includes a line-by-line breakdown, typical warranty terms, and the expected timeline for material delivery and installation. This alignment between photos, notes, and estimates minimizes back-and-forth with adjusters and supports a smoother claim review.
Assemble a complete packet: damage description, photo sequence, and the contractor estimates, plus any prior related repairs that might influence coverage decisions. Organize the packet so the most severe damage and the strongest photos appear first, followed by supporting notes and estimates. Include a simple index or cover page listing what each item represents. In a high-volume market, a neat, easy-to-navigate packet reduces the time an adjuster spends locating key details and helps push the claim toward a timely resolution.
Document collateral indicators around the property immediately after severe weather. Photograph nearby fences, soffits, and neighboring structures for context, and note ground-level evidence of hail impact like dented wind-driven debris, damaged air conditioning units, or dented gutters. These observations can corroborate the storm's intensity and help justify the scope of roof-related claims when the weather pattern involved multiple homes in the neighborhood. In practice, this speeds up the adjuster's understanding of the event and supports a quicker path to replacement or repair decisions.
Connect with contractors who help homeowners navigate the claims process from damage assessment to final approval.

Invictus Roofing & Construction
(469) 649-0288 www.invictusroofing.com
2103 E Eldorado Pkwy #200, Little Elm, Texas
4.9 from 134 reviews
Uptown Roofing Systems & Construction
(940) 279-2451 myuptownroof.com
1012 W Eldorado Pkwy #891, Little Elm, Texas
5.0 from 85 reviews
Szott's Roofing
2701 Little Elm Pkwy Ste 100-431, Little Elm, Texas
5.0 from 85 reviews
A full re-roof in this area typically requires a permit through the Town of Little Elm Building Department. The permit ensures that weather-related work follows current codes and passes required inspections, which is especially important after spring hail events and in the fast-paced lake-area neighborhoods. The process is straightforward, but timing matters: obtaining the permit before work starts helps avoid delays or non-compliance notices during the Town's permit checks.
In Little Elm, the permit can be pursued by either the contractor or the homeowner. If the contractor handles the paperwork, make sure you have a clear agreement in writing about who is responsible for order of operations, inspection scheduling, and any revisions that arise from the Building Department's feedback. If you prefer to apply yourself, gather the project details, contractor information, and any required disclosures in advance. Having an assigned point of contact on the project helps keep the permit timeline predictable, which is critical after a hail event when crews are in high demand.
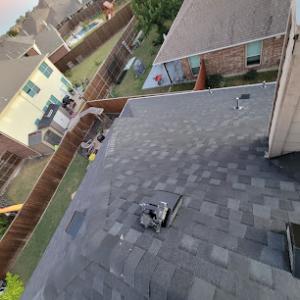
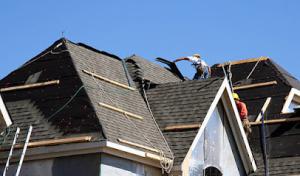
Inspections occur at staged points during installation, with a final inspection required before the permit can be closed. Typical milestones align with roof tear-off and deck inspection, underlayment and ventilation checks, and final finish work. Plan for these checks to occur on different days, and factor in weather windows that might push the schedule. Being ready for each inspector-having the correct access, materials, and documentation on site-helps keep the project moving rather than stalling at a late stage.
The Town may request ventilation verification, attic access verification, and in some cases energy-code compliance documentation during the roofing permit process. Ventilation checks ensure adequate soffit and ridge venting are in place for attic moisture control, which is important in the attic spaces commonly found in Little Elm homes. Attic access verification confirms that entry points for inspection are unobstructed and safe. Energy-code documentation may be requested to confirm that the roof assembly and attic insulation meet current efficiency standards. Having these items prepared and organized ahead of time reduces the chance of permit delays or compliance questions.
Coordinate carefully with local storm recovery timelines so that inspections aren't rushed or skipped. If hail damage is evident, document it thoroughly for the permit file, but avoid starting major work before the permit is clearly issued. Building Department staff respond to weather-driven surge periods, so expect potential backlogs after spring storms. A well-documented submittal package and a reachable point of contact for the crew can help inspections stay on track and the project stay compliant from first tear-off through final clearance.
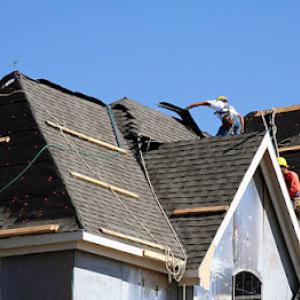
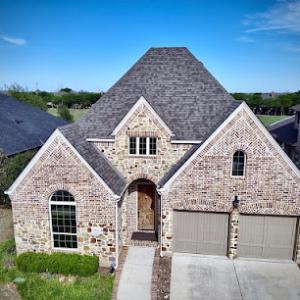
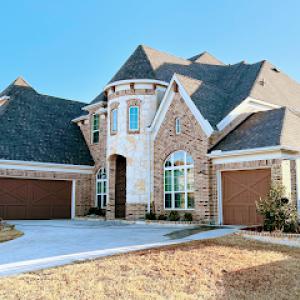
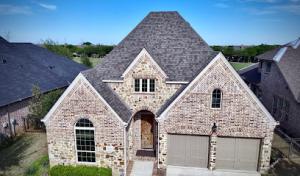
Asphalt shingles dominate replacement projects in this area because they fit the large re-roof market and are commonly selected after hail claims. In newer neighborhoods and higher-end homes, the local material mix shows up in steeper or more design-specific roof systems, with metal, clay tile, concrete tile, synthetic/composite, and slate appearing alongside asphalt. The choice is rarely about one-size-fits-all aesthetics; it hinges on how the roof handles spring hail, the demands of hot Texan summers, and how a roof breathes during long heat waves.
Heat performance is a real consideration here. Long, hot summers push attic temperatures up, so ventilation and attic sealing matter as much as the shingles themselves. Asphalt shingles with reflective coatings or proper attic vents can help reduce heat transfer, while metal, concrete tile, or slate offer distinct advantages in certain designs or climates but require careful attic detailing and underlayment to prevent heat-related issues. Impact resistance matters after hail, so many homeowners prioritize shingles and underlayment rated for impact. For steeper or more intricate rooflines common in newer subdivisions, select materials that tolerate wind uplift and maintain their performance under rapid temperature swings.
Spring storms and seasonal hail events drive the recovery timeline in Little Elm. When hail damage is suspected, roofers will perform a careful inspection of shingles, flashing, and ventilation systems, documenting denting, granule loss, and any compromised underlayment. The best approach is to coordinate with a local roofer early in the post-storm window to prevent further damage from leaks and to align with any insurance claim timelines. Keep a detailed log of damage, photos from different angles, and notes of any prior repairs. This documentation supports a smoother claim process and helps ensure that the eventual roof replacement aligns with the home's design and performance requirements, especially for homes with unique roof shapes or higher-end materials.
In this market, spring hail and North Texas storm patterns drive sharp swings in labor availability and crew schedules. After a major hail event, crews can be booked weeks out, and prices can jump as demand tightens. Homeowners who react quickly-without waiting for a lull in the storm queue-tend to keep repair timelines shorter and reduce the risk of prolonged exposure to weather. Plan for a window of higher pricing if a recent hail event is fresh in the area, and build contingency time into your project timeline so weather, inspections, and crew routing don't derail a timely replacement.
The local mix runs from common asphalt systems to tile, metal, synthetic, and even slate, which means replacement costs can swing widely. Asphalt shingles sit at the lower end of the scale, while metal and tile options push higher, and slate can be significantly more expensive still. When Little Elm sees rapid demand after a storm, the availability of preferred materials can shift, and lead times may affect both price and selection. You'll notice the cost differences most clearly when you compare per-square figures for the same home size, so have a rough target in mind for your preferred material before speaking with contractors. The typical cost spectrum you'll see includes asphalt shingles in the mid-range, metal in the upper-mid, and tile or slate stretching toward the higher end, with synthetic/shingle composites offering a middle-to-upper range option depending on brand and profile.
Day-to-day budgeting benefits from concrete benchmarks. Asphalt shingles commonly fall around the mid-cost range, with metal rising above asphalt as a durable choice for Texas heat and hail exposure. Clay and concrete tiles, while elegant and long-lasting, carry a higher installed price. Synthetic or composite shingles often sit between asphalt and higher-end tiles, providing a compromise on durability and cost. For planning, the regional range you'll encounter aligns with widely published replacement cost bands, but expect variability when a storm surge strains supply or when crews prioritize larger projects over smaller repairs.
When you're starting, align your expectations with the square-based pricing that many Little Elm projects use. Costs are typically reported per roofing square (100 square feet). A practical approach is to gather three local quotes that break out material, underlayment, and labor, then compare how each line item shifts as you switch materials. If you're weighing metal or tile versus asphalt, map out a scenario for a typical 1,500 to 2,000 square foot roof to see how the per-square delta compounds at scale. In a market teeming with storm-driven demand, timing your decision and material choice in parallel helps lock in pricing and reduce surprises when crews arrive.
Don't let upfront costs delay a critical repair - these contractors offer payment plans to fit your budget.
Accent Roofing Company & Construction
(214) 937-9908 accentroofingcompany.com
Serving
5.0 from 21 reviews

Hot, dry summers in this lake-area corridor can turn a straightforward tear-off into a slow, careful operation. Large exposed roof planes bake under direct sun, making shingles and underlayment become pliable and more vulnerable to handling damage during peak heat. Expect crews to pace the install to avoid overheating drivers, nails, and sealants, which can stall progress from mid-morning to late afternoon. If timing aligns with a stretch of calmer wind and cooler mornings, that window becomes valuable for efficiency and quality. Plan for daily tasks to shift: deck-out, safety checks, and material staging should occur in the cooler early hours, with decisive work on the roof only when temperatures let materials lay flat and fasten cleanly. Delays you see during peak heat are not about workmanship-they're about protecting the new roof from heat-induced faults and premature weathering.
Cool autumn temperature shifts in North Texas can affect underlayment behavior and installation sequencing. Materials that depend on precise temperature ranges for adhesion may require extra attention as evening temps drop quickly. Expect crews to adjust adhesive and sealant timelines, especially on day 2 when re-seaming or flashings are being finalized. The goal is to avoid gaps or wrinkling in the underlayment caused by sudden cooling. If a front moves through and daytime highs dip, it's often wiser to pause non-critical tasks and complete intricate detailing on the following sunlit window rather than force a rushed finish. Clear communication about anticipated temperature-driven changes helps homeowners avoid surprises when the crew returns to complete final laps around vents, chimneys, and edge details.
Occasional winter storms in the area can delay access, tear-off, and inspection scheduling even though winter is not the primary storm season. Snow events or freezing rain can close roads, complicate material delivery, and postpone roof-top work. If a storm is forecast, expect a short-term pause to protect freshly installed decking and underlayment. When the sky clears, a swift recheck is prudent-wind-driven debris, ice dam risk, and suddenly cold conditions can impact fastener performance and shingle set. Planning for a flexible window helps ensure a solid install without sacrificing safety or long-term performance.
When you can't wait, these contractors offer fast response times to stop leaks and prevent further damage.
Szott's Roofing
2701 Little Elm Pkwy Ste 100-431, Little Elm, Texas
5.0 from 85 reviews

In North Texas storms, skylights become a recurring leak point after hail. Those glossy plastic or glass units sit near vents and rafters where a storm can exploit weak flashing. When inspectors come, expect them to lift shingles near skylights and check the metal flashing along the curb edge. Small punctures or lifted tabs around the skylight flange can hide moisture that later shows up as staining inside ceilings.
Town inspection attention to ventilation and attic access means a roof problem can be evaluated beyond the exterior surface alone. During a storm, trapped heat and condensed moisture press on roof joints. A quick look at the attic hatch, soffit vents, and ridge vent gives clues about airflow and potential mold or rot. If attic moisture is found, remedying it early saves bigger leaks later.
In a hail-heavy North Texas market, small punctures, lifted shingles, flashing displacement, and hidden attic moisture can be missed if the inspection focuses only on obvious shingle bruising. Ask the contractor to simulate rain on suspect seams, corners, and around skylights. Look for damp insulation in the attic, musty odors, or staining near wall penetrations.
In the spring hail cycle around the lake, moisture can travel from the attic to ceiling boards without obvious exterior damage. Keep a dated record of any interior staining, musty smells, or warped drywall you notice after a storm. Take photos of attic vents, insulation, and any dislodged flashing you observe from inside the attic and from the roof line. When a contractor or adjuster arrives, present that documentation to help match storm impact to the repair plan, and don't rely on surface shingle condition alone. Weathered vents, rusted flashings, and sagging gutters can amplify leaks once the attic is compromised. Address these early to avoid cascading interior damage later.
Find contractors experienced in skylight installation, flashing, and leak repairs to bring natural light into your home.
Szott's Roofing
2701 Little Elm Pkwy Ste 100-431, Little Elm, Texas
5.0 from 85 reviews