Last updated: Apr 19, 2026
The spring hail, severe thunderstorms, and tropical weather that sweep through Brazoria County create a high-stakes window for homeowners. When a storm hits, a small roofing issue can become a full interior leak in hours, especially with wind-driven rain pushing through weak points and prolonged wet spells. The urgency here is tied to the Gulf Coast setting and the way storm systems roll across the Houston metro corridor, where quick deterioration can catch you off guard. Manvel sits in Brazoria County within that storm corridor, where spring hail, severe thunderstorms, and tropical weather can turn a small roof issue into an interior leak quickly. In such conditions, early action is not optional-it is protective.
In this market, many neighborhoods rise and develop on similar basic rooflines, so a single storm can reveal widespread vulnerabilities across blocks. After a major event, roof damage isn't always obvious from the ground-low-lying runoff and wind-driven rain expose flashing, ridge caps, and valley failures long before shingles visibly lift. The combination of a newer-growth residential pattern and dense housing means insurance activity surges, with neighbors reporting leaks, shingle anomalies, and water intrusion at the same time. The consequence is a surge in claim activity, tarping requests, and the need for clear, rapid documentation so an adjuster can see the full scope while weather holds. Being prepared means recognizing that the first responders to a storm are your roof, your tarps, and your documentation-not the phone call that comes later.
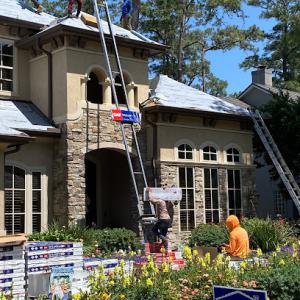
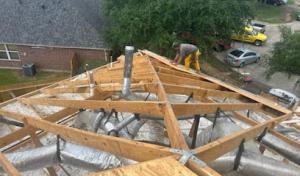
After a storm, your priority is to stop the leak from progressing. Inspect carefully for signs of moisture near ceilings, walls, and attic access points, but avoid wandering into a soaked attic without stepping carefully; hidden insulation saturation can be risky. If you see active dripping, feel a rush of wind-driven rain around penetrations, or notice staining spreading outward from soffits or chimney flashing, assume water is moving inward and respond promptly. Small roof issues in Manvel can rapidly become larger problems because of the long, unsettled, moisture-laden periods that follow a storm. Use a flashlight to trace drips to their source and photograph from multiple angles, especially around flashing details at valleys, dormers, and where roof meets siding.
In neighborhoods with clustered homes, tarping demand can spike as insurers and public adjusters converge after a storm. If a tarp is required, prioritize secure anchoring and edge protection to minimize wind lift. Do not attempt risky repairs yourself in gusty conditions; instead, set up tarps to cover exposed roof sections and protect interior spaces. Safety comes first: keep children and pets away from work areas, and avoid walking on compromised roof sections. A well-placed tarp buys time, reduces interior damage, and helps you maintain leverage when coordinating with the adjuster and contractor.
Storms that trigger neighborhood-wide inspections also heighten the need for timely, precise documentation. Gather all relevant information: photos of the roof from multiple angles, attic moisture observations, date-stamped weather reports, and a clear list of affected interior rooms. When talking with the insurer, be explicit about the sequence of events-when the leak started, how it progressed, and what areas were impacted. Clear, organized documentation shortens the path from claim to repair and helps ensure the response matches the true extent of the damage, not just the most visible symptoms.
Total Max Roofing
6925 Masters #922, Manvel, Texas
5.0 from 13 reviews
Free Roof inspections / insurance claim specialist
KGM Roofing
10213 Gracie Ln, Manvel, Texas
5.0 from 5 reviews
Local roofing contractor for over 25 years. Serving all Houston & surrounding cities. Family owned, competitive prices.
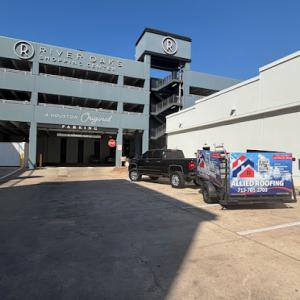
Allied Roofing
(713) 701-2703 alliedroofingtx.com
Serving
5.0 from 64 reviews
Allied Roofing offers expert roof repair, replacement, inspection, restoration, and washing services across Houston and surrounding areas.
Knight Roofing General Contractors
(832) 427-0970 knightroofing.org
Serving
5.0 from 43 reviews
We are a trusted residential roofing contractor serving Houston and the surrounding areas. Our team specializes in roof replacements, roof repairs, and storm-related hail damage for homeowners across Houston, Katy, Cypress, Sugar Land, Pearland, Pasadena, and The Woodlands. We work directly with insurance companies to help homeowners navigate the roof insurance claim process and ensure proper coverage after storms. From minor roof repairs to full roof replacements, we use high-quality materials built for Texas weather and provide clear communication from inspection to completion. If you’re looking for a reliable roofing company in Houston that puts homeowners first, contact us today for a professional roof inspection.
Gulf-Tex Roofing & Services
(281) 406-8791 www.gulftexroofs.com
Serving
5.0 from 60 reviews
Commercial & Residential Roofing Experts. Flat roofs and sloped roofs, we service them all. We have trained technicians for each and every type of roof system. Our services include everything from repairs to total roof replacements. Let us put our experience to work for you.
Black Coast Roofing
(832) 930-9863 www.blackcoastroofing.com
Serving
5.0 from 29 reviews
Black Coast Roofing is Fort Bend County’s trusted roofing company, specializing in residential and commercial roofing services. We handle everything from roof repairs and replacements to emergency storm damage response and insurance claim assistance. Our experienced team ensures a seamless process, working directly with your insurance provider to maximize your claim. Plus, we offer in-house financing, allowing you to get prequalified before reaching out—making your roofing project stress-free and affordable. Fully insured and committed to quality craftsmanship, Black Coast Roofing delivers reliable, long-lasting roofing solutions. Contact us today for a free consultation!
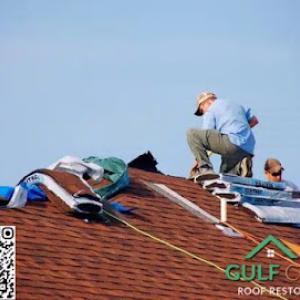
Gulf Coast Roof Restoration
Serving
5.0 from 18 reviews
We are Houston's best roofing company! Are you in need of a new roof for your home or want to restore it to new like condition? Let us help you decide with a FREE inspection report, assessment,. and estimate to determine you do or do not. Our roof restoration and rejuvenation is a safe, easy, proven and affordable alternative to a complicated, expensive and life-disrupting asphalt roof replacement. Roof Maxx is an environmentally-friendly plant-based oil which replenishes the asphalt petroleum-based oil and restores the flexibility in your shingles allowing them to shrink in cold weather and grow in hot weather. This helps prevent future cracking and becoming brittle.
Williams Family Roofing & Remodeling
(254) 605-6300 williamsroofing.site
Serving
4.8 from 69 reviews
Our Roofing Services for Pearland: Emergency Hail Damage Repair: Restoring areas impacted by hail. Shingle Replacement: Renewing damaged shingles. Storm Damage Repair: Fixing damages caused by storms. Structural Repair: Repairing structural weaknesses in the roof. Re-roofing: Layering new roofing materials atop old ones...
Alliance Roofing Company
(281) 485-8755 www.allianceroofinghouston.com
Serving
4.7 from 93 reviews
Residential & Commercial Roofing Contractor serving Metro Houston area since 1990. Other services offered: Hardie-Siding & Painting, Window Replacement, Gutters,
Randal's Roofing
(713) 487-9110 www.randalsroofing.com
Serving
5.0 from 80 reviews
Randal's Roofing specializes in affordable roofing and remodeling services, delivering top-notch craftsmanship and customer satisfaction. With over 20 years of industry expertise, we transform homes with quality solutions tailored to your needs. Contact us for a consultation today!
Shield Roofing Systems
(281) 241-7663 shieldroofers.com
Serving
5.0 from 75 reviews
Shield Roofing Systems is a Veteran Owned and Operated Company that serves the Houston area and beyond. We offer residential roofing, commercial roofing, storm damage repair, gutter services, and many more. We value the same things our customers value, Quality Materials, Selfless Service, Respect, and Honesty. Our crews are hand-selected and managed by experienced project managers to ensure that the job is done to a ridiculous standard. We believe our customers deserve the best the industry has to offer without being gouged. Contact your reliable roofing company in Houston today for a free estimate!
Exchange Roofing
Serving
5.0 from 16 reviews
We focus in completing all your roof needs. Roof replacement? Roof repair? We Got It. Call us for a free quote!
In Manvel, roof work is handled through the City of Manvel building permitting process rather than an unincorporated county-only system, so homeowners need to confirm city jurisdiction before work starts. Before any shingle lift or decking repair begins, you should call the city's permitting desk or check the online portal to verify that your address falls under city oversight rather than a county pathway. This matters because the required forms, plan review expectations, and inspection scheduling can differ between jurisdictions, even for the same roof scope. If the contractor suggests you can skip city review because it's "just a patch," push back and confirm in writing that the project will be filed with the city's permit office.
As a fast-growing city, permit oversight is tied to broader residential development controls, making permit closure and inspection sign-off important when selling or refinancing newer homes. You must clarify with the permit office early whether the project is treated as a repair or as a full re-roof. A repair designation can limit the paperwork and inspections, while a full re-roof typically triggers a more detailed plan review, a materials schedule, and multiple inspections. The distinction will show up on the permit application and in the inspection log, so ensure your contractor documents the expected scope clearly. If the scope shifts mid-project from repair to full replacement, re-check the permit path and schedule accordingly so you don't end up with an open permit on a new roof.
Start by confirming jurisdiction and the correct permit type for your project. Gather basic information about the existing roof: dimensions, structure type, leak history, and the proposed material list. Submit a permit application with required drawings or product specifications if the city requires them for a full re-roof; a simple repair may need less documentation but still requires a basic scope. After submission, you'll receive an issued permit number and an inspection schedule window. Expect at least one initial inspection to verify decking and underlayment, followed by a mid-project check if the project is categorized as a full re-roof, and a final inspection once the roof is complete. Make sure the contractor signs off on all city-required paperwork and keeps copies for your records. Permit cards should be posted visibly on-site until inspection is complete.
Permit closure and inspection sign-off are central when selling or refinancing newer homes because lenders and title companies want a clean, city-approved record that the roof work met code standards at completion. Track each inspection date, the inspector's notes, and any required corrections. If a deficiency is found, address it promptly and obtain a re-inspection to avoid delays in closing. When the project includes a new attic venting layout, flashing details, or wind-rated components, the final inspection will confirm these elements meet current code and city-specific requirements. Keep all permit-related documents, inspection reports, and final sign-off notices together in a file for the closing process. This organized record helps prevent last-minute surprises during appraisal or loan underwriting.
Coordinate with the roofer to align the permit submission with the project timeline, especially during peak storm season when city intake can slow. If your home has limited access or a tight lot, request pre-inspection planning to minimize site visits. Always verify that the contractor's license and insurance are current with the city's records and that the company understands the nuances of local development controls. When in doubt, call the permit office with your project address to confirm the exact form set required and the anticipated inspection sequence.
In this area, storm activity from Gulf Coast systems tends to spike demand for roof work decisively after hail and high-wind events. Manvel sits between Houston-area labor markets and fast suburban expansion, so when a major storm hits, crews from a wider metro area converge, and scheduling can tighten quickly. That demand pulse nudges pricing upward during surge periods, even for straightforward repairs. You'll notice longer lead times for tear-off crews, more frequent material backorders, and higher temporary labor premiums if the weather pattern keeps storms rolling through multiple weeks. Planning ahead for a spring or early summer surge can help you avoid the worst of the bump in rates.
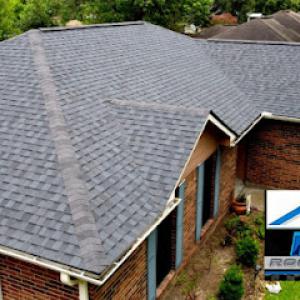
Many homes in the area sit in newer master-planned subdivisions with larger footprints and steeper front-facing rooflines. Those features aren't just about curb appeal; they shift the math on tear-off, staging, and material quantities. A broader expanse means more waste removal, more laddering, and more large bundles of shingles or metal accents to maneuver around. In practice, this pushes both labor time and material overhead higher than what you'd expect from an older, compact neighborhood. If your roof has a wide, complex surface, anticipate a bigger chunk of the estimate tied to debris management, ladder access, and crew setup.
Costs can also shift based on whether the project is a straightforward asphalt shingle replacement or involves metal accents, low-slope sections over patios, skylights, or insurance-required code-related upgrades. Asphalt shingles remain the baseline, with costs largely tied to square footage and labor hours. When metal accents are involved-ridge caps, decorative metalwork, or metal valleys-the price per square often climbs due to material complexity and installation time. Low-slope sections over patios require different equipment and sealing details, which adds to both material needs and labor. Skylights introduce penetrations that demand careful flashing and waterproof detailing, lifting the overall risk and the price tag. If an insurer flags code-related upgrades, those items can show up as mandatory add-ons that shift the bottom line upward, sometimes significantly.
Because Manvel's housing stock includes larger, more visible rooflines, your project will usually show higher per-square costs than a smaller home with a simple, conventional roof. Expect staging and access costs to appear in the later lines of the estimate when the crew has to maneuver around yard amenities, long eaves, and multiple angles. The insurance process often introduces timelines and scope nuances that influence pricing-particularly when temporary patches or rapid response options are requested to minimize interior damage. A practical approach is to align your bid with the most likely storm season, set aside a contingency for surge pricing, and be clear about whether upscale finishes or additional features are included in the scope.
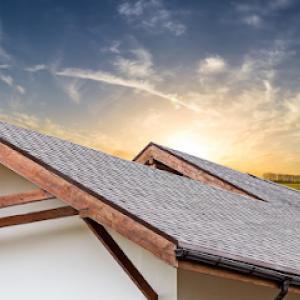
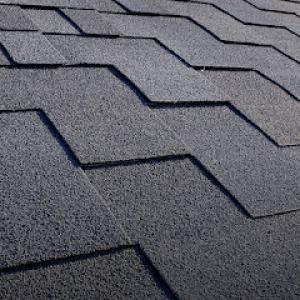
The most popular roofing material in the US. Find pros who install, repair, and replace asphalt shingles.
Williams Family Roofing & Remodeling
(254) 605-6300 williamsroofing.site
Serving
4.8 from 69 reviews
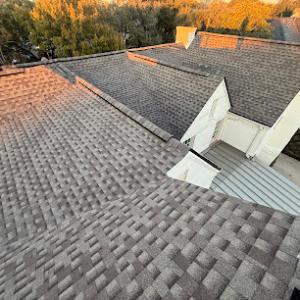
In Manvel's hot, humid Gulf Coast climate, asphalt shingles remain the practical default for many homes. They install quickly, handle typical summer storms, and pair well with the suburban rooflines common in newer neighborhoods. However, local realities show up in three recurring ways: algae staining that greens over time on north-facing or shaded sections, granule loss after hail events, and accelerated heat aging that can shorten their life after several summers of high UV exposure. If asphalt is your choice, look for reinforced or no-down-shake bundles, impact-resistant granular blends, and architectural profiles that help shed heavy rain quickly from near-vertical sections. Pay attention to overhangs and eaves; a well-vented attic and proper drip edge are essential to reduce heat buildup and slow water intrusion during intense Gulf storms. In areas with shading from trees, consider a shingle color that minimizes heat absorption while still hiding inevitable staining.
Metal roofing has local relevance because homeowners balancing storm resilience and long-term performance often compare it against standard shingle replacement in newer suburban neighborhoods. Metal sheets or standing-seam systems resist hail better than many asphalt configurations, and they typically shed wind-driven rain more efficiently once installed with proper fasteners and flashing. In practice, metal offers a useful upgrade when a home has a history of repeated hail exposure, or when you want a roof that preserves its appearance after heavy storms with minimal granule loss. The trade-off to plan for is installation detail: penetrations around chimneys, skylights, and vents require careful flashing to prevent leaks in heavy downpours. If your roof includes any slope transitions, or if a future re-roof might expose tall parapets or complex ridges, work with a contractor who can integrate a wind-rated metal system with the home's existing ventilation and attic space. The result should be a roof that remains durable under Gulf Coast winds and provides a clean, long-lived surface that resists staining and heat buildup.
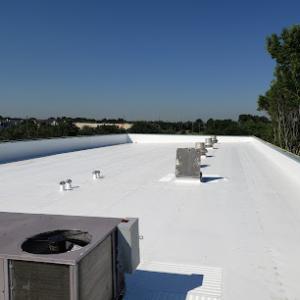
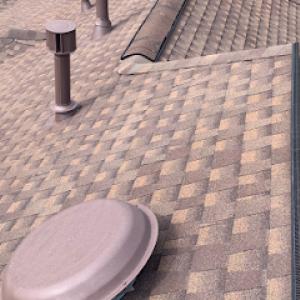
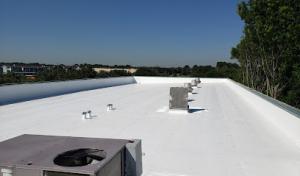
Some homes include low-slope sections, tile accents, or skylights that need different detailing than the main roof plane, especially where heavy rain runoff concentrates. Low-slope transitions demand careful flashing, uninterrupted drainage, and chosen membranes or flashing materials suited to Gulf Coast dynamics. Tile accents-whether clay, concrete, or decorative elements-need matching underlayment and edge detailing to prevent water tracking into the eave line or fascia during a downpour. Skylights introduce penetrations that require precise flashing and weatherproof sealants, plus panels with UV resistance to minimize heat transfer and glare. In practice, a thoughtful roof plan uses a cohesive transition approach: a single roof system that neatly channels water from tile or low-slope areas into the main drainage plan, with flashing that resizes appropriately at edges and cross-overs. For these features, prioritize experienced installers who understand how to blend aesthetics with waterproofing, ensuring that storms don't exploit weak seams or flashing gaps in these localized zones.
Manvel homeowners are operating in the broader Texas property-insurance environment, where storm losses across the Gulf Coast and Houston region have made roof age, documentation, and claim history more important. In neighborhoods recently hooked to a string of hailstorms, insurers are paying closer attention to how long a roof has stood up, what evidence is kept, and how past claims were handled. The goal for you is to keep a clear timeline of maintenance and events, so that any future evaluation can be anchored in verifiable history rather than memory.
Because local contractor signals show heavy insurance-claim activity, homeowners in Manvel should expect insurers to scrutinize storm date, photo evidence, and whether damage is functional or cosmetic. A dated photo set from immediately after a hail event can make a big difference, especially if shingles show unusual wear now or if there's a mismatch between shingles and flashing. Functional damage-loss of granules, compromised underlayment, or moisture in the attic-tends to carry more weight than cosmetic concerns when a claim is reviewed. Be prepared to demonstrate how the roof has performed since the storm and to distinguish what is truly needed for protection versus what is merely appearance-driven.
Prompt documentation matters in Manvel because clustered storm events can affect entire subdivisions, making it easier to establish a weather timeline but also increasing adjuster backlogs. When a neighborhood is hit by multiple storms in a short window, insurers may slow the processing pace or request additional verification. That means you should gather and organize your records early: photos before and after, notes on the date of each event, and any professional assessments you obtain. The objective is to prevent a delay from turning a legitimate claim into a protracted dispute, or a rushed, subpar repair that leaves you exposed to future weather.
Connect with contractors who help homeowners navigate the claims process from damage assessment to final approval.
In a market where many roofs are replaced after storms rather than at end-of-life, homeowners must clearly distinguish what the shingle brand covers versus what the contractor promises to stand behind. Manufacturer warranties typically address material defects and may require specific installation methods to remain valid. Contractor workmanship guarantees, if offered, cover the labor side-but those promises hinge on following the manufacturer's system requirements, not just picking a trusted brand. If a claim arises, you'll be comparing two layers of protection: a product warranty on the shingles and a workmanship warranty on the installation. Both must be honored for full post-storm peace of mind.
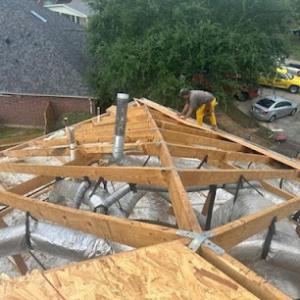
After a Gulf Coast hail event or high-wind downpour, crews move quickly through subdivisions with similar roof layouts. That speed can make important details easy to overlook: ventilation placement, flashing replacement, and cleanup quality. If attic or roof penetrations aren't properly vented, or if flashing isn't adequately integrated with the rest of the system, you may see leaks or moisture issues sooner rather than later. In practice, fast production should not mean compromised attention to these critical elements. A thorough inspection of intake and exhaust vents, drip edge, and step and base flashing is essential before finalizing any claim.
The true value of a warranty after a big storm isn't about how well-known the shingle name is. It hinges on whether the installer followed the manufacturer's system requirements during a high-volume season. installations that skip app-enabled sealants, improper nailing patterns, or non-conforming attic ventilation risk voiding coverage. In Manvel's humidity and storage conditions, a compliant, system-wide approach matters more for durability than the glitter of a well-advertised product. Ask for written verification that the contractor has adhered to the exact installation specifications, not only the shade or style of the shingles.