Last updated: Apr 19, 2026
Terrell sits in the Dallas-Fort Worth hail and wind claim zone, so spring thunderstorms are a primary trigger for sudden roof replacement decisions. A few minutes of hail can bruise every shingle edge, push moisture into already vulnerable seams, and set up a cascade of leaks that surfaces after the storm patrols have moved on. The urgency here is real: the best time to assess is within days of a storm, before interior damage compounds the cost and disruption. When a hail event hits, do not delay a careful roof check, because the longer the roof sits with unseen bruises, the more likely a minor repair becomes a full reroof later.
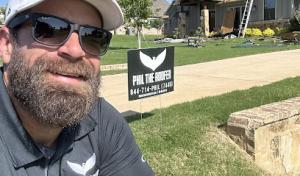
Triage begins at the first sign of trouble. If shingles show dimples, missing granules, or exposed underlayment, or if there are granules in the gutters, treat it as a damage signal rather than a cosmetic concern. In Cain County and the surrounding area, storm damage and insurance claims dominate the local contractor signal, and crews often slot emergency repairs into back-to-back jobs. Seek a contractor with a proven track record of storm response, rapid tarping if leaks are suspected, and a transparent how-and-when plan for assessment, documentation, and next steps. Document everything with photos from multiple angles, and keep a dated log of any rainfall that follows a storm; this helps establish a credible timeline for insurance review.
Post-storm recovery in this market hinges on prompt, accurate damage assessment. If a skylight, vent boot, or flashing shows signs of water intrusion, treat any dampness as an urgent warning, not a nuisance. A professional can determine whether the roof can be patched temporarily or requires a full replacement. In hail zones, it is common for hidden damage to exist behind the fascia and under shingles-areas that are exposed only after a careful, hands-on inspection. Expect that insurance-driven reroofing will be a central consideration, with adjusters closely reviewing granule loss, shingle fracture patterns, and the extent of edge damage. Clear, thorough documentation accelerates the claim and reduces the risk of disputes later on.
Autumn wind events introduce a secondary, persistent risk. Strong gusts in this part of North Texas can lift shingle edges and scatter debris, turning earlier hail bruising into active leaks as the weather shifts. The combination of high wind and lingering hail damage creates a fragile roof surface that can fail quickly under wind-driven rain. If a roof looks loose, edge lift is visible, or debris littering the gutters seems to be more than ordinary fall cleanup, anticipate a higher likelihood of urgent repair needs. Your triage plan should include securing the worst areas with tarps, staging a rapid roof assessment, and coordinating with a trusted local contractor who understands the seasonality of North Texas storms.
In this market, the right response is rapid, precise, and documented. A homeowner should know whom to call for immediate stabilization, what questions to ask during an inspection, and how to translate findings into an insurance claim path that minimizes downtime and disruption. The objective is to protect living spaces now and position the roof for a durable, storm-resilient outcome that can withstand the next round of spring squalls and autumn winds.
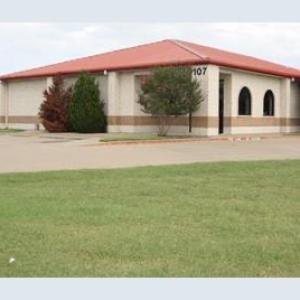
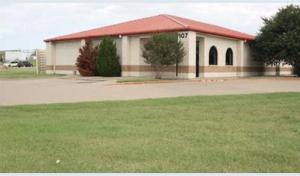
SCR, Inc. General Contractors
107 Tejas Dr, Terrell, Texas
4.9 from 90 reviews
SCR is a family-owned and managed general contracting firm with expertise in insurance recovery restoration, including wind, and hail, damage. We work only with the best in the industry. We've previously handled everything from roofing to remodeling and beyond, so let us provide you a free estimate for any of your insurance-related needs! Our team of former insurance experts is highly trained and knowledgeable about your coverage's rights and duties. We go to great lengths in selecting representatives that SCR has served thousands of delighted clients (commercial, industrial, and residential) on everything from tiny houses to multi-million dollar corporations since its inception in 1998.
MSM Construction & Roofing
(469) 222-0009 msmconstruction.com
Terrell, TX
5.0 from 46 reviews
IS YOUR ROOF IN GOOD CONDITION? A ROOFING CONTRACTOR CAN VISIT YOUR FORNEY OR CANTON TX PROPERTY TO FIND OUT How long has it been since you last had roof work done? If you're unsure, it could be time to call a roofing contractor.
Higher Roofing & Construction
(972) 885-7224 higherconstruction.com
14801 Co Rd 349, Terrell, Texas
5.0 from 43 reviews
Higher Roofing and Construction is a full-service roofing company that offers other complimentary services alongside roofing, such as gutters, siding, painting, and more. We pride ourselves in the highest standards of professionalism, workmanship, and customer relations. Our goal is to have customers for life. We are a certified roofing contractor with Owens Corning Corporation. We carry all of the necessary insurance and qualifications that a true roofing contractor should have. Call us today for a free inspection on your property!
Guerrero's Roofing
(469) 735-5275 guerrerosroofingllc.com
13330 Co Rd 237, Terrell, Texas
5.0 from 58 reviews
Veteran Owned Insured Family owned roofing company, who understand the importance of keeping your loved ones under a secure roof. My father and I built this company with the intention to provide peace of mind through dedication and respect. As a Marine I understand the due diligence of work well done. With that being said we want to make sure to affordably meet your needs without sacrificing quality. Go ahead and message me your questions to get started.
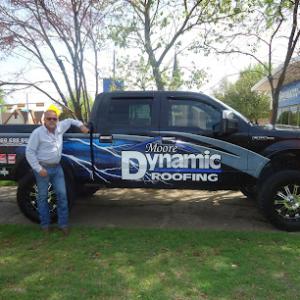
Moore Dynamic Roofing
(469) 688-6910 mooredynamicroofing.com
215 Rash Ln, Terrell, Texas
4.9 from 72 reviews
Moore Dynamic Roofing is a family-owned and operated business. Our team has over 25 years of roofing experience and has been providing services in every combination of roofing project size, type, and degree of difficulty. We understand that selecting a roofing contractor can be very difficult. We also understand that in order to succeed, our reputation is important. Our goal is to provide you with high-quality workmanship, customer service, and support. We'll help you through the whole process, from beginning to end, to make it as seamless and easy as possible. Our factory-certified contractors are hand-selected to be the best in the business.
Redcon Roofing & Restoration
8723 FM 2728, Terrell, Texas
4.8 from 46 reviews
Your home is our mission, transparency is our duty! We are your one stop shop for full property restoration! We work to serve our customers to the highest level! Veteran Owned & Operated.
Jg remodeling roofing
(469) 658-2809 jgremodelingroofing.com
12582 Emerald Ln, Terrell, Texas
5.0 from 8 reviews
We are a very professional rofing company with 20 years of experience We have emergency repair ,24 hours
Top Shelf Roofing
(214) 860-7250 topshelfroofing.us
1599 Co Rd 139, Terrell, Texas
4.1 from 14 reviews
Top Shelf Roofing is a family-owned roofing company specializing in insurance claims for full roof replacements due to wind and hail damage. We mainly service the Kaufman County area but we provide residential and commercial roofing services anywhere in Texas. We approach all our projects with the same commitment and professionalism and we’re proud of our hard-earned reputation for skilled workmanship and attention to detail. Contact us today to schedule a free roof inspection!
Circle B Construction
(469) 915-2255 circlebconstruction.com
Serving
5.0 from 28 reviews
Family Owned Construction and Roofing General Contracting Company with over 25 Years of Experience. Specializing in the Insurance claim process for all residential roofing & commercial roofing. We are your trusted resource for your roof inspection, roof repair, and replacement - metal roofing, asphalt/composite roofing, TPO roofing, flat roofing, tile roofing, etc., fencing, gutters - full restoration services to your property. We service the greater North and East Texas and surrounding cities - Roofing, Outdoor Living - fireplaces, firepits, outdoor kitchens, construction services - remodeling, restorations, and swimming pools.
Simmons Roofing
(214) 714-8317 simmonsroofingtx.com
Serving
4.9 from 181 reviews
LOSING SLEEP OVER YOUR SHABBY ROOF? REACH OUT TO A REPUTABLE LOCAL ROOFER IN QUINLAN, TX When the storms rage overhead, you shouldn't wonder if your roof is up for the challenge. Instead of crossing your fingers and hoping for the best, get in touch with Simmons Roofing in Quinlan, TX. You can count on our local roofer to go the extra mile to keep you and your family safe. Whether you need roof installation, maintenance or repair services, we have you covered. You can also look to us for gutter, blown-in insulation and vinyl siding services.
Smith Roofing & Restoration
(972) 851-7420 smithroofingtx.com
Serving
5.0 from 53 reviews
Roofing and Restoration
Brownlee Roofing & Gutters
(972) 312-1008 www.brownleeroofing.com
Serving
4.9 from 49 reviews
With over two decades of dedicated service since 2003, Brownlee Roofing & Gutters has been the trusted partner for all roofing and gutter needs. Our expertise lies in providing exceptional solutions, from new roof installations to seamless gutter services. We take pride in our meticulous craftsmanship and unwavering commitment to customer satisfaction. Our team is dedicated to protecting your home and enhancing its beauty with every project we undertake. Choose Brownlee for quality, reliability, and peace of mind.
The broader Dallas-Fort Worth insurance environment has frequent hail and wind claims, so Terrell homeowners are more likely to face adjuster scrutiny than owners in lower-claim regions. This isn't about bad luck; it's about how adjusters in this storm corridor evaluate the larger picture of your roof's condition. When a hail event or strong windstorm hits, a quick jump to conclusions can slow recovery. Understanding the pattern helps you stay prepared and protect your home's value.
Insurers commonly ask for roof age, installation method, and wind-resistance documentation after major North Texas storm events. If your roof is older or has a mix of materials, expect questions about the original installation details and any upgrades you've made since. In this climate, contractors often use older underlayments or fasteners that don't match current wind-resistance standards, and that discrepancy can become a focal point in the claim. Having clear records from the original installer or a trusted qualified roofer can prevent miscommunications from slowing your settlement.
After hail events, adjusters in this market may request roof certifications and scope reviews before settling claims, making photo documentation and dated repair records especially important. That means you'll want a tidy trail: dated photos showing the roof from multiple angles, close-ups of damaged areas, and notes on what was repaired or replaced in each visit. If you have prior permits, warranties, or service histories, keep them handy in a single folder you can share quickly. A well-documented claim can reduce back-and-forth and help you reach a fair outcome without misunderstandings about what the roof has endured over the years.
Keep a current set of high-resolution photos of the roof from different seasons, especially after severe storms. Create a simple timeline: pre-storm condition, storm impact, and post-storm repairs, each with dates and contractor names. If you've had any wind or impact certifications performed previously, store those results where they're easy to access. When speaking with the adjuster, reference the documentation and any patterns you've noticed-like recurrent issues with fastener corrosion or shingle edge lifting-rather than describing impressions alone. In Terrell's environment, a proactive, organized approach can keep the claim process moving and help you recover more quickly.
Choose a local roofer who understands the typical aging patterns of common regional materials and who can provide storm-specific documentation, including wind-resistance ratings and installation details for your roof type. Ask for a written summary of how your roof performed under nearby storm conditions and what the recommended remediation steps would be if a full replacement becomes necessary. A contractor with a track record here will know how to assemble the right photos, certifications, and scope reviews to support your claim without causing unnecessary delays.
Connect with contractors who help homeowners navigate the claims process from damage assessment to final approval.
SCR, Inc. General Contractors
107 Tejas Dr, Terrell, Texas
4.9 from 90 reviews
Higher Roofing & Construction
(972) 885-7224 higherconstruction.com
14801 Co Rd 349, Terrell, Texas
5.0 from 43 reviews
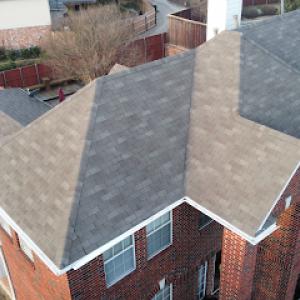
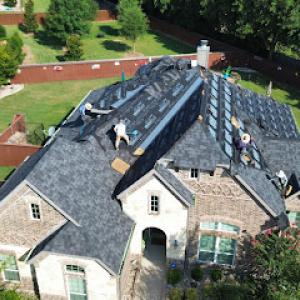
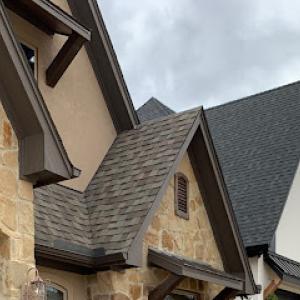
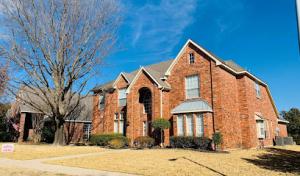
Asphalt shingles dominate the roofing scene in this area, reflecting a practical balance of upfront cost, repairability, and familiarity for crews. But hot summers and high humidity intensify aging by accelerating granule loss and the breakdown of adhesive layers compared with milder climates. When choosing a roof, the material must handle rapid temperature swings, summer UV exposure, and the possibility of tough spring storms that deliver hail. Keep in mind that your roof is a daily load-bearing system: it must absorb heat, shed water, and resist wind uplift without frequent repairs after a heavy shower.
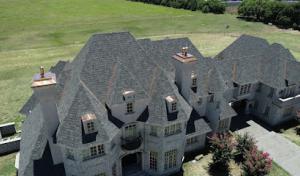
The local material mix shows a broader range than in many nearby markets. Metal, clay tile, concrete tile, wood shakes, and synthetic or composite shingles all appear, offering distinct performance and aesthetics. Metal panels respond well to heat and can shed hail better than some other options when installed with proper underlayment and fasteners. Clay and concrete tiles bring long life and a proven hail record, though their weight and installation requirements demand structural consideration. Wood shakes deliver a traditional look but require care to resist moisture and decay. Synthetic or composite shingles try to blend durability with lower weight and hail resistance, often offering good impact resilience and faster installation. Each choice has a practical profile for hot, storm-prone conditions, so the selection should align with the house's structure, attic ventilation, and typical storm intensity.
Service life hinges on more than just selecting the right material. Hail exposure, summer heat load, and wind uplift performance directly affect how long a roof lasts and how it behaves during insurance conversations after a severe storm. For example, asphalt can endure frequent hail hits if installed with a strong underlayment and correct shingle granule density, but extreme impacts may reveal underlying decking or require quicker re-covering. Metal roofs commonly resist hail impacts, yet improper installation or insufficient sealing can lead to leaks around fasteners. Tile roofs, whether clay or concrete, stand up to hail in many cases but require a robust substructure and careful edge detailing to prevent cracking from heavy hits or rapid temperature shifts. The best choice balances impact resistance, heat management, and the ability to maintain a weather-tight seal after major events.
Consider the roof's slope and exposure-edges catch more windborne debris in North Texas storms, and low-slope surfaces can struggle with proper drainage during heavy downpours. Ventilation and attic insulation play a bigger role than some homeowners expect; cooler attic conditions reduce heat load on the roofing system and slow deterioration of the surface materials. When evaluating options, look for impact-resistant ratings where available, and ask about warranty coverage that explicitly includes hail events and wind uplift. Pay attention to how the chosen material handles color selection, as lighter shades can reflect more solar radiation and reduce attic temperatures, while darker tones may accelerate aging under intense sun.
Choosing a roof is also about who does the install. Local crews understand how this climate and the typical North Texas storm pattern stress roofs, and they know calibration for fasteners, underlayment, and flashing that withstands heat cycles and hail roughness. After installation, routine inspections after spring storms are prudent: look for granule loss on asphalt, loose fasteners on metal panels, or cracked tiles on tile roofs. A well-coordinated maintenance plan helps protect the investment and keeps the roof performing through the region's signature mix of sun and storms.
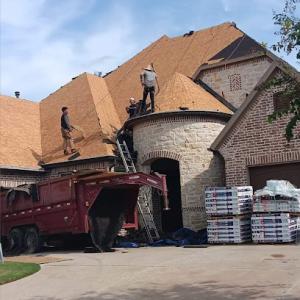
Typical local pricing runs about $380-$750 per square for asphalt shingles, $700-$1200 for metal, $900-$1600 for clay tile, $850-$1500 for concrete tile, $600-$1000 for wood shingles or shakes, and $700-$1100 for synthetic/composite shingles. After a storm season, those numbers can shift quickly as suppliers and crews respond to a wave of reroofs. In Terrell, it's not unusual to see a mid-season bump if several roofs are being replaced in the same neighborhood within a short window. If your project is a tear-off and replacement, expect the higher end of the local ranges or nearby adjustments based on material availability and crew demand.
In this area east of Dallas, the storm corridor brings sharp price moves when hail is common and many roofs need attention at the same time. The labor and material market tightens, which means you may encounter longer lead times and higher labor rates even for standard installations. It helps to have a plan that accounts for potential weather delay windows and a realistic timeline for material delivery. When a carrier approves a replacement, the upgrade path-such as moving from basic shingles to a more impact-resistant option or increasing underlayment quality-can influence both the schedule and the overall cost.
Asphalt shingles stay the most budget-friendly, but a severe season can push pricing upward for any material as demand rises. If the structure previously had an older or lighter underlayment, you might see recommended upgrades during reroofing to improve wind uplift performance and weather resistance-especially on steeper slopes common in many Terrell homes. Metal roofing, while higher in upfront cost, can offer durability and longer service life which some homeowners weigh against the likelihood of future hail events and insurance considerations. Tile options (clay or concrete) bring distinct aesthetics and long-term value but require a strong substrate and framing, which can add to labor costs in a region where crews handle a mix of roof styles. Synthetic or composite shingles provide a middle ground, balancing cost and performance.
Start with a formal roof assessment that documents hail damage, ventilation, and underlayment needs. Get three written bids from reputable local contractors who have experience with storm-related reroofs and confirm they can provide detailed line items for tear-off, disposal, underlayment, and any needed improvements to wind management. Ask about expected lead times and weather delays to set a practical project window. Finally, align material choices with your local climate realities and the home's net-value return, recognizing that post-storm pricing dynamics can shift on short notice.
Don't let upfront costs delay a critical repair - these contractors offer payment plans to fit your budget.
A full reroof in Terrell typically requires a permit through the local building department serving this Kaufman County jurisdiction. Before any shingling starts, verify that the permit is pulled in the homeowner's name or the contractor's, and that the site address matches the project. The permit process signals to the jurisdiction that a complete replacement will meet current codes and wind uplift requirements, which is crucial after North Texas storms. Expect the permit to document the roof's square footage, the material type, and the plan for underlayment and ventilation. If the project involves structural changes or updates to attic ventilation, those details should be reflected in the permit application.
Inspections are generally required at key milestones, commonly including a rough-in stage and a final inspection after completion. The rough-in inspection typically occurs once the roof deck, underlayment, and any necessary ventilation components are in place but before the final shingles are installed. The final inspection confirms that the installation complies with wind load requirements, underlayment corrects, and ventilation paths remain unobstructed. In Kaufman County, the timing of inspections matters just as much as the workmanship, since deviations can trigger rework and additional permit holds. Plan for a window of an inspector visiting the job site and coordinate access to the attic and eaves.
Terrell inspections focus on underlayment, ventilation, and compliance with wind uplift requirements, so homeowners should expect correction items if crews skip those details. The underlayment must lay flat without gaps or wrinkles and extend properly at all eave edges and rakes. Ventilation is evaluated to ensure attic vent pathways are adequate for the roof's design, which helps prevent heat buildup and moisture-related issues that can compromise the deck and fasteners. Wind uplift requirements mean the fastener pattern, shingle overlap, and edge detailing meet local code expectations. If any component appears undersized or improperly installed, the inspector will request corrections before the final permit clearance.
Communicate clearly about permit conditions and inspection timing with the roofing contractor, and keep copies of all permit documentation on site. A smooth process relies on arranging access for inspectors and ensuring the attic and roof penetrations are ready for review during rough-in and final inspections. If corrections are needed, address them promptly to avoid delays in the permit release and the final work approval. This approach helps ensure a durable, code-compliant reroof that stands up to North Texas storms and the region's hail-prone climate.
In this hot summer belt, asphalt and some synthetic shingles wear faster than in cooler regions. The sun's glare and daily temperature swings push materials to expand and contract, so the aging process shows up as curled edges, faded color, and accelerated granule loss. Synthetic shingles that claim "long life" can still suffer faster than expected when exposed to North Texas heat cycling. If a roof is already weathered from hail, that heat stress compounds the existing wear, shortening the window before a reseal or replacement is needed.
Heat cycling not only weakens the main roof covering but also hardens sealants and stresses flashing details. Even roofs with no obvious hail impact can develop micro-cracks in sealant joints and minor flashing leaks that reveal themselves only after a series of hot days followed by cool nights. In Terrell, this pattern matters because storm-driven cycles can force rapid changes in roof conditions between the hottest weeks and the shoulder seasons. Regular inspections that target sealant integrity and flashing connections help catch trouble before it becomes a leak flood during a spring storm.
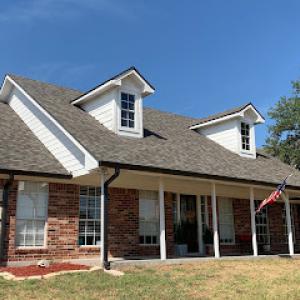
Spring and fall are commonly preferred replacement windows, fitting neatly around the city's typical storm timing and the peak heat of summer. Replacing during these seasons minimizes exposure to extreme heat while aligning with recovery cycles after North Texas storms. This timing also gives you a clear window to coordinate with any hail-damaged roof work, ensuring new materials can cure and seal properly before the next heat spike or storm.
After a copper-colored afternoon thunderstorm or hail event, walk the ridge line and check for lifted shingles, granule sheen in gutters, and any ripped or displaced flashing patches. Look closely at critical transitions where two planes meet a chimney, vent pipes, or skylights. If damage or unusual softness is noticed, arrange a professional evaluation promptly, because even small issues can expand with the season's heat and storm activity.
In Terrell, skylights and their flashing endure heat and storm exposure, then face occasional winter cold snaps that stress joints and sealants already strained by the previous season. Those combined shifts can reveal hidden weaknesses only after a thunderstorm or a rapid temperature swing. A small drip may signal a larger issue with flashing or the roof deck around a penetration, not just the skylight itself.
Because steady winter snow load isn't the dominant local issue, leak complaints often become visible after a heavy rain event or a sudden cold-to-warm swing. Skylights that seal poorly or flashing that pulls away from the curb can leak only when pressure changes drive water toward vulnerable seams. If you notice moisture along the interior edge of a skylight or damp ceiling near it after a storm, inspect the flashing first rather than chasing general roof leaks.
Skylight repair is a meaningful specialty among local contractors, indicating that penetrations and flashing details are a recurring service need here. A qualified roofer will evaluate the curb, the curb flashing, and the sealant around the skylight pan, then address any signs of UV deterioration or wind uplift. In this market, timely attention to flashing joints can prevent escalating interior damage during the next storm cycle.
Regularly inspect the skylight perimeter from a ladder with a partner, looking for hairline cracks, lifted flashing, or softened sealant. Keep gutter runoff away from the skylight base, and note any changes in interior warmth or unusual condensation. If a repair involves the skylight itself, verify the contractor's workmanship on both the flashing and the surrounding roof surface to minimize return trips after the next hail event.
Find contractors experienced in skylight installation, flashing, and leak repairs to bring natural light into your home.
Higher Roofing & Construction
(972) 885-7224 higherconstruction.com
14801 Co Rd 349, Terrell, Texas
5.0 from 43 reviews
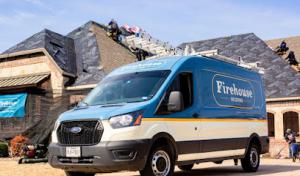
Because the market is highly storm-driven, homeowners should expect many reroofing-focused contractors competing immediately after hail events. In this town, cleanup crews and quick response teams often move faster than the paperwork, so the first crew that knocks on the door may not always be the best long-term partner. Your best sign of a solid choice is a firm that prioritizes clear communication, on-site assessments within 24 to 48 hours, and a plan that covers both immediate tear-off safety and a durable, code-respecting replacement.
After a hail storm, you want a crew that can balance urgency with workmanship. Look for a local company that logs every call, documents damaged areas with photos, and provides a transparent sequence: asphalt shingles versus higher-performance options, underlayment checks, and ventilation review. A practical team will walk you through what they find, explain repair versus replacement thresholds, and set realistic timelines for ordering materials and completing work, so you're not left bouncing between crews weeks after the storm.
Family-owned, long-established, and residential-focused firms are well represented locally, suggesting homeowners here value stability and service reputation over purely sales-driven storm chasing. Favor firms that show steady staffing, a legitimate local address, and a track record of repeat customers. A trustworthy contractor will offer references from other nearby homes, provide a written warranty, and be willing to connect you with past clients who lived through a hail event. If a crew arrives with pushy sales tactics or pressure to sign immediately, step back and compare with at least two other Terrell-area options to confirm you're getting steady service, not a rush-job.
When you choose, lean toward a contractor who demonstrates organized project management: a written scope of work, a clear material selection path, and a single point of contact for updates. Confirm they'll handle debris removal, ensure proper flashings, and follow up after the installation with a post-project check-in. In this market, that thoughtful aftercare matters as much as the initial install.