Last updated: Apr 19, 2026
Claremont sits at the base of the San Gabriel foothills, where fall Santa Ana wind events can create uplift concerns and make tile handling and tear-off scheduling more difficult. When those dry, gusty spells align with a reroof project, tarping, staging, and bracing become critical to prevent wind-driven debris from getting under tiles or into the attic. On steep sections or clay and concrete tile roofs, wind-driven uplift can magnify the risk of loose edges. Plan for more frequent, shorter work windows during peak wind days, and coordinate with the crew to secure materials overnight or during lulls. Increases in wind speed can also complicate delivery of long roof runs, so layout and staging areas should be mapped to minimize exposure and handling time in exposed zones.
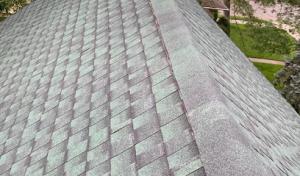
Inland heat from the eastern San Gabriel Valley pushes roof-surface temperatures higher than coastal communities, accelerating wear on exposed asphalt shingles and underlayments, and stressing tile fasteners and sealants in the hottest hours. Tile roofs in this climate endure expansion and contraction cycles that, if not anticipated, can lead to cracked tiles or warped flashing. During reroof planning, expect an emphasis on proper nailing patterns and the use of fasteners rated for higher heat environments. When the sun is high, break the work into morning and late-afternoon sessions to limit hot-handling of materials. For tile replacements, verify that the chosen tiles and underlayment are compatible with the local sun exposure and temperature swings to maintain long-term roof integrity.
The city's dry summer pattern and milder wet winter mean reroof timing is best in spring or fall to avoid both peak heat and winter rain exposure. Spring offers milder daytime temperatures for lifting, cutting, and setting tiles, while fall aligns with a cooler, more manageable pace before the Santa Ana season resumes or the first winter storms arrive. Create a schedule that blocks the hotter mid-day hours and builds a buffer for potential wind-driven delays. In a year with abrupt Santa Ana events, keep a contingency plan for tarp placement and temporary weatherproofing to protect interior spaces during an extended wind event or brief rain showers.
Coordinate access routes so trucks and cranes or lifts can reach the roof without negotiating tight drives or loose debris zones. For tile roofs, pre-lay a dry run of the underlayment and flashing transitions in a shaded morning window, then complete sealing as temperatures drop in the afternoon. Keep extra tiles, fasteners, and sealants on hand for rapid replacements due to wind or heat-induced damage. If reusing existing tiles, inspect each piece for micro-cracks or slight warping caused by heat cycling, and set aside candidate tiles for careful matching and placement. Finally, communicate clearly with the homeowner about the expected pace and any weather-driven schedule changes so occupants can plan around a quieter, cooler work rhythm.
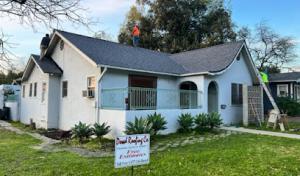
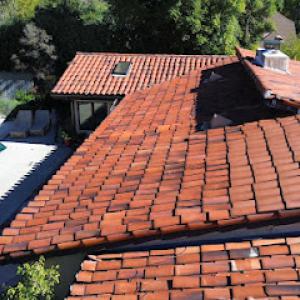
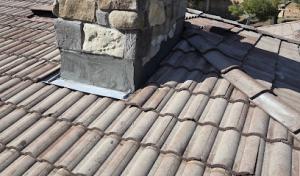
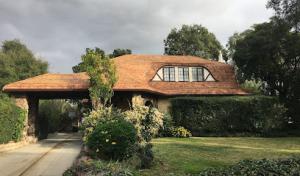
Clay and concrete tile are especially relevant in Claremont because of the city's large stock of Spanish, Mediterranean, and ranch-style homes common in established neighborhoods. Those tile profiles not only mirror historical aesthetics but also provide durable, long-term performance when installed and maintained with attention to the local climate. In reroof projects, choosing a tile that complements the roof pitch, fascia, and parapet details helps preserve the neighborhood's distinctive character while offering reliable weather resistance. If a project involves overlapping generations of tiles, aim to keep as much of the original field tiles as possible, since the visual continuity matters in these classic neighborhoods.
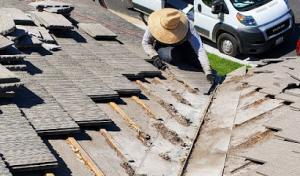
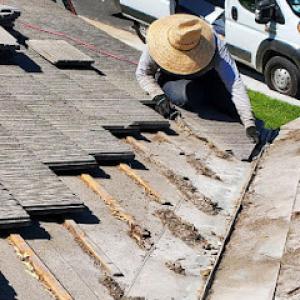
In reroofs, tile projects often involve attention to underlayment aging beneath otherwise reusable field tiles, especially on older homes where the visible tile outlasts the waterproofing layer below. The underlayment in these homes can be several decades old and may have endured heat, Santa Ana winds, and seasonal moisture fluctuations. For a sound reroof, inspect the underlayment for worn spots, cupping, or dried-out felt, and address any delamination or mineral-slicked layers that can compromise the roof's barrier. If you find signs of moisture intrusion or mold growth behind the tiles, prioritize replacing the vulnerable sections of underlayment before reinstalling or resealing tiles. When possible, coordinate tile reuse with careful handling to avoid crack propagation in fragile pieces, and plan for a breathable, weather-resistant underlayment system that aligns with the tile's expected ventilation and drainage paths.
Foothill wind exposure in parts of Claremont can make slipped, cracked, or displaced edge and ridge tiles a more important maintenance issue than in more sheltered inland tracts. Santa Ana wind events can lift or topple lightweight pieces, creating gaps that allow wind-driven debris to reach the underlayment and contribute to water entry during storms. Before reroofing, assess the edge and ridge line thoroughly, identifying any cracked or missing segments and noting fastener corrosion. When re-installing, use high-quality, corrosion-resistant fasteners and ensure proper tile-to-bedding material at the edges to resist wind uplift. Consider installing edge metal or a continuous cap that coordinates with the tile profile to reduce vulnerability to gusts. Regular inspections after Santa Ana events help catch shifts early, saving money and preventing interior damage.
Tile roofs enjoy long lifespans, but periodical care is essential to maximize performance in this climate. Keep gutters clean and free of accumulated debris so water can reach the eaves without backing up onto the tile course. Inspect for cracked or broken tiles following heavy winds or hailstorms, and replace individually if feasible to minimize unnecessary disruption to the roofscape. Color and shade choices matter: lighter-toned tiles reflect heat more effectively in inland heat spikes, promoting cooler roof interiors and potentially reducing attic moisture and expansion stress. For established homes with clay or concrete tiles, periodic checks of the bedding and mortar joints around hips and ridges help prevent moisture intrusion during Santa Ana gusts. If sidewalks or planters sit near the roof line, trim nearby branches to avoid puncture risks during wind events.
Concrete and clay tile each have distinctive performance traits in this area. For reroofing, evaluate the roof's pitch, layout, and parapet details to choose a tile profile that aligns with the home's original rhythm while offering improved wind resistance and sealing capabilities. Consider the impact of tile weight on structural framing, especially in older houses that may require reinforcement. When reroofing, plan for integrated underlayment upgrades and edge protections that support long-term durability against the foothill climate, ensuring the home retains its historic look without compromising modern weatherproofing.
Find contractors who specialize in clay and concrete tile roofs, known for their durability and curb appeal.

Competition Roofing
(909) 599-6270 www.competitionroofingco.com
Serving
4.8 from 49 reviews
Competition Roofing is a full-service roofing company in Upland, California, We specialize in Composition, Tile & Flat Roofs. We service Residential, Commercial, Industrial & HOA's.
West Meridian Roofing
Serving
5.0 from 44 reviews
West Meridian Roofing is a family owned business, formerly known as Oshcon, now rebranded as West Meridian Roofing. Still run by the same great team: Jeremiah, Eli Estrada and David Kauffman. We have crews to service the commercial and residential roofing projects as well as decks, porches, and patio structures. Our quality and customer service is reflected in our projects and customer reviews! We’re also partnered with a couple American based Solar Companies and have great options for solar/roof finance packages, call us for a free estimate.
A-MRK Roofing
(909) 314-1185 roofinguplandca.com
Serving
5.0 from 8 reviews
A-MRK Roofing provides dependable residential and commercial roofing services backed by skilled craftsmanship and honest service. From roof repairs and replacements to new installations and inspections, our licensed and insured team delivers long-lasting protection for your property. We use premium materials and proven techniques to ensure every project meets the highest quality standards. Whether you’re dealing with leaks, storm damage, or planning a full roof upgrade, trust A-MRK Roofing for reliable solutions and clear communication every step of the way. Call today for your free roof estimate.
Micasa Pro Roofers - Upland
(909) 294-7600 www.uplandroofer.com
Serving
4.6 from 19 reviews
As a family owned roofing business based in Upland, you can trust us to provide quality services at fair prices, all without cutting any corners. We make the whole process easy to understand, and share your warranty options with every estimate so that you can stay informed. With every job, we provide contracts, share photos of the progress, and lay protective tarps to keep everything nice and tidy. After we finish, you’ll receive a certificate that outlines your warranty for both materials and our workmanship. Our hardworking team is skilled in installing all types of roofs, including flat roofs, shingle roofs, asphalt roofs, metal roofs, clay or concrete tiles, and more. Get started on your roofing project.
ND Roofing
Serving
5.0 from 9 reviews
ND Roofing is distinguished by its commitment to excellence and customer satisfaction. For 15 years, we have provided high quality roofing and construction solutions, prioritizing trust, professionalism and meeting the highest standards on every project.
Kaliber Roofing
(909) 631-0310 www.kaliberroofinginc.com
Serving
4.8 from 82 reviews
Kaliber Roofing is a trusted, family-owned roofing company proudly serving residential and commercial clients with expert roofing solutions. Based in Montclair, CA, we specialize in roof installation, repairs, inspections, maintenance, leak repair, and re-roofing. Our experienced team uses high-quality materials and delivers craftsmanship that stands the test of time. As an Owens Corning Preferred Contractor, we’re committed to durability, safety, and customer satisfaction. Fully licensed and insured, Kaliber Roofing brings integrity, transparency, and care to every project. Contact us today for dependable roofing services you can count on.

Custom Roof Company
(909) 623-7753 www.customroofcompany.com
Serving
4.7 from 17 reviews
Custom Roof Company has been providing professional roofing in Pomona and surrounding areas for 25 years. We are one of the most established and trusted name for roofing services in Pomona, and are accredited by the Better Business Bureau as an A+ roofing contractor. We offer some of the best roofing warranties in Pomona, because we stand behind the quality of our work. In the unlikely event that you need to utilize your roof’s warranty, you can rest easy knowing we’ve been in business for over 25 years, so we will still be around to make sure your home or business is protected. If you need roofing installation, roof leak repair, roofing maintenance, commercial roofing, industrial roofing or residential roofing, call us today!
B & M Roofing
Serving
5.0 from 26 reviews
B & M Roofing provides residential and commercial roofing services to the West Inland Empire and surrounding areas.
Hyt Pros
Serving
5.0 from 11 reviews
Having over 24 years of experience in the construction industry HYT Construction, Inc., is here to serve you as a specialized Roofing Contractor and also licensed as a General Contractor. With affordable pricing, using top quality materials, and pride in our work you can count on HYT Construction to get the job done. Please reach out via text/call or email to the following phone number 626)316-9456, or to Hector@hytconstructioninc.com. We offer both residential and commercial services. Let us know what your project consists off and we can determine the best approach to get it completed.
Escandon construction
(909) 278-6548 www.escandon-construction.com
Serving
5.0 from 8 reviews
ESCANDON CONSTRUCTION INC .#1123673 license remodeling work and demolition , KITCHEN,SHOWER,FLOORS,PLUMBING,DRYWALL,CARPENTRY FINISH,ROOF REPAIR,STOCCO,CONCRETE,PAINT EXT AND INT INSOLACION,FENCE&HVAC REPAIR

Pomona Roofing Group
(909) 365-2295 rooferspomonaca.com
Serving
5.0 from 9 reviews
Pomona Roofing Group works closely with property owners throughout Pomona, CA to address everyday roofing needs and long-term roof care. Our roofers take on roof repair, roof replacement, roof installation, roof inspections, commercial roofing projects, and emergency roof repair for homes and commercial buildings. Having worked on properties across Pomona, our team is familiar with local construction styles, inland climate conditions, and the types of roof systems common in the area. We provide roofing services across Pomona, CA with a practical, detail-focused approach to maintaining reliable roof performance.
The Roofing Company
(909) 333-5415 theroofingcompanyoc.com
Serving
5.0 from 16 reviews
The answer is yes, now whats the question? Want advice on roofing? we can help. Our business is to help you. advice and estimates are always free. Don't want to risk it? We'll do it for you!
In this foothill setting, the cost spread is strongly influenced by whether the home wears asphalt shingles or heavier tile systems typical of established neighborhoods with Spanish-style architecture. Asphalt shingles typically run lower, while clay or concrete tile reroofs push labor and material costs higher, especially when the roofline features decorative detailing. When planning, focus first on the dominant roof type you're replacing. A tract-roof layout with standard straight runs will generally be closer to the low end of the range, whereas a roof with steep pitches, scroll-work, or tile detailing common on older homes pushes both material and labor toward the upper end.
Costs can rise significantly if the teardown reveals decking deterioration, damaged underlayment, or a need for structural review. If the project requires replacing decking or upgrading the underlayment, you're looking at a higher overall cost than a simple same-material overlay. In this climate, where inland heat can bake underlayment and decking over years, a thorough inspection and repair plan can be worthwhile even if the initial scope was to reroof with the same material. For tile roofs, a careful assessment of the substrate is essential because tile systems demand a solid, well-supported base. If upgrades are needed, budget for both labor and additional materials accordingly.
Scheduling around winter rain and fall wind events can affect labor efficiency in this area. Winter rain may compress a schedule or necessitate protective measures to prevent leaks during storms. Fall Santa Ana winds can ramp up risk for crews working on exposed ridges and steep slopes, potentially increasing labor time and safety considerations. If a reroof is planned during peak wind months, expect tighter windows and possible price adjustments to reflect handling and safety demands. For steeper decorative rooflines, tile detailing, or older homes with complex geometry, labor costs tend to be higher than basic tract-roof layouts, so plan with a cushion for timing and access challenges.
Asphalt Shingles: low to mid range, typically around 350-700 USD per square. This remains the most common option for many homes and tends to dampen variables from weather-dependent scheduling.
Metal Roofing: mid to high range, 800-1,400 USD per square. Expect savings on long-term durability but higher installation complexity on older or irregular roofs.
Clay Tile: mid to high range, 1,100-1,800 USD per square. Heavier tile systems demand a robust structure and careful detailing, with labor costs rising for decorative edges and ornate terms.
Concrete Tile: mid to high range, 1,000-1,700 USD per square. Similar to clay, but often with different substrate requirements and weight considerations.
Wood Shingles/Shakes: mid to high range, 700-1,200 USD per square. Offers a distinct aesthetic but requires precise weather sealing and ventilation, plus additional moisture considerations.
Synthetic/Composite Shingles: mid range, 800-1,400 USD per square. A practical choice when weight or maintenance is a concern, with installation nuances similar to asphalt.
Start by confirming the predominant roofing material and the roof's complexity (steepness, decorative elements). Factor in potential decking or underlayment work if the initial assessment flags any weakness. Build a contingency for weather-related delays, especially around fall winds and winter rains. If tile or heavier systems are chosen, verify substrate readiness and plan for longer timelines and higher labor costs. Finally, compare the material's long-term performance against your immediate budget, recognizing that initial savings with asphalt can be offset by replacement cycles, while tile systems offer durability with corresponding upfront investments.
The most popular roofing material in the US. Find pros who install, repair, and replace asphalt shingles.
A full reroof in this foothill area typically requires a building permit issued through the City of Claremont Permit Center. The process helps ensure storm protection for Santa Ana winds and heat, plus compatibility with the neighborhood's Spanish-style tiles and clay or concrete options. Before any nail is driven, you should submit the project scope, materials, underlayment, and roof venting plans for review. The clerks can guide you toward the right permits if you are replacing like-for-like, or toward additional reviews if the roof frame shows signs of wear or structure changes. The permit also helps ensure you are using approved underlayment that performs in Claremont's dry heat and afternoon Santa Ana gusts, and that reroofing choices respect noise and ladder safety during hot months.
If a project includes roof structure changes rather than straightforward replacement, the city may require plan review before work proceeds. That means extra time and potential revisions to meet local seismic and wind uplift requirements for the inland climate. In established neighborhoods near the San Gabriel foothills, plan reviewers look for historic roof forms and compatibility with the surrounding skyline, especially when replacing clay tile or concrete tile with modern assemblies. Expect labeled drawings, a load path note, and confirmation of fastening intervals. If your project involves changing rafters, ridge beams, or adding skylights, plan review becomes more likely, and revisions may be required to demonstrate wind uplift resistance for the intense inland summers.
Claremont inspections are typically scheduled during and after installation, with a final inspection needed to close out the permit. Inspectors check that underlayment, flashings, and venting meet code, and that any structural alterations align with current framing standards. If a Santa Ana wind event occurs during reroofing, you may encounter additional checks for temporary protection and site safety. Having staged access and clear paths helps inspectors complete visits without delaying your project. Be prepared for possible hold times if the weather heads into Santa Ana season, since inspectors may bundle visits for efficiency and scheduling.
In this foothill town, homeowners operate within a broader California underwriting climate that has tightened around wildfire risk. Carriers are paying closer attention to roof age, materials, and visible wear, especially for properties near the San Gabriel foothills. A reroof can be a factor in whether a policy renews smoothly or at all, so keeping documentation ready and your roof in solid condition matters. The goal isn't to spark alarm, but to anticipate how insurers view risk in the Inland Empire's hotter stretches and on edges where Santa Ana winds can press through.
Because Claremont sits near foothill wildfire corridors of the Inland Empire and eastern Los Angeles County edge, roof replacement documentation can matter when homeowners are trying to maintain or renew coverage. Insurers may request detailed records that show the age of the roof, the materials used, and the dates of any recent work. Having a clear, professional write-up of the roof replacement, including contractor credentials and product specifications, helps paint a straightforward picture of risk reduction. In a market where wildfire exposure informs underwriting, prepared documentation can smooth a renewal or a policy decision, particularly after a retrofit or reroof.
For wind or storm-related claims in Claremont, insurers may request prior claims history, contractor estimates, and clear photo documentation showing whether damage is sudden event damage or long-term wear. Santa Ana gusts can create both abrupt damage and gradual deterioration that mimics age-related failure. Separate photos for each roof area-undamaged sections, wind-damaged edges, and attic or underlayment exposure-are valuable. A quick chronology helps insurers see whether the event was a discrete windstorm or a progressive vulnerability that predated the incident.
Keep a running file with recent roof work, including invoices and material specs, and store before-and-after photos in a cloud folder labeled by address. When a renewal is approaching, assemble a concise summary of roof age, maintenance history, and any recent repairs. If a claim occurs, document not just the visible damage but the surrounding context: airflow, wind direction, and obvious signs of wear that could influence interpretation of causality. By building a transparent, organized record, you reduce the chance of gaps that complicate coverage decisions during renewal or after a storm.
Connect with contractors who help homeowners navigate the claims process from damage assessment to final approval.


Low-slope sections show up often on additions, patio transitions, apartment buildings, and commercial properties near village and corridor areas. In a town with foothill heat and Santa Ana winds, a flat or near-flat extension must handle more than rain drainage - it also battles wind uplift and solar gain. The typical roof in these additions tends to see rapid temperature swings, so choosing materials that tolerate thermal cycling without cracking or sealing failures is essential.
Claremont's winter rain pattern matters for low-slope roofs more than summer conditions. Drainage details and ponding control are especially important on sections that may perform acceptably through summer but reveal leaks during the wetter season. When planning, prioritize positive drainage toward suitable scuppers or internal drains, and maintain clear paths for water to evacuate even when debris accumulates after storms. A well-sealed perimeter and precise flashing transitions to higher pitched roof areas prevent leaks at wall interfaces and penetrations.
The local climate pushes materials toward resilience. On low-slope roofs, asphalt shingles are less common for new flat sections, while metal, single-ply, or enhanced membranes offer better wind uplift resistance and heat resistance. In existing mixed stock, it is common to see reroofing that blends new flat- or low-slope systems with older pitched tile or shingle sections. Pay attention to compatibility at transitions: differences in expansion, contraction, and fastener design can create premature failures if not detailed carefully.
The local contractor market shows meaningful flat-roof and commercial activity, indicating that many Claremont owners are dealing with mixed roof systems rather than simple single-plane residential roofs. When approaching an addition, engage a contractor experienced with low-slope details, including flashing at parapets, edge metal, and proper insulation beneath the membrane. A thoughtful integration with the existing roof line reduces risk and improves long-term performance for both heat and wind exposure.
Find specialists in TPO, EPDM, and built-up flat roofing systems for residential and commercial properties.
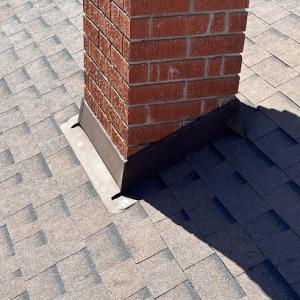
Aging roof lines in this foothill area often show leak-prone transitions around skylights, chimneys, and where the roof meets the wall. In homes with multiple reroofs, the fast pace of flashing work can leave small gaps that only show up after winter moisture moves through the stacks of layers. Those narrow failure paths are more common than a broad field failure, so keep an eye on the flashings at penetrations rather than assuming the whole roof needs replacement.
In a reroof-heavy neighborhood, contractors frequently diagnose localized flashing problems first. A careful inspection with a flashlight and a mirror can reveal lifted step flashing where the roof deck meets a dormer, or corroded counter-flashing around a chimney. You may find dried sealant instead of proper metal flashing, a sign that past repairs were temporary. Addressing these weak points early prevents bigger leaks after Santa Ana winds.
Winter moisture exposure in this foothill town tends to reveal defects at penetrations and transitions that stay hidden during the long dry season. Warm winters can push water into tiny crevices, so a careful rain test after installation helps verify that the skylight curb, roof-to-wall connections, and flue penetrations seal well. If you notice staining along the skylight curb or at the base of a chimney after a few storms, investigate those joints first.
Practical fixes you can manage before calling in a full reroof include resealing with compatible flashing materials, reseating skylight units, and replacing degraded sealants around vent stacks with products suited to hot-dry Santa Ana conditions. For older homes, installing continuous flashing or upgrading to a curb-mounted skylight with proper counter-flashing can reduce recurrence of leaks across several reroof cycles. Additionally, note that the mix of tile styles in this city affects flashing details that carry a roof aesthetic. When a leak sits at a transition, it can indicate the underlying deck and fasteners remain sound, while surface flashings need refreshment to withstand heat and wind for longevity.
Find contractors experienced in skylight installation, flashing, and leak repairs to bring natural light into your home.

When evaluating reroofs in this foothill-adjacent climate, focus on the difference between workmanship warranties and manufacturer material warranties. A replacement project in this area often hinges on whether the contractor stands behind the installation, not just the shingles or tiles themselves. In practice, you want a workmanship warranty that explicitly covers labor failures related to flashing, underlayment, fasteners, edge details, and the roof-to-wall transitions. Compare that to the material warranty, which protects the actual shingles, tiles, or panels. In a market where reroofs are common, it's common to see contractors advertise both, but the durability of the installation matters more for long-term protection after Santa Ana winds and inland heat.
Heat exposure and wind events make edge details, underlayment, and flashing critical failure points. If underlayment degrades or fasteners loosen due to temperature swings, leaks follow. A solid warranty will specify how wind speeds, exposure, and roof pitch affect coverage. Look for written language that addresses edge metal, drip edges, ridge caps, and intersections with chimneys or vents. The stronger the language tying coverage to proper installation standards, the better the odds that wear from Santa Ana conditions won't be denied as "normal wear."
The local market includes a meaningful share of contractors advertising warranties, suggesting homeowners here actively compare long-term protection on replacement projects. Ask for sample language that explains exclusions, claim processes, and required maintenance. Verify who covers leaks caused by installation flaws versus those caused by aging components. Request a written protocol for documenting wind-related damage, including inspection timelines after large wind events. Finally, confirm transferability if you sell the home, and note any maintenance milestones required to keep coverage active.