Last updated: Apr 19, 2026
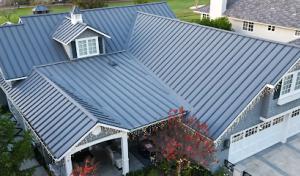
Your roof sits in canyon and hillside terrain where Santa Ana wind events push debris and uplift pressure more aggressively than in flatter inland neighborhoods. That means the roof edge is not just cosmetic-it's the first line of defense against flying branches, projectiles, and sudden uplift. When a wind event gathers speed, loose shingles, rattling edge drip edges, and undersized fasteners become failure points in minutes. A canyon-focused approach requires aggressive edge detailing: continuous eave and rake overhangs secured with corrosion-resistant fasteners, properly seated and sealed starter courses, and ridge and hip lines that resist uplift. If the edge details aren't pristine, you're not just replacing shingles; you're inviting wind-driven damage that can propagate into the attic and interior.
The wildfire-sensitive setting elevates the stakes for each roof replacement. Embers can start fires long after a flame front has passed, so every detail matters. Ember-resistant venting, drip edge, and ridge cap systems help keep embers from landing and igniting hidden pockets. Look for tight panel joints, solid sealant at roof-to-wall penetrations, and corrosion-resistant components around any mounted equipment. Assess roof penetrations carefully: skylights, attic vents, and plumbing stacks all provide potential ember entry points unless properly flashed and sealed. The goal is to minimize any surface area where embers could cling or infiltrate the attic through gaps, while still allowing for drainage and ventilation that won't compromise fire resistance.
Dry summers followed by wind season stress roofs in a way that goes beyond age-related needs. Many owners replace not just to refresh appearance, but to reduce vulnerability before the highest wind and fire exposure period. A proactive replacement plan tailored to canyon exposure means selecting materials and assemblies that offer superior wind uplift resistance and ember resistance, with attention to fastener patterns, underlayment choices, and secure edge details. In practical terms, that translates to more robust fastener schedules, reinforced edge systems, and a careful review of any existing decking or substrate conditions that might compromise the new roof under high-wind episodes.
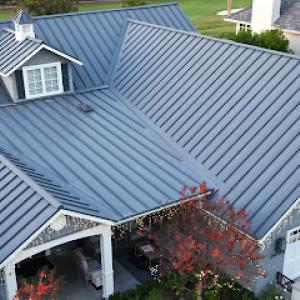
Different roofing assemblies perform differently under Santa Ana winds and ember loads. Metal and concrete tile systems can offer excellent wind uplift resistance when installed with a proven fastener pattern and high-quality underlayment. Clay and concrete tiles can provide durability, but require careful alignment and edge restraint to withstand uplift and debris impact. Synthetic or composite shingles can combine wind performance with ease of install, but rely on proper attachment methods and edge protection. Asphalt shingles, while common, must be paired with wind-appropriate fasteners and premium underlayment to avoid lift in canyon gusts. Your choice should balance wind resilience, ember resistance, and the specific slope and exposure of the hillside site.
Edge condition is not a one-time check. After installation, perform regular inspections especially after high-wind events. Look for lifted edges, loose fasteners, damaged underlayment, and any gaps at penetrations. In Trabuco Canyon, a proactive maintenance mindset saves more than it costs: catching a minor edge lift early prevents expensive downstream repairs and reduces fire exposure risk. If any edge components show corrosion, wear, or loosening, plan for immediate remediation rather than waiting for the next storm.
Document replacement details with an emphasis on wind and ember considerations. Record the exact edge and flashing systems used, fastener types and patterns, underlayment thickness and type, and any reinforcement measures around hips, ridges, and penetrations. This documentation supports future wildfire readiness, insurance dialogues, and potential inspections after wind events. Precise records help ensure that the roof's defensive features remain traceable and verifiable for years to come, aligning with the canyon's heightened risk profile and wildfire-sensitive setting.
After a replacement, prioritize securing all venting and flashing components, and schedule a follow-up inspection within the first season to confirm that wind-driven conditions have not compromised edges or penetrations. Keep debris cleared from eaves and gutters to reduce ember accumulation and improve early detection of uplift or edge issues. Build a simple, repeatable inspection routine into your seasonal maintenance so every high-wind period begins with confidence in your roof's defenses.
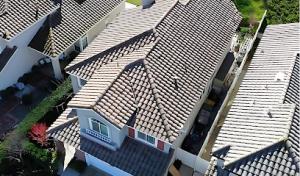
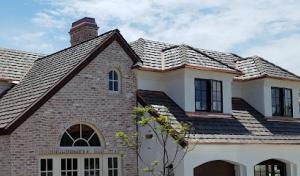
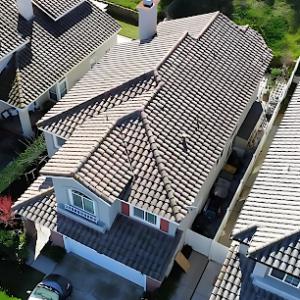
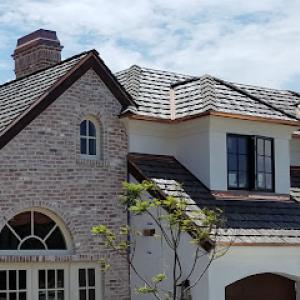
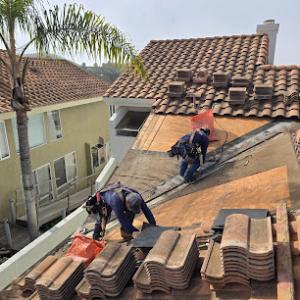
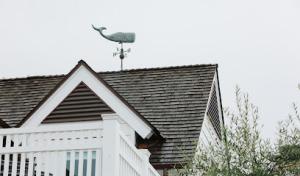
Clay and concrete tile are the defining roof types for hillside homes around this canyon-adjacent stretch of Orange County. The Mediterranean and Spanish influences on the housing stock here mean that tile carries not just style but structural expectations. On a slope, the weight of tile matters more than you might expect, and the way tiles break under wind, sun, and impact shapes the stability of the entire roof system. When planning a re-roof, think beyond the visible tiles: the underlayment, fasteners, and the overall roof deck carry more risk on a hillside than on a flat lot.
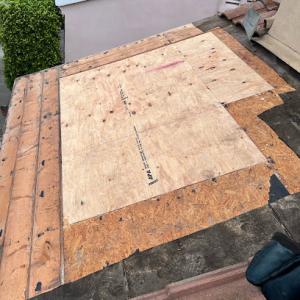
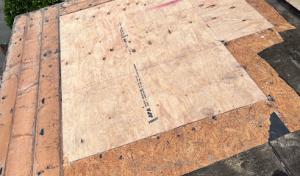
On a hillside, the underlayment is your first line of defense against wind-driven debris and rain that can seep between tiles. If the deck is warped, bowed, or pocked from foot traffic during inspections, replacement becomes more complex and costly. Before choosing tile, verify that the roof deck is solid, dry, and properly vented. A continuous, high-grade underlayment with appropriate wind uplift ratings helps keep the interior dry when wind shifts debris from the canyon winds. If the deck shows any signs of movement or moisture damage, plan for repairs or reinforcement before tile installation, because tile systems rely on a stable base to perform as intended.
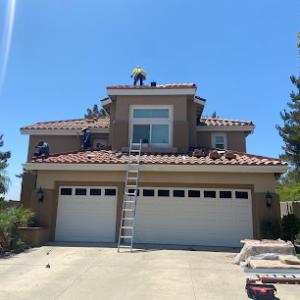
Tile roofs on steep hillside lots present regular maintenance challenges. Foot-traffic breakage during routine inspections or cleaning can be a common source of damage. When planning maintenance access, consider using temporary platforms and non-marking footwear to reduce tile-breakage risk. Keep paths clear of dense shrubs or loose debris that can cause slips. If a portion of the roof receives frequent maintenance, you may want to discuss strengthening the roof edge and installing dedicated walkways or mats to distribute weight and reduce tile fatigue.
The combination of Santa Ana winds and sun exposure makes tile a durable choice, but it also shifts debris patterns and increases the likelihood of displacement or breakage during storms. In a re-roof scenario, select a wind-resilient layout that minimizes exposed edge tiles and uses properly rated fasteners and clips. Consider larger, more integral fasteners and corrosion-resistant hardware to resist salt air and wind gusts. If a tile becomes cracked or dislodged, replace it promptly to avoid adjacent tiles loosening from wind pressure.
Begin with a careful assessment of the existing roof structure, underlayment, and deck condition. If the project moves to replacement, engage a contractor experienced with tile systems on hillside homes, who can design a layout that reduces live load stress and maximizes edge protection against wind uplift. Plan for a robust underlayment, matched to the tile type, and ensure access paths are guarded and stable for future maintenance. Finally, discuss tile choice and installation details with attention to impact resistance, color fading under sun, and the potential for limited future repairs on a steep, exposed slope.
Find contractors who specialize in clay and concrete tile roofs, known for their durability and curb appeal.
Purpose Roofing & Waterproofing
(949) 409-5450 www.purposeroofs.com
Serving
4.4 from 23 reviews
Purpose Roofing & Waterproofing is a full service Residential, HOA and Commercial roofing and waterproofing contractor based in Orange County, CA. We are fully licensed, bonded and insured, serving all of Southern California. It's more than just a name, our PURPOSE is to service our clients and ensure the best possible result for each and every project. PURPOSE is dedicated to meeting the specific needs of our clients with services tailored to the individual project. We are small enough to insure hands-on involvement by key personnel, yet able to offer a degree of professionalism and attention that is unsurpassed.
Peak Builders & Roofers of Orange County
(949) 787-2555 www.peakbuildersoc.com
Serving
5.0 from 5 reviews
Peak Builders & Roofers of Orange County is your premier choice for top-quality roofing services and exceptional remodeling projects. With a steadfast commitment to excellence, we specialize in providing comprehensive roofing solutions, from new roof installations to thorough roof repairs, ensuring your home is protected and looks stunning. Our expert team also excels in home remodeling, bringing your vision to life with meticulous attention to detail and superior craftsmanship. Whether you're looking to upgrade your kitchen, renovate your bathroom, or undertake a complete home transformation, we deliver results that exceed expectations.
Forefront Roofing
(800) 702-5032 www.forefrontroofinginc.com
Serving
5.0 from 105 reviews
Forefront Roofing is a family owned and operated roofing company that serves Orange County and Los Angeles. We specialize in residential and commercial roofing services, including new roof installations, roof repairs, and roof replacements. Our team of highly skilled and experienced roofers is dedicated to providing the highest quality workmanship and customer service. At Forefront Roofing, we understand the importance of a safe and reliable roof for your home or business. That's why we use only the highest quality materials and state-of-the-art techniques to ensure that your roof is built to last. Whether you need a small repair or a complete roof replacement, we are committed to providing you with the best possible service.
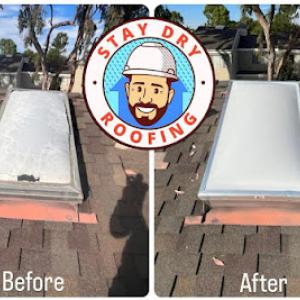
Stay Dry Roofing
(949) 528-7663 staydryroofingmissionviejo.com
Serving
4.5 from 16 reviews
Stay Dry Roofing Company is a 3rd generation roofing company based in Mission Viejo. We are Mission Viejo's local and highly requested roofing team dedicated to protecting your home and business and keeping you Dry during winter. Our skilled team specializes in high-quality roofing solutions from new installations, roof repairs, 24 hour emergency roofing services, Metal Roofs to meticulous repairs and much more. We use only the finest materials, ensuring every project is built to last against the elements. Trust us to deliver professional expertise and a secure, long-lasting roof for your property. (949)-528-7663 (ROOF) Stay Dry Roofing Company License #911019
B.P. Custom Roofing
(949) 390-3627 www.bpcustomroofing.com
Serving
5.0 from 75 reviews
Quality residential roofing company in business since 1992 (License #652641 C-39)
Pacific Roofing Systems
(949) 495-4200 pacificroofingsystems.com
Serving
4.7 from 47 reviews
For over 25 years, Pacific Roofing Systems has been Orange County's trusted roofing expert. Specializing in all roofing types, from classic tile and composite shingles to modern metal and innovative green roofing solutions, they deliver premier roofing services for every need. As a VELUX 5-Star certified installer, Pacific Roofing Systems expertly installs and services the complete VELUX product line for both residential and commercial properties. Experience the difference of superior craftsmanship and dedicated customer service; Pacific Roofing Systems takes pride in using only the best products to exceed your expectations with every project.
South County Roofing
(949) 597-0192 southcountyroofing.com
Serving
4.7 from 27 reviews
South County Roofing is a roof repair–only company located in Lake Forest, California, specializing in tile roof leak repair and tile roof maintenance for homeowners throughout Orange County. We focus on identifying the source of roof leaks and performing permanent, targeted repairs rather than recommending unnecessary roof replacement. Our work commonly addresses leaks caused by localized issues in valleys, skylights, chimneys, roof transitions, and field areas where water is concentrated. Services include professional roof inspections, roof leak detection, broken tile roof repair, flashing repair, and preventive roof maintenance. Our approach is based on experience, clear evaluations, and practical repair solutions tailored to each roof’s

Single Ply Roofing Experts
(949) 966-7819 singleplyroofingexperts.com
Serving
4.3 from 18 reviews
When working with Single Ply Roofing Experts, you know that you are working with a company that is highly advanced in the field of commercial roofing. We have specialized in Single Ply Roofing for nearly 2 decades, so when it comes to the unique challenges and opportunities that this type of roofing presents, you can count on the fact that we’ve got it all figured out! We are a California Licensed Contractor, and possess the proper training and certifications to do the job right, and to do it safely.
OC Custom Roofing
(949) 431-2220 occommercialroofing.com
Serving
5.0 from 7 reviews
TAKE IT TO THE EXPERTS When installing a new roof on your commercial building, you want the best fit for your budget and building needs. There are many roofing companies to call on, but not all roofing companies are the same. OC Custom Roofing has a reputation for designing and installing quality roofs, custom fit for your commercial or industrial buildings. Our roofing experts and installers will answer any questions you may have throughout the roofing project, and will guide you through the process so that you are comfortable and knowledgeable of your new roofing system. Call today and set up an appointment with one of our experienced roofing consultants. You can be sure that you are getting a quality roof installed by a company you ca...
Di Rock GC & Roofing
(949) 545-1976 www.dirockgc.com
Serving
5.0 from 49 reviews
Established in 2010, DiRock General Contracting & Roofing safeguards Orange County homes with expert roof care. Their licensed and insured team offers a complete range of services, from inspections and repairs to replacements. DiRock prioritizes client collaboration and utilizes skilled craftsmanship to ensure your roof's long-lasting protection. Please reach out and make the call!

Rod's Roofing Company
(949) 212-3557 www.roofingsanclementeca.com
Serving
4.7 from 14 reviews
If your roof is in a state of disrepair or looking worn-out, you need a local roofing company you can trust to restore it or replace it. That's where Rod's Roofing Company comes in. We offer professional roof replacement, repair and reroofing services to homeowners throughout San Clemente, CA and the surrounding areas.
City Roofing & Maintenance
(949) 500-3980 www.cityroofingandmaintenance.com
Serving
5.0 from 31 reviews
The integrity of your roof, on a personal residence, rental property or business, is vital. Choosing the best roofing contractor should be simple. At City Roofing and Maintenance, (CR&M) our philosophy is also simple: "Your satisfaction is our priority." We ensure our clients a seamless and professional experience regardless of job size, material installation, timeline or price. CR&M clients always feel respected and appreciated.
Replacement scheduling in this canyon country is all about balancing wet-season disruption with wind-season risk. Local replacement scheduling is commonly pushed into spring or fall to avoid the wettest winter periods while also trying to finish before peak Santa Ana wind exposure. If you're planning a roof swap, align tear-off and dry-in to the shoulder seasons, when days are drier and winds are typically gentler. A staggered plan that targets a mid-spring start or an early-fall kickoff reduces the chance of a weather snag turning into a months-long delay.
Winter rainfall can interrupt tear-off and dry-in timing in Trabuco Canyon, which matters more on larger tile and multi-plane roofs that take longer to stage and weatherproof. If your roof has multiple planes or a tile layout with steep transitions, expect a longer staging period and tighter scheduling as storms roll through. Build contingencies for days spent tarping sections and for temporary weatherproofing while crews shift between angles and elevations. In practical terms, aim for a window with a few clear, dry days back-to-back to minimize the risk of moisture intrusion into underlayment and flashings.
Santa Ana winds are less predictable at canyon elevations, but they reliably pick up in fall and winter. The key is to choose a roof system that can stand up to gusts while preserving defensible features against embers. When selecting materials and fasteners, prioritize systems with proven wind uplift resistance and robust attachment methods. In this area, look for high wind-rated underlayment and fasteners specified for elevated exposure. If a multi-plane roof is involved, ensure ridge and hip lines are integrated with secure flashing along all transitions to prevent wind-driven uplift at eave and valley intersections.
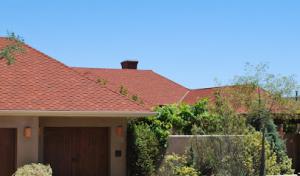
Extended hot summers accelerate aging in asphalt, wood, and composite roofs here, so visible wear often becomes most apparent after prolonged sun exposure. That means a small cosmetic cue today can signal deeper issues next season if the roof isn't well matched to sun exposure and canyon heat cycles. For canyon homes with tile-heavy stock or composite accents, plan for systems that demonstrate slow optical aging and stable color retention under intense sun. A well-sealed roof that resists heat-driven expansion and contraction reduces the chance of micro-cracks along ridge lines and near vent penetration points.
On the day of tear-off, verify weather forecasts for at least a week ahead, and arrange for wind screens or tarp utilization to manage blowing debris during staged removal. Coordinate with crews to complete dry-in before the first strong Santa Ana pulse, and schedule a mid-day heat-minimizing shutdown to protect underlayment during peak sun. After installation, insist on prompt recovery of any vent boots, flashing, and sealant work while the weather is still favorable. Finally, set expectations with your crew for prioritizing secure, continuous wind barriers around any exposed roof sections to reduce the risk of uplift during the first windy days after completion.
Find local contractors experienced in assessing and restoring roofs after hail, wind, and severe weather events.

When planning a re-roof, you will see cost ranges reflect the material choice. Asphalt shingles run from about 350 to 650 USD per square, metal from 600 to 1200, clay tile from 900 to 1700, concrete tile from 500 to 1100, wood shingles or shakes from 600 to 1000, and synthetic or composite shingles from 450 to 900. These numbers are typical for canyon settings where the terrain and exposure influence material handling and labor. For homes perched on hillsides or with canyon exposure, the higher end of each range is common, especially on larger roofs or steeper slopes.
Costs in a canyon setting can rise because access, staging, debris handling, and safety setup are more difficult than on flat-lot subdivisions. Narrow driveways, loose gravel turnout points, and limited storage space mean crews must maneuver equipment with extra care, sometimes requiring longer setup times or additional hauling. Debris containment plans may need more robust containment to prevent wind-blown material from reaching the canyon edges. When budgeting, plan for modest upticks above standard flat-lot estimates to cover these logistical realities.
Tile-heavy homes are common in this area, and tear-off work on clay or concrete tile adds labor and disposal needs. Tiles can break during removal, increasing replacement quantity and hauling tasks. The weight and fragility of tile also demand careful sequencing and crew coordination, which can push labor hours higher than anticipated. Expect a higher per-square cost for tile replacements versus shingle options when the existing roof is large or irregular in layout.
Winter rain or wind events can disrupt schedule and pricing locally. Short-notice weather gaps may lead to extended project windows, or limited daytime access due to safety concerns. In practice, this means potential price volatility and the possibility of staged work across weeks rather than a single continuous interval. If a contractor offers multiple start dates, choosing a window with predicted mild conditions can help stabilize costs and minimize delays.
Start by confirming your preferred material and a target square count, then add a contingency of 10 to 15 percent for staging, disposal, and weather-related delays. Ask for a written staging plan, including driveway access, material drop points, and debris containment. For canyon homes, it helps to request a clear breakdown of labor hours tied to tear-off complexity and tile handling so the bid reflects the real on-site efforts expected.
Get a clear picture of your project costs upfront - no commitment required.
Because Trabuco Canyon is generally served through Orange County Building and Safety rather than a large standalone city department, homeowners should expect permit handling through the county unless a more specific local jurisdiction applies. The county system is familiar with canyon and hillside residences where wind exposure and fire season readiness drive code choices, so starting with the county portal or a scheduled plan review can save back-and-forth time. If a contractor raises a jurisdictional question, verify whether the project falls under an HOA, fire zone overlay, or any local amendment that might shift the permitting path.
A full re-roof typically requires a permit in this area, with an inspection after tear-off and another at completion to confirm the installation meets code. The tear-off phase is usually the first critical checkpoint, ensuring the roof deck is structurally sound and prepared for the new substrate and underlayment. The final inspection verifies proper fastening, weatherproofing, and compliance with energy, fire, and wind-resilience standards. Expect a few notes from inspectors about flashing, edge details, and venting where canyon exposure can influence performance. Plan ahead for weather windows, since wind-prone Santa Ana conditions can complicate staged work.
Some properties may face added review through HOA rules or local amendments, which is especially relevant in planned communities and canyon-area neighborhoods with design controls. HOAs can impose stricter aesthetic and material requirements, and may require submittal of color samples, product data, or an additional review cycle before county approval is granted. If HOA approval has not already occurred, coordinate a timeline that aligns permit readiness with architectural review board (ARB) deadlines to prevent delays.
Begin by confirming the project scope with the county Building and Safety counter or website, and gather local amendments or ARB guidelines early. Have your roofing contractor provide product data, wind-resistance designs, and installation details tailored to canyon exposure to ease the plan-review process. When planning the schedule, build in buffer time for inspections, and identify a single point of contact at the contractor's office to streamline communication with the county and any HOA reviewers.
California insurers have tightened underwriting around wildfire exposure, and canyon and hillside properties are often evaluated through a higher fire-risk lens. In this setting, the consequences of a roof replacement go beyond the project itself; the decision can ripple into insurability, premium stability, and future coverage. When a shake of Santa Ana winds rips through the oaks and brush, carriers scrutinize how a new roof holds up against embers, radiant heat, and wind-driven debris. The result is that your choice of roofing material, fasteners, and overall system resilience can influence whether you keep, modify, or lose certain coverages over time.
Roof replacements here may require stronger documentation than homeowners expect, including before-and-after photos, proof of completion, and records showing whether damage was weather-related or part of planned replacement. The emphasis on wildfire exposure means insurers often request evidence that the new roof meets enhanced wind and fire resistance standards, and that any repairs to surrounding structures were properly handled. In practice, that translates to a longer, more deliberate claims path and a need to maintain meticulous records. If a claim is filed in the wake of a wildfire or wind event, be prepared to present a clear narrative of the roof's condition before, during, and after the work, plus contractor certifications.
Deductibles, exclusions, and endorsements can vary significantly for hillside and high-fire-risk properties, so roof decisions are closely tied to maintaining or improving insurability. Choosing a roof that aligns with fire-retardant performance, wind resilience, and credible installation documentation can help protect long-term coverage. It is prudent to discuss with the insurer or agent how specific roof assemblies-from tile to synthetic options-affect not only fire ratings but also wind-retention factors and debris resistance. In canyon conditions, every fastener, underlayment, and edge detail matters, because sustained performance in high-risk scenarios reduces the likelihood of coverage disputes after a storm or ember exposure. Keep the conversation anchored in documented performance, verified installations, and durable, defensible choices.
Connect with contractors who help homeowners navigate the claims process from damage assessment to final approval.
In sunny inland Orange County conditions, roof penetrations from skylights and solar-related work deserve extra attention because prolonged UV exposure and heat can shorten sealant life. When choosing sealants, select high-UV formulations and schedule re-caulking on a predictable cadence. Position flashing to shed water quickly and avoid long horizontal runs where heat can bake joints. Keep surrounding surfaces clean to improve sealant adhesion.
On tile roofs common in this market, penetrations are more complicated to flash and service than on simple shingle roofs, especially when replacement work disturbs surrounding tiles. Use continuous apron flashing beneath the penetration and customize mortar-set flashings to minimize tile breakage. When reseating a tile, replace nearby tiles in pairs to maintain wind resistance and to avoid creating new leak paths.
Leak complaints after re-roofing in canyon homes often center on transitions and penetrations rather than the broad field of the roof itself. Inspect step and counter flashings where the roof meets walls, chimneys, and skylight curbs. Test with light pressure and water spray on a calm day, focusing on the lowest points where water can pool or back up toward the underlayment.
Plan penetrations with future solar additions in mind, using standoff brackets and compatible flashing materials. Use tile-compatible sealants at tile-to-flashing interfaces, and verify that fasteners do not penetrate into insulation or vent channels. Order a few extra tiles for a few seasons of maintenance, since tile loss or cracking is more likely during reseating.
In this terrain, heat and wind exacerbate wear at penetrations. Schedule periodic inspections after Santa Ana events and after major storms, and keep a focused eye on seals, flashings, and curb fittings. Addressing these specifics helps keep leaks preemptively at bay amid Santa Ana winds events.
Find contractors experienced in skylight installation, flashing, and leak repairs to bring natural light into your home.
City Roofing & Maintenance
(949) 500-3980 www.cityroofingandmaintenance.com
Serving
5.0 from 31 reviews
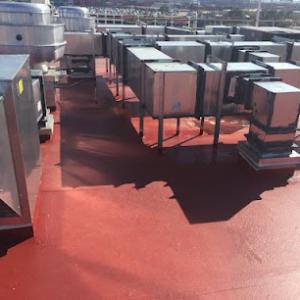
Even in a market dominated by pitched tile and shingle roofs, Trabuco Canyon homes can include low-slope patio covers, additions, and transition areas that age differently from the main roof. Those low-slope sections are common where a hillside build ties a flat or gently sloped expansion to a steeper primary roof. In this canyon, the exposure from Santa Ana winds and the potential for wildfire-driven insurance scrutiny amplify the consequences when those transitions fail. A practical approach starts with recognizing where the low-slope areas live on the property and how their age compares to the main roof.
These mixed-roof sections are more vulnerable during winter rain because drainage and flashing details become critical where low-slope areas meet steeper roof planes. Pay attention to any signs of ponding, irregular drainage, or standing water near transitions. Check under the edge flashings and along the seam where the low-slope surface meets the higher roof line. If you see water stains on interior ceilings near a transition, that's an indication the current details aren't keeping up with seasonal rains. Addressing this during a main roof refresh helps avoid a patchwork repair that never quite seals.
Homeowners replacing the main roof in this area should evaluate attached low-slope sections at the same time to avoid mismatch in remaining service life. Begin with a joint assessment: confirm the age and condition of the low-slope surface, its drainage path, its underlayment, and its flashings. A unified plan reduces the risk of rapid failure in the future and helps ensure that the new main roof and the auxiliary areas wear at a similar pace. Consider upgrading underlayment, improving drainage, and reworking flashings at all transitions to create a cohesive, wind-resistant, and weather-tight envelope.
Walk the transitions with a dry, windy day in mind. Document every edge, seam, and penetration where the low-slope meets the steep roof. When replacing, prioritize a continuous waterproofing strategy across the whole system: compatible underlayment, reinforced edge flashings, and appropriately treated penetrations. In Trabuco Canyon, detailing matters as much as material choice, so align the sealants and flashing profiles with the slope change to reduce wind-driven uplift risks and moisture ingress in winter storms.
Find specialists in TPO, EPDM, and built-up flat roofing systems for residential and commercial properties.
In this canyon-and-hillside setting, you want warranty coverage that stands up to Santa Ana winds and the rugged aftermath of a wildfire season. Look for al to-year workmanship coverage that explicitly names wind-driven conditions and fasteners, plus manufacturer warranties that cover tile breakage and underlayment integrity. Homeowners here benefit from documentation that spells out what is covered if a wind event rattles tiles or if heat exposure accelerates wear. Favor contractors who provide clear, written failure reasons and a responsive process for filing claims, because post-installation support matters just as much as the initial price. A solid warranty package reduces anxiety when the next seasonal gusts roll through and the terrain shifts under heavy tiles.
Cleanup is a major homeowner priority in this market, especially on sloped lots and tile-heavy homes where broken pieces, nails, and underlayment debris can spread across driveways and landscaped terrain. Ensure the contract specifies daily cleanups during installation and a thorough final sweep, with a checklist that includes tile fragments, nails, and any stray underlayment. Ask about scaffolding or ladder drawers that help crews avoid leaving debris on steep sections or in the yard. Request a dedicated cleanup contingency, so gutters, shrubs, and the gravel driveway are kept clear after each shift. For your own peace of mind, insist on a completion walk-through and written confirmation that all debris has been removed.
The local contractor market shows unusually strong emphasis on quick response, which fits a canyon area where wind events and sudden leaks can create urgent service calls. Look for a stated response timeframe and a triage process for weather-related emergencies. Favor firms that offer on-call crews and a plan for temporary mitigation-such as tarping or quick-secure fasteners-during active wind alerts. A reliable local team should provide a clear channel for after-hours concerns and a structured escalation path if a leak or damage surfaces between regular service visits. In a place with wildfire-driven insurance scrutiny, ready responsiveness is as valuable as any warranty clause.