Last updated: Apr 19, 2026
Snow in this area tends to accumulate on steep-pitched roofs, then melt during sunny days and refreeze at night. In inland, cold winters and repeated freeze-thaw cycles drive ice dam formation as heat leaks from the attic to the roof edge. The combination of attic spaces, chimneys, and older ventilation layouts creates uneven roof temperatures, which worsens ice buildup at eaves. That uneven heat transfer means meltwater that should flow off the roof instead backs up under shingles, leaking into soffits and walls. This is one of the primary roof risks you'll encounter in this town, and it can strike suddenly after a thaw followed by a cold snap.
Your first move is to shrink heat in the attic that travels to the roof deck. Improve insulation where gaps exist and seal air leaks around attic hatches, around chimney penetrations, and any duct runs that pass through the attic. If the attic floor currently has limited insulation, add more to create a continuous barrier between living spaces and the roof deck. Use high-quality gaskets around attic access points and seal penetrations around chimneys and vent pipes to prevent warm air from slipping into the attic.
Ventilation matters just as much as insulation. If your attic lacks enough intake and exhaust air, warm air will accumulate near the roof edge. Add or adjust soffit vents, ensure the ridge vent isn't obstructed, and consider baffles along the rafter bays to Pat out cold air from the eave to the ridge path. The goal is a near-uniform roof temperature, not pockets of heat that melt snow at the eaves while the rest of the roof remains cold.
Chimneys pose a particular challenge. Their flue heat can create a local heat pocket that feeds ice dams. Improve flashing around chimneys and ensure sealant joints remain intact. Any cracks in the flashing or gaps where roof material meets brick or stone should be addressed promptly. If a long, narrow chimney wall runs along the roof, consider additional flashing detailing or a kick-out splash to direct runoff away from the eave and toward a safe area.
Where a roof meets the eaves, protect the edge with proper underlayment and consider upgrading or installing a ridge-to-eave ventilation plan that balances temperatures across the entire roof. In older homes, that may involve retrofitting additional insulation in the attic vault and reworking ductwork that pushes warm air into the attic space. Avoid relying solely on blow-in insulation; ensure the attic is densely packed where it matters most and that there are no oversized gaps or bellies that trap warm air near the deck.
Snow management should be part of your routine during storms. Build a habit of clearing light, non-adhesive snow from the lower roof edge with a roof rake when safe to do so. Reducing the depth of snow at the eaves minimizes the potential volume of meltwater that could refreeze into an ice dam. After a storm, listen for the telltale drip of water indoors or observe stained ceiling areas-these are signs to inspect for damming and address it quickly.
Keep an eye on attic temperature indicators: unusually warm ceilings or odors of heat escaping into the attic can signal insufficient insulation. Watch for frost patterns on the underside of roof sheathing after a thaw; glossy, dark patches near the eave indicate heat transfer at the edge. If you notice recurrent ice dams forming at the eave after each thaw, plan a targeted upgrade to insulation, ventilation, and flashing, rather than waiting for a bigger problem to emerge.
When ice dams occur, remove them safely only if you can do so without climbing onto an icy roof. Use a roof rake from the ground to pry loose surface ice. Do not strike with metal tools that could damage shingles. For persistent damming, call a local roofer with experience in cold-climate detailing to assess flashing, ventilation, and potential interior damage. Early intervention saves interior drywall, ceilings, and trim from water intrusion and keeps the roof deck sound for the long-term season ahead.
Storms in this region bring wind-driven rain, fallen limbs, and sudden gutters-fulls of debris that can puncture or loosen roofing materials. When hail or heavy wind hits, you may see slates or shingles displaced, flashing lifted, or new leaks appearing after the rain stops. If you notice sudden interior dampness in ceilings or walls, treat it as urgent-water can saturate roof decks quickly and breach insulation layers. In the hours after a storm, your first move is to create safe access to the attic area and check for visible penetrations around chimneys, skylights, and vents. Do not climb onto a visibly damaged roof during ongoing gusts; instead, focus on preventing interior water intrusion and securing loose debris from below.
Spring rain and fall wind events can interrupt tear-offs and leave exposed roof decks vulnerable if scheduling is not tightly managed. Prioritize tarping or boarding exposed deck areas and sealing gaps around penetrations to buy time until a professional can mount a proper temporary cover. If your roof has experienced ice dam-related drainage issues in the past, look for uneven ice buildup along eaves and ensure attic baffles are intact to maintain ventilation. In New Milford's inland setting, cutters and hats on roof edges can fail under wind pressure, so reinforce with sturdy, properly installed temporary barriers. Document damage with photos from multiple angles for insurance and contractor coordination.
The local contractor market shows strong demand for emergency repair, storm damage, and insurance-claim help, indicating that fast post-storm response is a real homeowner priority in New Milford. When selecting help, prioritize firms with 24/7 on-call capabilities, clear communication lines, and a documented plan for rapid assessment, temporary protection, and subsequent permanent repair. Ask for references from neighbors with similar housing stock-historic homes with steep pitches and chimneys require specialized experience. Ensure the contractor can coordinate directly with your insurer, provide a written scope of immediate stabilization, and schedule a staged plan that minimizes exposure to additional weather.
Steep pitches and chimneys are common in village-center and rural properties, so protect those elements during repairs. Focus on securing ridge lines, ensuring proper drainage away from soffits, and preventing wind-driven debris from penetrating roof edges again. Prioritize repairing or replacing damaged flashing around chimneys and skylights, then address ice dam risk with enhanced attic ventilation and insulation upgrades when the weather allows. Establish a concrete post-storm timetable with the contractor that covers temporary fixes, deck protection, and a prioritized sequence for tear-off and re-roofing that keeps interior spaces dry as temperatures fluctuate.
StormMate Roofing
11 Howland Rd, New Milford, Connecticut
5.0 from 15 reviews
At StormMate Roofing, we make sure your roof is in great shape, no matter the weather. From quick repairs to full replacements, our team is here to help you keep your home safe and dry. We’re all about providing honest, friendly service that you can trust. Need help with your roof? Give us a call today!
The Roof Specialist
(203) 300-6848 www.theroofspecialistsct.com
New Milford, Connecticut
5.0 from 13 reviews
Our team is a blend of expertise and dedication, bringing over 20 years of experience in roofing and home improvement. From our skilled roofers to our talented remodelers, each member plays a crucial role in delivering top-notch services. We work closely with clients to understand their needs and offer personalized solutions. Our hands-on approach ensures every project is executed with care and precision, making sure your vision becomes a reality.
RT's Construction
(203) 948-0774 www.rtsolarconstruction.com
165 Chestnut Land Rd apt.2, New Milford, Connecticut
5.0 from 5 reviews
A family owned and operated company with 35 years of contracting and roofing experience, as well as 15+ years of solar energy experience. With RT's Construction you will see how personal we treat each job and be informed every step of the way.
Greenland Construction Services
(203) 491-5655 www.greenlandroofingsiding.com
Serving
5.0 from 61 reviews
Greenland Construction Services provides roofing, siding, windows, doors, gutters, decks, railings, and more with free estimates in Brookfield and Fairfield County, CT.
Affordable Roofing
(203) 948-7393 www.affordableroofingct.com
Serving
5.0 from 60 reviews
Welcome to Affordable Roofing, your trusted provider of roofing services located in Brookfield, CT. We’re a family-owned business that doesn’t rely on sub-contractors. All our work is done in-house by our team of professionals. Founded in 1990, we have three decades of experience in delivering top-notch services. We are committed to providing excellent customer service, and we pride ourselves on our affordable pricing. Whether it’s residential or commercial, a roof repair or a new installation, we’ve got you covered.

MVP Gutters & Roofing
(203) 628-6914 mvpguttersroofing.com
Serving
5.0 from 12 reviews
At MVP Gutters and Roofing, we provide top-quality roofing and gutter solutions built to last. With years of hands-on experience and a commitment to excellence, we specialize in residential and commercial services including roof installation, roof repair, gutter installation and gutter repairs, gutter cleaning, power washing and exterior painting. We take pride in our craftsmanship, honest pricing, and customer-first approach. Why Choose MVP Gutters and Roofing? ✔ Skilled, licensed, and insured professionals ✔ High-quality materials & workmanship guarantees ✔ GAF and IKO certified installers Serving CT including all Fairfield county, Litchfield county, New Haven county. - serving all cities near you
R & K Roofing & Siding
(203) 364-4964 www.randkroofingandsidingllc.com
Serving
5.0 from 55 reviews
R & K Roofing and Siding provides roofing, siding, installation, repair, doors, windows, power washing, and skylights in the Danbury, CT area.
EP Construction Group
(203) 798-1489 www.epconstructiongroup.com
Serving
5.0 from 15 reviews
EP Construction Group is the premier provider of residential and commercial roofing services in the Brookfield, CT, area.
Bridges Roof Repair & Install
(475) 294-2298 bridgesroofrepairnewfairfield.com
Serving
5.0 from 53 reviews
Bridges Roof Repair & Install provides solutions for both urgent roofing problems and planned upgrades. The crew responds quickly to leaks and storm damage, making sure repairs are done thoroughly to prevent future issues. For new installations, they focus on selecting materials that match the property’s style while offering strong, long-term protection. Customers often mention how clearly the team explains each step of the process and how smoothly the work is carried out from start to finish. Bridges Roof Repair & Install delivers dependable service backed by attention to detail and quality workmanship.
Easy Roofing
(203) 951-1182 easyroofing.com
Serving
5.0 from 36 reviews
Established in 2015, Easy Roofing is a Brookfield, Connecticut-based roofing contractor serving Danbury, Brookfield, Milford, and surrounding areas. Their team specializes in residential and commercial roof repairs and installations, handling projects of all sizes. Easy Roofing prioritizes quality workmanship and personalized service, ensuring customer satisfaction throughout the project.
RK Roofing
(845) 416-0002 www.rkroofers.com
Serving
4.8 from 129 reviews
RK Roofing stands as a pinnacle in roofing solutions, specializing in a triad of expertise: commercial, residential, and metal roofs. With a commitment to excellence, RK Roofing seamlessly blends durability and aesthetic appeal, ensuring top-tier protection for diverse structures. From sleek commercial spaces to cozy homes, and the robust reliability of metal roofing, RK Roofing elevates roofing expectations. RK Roofing, Where Elevation Meets Excellence.

Northland Roofing
(203) 448-8793 northlandroofingllc.com
Serving
4.9 from 182 reviews
Northland Roofing has been providing outstanding roofing repairs and replacement in Connecticut for a combined 13 years. We are available 24 hours a day, 7 days a week for all your roofing emergencies. Our full licensed professional contractors have the knowledge and experience to handle any type of job. Email to schedule an appointment for a FREE estimate. Services include roof installation and repair, gutter installation, siding installation and repair, asphalt roofing, slate roofing, shingle roofing, flat roofing and more! Serving Fairfield County and surrounding areas!
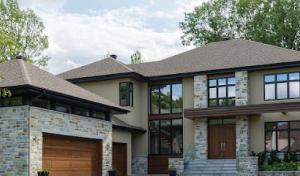
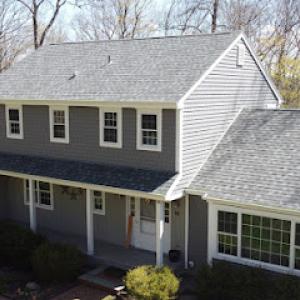
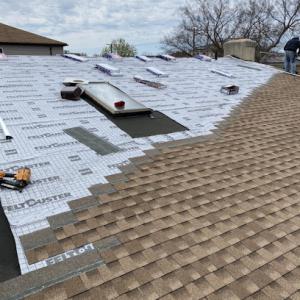
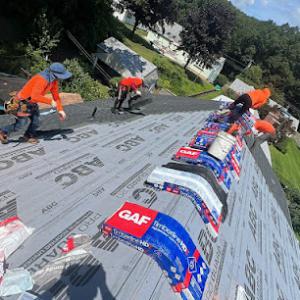
Asphalt shingles remain the most common practical choice for many homes in this area. The combination of snowy winters, freeze-thaw cycles, and blazing summer sun means that ventilation and underlayment details matter as much as the shingle itself. In older, smaller cottage-style homes with attic space that tends to get more air than one might expect, ensure the attic is well vented and that the roof deck is clean and dry before installation. A solid underlayment and a proper ice barrier in the eaves help reduce edge damage from meltwater refreezing. If the roof has a long, steep pitch, consider matching the shingle style to the house's character while prioritizing a higher-performance architectural shingle that can better resist wind uplift and thermal cycling.
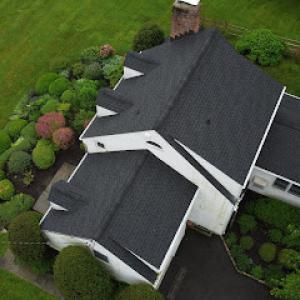
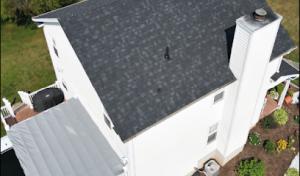
Slate continues to fit well on many Western Connecticut properties where historic aesthetics prevail. In New Milford, slate fits the architecture on older village-center homes and certain rural properties. When slate is chosen, the repair and replacement approach should account for its weight and the need for crews experienced with slate-specific flashing, nails, and lap details. Slate systems often demand a solid substrate and precise gaps for drainage; mismatches in substrate or backing can expose the roof to freeze-thaw damage. If existing slate is repaired rather than fully replaced, ensure matched thickness and profile directions to preserve the historical look and avoid localized cold spots where ice may form.
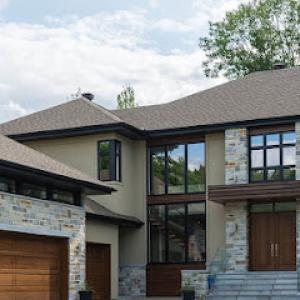
Metal roofing and premium tiles appear in the local market, reflecting a broader material mix than many neighboring towns. Structural load and flashing details become more important during any replacement or upgrade. Metal can handle winter weight and heat expansion well if fasteners and seams are correctly installed, but flashing around chimneys and dormers must be meticulous to prevent intake of meltwater. Clay and concrete tiles offer strong freeze-thaw resistance when installed with proper underlayment and support, though their weight requires a careful structural assessment. Synthetic or composite shingles bring a more forgiving weight profile while providing good resistance to heat and ice dam formation when paired with a robust ventilation plan and compatible flashing. In all these options, the roof's overall rigidity, the edge detailing, and the compatibility of fasteners with the substrate are critical for long-term performance in this climate.
With the mix of steep pitches and chimneys common here, flashing details deserve extra attention. Chimney-to-roof joints, valley treatments, and dead-air channels around vents can all influence ice dam risk. Any premium system-whether slate, metal, or tile-should be anchored with flashing that accommodates thermal movement and seasonal moisture. If a replacement is planned, verify that the chosen material's weight and span align with the existing roof structure. A mismatch can create hot spots in the summer or load-related issues in the winter, inviting fatigue and potential leaks.
In a climate that swings quickly between freezing and thawing, proactive maintenance pays off. After heavy snowfall, clear a safe, unobstructed path for meltwater to reach eaves and gutters. Regular inspections after freeze-thaw cycles can catch loose fasteners, degraded underlayment, or compromised flashing before ice dams form. For all material choices, keeping the roof surface clear of debris in late fall reduces the chance of heat spots that encourage ice buildup.
When planning a replacement or major repair, use these per-square (100 sq ft) ranges as a practical baseline. Asphalt shingles: 350 to 700 USD per square. Metal roofing: 800 to 1200 USD per square. Clay tile: 1100 to 1900 USD per square. Concrete tile: 950 to 1500 USD per square. Synthetic or composite shingles: 550 to 950 USD per square. Slate: 1500 to 2500 USD per square. These figures reflect New Milford's mix of village-center historic homes and larger rural properties, where longer spans and premium materials show up in the bill. Costs in this market can rise on larger rural homes, steeper rooflines, and houses with multiple chimneys and complex flashing transitions that are common in this area.
The slate and tile options are favored on higher-end homes with steep pitches and prominent chimneys. If the roof has a steep rise, expect higher labor time and more waste management cost, which pushes square footage pricing toward the upper end of the range. Asphalt remains the most accessible for a standard gable or modestly pitched roof, especially in historic districts where roof lines are less forgiving to oversized overhangs. Synthetic or composite shingles provide a middle path: good durability and color retention without the premium tag of slate or clay. In rural sections with longer, multi-stage roof runs, concrete and clay tiles can be cost-efficient on a life-cycle basis, but installation complexity matters.
Seasonal weather swings influence timing and pricing. Winter damage or freeze-thaw cycles can shrink the available window for work, driving demand and cost up temporarily. Spring rain can delay crews and material deliveries, while fall storms create bursts of scheduling activity and higher labor rates. Complex flashing details-around chimneys, dormers, and skylights-drive up both material and labor costs. In New Milford, expectations should account for extra flashing transitions and careful sealing against freeze-thaw stress when choosing a material.
Start with a roof assessment from a local contractor who understands New Milford's climate and housing stock. Get itemized quotes that separate material costs, underlayment, flashing, and disposal. Confirm expected life span relative to local weather patterns and plan for periodic maintenance to maximize a longer roof surface life. If options include a premium material, ask for a comparison of long-term value versus upfront price, including anticipated energy performance and future repair needs. A well-grounded plan reduces surprises when the first snowfall arrives.
Don't let upfront costs delay a critical repair - these contractors offer payment plans to fit your budget.

A full roof replacement typically requires a permit through the local Building Department rather than being treated as informal maintenance. This process is rooted in ensuring that critical elements-such as ventilation, attic insulation, and structural changes-meet current code expectations, especially since winter ice-dam performance hinges on proper assembly. Before any shingles come off or underlayment goes down, you should verify that the project scope aligns with the permit requirements and that the plan includes all major components of the job. In practice, that means coordinating with a contractor who can present a clear, code-compliant plan to the Building Department and who understands how a roof interacts with ventilation and insulation in a climate with freeze-thaw cycles.
Applications generally need project scope, roof type, and ventilation details. In this climate, ventilation is not just a detail; it directly affects ice-dam risk and roof integrity during midwinter thaws and cold snaps. When you file, expect to specify whether the attic space will be vented or sealed, the type of soffit and ridge vents, and any changes to attic insulation levels. If a project includes replacing sheathing, adding vents, or altering ventilation ducts, the Department will want these items described with drawings or notes from the design professional. Having precise ventilation details at the outset helps ensure that the roof breathes properly in harsh conditions, reducing trapped moisture that can contribute to ice-dam formation along eaves and gutters.
Inspections are usually scheduled during and after the work, with a final sign-off issued once materials and installation meet code expectations. A typical sequence includes an initial inspection to verify permit compliance, framing or deck work if involved, and underlayment and ventilation checks as the project progresses. Mid-project visits are common to confirm that weatherproofing stages, ice-and-water shield placement, and flashing around chimneys and skylines follow approved plans. The final inspection confirms that the chosen roof system, ventilation, attic insulation, and fasteners comply with current code provisions and that all components are installed according to the permit's scope.
Keep a detailed record of communications with the Building Department, including approvals, plan revisions, and inspection notices. Bring updated drawings or notes if the contractor makes changes after the permit is issued. If questions arise about ventilation integration or ice-ddam performance, request a note from the project supervisor or design professional to accompany the final submission. Remember that the final sign-off serves as the official acknowledgment that the installation meets local expectations, which helps future maintenance, upgrades, or resales go smoothly.
In this climate, roof claims often hinge on careful documentation of the pre-loss condition, and New Milford homeowners should expect an adjuster review when storm or leak damage is significant. A clear before-and-after narrative helps an adjuster distinguish wind- or hail-driven impacts from aging or pre-existing wear. Seasonal photos, dated time stamps, and notes from trusted local roofers can streamline the process and reduce back-and-forth.
Policy terms and premiums can vary by roofing material, which is especially relevant in New Milford because premium systems like slate and tile are part of the local material mix. When a storm or thaw reveals hidden weaknesses, the insurer may scrutinize whether a damaged area is consistent with the installed system's expected performance. Communicate the actual material identity and any associated manufacturer recommendations to the adjuster, since some synthetics mimic slate or tile without the same coverage implications.
Because winter damage can develop from snow, ice, and repeated thawing rather than one obvious event, photo records and maintenance history are especially important when discussing coverage. Start documenting a season-by-season condition like ice dams, gutter overflow, or cracked flashing as soon as they appear. If damage is discovered after a thaw cycle, capture multiple angles and cover any temporary leaks to protect interior spaces while awaiting an adjuster's assessment.
Be prepared to present subscription-style maintenance logs that show proactive upkeep, such as snow removal from critical zones and routine flashing inspections. A well-documented history supports coverage for failures tied to freeze-thaw stress, especially on historic village homes or steeper rural roofs where aging components interact with heavy winter loads.
Connect with contractors who help homeowners navigate the claims process from damage assessment to final approval.
The Roof Specialist
(203) 300-6848 www.theroofspecialistsct.com
New Milford, Connecticut
5.0 from 13 reviews
Greenland Construction Services
(203) 491-5655 www.greenlandroofingsiding.com
Serving
5.0 from 61 reviews
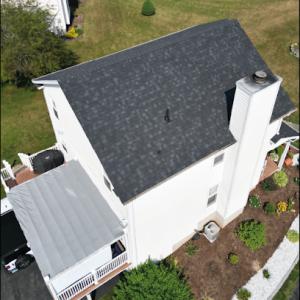
Chimneys sit right at the edge of the roofline on many older homes, and in this market that work is unusually visible to neighbors and contractors alike. When flashing around a chimney isn't drawing tight against the masonry, freeze-thaw cycles begin to push up shingles, sealants, and even the counter-flash. The first sign is typically a small mound of ice at the base or a dark streak where water has briefly leaked inside the attic. Schedule a careful inspection of the chimney apron, step flashing, and the structural deck where the chase meets the roof. If mortar joints show deterioration, consider repointing before the next winter freeze hits.
Skylights are a meaningful specialty locally, and flashing around these openings is where many leaks originate during freeze-thaw weather. Look for loose or missing sealant, brushed metal flashing pulled away from the curb, or cracked glazing on the skylight itself. In a typical New Milford attic, ice dams can push water laterally under the flashing, so check for damp rafters or stains along the interior knee wall near the skylight. Proactive resealing, upgrading curb flashing, and ensuring the flashing slope directs meltwater away from the joints are worth scheduling before mid-winter.
Older homes in and around town often need replacement planning that focuses on flashing transitions and deck condition, not just the field shingles. Inspect all transition zones where roof planes meet chimneys, skylights, and dormers. Check for sagging decking, loose nails, or signs of past ice dam repair that didn't address the root cause. When deck wood shows signs of rot or cupping, replacement before another freeze-thaw cycle preserves the roof's overall integrity and reduces the risk of hidden leaks.
Pair inspections with a practical maintenance routine: twice a year, inspect flashings at chimneys and skylights, and after heavy snow seasons. Keep gutters clear of debris to prevent meltwater from overflowing onto flashing and underlayment. If any flashing work is needed, address it promptly to reduce the chance of interior damage during a harsh winter.
Find contractors experienced in skylight installation, flashing, and leak repairs to bring natural light into your home.
The Aiello Roofing Company
(860) 350-3801 www.theaielloroofingcompany.com
5 Bluestone Ln, New Milford, Connecticut
5.0 from 93 reviews
Greenland Construction Services
(203) 491-5655 www.greenlandroofingsiding.com
Serving
5.0 from 61 reviews
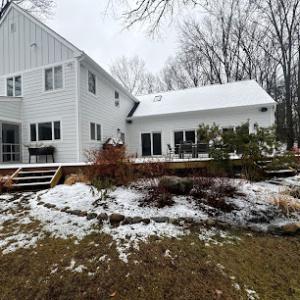
Flat-roof specialization exists in the New Milford market but is secondary to pitched residential re-roofing, suggesting this is most relevant for additions, porches, garages, and mixed-roof homes. Those low-slope sections sit under regular precipitation and face standing water risks, and they also bear extra membrane stress during winter freeze-thaw cycles. In this climate, a quiet drip or a slow leak at a low-slope tie-in can become a headline after a storm or a deep freeze.
A frequent problem is the tie-in between amain pitched roof and a low-slope section. If the transition isn't seamless, standing water can back up and push water toward interior edges, especially where parapets, skylights, or exhausts meet the membrane. Chimneys, dormers, and overhangs create corners where ice dams set up shop along the membrane edge or at flashing transitions. Relying on a single-applied membrane without reinforced corners and penetrations increases the chance of early deterioration after freeze-thaw cycles. In additions or garages with flat or low-slope roofs, improper drainage and inadequate insulation can compound leaks during late-winter thaws.
When planning a reroof or partial replacement, insist on a continuous, properly lapped membrane across the low-slope sections, with robust flashing at all penetrations and tie-ins. Inspect potential ice dam pressure points-near gutter lines, edge valleys, and transition points-before winter. Ensure insulation beneath the low-slope area is sufficient to minimize warm-air updraft that melts snow at the membrane, creating further ice dams. For mixed-roof properties, treat the low-slope section as a distinct subsystem: verify that its drainage, insulation, and flashing are designed to endure both regular rain and winter freeze-thaw cycles. Schedule targeted inspections after heavy storms and after the season's first freeze.
Find specialists in TPO, EPDM, and built-up flat roofing systems for residential and commercial properties.