Last updated: Apr 19, 2026
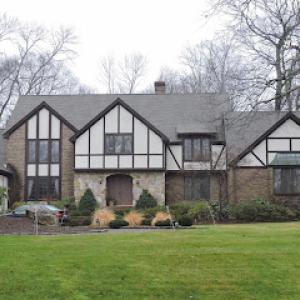
Shelton experiences cold winters with snow and repeated freeze-thaw cycles that commonly stress shingles, flashing, and roof edges. Those daily shifts between wet, freezing nights and sunlit, warmer days tilt the roof into a pattern that pushes water up, under, and around the flashing. When this cycle repeats, small weaknesses become big leaks. If you hear dripping inside after a thaw, or notice icicles hanging from rafter tails and gutters, you're seeing the warning signs that the roof edge is under serious strain.
Ice damming is a stated local seasonal risk, especially after snow events followed by daytime thaw and nighttime refreeze. Melted snow advances toward warmer areas near the eaves, where temperature differences create a dam. As the water refreezes at the edge, it backs up under shingles and behind flashing, pushing moisture into attic insulation and ceiling trays. In Shelton, where snowpack is common and winter nights drop quickly, this cycle can repeat for weeks. Left unchecked, the repeated layering of ice and water accelerates shingle deterioration and flashing failure.
Final inspections in Shelton typically review ventilation and flashing details, which directly affect winter moisture and ice-dam performance. Look for gaps around vent stacks, chimneys, and transitions where shingles meet masonry or metal. Dark stains or shingle curling at the eaves are early indicators. If you notice damp attic insulation, peeling paint, or new brown stains on ceilings after a cold snap, address it now. Do not assume a temporary chink in the system will hold through another freeze-thaw cycle.
Ventilation is not a luxury; it's a frontline defense. In tight, well-ventilated homes, attic temperatures stay closer to outdoor conditions, slowing the formation of warm roof areas that feed ice dams. Ensure soffit vents are clear, ridge vents are unobstructed, and baffles maintain proper airflow from eave to peak. Seal penetrations where warm attic air can escape to the roof deck, because warm air lifts moisture into the attic and toward the shingles, intensifying deterioration during thaw cycles. In homes with radiant or compact insulation, prioritize adequate venting above the insulation line to keep the roof cold and curb damming potential.
Flashing is a critical line of defense against ice dam damage. In Shelton, repeated freeze-thaw stress can cause flashing to loosen, crack, or pull away from joints at chimneys, skylights, and corner boards. Inspect metal flashings for corrosion, shrinking sealants, and lifted edges. Seams need continuous, watertight bonding; gaps invite water to creep under shingles during thaw periods. If flashing shows wear, treat it promptly with proper sealants and corresponding flashing replacement where needed. A small edge repair now saves far bigger water intrusion later.
Prepare for the season by checking gutters and downspouts to ensure proper drainage away from the roofline. Remove excess snow from the upper roof when safe, focusing on areas over living spaces and along eaves to reduce the meltwater load feeding ice dams. Install or upgrade ventilation to balance attic temperatures, and re-secure or replace damaged flashing where there are signs of movement or leaks. Finally, arrange a targeted roof inspection later in the season, focusing specifically on edge flashings, penetrations, and the attic ventilation strategy, so minor issues don't become major water problems when another thaw arrives.
Chimneys are a frequent source of leaks in this market, where the combination of brick or stone masonry and the roof plane creates a constant battle with freeze-thaw cycles. In Shelton, chimney work is a notably common contractor capability, and homeowners often find themselves facing flashing failures at the base of the chimney or where the masonry meets the roof. The most common culprits are stepped flashings that have pulled away from the chimney or from the shingles, deteriorated silicone or sealant joints, and mortar gaps that have widened with temperature swings. When the chimneystone settles or cracks, water finds its way into the flashing laps and into attic spaces or ceilings.
If you notice staining along the ceiling near a chimney, or you see efflorescence on brickwork near the roof line, treat that as a warning sign. In this climate, the first cold snap after a warm spell can expose compromised flashing as ice forms along the chimney step and around the cricket (the peaked transition behind a chimney). An annual inspection with a roofer who understands masonry details is time well spent, especially before winter sets in. For a practical DIY check, look for loose shingles directly above the chimney, gaps where flashing meets the roof deck, and any white, mineral-based staining that might indicate moisture infiltration. If a contractor notices cracked mortar joints, loose have-its, or rusted or popped fasteners in the chimney cap assembly, those issues must be addressed promptly to prevent further water migration.
When scheduling repair work, emphasize proper integration between the chimney flashing and the roofing material. In Shelton, the best results come from a continuous flashing plane that ties into the roof's underlayment and a properly sealed counter-flash at the chimney side. Pay attention to the area where a cricket sits behind or beside the chimney; if the cricket drainage is clogged or misaligned, meltwater or roof runoff can pool and leak back into the attic. A thorough repair plan should include replacing degraded flashed metal, resealing sealant joints with a product rated for masonry and UV exposure, and ensuring tie-in details with the shingle rows are watertight. Finally, ensure that any repairs include a test for wind-driven rain and a follow-up inspection after the first major freeze.
Skylights are a common target for leaks in this area, where skylight penetrations become points of recurring flashing issues. The prevalence of skylight service among Shelton-area roofers reflects how often those penetrations demand attention. Leaks around skylights typically stem from aging or damaged flashing, poor step flashing integration with surrounding shingles, or degraded curb seals. In practice, the flashing around a skylight needs to function as a continuous seal that accepts expansion and contraction without tearing or pulling away. When flashing fails, water can wick into the roof deck and travel to the interior corners of a room.
Look for signs of wear along the skylight flange, especially at the corners where metal flashing meets the curb and the surrounding shingles. In winter, ice dam formation near skylight edges can force water under flashing laps, creating a noticeable drip line on ceiling surfaces. If a skylight sits on a low-slope section or near a boundary where roof-wall transitions occur, the flashing detail must bridge the transition smoothly, with appropriate sealant and a waterproof collar at the curb. A practical check is to run your hand along the skylight edges during a dry day and look for hairline gaps or crusty sealant that has lost adhesion. If the glass shows signs of obscured or damp framing inside, that signals a moisture path that requires attention.
Shelton's final inspection typically confirms proper flashing and connection details, making penetrations and roof-wall transitions a key local quality checkpoint. When a project nears completion, verify that flashing around chimneys and skylights is continuous, with no gaps or misaligned laps. Confirm that the counter-flashing has been sealed properly against the masonry or curb and that the roof shingles have complete, clean contact with the flashing without protruding edges that could trap ice. The insulation and ventilation around these penetrations should be assessed to prevent condensation buildup in attic spaces. A thorough walkthrough after installation or repair should include a test for water ingress with a controlled rain test or after a heavy freeze-thaw cycle, if feasible, to ensure the flashing remains secure through Shelton's hardest seasons.
Find contractors experienced in skylight installation, flashing, and leak repairs to bring natural light into your home.
KBL Roofing Contractor
(203) 208-7126 kblroofingcontractor.com
Shelton, Connecticut
5.0 from 9 reviews
KBL Roofing Contractor offers well experienced roofers in roof replacement and repair. With over 10 years of experience in the field, we guarantee the satisfaction.
Fulcrum Contracting Fairfield
Shelton, Connecticut
5.0 from 7 reviews
Fulcrum Contracting Fairfield brings together craftsmanship and excellence, specializing in roofing and siding. With an unwavering commitment to customer satisfaction, we utilize only the finest quality products and expert installation techniques. Our exceptional customer service sets us apart, assuring you of a seamless and satisfactory experience. Trust in our expertise and professionalism; Fulcrum Contracting stands behind our work, providing an installation warranty alongside the manufacturer's coverage.
New England Roof Care
(203) 228-6272 www.newenglandroofcare.com
Shelton, Connecticut
4.3 from 12 reviews
Whether you’re looking for a roofing service provider for your commercial building or residential home, or you’re in need of an entirely new roofing system, New England Roof Care is one of the most respected roofing service providers in CT. Licensed and insured, NE Roof Care has grown quickly through repeat customers and referrals from the quality of work performed. Call us today.

Storm Shield Roofing
(203) 754-3071 www.stormshieldct.com
Serving
5.0 from 70 reviews
We strive to be the best construction and project management organization by achieving extraordinary results for our customers, building satisfying careers for our people, and earning a fair return on the value we deliver. Our services include but are not limited to: Roofing, Repair Roofing Replace Solar Panels Roof
The Vinyl Kings
Serving
4.8 from 26 reviews
Start on your home today! When you aren't sure whether or not a renovation fits into your budget, discuss your wishes with our knowledgeable team and Vinyl King specializes in siding, roofing, windows and gutters. Owner, Peter Pastuszek, has been working in the industry since 1998. He's an expert in his trade of business. We are a local business, dedicated to serving you, our customer. Our highly skilled and professional team are here to offer you a comprehensive treatment service, with the best services possible. We guarantee this high level of service at all times, so you can rest assured that you are in safe hands. Give us a call today!
Rooftop Construction
Serving
5.0 from 10 reviews
Our roofing and siding company stands out because of our commitment to quality, integrity, and customer satisfaction. We use top-tier materials, offer skilled craftsmanship, and ensure every project is completed on time and on budget. Your home deserves the best protection and curb appeal, and we make it our mission to deliver results that exceed expectations. We build trust by providing honest consultations, transparent pricing, and reliable warranties. Choose us for unmatched service and long-lasting solutions that add value and security to your home.
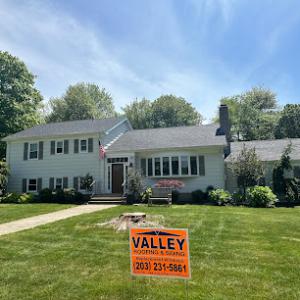
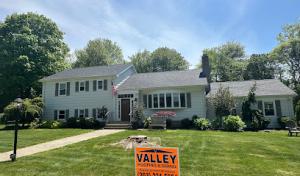
Valley Siding
(203) 734-7258 www.valleyroofingandsidinginc.com
Serving
4.8 from 117 reviews
Family owned and operated , since 1958. Valley Roofing and Siding was a business built on honesty, integrity, and customer satisfaction. This commitment has allowed us to maintain our pristine reputation as the top roofing and siding company in Connecticut. The company’s work force of two dozen employees insures jobs are completed skillfully and in a timely fashion . Thousands of references are available to back this up and give home owners peace of mind that they are choosing the correct contractor for now and the future . As our company motto says …. Valley Roofing and Siding - here today and here tomorrow !
Gutter King
(203) 540-8101 www.gutterkingconnecticut.com
Serving
4.7 from 82 reviews
Gutter King, LLC provides gutter installation and repair to Orange, CT and surrounding areas.

HGC Roofing & Siding
Serving
4.9 from 31 reviews
Helio General Contracting is a local Connecticut based general contractor focused on residential and commercial roofing, gutters, siding, and window installations primarily.
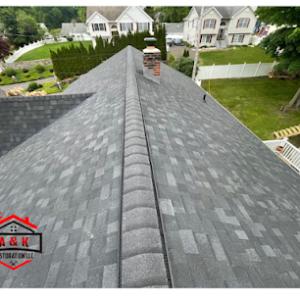
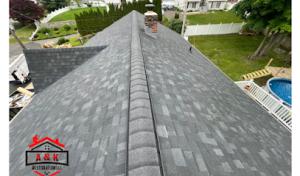
A & K Restoration Of CT
(203) 721-4791 www.akrestorationct.com
Serving
4.9 from 14 reviews
A & K Restoration Of CT is a roofing contractor in Derby, Connecticut. They specialize in roof restoration and repairs, ensuring long-term stability for your home. Their team of specialists can assist you with navigating the insurance claim process to get your roof repairs approved.
Chief Cornerstone Construction
www.chiefcornerstoneconstructions.com
Serving
5.0 from 13 reviews
Chief Cornerstone Construction of CT is dedicated to becoming the last roofing specialist Fairfield County will ever need. We take tremendous pride in providing expert roofing across the county and quality craftsmanship. As CT homeowners, we understand that your home is one of your biggest investments. We work on every home as if we were working on our own home. We offer practical solutions for all your roofing needs here in Fairfield County CT. We offer full roof replacements, reroofing, roofing repairs, Leak detection & resolution, siding repairs, minor carpentry work, chimney repair, gutters are some of our specialties. All phases or exterior home remodeling. We service all of Monroe, Trumbull, Shelton and all surrounding towns.
Integrity Home Services
(203) 922-2408 www.integrity-home-services.com
Serving
5.0 from 13 reviews
Integrity Home Services has become a trusted and respected name in Southern Connecticuts residential roofing industry.IHS was established in 1991 and is located in Stratford CT.We service all of Fairfield and New Haven Counties. We are fully licensed and insured. IHS offers a full line of roofing products and services. Roof replacement, roof repairs, gutters, skylights, flashings and roof ventilation to name a few.We also offer roof inspections.All our work is performed with a personal call to integrity, excellance and customer satisfaction. With a focus on timely completion of contracts. Quality craftsmanship in all installation procedures and clear, open, honest communication with each of our clients. Ask about our financing options.
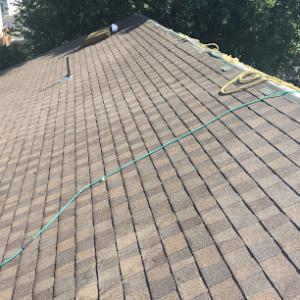
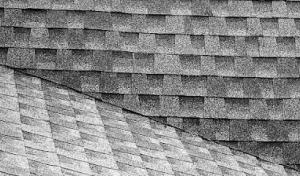
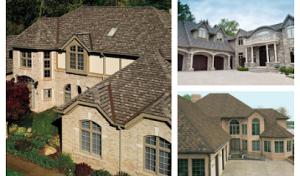
Asphalt shingles are a dominant local material and are exposed to both winter freeze-thaw stress and warm, humid summer conditions. In this climate, you'll want shingles with good granule retention and a strong sealant to resist wind uplift and ice dam development. Choose architectural or laminated options for added weight and a longer warranty against curling and granule loss. In winter, ensure the attic is well ventilated and the roofline is free of obstructive debris so meltwater can travel to gutters rather than pooling at the eaves. Regular inspections after freeze-thaw cycles help catch small cracks or lifted edges before they become larger leaks. For best performance, pair asphalt shingles with proper attic ventilation and a reliable ice-and-water shield at the eaves and along any valleys or penetrations.
Metal roofing is also a meaningful specialty in this market, making it a realistic local option for homeowners comparing snow-shedding and longevity tradeoffs. Metal panels or standing-seam systems shed snow more effectively and can reduce the risk of ice dams when paired with tight flashing and sound underlayment. Look for corrosion-resistant alloys and factory-applied coatings that hold up to humidity and salt air if you're near coastal runoff or winter road de-icers. A key advantage in this climate is reduced thermal expansion stress when a metal roof is properly installed with floating clips and room for movement. Ensure flashing around chimneys, vents, and skylights is continuous and well-sealed, because poor flashing quality under Connecticut seasonal swings is a common culprit in leakage. If you consider metal, plan for careful contractor detailing at eave edges and at roof-to-wall junctures to preserve long-term performance.
Tile, wood shake, and synthetic/composite roofing are present in Shelton's market but require attention to weight, moisture behavior, and flashing quality under Connecticut seasonal swings. Clay and concrete tiles bring notable durability but are heavy; ensure structural framing can handle the load and that substrate is dry and well-ventilated to prevent moisture intrusion behind the tiles. Wood shakes offer rustic appeal but absorb moisture and can warp or rot if ventilation and drainage aren't adequate; expect higher maintenance in humid summers and freeze-thaw cycles that stress fasteners and flashing. Synthetic or composite options can be tailored for weight and performance, yet still rely on precise flashing and venting. In all three categories, meticulous installation is essential: ensure underlayment is continuous, fasteners are appropriate for the substrate, and flashing around chimneys, skylights, and vent pipes is robust and weatherproof to handle the tough seasonal shifts. Regular inspections after severe storms help catch loose edges or moisture intrusion early, preserving the roof's integrity through manyбы winters.
Pricing for roof replacement in this area follows the typical material ladder, with asphalt shingles at 350 to 700 USD per square, metal roofs from 600 to 1100, clay tile 1000 to 1800, concrete tile 900 to 1600, wood shingles or shakes 550 to 900, and synthetic or composite shingles 600 to 1100 per square. These ranges reflect a practical mix of residential pitches common in this market and the need to match a roof to the house style while coping with the freeze-thaw cycle. In Shelton, you'll notice the upper end of these ranges when the project includes more complex layouts or higher-quality underlayment and finishes.
Costs in Shelton can rise when winter storms or autumn storm activity create demand spikes for quick-response repairs and full re-roofing. If a sudden freeze-thaw cycle exposes hidden damage, replacement may move from a planned project to an urgent one, driving up labor availability and material timing. Planning with a cushion for seasonal fluctuations helps keep budgeting realistic. Beyond the storm season, a steady contractor schedule tends to level pricing, but be mindful of peak windows after heavy snows or prolonged cold snaps.
Pricing is also affected locally by flashing complexity around chimneys and skylights, both of which appear frequently in Shelton contractor service profiles. Areas with multiple penetrations or intricate flashing detail require additional workmanship and materials, which pushes the per-square cost higher. If the roof includes valley intersections or raised parapets, expect a measured bump in the overall quote. When you receive bids, ask specifically how flashing around chimneys and skylights is priced and whether the contractor accounts for any special sealants or vapor barriers needed for our climate.
Begin with a precise roof area calculation and a material choice aligned to your home's design and climate needs. Get at least three written bids that itemize material, underlayment, flashing, ventilation, and disposal. Check that bids include ice-dam prevention measures such as proper attic ventilation and adequate insulation, since those factors directly influence long-term performance in freeze-thaw conditions. For a home with complex flashing, request a dedicated line item and a clear explanation of any additional warranty coverage tied to flashing work. Keep in mind that local costs reflect both material selection and the added labor associated with Shelton's typical chimney and skylight configurations.
Get a clear picture of your project costs upfront - no commitment required.
Shelton homeowners face a distinctive mix of freeze-thaw cycles, humid summers, and a neighborhood of pitched roofs alongside a few low-slope commercial structures. The combination makes ice dam risk real every winter and wind-driven debris a regular autumn concern. Roofs that have aged or have marginal attic ventilation tend to show up as spring leaks after thaw and rain periods. This isn't a hypothetical problem here; it plays out in driveways and on kitchen ceilings when a late-season thaw meets a stubborn ice dam.
Connecticut insurers generally cover documented roof damage from wind, hail, and winter storms, but proof matters. In practice, a successful claim often hinges on clear photos, a precise, itemized scope of work, and an adjuster review of ventilation and underlayment. When a leak surfaces after a thaw, gathering evidence quickly-dates, weather notes, and a walk-through video-can prevent a long back-and-forth. The goal is to connect the visible signs of damage to the events that caused them, not to rely on memory alone.
Insurance-related roofing help is an active specialty in Shelton's contractor market, indicating that claim support is a meaningful local service need. A knowledgeable contractor can guide a homeowner through the documentation, help prepare the scope of work with emphasis on proper ventilation and underlayment, and coordinate with the insurer for an efficient assessment. This support is not a luxury; it frequently determines whether a claim covers the necessary repairs rather than a partial adjustment that leaves critical components exposed to future freeze-thaw cycles.
When winter storms hit, inspect eaves and shingles for displaced granules, cracked edges, or damaged flashing. After autumn wind events, look for debris buildup in valleys and around flashing feet. In spring, prioritize addressing any sign of moisture intrusion behind walls or ceilings and ensure the attic is properly ventilated to reduce ice dam formation. A proactive contractor can help prepare the documentation to support a smooth claim and a durable repair.
The key is timely action paired with solid documentation. Delays or vague notes can complicate an insurance response and extend exposure to further damage. In this market, aligning with a contractor who specializes in insurance-assisted repairs can make the difference between a temporary fix and a lasting, weather-resilient roof.
Connect with contractors who help homeowners navigate the claims process from damage assessment to final approval.
For a full re-roof, a building permit is usually required. The local code enforcement budget and staff focus on ensuring systems like flashing, ventilation, and drainage are upgraded to handle Shelton's freeze-thaw cycles. Starting the project with this permit in hand helps avoid delays if inspectors need to review the work midway or after completion.
The permit application is submitted by the contractor or homeowner with project details for building department review for local code compliance. Expect to outline the roof type, underlayment choice, venting plan, and flashing details at eaves, hips, valleys, and around dormers. Providing a clear sequence of work helps the reviewer verify that the planned installation will resist ice dam formation and manage condensation effectively. If possible, include product specifications and a basic roof plan showing penetrations and ventilation routes.
Communication matters. A quick call to the building department before filing can confirm submittal requirements, such as whether digital plans are acceptable or if wet signatures are needed. Some projects benefit from a pre-submittal walkthrough with a permit reviewer to flag potential issues with existing conditions, like deteriorated decking or gutter connections that influence flashing and ice dam prevention strategies.
A final inspection is typically scheduled after completion to confirm proper flashing, ventilation, and connection details. Inspectors pay particular attention to eave and rake flashing continuity, chimney and vent terminations, adequate attic ventilation, and proper fastening patterns for the chosen roofing material. The goal is to verify that installation aligns with local amendments and the manufacturer's guidelines for climate-specific performance. Being ready with access to attic spaces and a clear view of eaves, valleys, and roof penetrations helps the process move smoothly.
Keep a current contact at the roofing crew and share schedule updates with the building department to avoid missed inspections. If any changes occur during installation, update the permit records and notify the inspector. Properly staged ventilation and flash detailing identified in the permit review reduce the risk of ice dam-related damage when Shelton's winter returns.
In this market, flat-roof service is a meaningful specialty, reflecting a real local need beyond standard pitched residential roofing. The inland Fairfield County freeze-thaw cycle, humid summers, and a mix of housing stock mean low-slope assemblies face unique stresses. Freeze-thaw cycles push water into seams and penetrations, then refreeze and expand, which can aggravate leaks and cause fastener or flashing issues. The typical Shelton setting-short transitions between indoor and outdoor spaces, and occasional low-slope commercial-adjacent layouts-means these roofs demand careful attention to detail and materials chosen for durability in our climate.
Spring rains and thaw periods are a stated local risk for leak development if low-slope work is performed during wet conditions. Plan repairs and resealing for dry spells, ideally after the ground dries and temperatures stay above freezing at night. If you must schedule work during shoulder seasons, use crews that manage moisture control on the roof and verify membrane adhesives are rated for damp conditions. After a thaw, inspect edges and penetrations promptly, because warm days followed by cool nights can create micro-movements that reveal vulnerabilities.
Summer heat and humidity in Shelton can affect sealant curing and material movement, which matters on low-slope assemblies and roof penetrations. Choose products with compatibility to high humidity and temperature swings, and ensure the installation details account for expansion and contraction of membranes. Ventilation plays a real role even on low-slope layouts: insufficient intake or exhaust can trap heat under the membrane, accelerating wear.
Periodically check for pooled water on any flat sections, especially after rain events, and verify that drains and scuppers are free of debris. Inspect flashing around edge details, skylights, and penetrations for signs of separation or corrosion. When you see efflorescence, soft spots, or unusual bumps in the membrane, treat it as a warning sign rather than a cosmetic issue. Here in Shelton, proactive maintenance and timely resealing in dry conditions can prevent small issues from becoming costly repairs later.
Find specialists in TPO, EPDM, and built-up flat roofing systems for residential and commercial properties.

New England Roofing & Home Repair
(203) 795-3947 newenglandroofingct.com
Serving
4.8 from 110 reviews
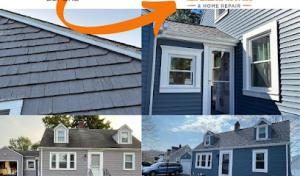
In this market, homeowners look for contractors who can handle a full installation with cleanup included. Re-roofing plus thorough site cleanup shows the team can deliver a complete replacement and leave the yard clear of nails and debris. When you call around, ask for a written scope that explicitly lists full tear-off (if needed), roof disposal, and a final cleanup pass. If a contractor treats cleanup as an afterthought, that hesitation often mirrors other missed details during the job.
Active leaks and storm damage prompt fast outreach, and Shelton crews that respond quickly tend to keep downstream damage in check. A contractor's ability to schedule a site visit within 24 to 48 hours, provide a clear plan, and set expectations for temporary precautions matters. In winter, a timely visit can mean the difference between a small repair window and a larger, more disruptive project. Look for firms that confirm visit times, arrive prepared, and communicate ongoing timelines without delays.
Shelton's market features long-established, family-owned firms alongside manufacturer-certified teams and more modern outfits. That mix gives you a range of service styles, from hands-on local ownership to streamlined project management. When evaluating, note whether the company has legitimate manufacturer certifications, strong references from homeowners with similar roof types, and a visible track record of clean, respectful job sites. Ask who will supervise the work on site, how crews are vetted, and whether the company will stand by the workmanship with a clear warranty path. This neighborhood diversity makes it possible to balance personal rapport with proven capability.