Last updated: Apr 19, 2026
Staten Island's shoreline exposure leaves many homes vulnerable to wind-driven rain and salt-laden moisture, especially during coastal storms moving through New York Harbor and the Lower Bay. That salt-logged air accelerates deterioration of edge flashings, fasteners, and the underside of roof transitions. Pitched sections mix with low-slope porches and rear extensions, creating routes for water to find weaknesses where the wind can pry at shingles, seams, and caulk. The result is a pressure-driven cascade: a storm rips in moisture, finds the tiniest opening, and then compounds that leak across the roof deck and into the attic.
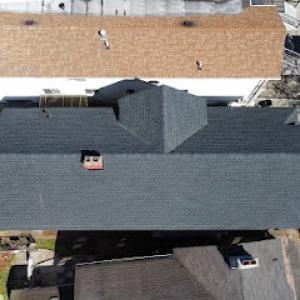
Local roof failures often start at edges, flashing, and low-slope transitions where older additions, porches, and rear extensions meet the main roof. Those points are under the most stress during coastal winds, and they're the most likely to show up with wind-driven rain. Over time, salt-laden spray corrodes metal components, and flashing that once sealed a corner becomes brittle or loose. If a roof has been patched or lowered with mismatched materials, those transitions become prime leak channels when a nor'easter or tropical-storm breeze hits the shore.
Look for exposed fasteners along ridge caps and edge metal, especially where a porch roof ties into the main structure. Check for cracked or curled shingles near edges, split sealants around valleys, and displaced boot flashing around vents. On low-slope sections, be wary of blisters, ponding, or missing granules that allow water to sit and creep under coverings. In attic spaces, note any signs of moisture staining, dark mold spots, or a musty odor after rain-these are red flags that moisture has wiggled through corners or seams during a storm.
Prepare with a focus on coastal wind zones and low-slope transitions. Inspect exterior edge flashing and near-porch junctions before a storm; reseal any loose caulk and ensure flashings have a clean, tight fit. Clear roof debris only if safe to access; avoid scaling wet or brittle roofs during high-wind events. If there is a preexisting leak, protect valuables below with tarps or buckets and shore up any compromised areas temporarily with appropriate sealant and non-penetrating fasteners. After a storm, prioritize rapid inspection of edges, flashings, and low-slope areas, since those are where damage tends to concentrate.
Once winds subside, conduct a careful walk-around with a flashlight to locate lifted shingles, torn flashing, or displaced edging along the roof perimeter. In attic spaces, re-check for new damp spots, damp insulation, or daylight visible through seams. For any found vulnerabilities, patching at the edges and over low-slope transitions should take precedence, because wind-driven rain will keep exploiting those weak points until they're addressed. Document damaged areas with photos and note the exact locations to guide a professional assessment.
A durable coastline-ready roof on a low-slope or porch extension requires reinforced edge systems, corrosion-resistant flashing, and properly integrated transitions between roof planes. Consider upgrades that address salt exposure and wind resilience: high-performance underlayment where appropriate, continuous edge protection, and flashing details that accommodate mounting tolerances across multiple roof planes. Regular seasonal checks focused on edges, flashing, and low-slope junctions will help catch wear before a major storm forces costly, cascading failures.
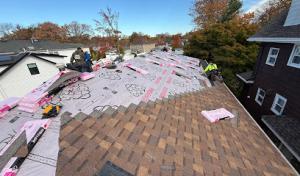
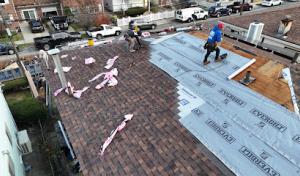
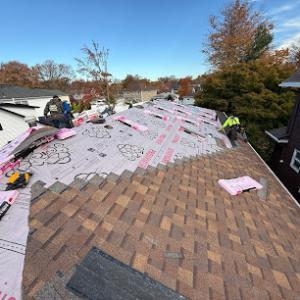
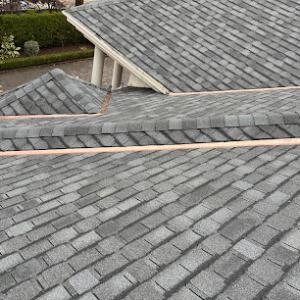
Many homes combine a sloped main roof with low-slope areas over dormers, porches, garages, and rear additions. Those transition zones are where leaks often start, especially when wind-driven rain from the harbor hits at an angle and salt spray weakens sealants. Inspect the edge terminations where shingles meet membrane, and look for gaps, misaligned flashing, or dried-out sealant joints. In practice, check after strong storms and again after a season of shifting temperatures. If you see hairline cracks at the seam or a gap where the low-slope section meets the main roof, plan a targeted reseal or flashing refresh before moisture finds its way further into the structure.
Low-slope sections collect water more readily, and in winter snow and ice tend to linger there longer than on steeper roofs. That stagnation increases pressure on membrane seams and can push water toward fasteners or joints. On many homes, these areas sit under overhangs or next to porous deck materials, which can trap moisture and promote blistering. Regularly inspect for ponding, especially after storms, and keep a close eye on seam tapes or adhesives that may have softened or lifted with heat and humidity. If you notice standing water that doesn't drain within 48 to 72 hours after a rain, you should address grading or add improved drainage details to reduce prolonged contact.
Winter conditions bring ice dams and increased load on low-slope surfaces. Snow can bridge across a membrane edge where flashing terminates, forcing melt water to back up under the cap or into fastener lines. Clear snow from low-slope zones after storms and ensure attic or ceiling ventilation is adequate to reduce interior moisture peaks that drive mold and substrate deterioration. When inspecting, pay attention to the underside of overhangs and dormer connections for signs of ice-related damage such as still-standing meltwater marks or staining along joints and fastener rows.
Humid summers in New York City can accelerate problems with trapped moisture in low-slope assemblies and make timing of coatings or adhesive-based work more sensitive. If a coating or sealant relies on heat to cure, high summer humidity can extend cure times and compromise the bond. Plan any coatings or adhesive work for cooler, drier days and consider the impact of coastal humidity on substrate prep. Look for soft or tacky patches along seams after a heatwave, which can indicate adhesive breakdown or moisture entrapment.
Walk the roof after a storm and again after several sunny days. Start at the transition zones and trace any discoloration or staining back to a possible flaw in flashing or seam tapes. Inspect all edge terminations where the low-slope sections meet the main roof: look for lifted metal flashing, worn caulk, or cracked sealant. Test drainage by observing whether water pools in the low-slope corners and, if needed, adjust the slope or add a secondary drain point to move water away from sensitive seams. For any suspected seam or flashing issues, schedule a targeted repair focusing on the vulnerable junctions rather than replacing entire sections. On Staten Island, where coastal exposure compounds wear, prioritizing these detail repairs can extend the life of flat and low-slope assemblies.
Find specialists in TPO, EPDM, and built-up flat roofing systems for residential and commercial properties.
Calco Roofing / Seamless Gutters
(917) 226-0113 www.calcohome.com
2655 Richmond Ave, Staten Island, New York
5.0 from 174 reviews
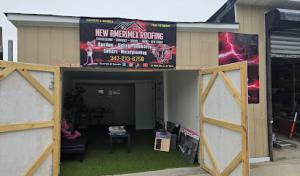
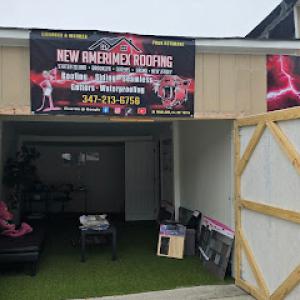
New Amerimex Roofing
(347) 213-6756 www.newamerimex.roofing.com
81 Wild Ave, Staten Island, New York
5.0 from 100 reviews
Top Tier Roofing NY
(347) 359-2457 toptierroofingny.com
Berry Ave, Staten Island, New York
5.0 from 95 reviews

B&B Roofing & Gutters
(718) 981-7663 bbroofingpros.com
84 Jewett Ave, Staten Island, New York
5.0 from 231 reviews
B&B Roofing is a locally trusted roofing company serving Staten Island, Brooklyn, and New Jersey. With years of experience and thousands of satisfied homeowners and business owners, we specialize in roof replacement, roof repair, gutter installation, skylights, and waterproofing. Our licensed and insured roofers deliver quality work using top-grade materials from leading brands to ensure every roof is built to last. Whether it’s a leaking roof, storm damage, or a complete roof installation, our team provides fast, reliable service with clear communication and spotless cleanup. We take pride in honest pricing, professional workmanship, and customer satisfaction that’s second to none.
Calco Roofing / Seamless Gutters
(917) 226-0113 www.calcohome.com
2655 Richmond Ave, Staten Island, New York
5.0 from 174 reviews
We specialize in high-quality roofing and seamless gutter solutions for both residential and commercial properties. With years of experience and a reputation for excellence, our licensed and insured team is committed to protecting your home with expert craftsmanship and durable materials. Whether you need a full roof replacement, minor repairs, or custom seamless gutters that perfectly match your home’s exterior, we deliver dependable service with honest pricing and clear communication. We work with asphalt shingles, metal roofing, flat roofs, and more—always focusing on long-term performance and curb appeal. ✅ Free Estimates ✅ Storm Damage & Insurance Claims Assistance ✅ Seamless Aluminum & Copper Gutters ✅ Local, Family-Owned Business
Golden Key Construction Group
(929) 564-4310 goldenkeyconstructiongroup.com
15 Hilltop Terrace, Staten Island, New York
5.0 from 111 reviews
Golden Key Construction Group, founded in 2004, offers Staten Island and New Jersey residents a one-stop shop for their exterior needs. They specialize in Roofing, Siding, Decks, Chimneys, and Masonry, ensuring the durability and beauty of your home's exterior.
New Amerimex Roofing
(347) 213-6756 www.newamerimex.roofing.com
81 Wild Ave, Staten Island, New York
5.0 from 100 reviews
new amerimex roofing llc was founded in 2019 it is a family business that seeks to please each of its clients by providing them with an excellent job you can call robert at 347 213 6756 to make your appointment we make free estimates we are experts in shingles tpo epdm slatestone and rn all types of flat roofing .... in advance we thank you for the support and confidence you give us in doing the work
Top Tier Roofing NY
(347) 359-2457 toptierroofingny.com
Berry Ave, Staten Island, New York
5.0 from 95 reviews
Top Tier Roofing NY is your trusted partner for roofing services in New York City, including the Bronx, Queens, Brooklyn, and Staten Island. Specializing in residential and commercial roofing, they offer roof flashing, skylight repair, and installation as well as flat roof repair and replacement. Their team is known for its precision in roof inspections and commitment to using superior materials. Top Tier Roofing NY stands out for its reliable service and dedication to customer satisfaction, ensuring every project is completed to the highest standards.

Alter Phase Roofing Contracting
(929) 370-1552 alterphaseroofing.com
61 Appleby Ave, Staten Island, New York
5.0 from 63 reviews
"Alter Phase Roofing is your trusted Staten Island and Brooklyn source for professional roofing solutions, whether you need a full roof replacement, reliable roof repairs, or a robust commercial roof. We specialize in both residential and commercial projects, including flat roofing, and will help you choose the best materials to suit your needs and budget. From speedy leak fixes to beautiful new roofs, we're committed to quality workmanship, clear communication, and making the process hassle-free, from your initial call to the final inspection. Call Alter Phase Roofing today for your free estimate and experience the difference!
Global Roofing & Siding
(718) 715-5550 globalroofingnynj.com
11 (B Kermit Ave, Staten Island, New York
4.9 from 116 reviews
Because of our strong focus and daily routine, our team is prepared to handle all your specific needs in an efficient and professional manner and there really isn’t any type of roofing situation we haven’t seen before. Besides our vast experience, attention to detail, impeccable customer support and passion for home owner satisfaction, here’s a few things to note about Global Roofing services we provide for ROOFING & SIDING SPECIALISTS LICENSED AND INSURED LOCALLY OWNED AND OPERATED PERSONAL GUARANTEES UNBEATABLE PRICES FREE ESTIMATES CIVIL SERVANTS & VETERAN DISCOUNTS PROUDLY SERVICING NJ & NY!
Eddy Roofing & Repair
(347) 603-1847 eddyroofstatenisland.com
2071 Clove Rd #317, Staten Island, New York
5.0 from 55 reviews
Eddy Roofing & Repair proudly serves Staten Island with expert roofing solutions for residential and commercial properties. Whether you need a quick repair, leak fix, or full roof replacement, our skilled team uses high-quality materials and proven methods to ensure lasting protection. We work with shingles, flat roofs, and more. Trust Eddy Roofing & Repair for reliable service and durable results.
Staten Island Exteriors
(646) 632-1505 www.statenislandexteriors.com
438 Stobe Ave, Staten Island, New York
4.9 from 63 reviews
Staten Island Exteriors is the premier roofing contractor, offering top-notch residential and commercial roofing services. Our expertise spans roof repair, emergency roofing, roof inspection, and more. As one of the best roofing companies on Staten Island, we pride ourselves on delivering affordable, high-quality solutions tailored to meet your needs. Whether you're in need of reliable roof repairs or comprehensive inspections, our dedicated team ensures your roof is in peak condition. Choose Staten Island Exteriors for unparalleled workmanship and exceptional customer service. Reach out today to experience the best in roofing.
ProLine Roofing
(347) 323-9128 www.proline-roofing.com
481 Mill Rd, Staten Island, New York
5.0 from 30 reviews
ProLine Roofing is Staten Island’s top-rated roofing contractor, specializing in expert roof repair, roof replacement, flat roofing, and emergency roof services for homes and businesses across the island. Fully licensed and insured in New York, we bring over a decade of hands-on experience serving Staten Island homeowners with honest pricing, quality materials, and fast, reliable service. We work on all roof types from asphalt shingles to EPDM and TPO flat roofs, and handle everything from leaky roof repairs to full roof tear-offs and replacements. Our team also provides gutter replacement, roof inspections, skylight installation, and storm damage repair with a focus on lasting protection and clean, professional results.
Joseph S Galante & Son Contracting
(917) 613-6351 www.statenislandcontractor.com
30 Canterbury Ct, Staten Island, New York
4.8 from 52 reviews
At Joseph D. Galante & Son Contracting, we offer a full range of contracting services tailored to meet the unique needs of our clients. No matter the size or complexity of your project, we have the expertise to deliver exceptional results. Our services include: Kitchen Renovations, Bathroom Remodeling, Roofing, Siding and Exterior Work. Baseme
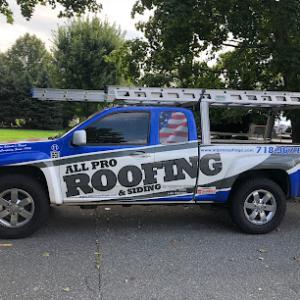
All Pro Roofing & Siding
(718) 967-6630 allproroofingsi.com
72 Goff Ave, Staten Island, New York
4.7 from 84 reviews
Family Owned & Operated for 29 years. We Specialize In Roofing, Siding, Windows, Doors, & Gutters
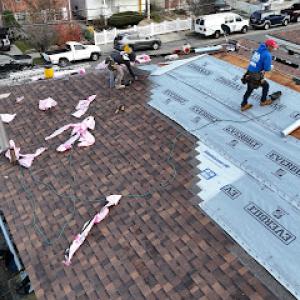
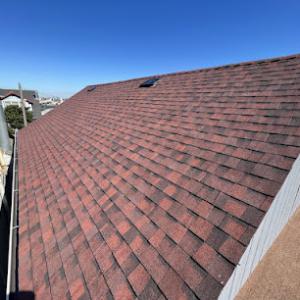
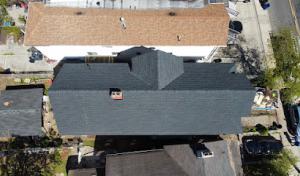
Asphalt shingles remain the dominant practical choice on Staten Island, but coastal wind exposure makes correct fastening patterns and edge detailing especially important. The harbor-facing shoreline ratchets up wind speeds during nor'easters and fast-moving storms, so shingles need robust nailing, a properly sealed starter course, and reinforced edges at rake and eave lines. Look for ratings that match wind zones typical to the area, and ensure the contractor uses corrosion-resistant fasteners and ring-sholt nails where applicable. In a low-slope or porch extension, double-check that the shingle edges are fully sealed and that the roof deck is clean and dry before installation. Regular maintenance should include checking flashing around valleys, penetrations, and any vents that run along exposed sections.
Metal roofing can perform well in exposed areas, yet homeowners near salt air need attention to finish durability, fastener compatibility, and flashing corrosion resistance. On bays and shore-adjacent blocks, the salt-laden breeze accelerates wear on uncoated or poorly matched fasteners, so choose a system with corrosion-resistant screws or nails and a finish that resists chalking and color fade. Edge detailing matters: long, continuous eave and rake trims should be installed with hidden fasteners or exposed-fastener systems designed for harsh coastal environments, and flashing should be pre-painted or factory-coated to reduce galvanic reactions with the deck or framing. For low-slope portions, verify that the panel seams and transitional curbs are sealed to prevent wind-driven leaks, especially around vents and skylights. A well-installed metal roof can shed wind-borne spray more effectively than some other materials, but routine checks for loose panels or seam integrity remain essential after heavy storms.
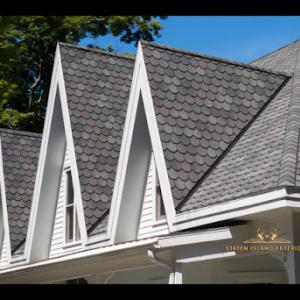
Clay, concrete, wood, and synthetic products appear in smaller pockets of the borough, often on higher-end or stylistically distinct homes where weight, maintenance, and wind performance need closer review. Clay and concrete tiles offer excellent impact resistance but require careful installation on a solid, well-supported deck and solid fastener patterns to resist uplift in coastal winds. They can be heavy, so structural support and attachment details must be evaluated for long-term performance when porches or extensions are involved. Wood shingles or shakes bring a traditional look but may demand more meticulous edge detailing and fastener selection to withstand salt air and humidity; verify preservative-treated substrates and moisture control within the roof assembly. Synthetic shingles provide versatility and easier handling, yet exposure to salt spray requires checking for UV stability and compatibility with existing flashing materials. In high-wind zones, any roof with low-slope sections should include reinforced edge restraints, properly sealed joints, and a plan for storm-driven leaks that prioritizes rapid access for repairs without removing large portions of the roof. For all these materials, ongoing inspection after coastal storms is key, focusing on corners, vales, and penetrations where wind-driven rain can first intrude.
A full re-roof in Staten Island typically requires a permit through the New York City Department of Buildings rather than a standalone borough-only building office. That means your project is reviewed within the city-wide framework, and a simple "renovation" sticker won't cut it when you're replacing a whole roof or changing the roof assembly significantly. The DOB process is designed to verify wind resistance, drainage, and proper flashing in the coastal climate you deal with, so rushing through can backfire once the inspector arrives.
Depending on project scope, plan review may be part of the process before work proceeds, which can affect scheduling more than homeowners expect for what seems like a straightforward replacement. Even small upgrades can trigger a review if the roof line or ventilation changes. For coastal and low-slope sections over porches, the review is particularly sensitive to details like setbacks, edge protection, and rainwater handling. In Staten Island, where the mix of pitched shingles and low-slope areas is common, expect a review cycle that adds a few weeks to the timeline if the plans need to be refined.
Inspection timing can be influenced by both weather and DOB availability, so Staten Island roofing schedules often need more buffer than purely private-schedule jobs. Storm-driven leaks and wind damage can push urgency, but the DOB's calendar matters just as much. After permit issuance, inspections are staged-pre-roof, mid-construction, and final-so delays can cascade if weather windows collapse or if inspectors have backlogs. Planning around a realistic window that accommodates possible weather holds helps reduce the stress when a quick replacement becomes a longer process.
Before you start, confirm whether your project triggers a full plan submission or a simpler filing. Have your roofer prepare detailed drawings and wind-resistance calculations tailored to coastal exposure. Build in extra buffer for inspections, especially if your roof includes multiple low-slope areas that require careful flashing and drainage details. If a revision is requested, respond promptly to keep the project moving rather than losing the next good weather window.
When you price a roof on the island, the local ranges are a helpful starting point: asphalt shingles run about 350 to 650 per square, metal about 900 to 1500, clay tile 1000 to 1800, concrete tile 1000 to 1700, wood shingles or shakes 700 to 1200, and synthetic or composite shingles 600 to 1100 per square. These figures reflect the mix of pitched shingles and the many low-slope areas common on coastal homes, porches, extensions, and multifamily buildings that are typical here. Your exact price depends on roof complexity, material choice, and the number of penetrations or dormers that drive installation time and waste disposal.
Costs on this side of New York City are often higher because of disposal logistics and the need to haul debris from tight lots or elevated structures. If a roof has multiple dormers, attached garages, or low-slope tie-ins to porches, those features add labor hours and material waste, which show up in the bottom line. In practical terms, a single steep section or a few dormers can push a project from a straightforward replacement into a more labor-intensive job, especially when you're working around existing roof penetrations and tight access.
After a regional storm event, prices tend to rise as demand surges across the borough and the wider market. That means you might see a spike in material costs or contractor availability for a window of time, even if your roof is otherwise standard in size. Plan ahead if you can, and recognize that a swift response after a storm can help minimize further damage and additional costs from leaks driving through coastal and low-slope areas.
Choosing a material isn't just about upfront cost. Asphalt remains a practical baseline for many roofs, but coastal exposure and wind-driven rain push some homeowners to consider metal for longevity, or concrete and clay tiles where climate conditions align with their aesthetics and durability. Wood shingles offer a traditional look but require more maintenance in salty air, while synthetic options often balance cost with performance in windy, storm-prone neighborhoods. The right mix depends on how much roof area is low-slope, how exposed the property is to spray from the harbor, and long-term upkeep expectations.
Get a clear picture of your project costs upfront - no commitment required.
Calco Roofing / Seamless Gutters
(917) 226-0113 www.calcohome.com
2655 Richmond Ave, Staten Island, New York
5.0 from 174 reviews
New Amerimex Roofing
(347) 213-6756 www.newamerimex.roofing.com
81 Wild Ave, Staten Island, New York
5.0 from 100 reviews

Alter Phase Roofing Contracting
(929) 370-1552 alterphaseroofing.com
61 Appleby Ave, Staten Island, New York
5.0 from 63 reviews
On this island, the best practice is to plan replacements for milder windows. Cold winters bring snow, freeze-thaw cycles, and a higher risk of ice damming that can complicate mid-winter work. Warm, humid summers stress adhesive set and underlayment performance, making peak heat months less forgiving for clean installations. Think of spring or fall as the practical compromise, when moisture is lower and temperatures stay within a reliable range for both removal and resealing.
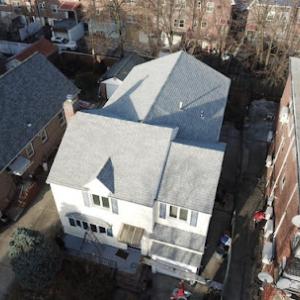
A mix of pitched shingles and low-slope sections over porches and extensions is common here, so the decision to replace should account for wind-driven rain exposure and salt spray from the harbor. Low-slope areas tend to reveal faster aging and edge flashings that crack first after a storm. If the roof shows widespread granule loss, curling, or lifted edges on shingles, or persistent condensation under the decking, a replacement is more predictable than a patchwork repair.
When you target spring, plan after the last major freeze and before the first heavy rain spells. Fall should come after summer heat has eased but before the first freezes. Mid-season gutters and connected structures should be considered in the schedule, since coastal winds can shift debris and moisture flows quickly. Clear the job site of wintery debris and ensure crews have workable access so they can complete clean, weather-tight installation within the window.
If multiple roof sections fail simultaneously, if along-hip line flashing shows rust or corrosion, or if attic leaks persist after targeted repairs, replacement becomes a practical option. For the typical Staten Island home, a timing decision aligned with spring or fall often yields the most reliable and durable result.
New York insurers commonly expect thorough documentation, including pre- and post-project photos and a weather-related damage narrative, before approving larger roof claims. On a shoreline-leaning borough like this, that means gathering images that show both the roof's condition before weather events and the specific areas affected by wind-driven rain, salt exposure, and any visible lifting or gaps. Keep a dated sequence of shots from multiple angles, especially of hips, valleys, and low-slope sections over porches or attachments. A clear narrative should tie the observed damage to a documented storm event, noting wind directions, rain intensities, and any nearby debris or spray that could have contributed to failure.
On Staten Island, wind uplift and storm-driven water entry are especially important to document because coastal exposure can blur the line between sudden storm damage and longer-term wear. Focus on flashing integrity, edge fasteners, and the transition between roof planes where salt-laden air can accelerate corrosion or sealant degradation. Photographs should include close-ups of fasteners, underlayment, and any signs of moisture staining inside attic spaces, along with exterior soffits and fascia. If a porch or low-slope area exists, document scuppers, drainage, and any ponding that could have facilitated water intrusion during a nor'easter or tropical system.
Claim timelines can stretch after major regional storms as adjusters handle losses across New York City and surrounding counties at once. Prepare to respond promptly to requests for additional photos, measurements, or contractor assessments, and keep a running log of communications. If an initial assessment seems incomplete, submit clarifying notes that connect damage to storm-induced conditions rather than routine wear. Patience, paired with precise records, helps prevent disputes over what constitutes storm-related damage versus preexisting deterioration.
Coastal winds and salt air on the harbor-facing side of the island push rain right at penetrations. In homes with both pitched and low-slope sections, the flashing around chimneys, skylights, walls, and roof-to-addition transitions often fails first, not the field shingles. A Staten Island contractor signals strong demand for chimney-related roofing work, reflecting how leaks path through masonry penetrations meet aging roof systems. Skylight repairs are a meaningful local specialty, common in borough homes that blend older structures with later additions where flashing details may not align with the current roof assembly.
Start with a careful inspection after storms: look for wet streaks near chimneys, skylights, and wall flashings where two different roof planes join. On low-slope sections over porches or additions, verify that the flashing continues properly up and over the transition and that step and counter-flashing are intact. On pitched roofs, focus on the chimney base, skylight frames, and where a dormer or addition intersects the main roof. If you see blistering, exposed fasteners, or cracked sealant, plan for targeted resealing or flashing replacement rather than full roof tear-off.
Sealant age and weathering are key failure drivers here. Replace deteriorated plastic or metal trim with corrosion-resistant options, and ensure that flashing is integrated with the roof deck and siding to avoid trap zones. When replacing or repairing skylights, match the flashing method to the existing roof assembly and ensure proper drainage away from the curb. For chimneys, verify that the stack counter-flashing extends well under the shingles and that the mortar joints aren't allowing water intrusion.
Seasonally clean debris from chimney and skylight flanges, re-tape or reseal where needed, and check under finials and vent pipes for signs of moisture intrusion. Keep a close eye on any daylighting gaps at transitions where two roof planes meet, and address minor gaps before they widen into leaks. In homes with multiple roof levels, schedule periodic flashing audits rather than waiting for a visible leak to appear.
Find contractors experienced in skylight installation, flashing, and leak repairs to bring natural light into your home.

B&B Roofing & Gutters
(718) 981-7663 bbroofingpros.com
84 Jewett Ave, Staten Island, New York
5.0 from 231 reviews
Calco Roofing / Seamless Gutters
(917) 226-0113 www.calcohome.com
2655 Richmond Ave, Staten Island, New York
5.0 from 174 reviews
Golden Key Construction Group
(929) 564-4310 goldenkeyconstructiongroup.com
15 Hilltop Terrace, Staten Island, New York
5.0 from 111 reviews