Last updated: Apr 19, 2026
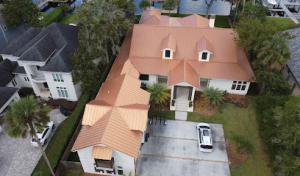
Roofs in this coastal environment endure more wind-driven rain and salt exposure than homes farther west in the county. Direct Atlantic exposure means days of driving spray, salty mist, and impulsive gusts that testing roofing joints, flashings, and edge details. The house stock along the barrier island tends toward lighter framing and shallower roofs, which can fail more quickly under a sudden hurricane-force blow or a long, soaking downpour. Every roof should be treated as a wind and salt challenge, not a routine maintenance item.
Hurricane season runs from June through November, and that window overlaps with the region's hottest and wettest stretch. That means you're more likely to experience both damage risk and scheduling delays when storms form. Plan ahead for storm season: pre-order critical components, secure fasteners and sealants, and schedule inspections well before June. If a storm is imminent, expect urgent work windows and limited access to crews; timing matters as much as the repairs themselves. A proactive stance reduces the exposure window and minimizes days with vulnerable gaps in protection.
Coastal salt air accelerates corrosion at flashing, fasteners, drip edge, and exposed metal accessories even when the primary roof covering still looks serviceable. That makes frequent micro-damage harder to notice until a heavy rain confirms the problem. Corrosion can creep under lapped edges, around skylight frames, and at penetrations where sealants have aged. In this climate, rust or zinc patina on metal components isn't a warranty issue to be ignored-it's a warning. Pay special attention to bare metal components, such as ridge vent caps, turbine vents, vent flashings, gutter brackets, and metal drip edges; these are common failure points after a season of salt spray and storms.
When choosing materials, opt for systems with corrosion resistance and wind performance designed for barrier-island exposure. Look for fasteners with stainless steel or corrosion-resistant coatings, reinforced flashing that clamps tightly, and sealants that stay elastic in heat and salt air. If a roof already shows age on the surface but still looks sound, consider upgrading the underlying fasteners and drip edge first, before the outer covering shows failure. For metal roofs, coatings that resist salt tarnish and aerodynamically clean profiles reduce wind uplift and water intrusion. For tile roofs, ensure concrete or clay fasteners are rated for elevated wind zones and salt exposure, not just overall aesthetics. For shingle roofs, choose products with enhanced edge seal and hidden nailing options that minimize exposure to spray and wind-driven moisture.
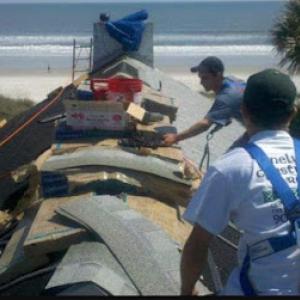
After a tropical or hurricane event, inspect for wind-driven debris impacts, lifted edges, loose fasteners, and visible corrosion. Salt-laden spray can compromise sealants within hours on exposed seams, so verify flashing integrity and drip edge connections as part of a post-storm check. Maintain a rapid-response plan: have a trusted roofer on standby for urgent tarping or temporary fixes, keep a kit of high-quality sealants and reference photos of critical flashings, and document any damage immediately for accountability and scheduling. In this climate, fast action keeps secondary damage from escalating and reduces the chance of long-term leaks.
Coordinate with neighbors to share storm-season maintenance tasks and temporary protection strategies. A small, shared stock of corrosion-resistant fasteners and flashings can cut downtime when a storm hits. If a roof has aged components near the flashing lines or drain edges, address those areas proactively before the next storm surge-anticipation here saves more than it costs. Remember: the first few hours after a storm are often decisive for preserving the roof's long-term integrity.
In this coastal market, replacement decisions are often driven as much by insurability and wind documentation as by visible wear. The Atlantic exposure, salt-laden air, and high wind risk during hurricane season mean that a reroof is more than cosmetic protection-it's a shield against sudden, storm-driven damage. When a beachside roof is replaced, the goal is to demonstrate sustained performance under design wind loads, not just to cover an old deck with new shingles. That means focusing on the components that resist uplift and shear forces, especially where the roof meets walls and where underlayment plays a critical role.
Local re-roof projects commonly require wind mitigation information as part of the permit and inspection process in Jacksonville Beach. Homeowners should gather and verify three core areas: deck attachment, underlayment, and roof-to-wall connections. Deck attachment refers to how the roof deck is fastened to the framing and to supporting beams, including any corrosion-resistant hardware. Underlayment should be appropriate for coastal exposure, with proper overlap and fastener choice to prevent wind-driven leakage. Roof-to-wall connections cover connectors, straps, and nailing patterns that transfer loads from the roof deck into the wall framing. These elements are central to insurance underwriting and credits in this market.
Inspect whether the deck is fastened to the home with corrosion-resistant screws or nails rated for coastal use, and confirm that the number and spacing meet current wind-resistance guidelines. In a beachside reroof, a robust deck attachment helps prevent roof uplift during gusts and storms. If the deck or its fasteners show signs of salt corrosion, plan for upgrading to hardware rated for salt exposure and for the correct structural screws or nails. Confirm that any new deck connections align with the framing layout to avoid weak points at hip joints or ridge transitions.
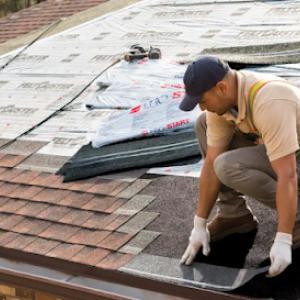
Coastal underlayment should resist wind-driven moisture and salt air while allowing any incidental moisture to escape. Look for 180-day exposure-rated products with a proper nailing pattern and sealant coverage at penetrations. Ventilation paths must remain clear; blocked vents can trap humidity and create soft roof zones that fail under wind pressure. If the roofline includes eaves or overhangs, ensure the underlayment extends properly to protect gable ends and drip edges, which are critical for shedding salt-laden spray.
Straps, clips, and fasteners that tie the roof structure to the wall are essential in high wind environments. Confirm installation matches the latest coastal guidelines for wind uplift resistance. Pay attention to corner and valley intersections, where loads concentrate. If retrofits are needed, plan for upgraded connectors and reinforced nailing schedules that deliver predictable performance without sacrificing the aesthetic or the airflow needed to prevent moisture buildup.
Before the final inspection, walk the roof edge to confirm drip edges and flashing are continuous and watertight. Check fastener heads for corrosion and ensure sealants at penetrations are intact and compatible with coastal substrates. Document the deck, underlayment, and roof-to-wall connections with photos and a simple notes sheet that highlights improvements and material specs. In this market, having clear, organized documentation can smooth the path to coverage credits and faster underwriting decisions.
Heritage Roofing of North Florida
(904) 962-7663 heritagenfl.com
14841 Bonefish Dr, Jacksonville Beach, Florida
5.0 from 135 reviews
Heritage of North Florida's goal is to create the best possible experience for you and your family by providing exceptional service and craftsmanship. We have over 30 years' experience in roofing and remodeling. We keep our overhead low so we can give you the best possible pricing in Jacksonville. We are also proud partners with Tony Boselli, Jacksonville’s only NFL Hall Of Fame member. License #: 1335410
Neligan Construction & Roofing
(904) 247-3777 www.neliganconstruction.net
910 11th Ave S, Jacksonville Beach, Florida
4.9 from 141 reviews
Neligan Construction & Roofing, LLC, based in Jacksonville Beach, FL, is a trusted name in roofing and construction since 1988. We specialize in residential and commercial roofing, offering durable roof installation, roof leak detection, and energy-efficient solutions. Our expertise extends to metal roofing, reflective coatings, and elastomeric coating. We also provide professional siding installation, including fiber cement and vinyl siding, as well as gutter, downspout, soffit, and fascia installation. From home renovation and custom builds to construction consulting and insurance claim, we deliver precision and quality.
Weatherlock Roof Systems
(904) 204-4650 www.weatherlockroofsystems.com
3948 3rd St S Unit 195, Jacksonville Beach, Florida
5.0 from 84 reviews
WeatherLock Roof Systems is a full-service roofing company serving home and business owners in Jacksonville FL and the surrounding areas. As a family owned and operated business, our roofing company always treats your home and business – and any project we tackle – like our own. We are a full service Florida state licensed roofing contractor. We have an A+ rating with the BBB and are a GAF certified Weather Stopper Contractor and an Owens Corning Certified Contractor. A Faith-Based Business – With Rock-Solid Credentials! We offer free roof inspections for your home or business in Jacksonville FL so call 904-204-4650 today!
K&D Roofing & Construction Company
(904) 541-1700 www.kanddroofing.com
74 6th St S Suite 104, Jacksonville Beach, Florida
4.9 from 224 reviews
K&D is the most highly accredited GAF Master Elite Contractor in Northeast Florida. We specialize in residential, commercial, insurance claims and multifamily roofing projects. The owner is a HAAG certified residential inspector specializing in wind and hail damage. In the roofing and insurance industries, the phrase "Haag Certified" carries a lot of weight. It indicates that you can effectively and efficiently inspect and assess damage. K&D is a member of Angie's List with an A+ rating and a member of the BBB with an A+ rating. K&D is family owned and operated since 1994. K&D prides themselves on exceptional workmanship and customer service.
A1A Roof & Repair
(904) 735-9913 www.a1aroofandrepair.com
388 33rd Ave S, Jacksonville Beach, Florida
5.0 from 14 reviews
A1A Roof & Repair was founded on our belief in the importance of professional service standards. We are fully licensed, insured and accredited by the Better Business Bureau. Our trained roofers are highly experienced and care deeply about protecting your home. We promise our people will show up to your door on-time and get you taken care of right, the first time. We also help with insurance claims and locating storm damage.
Shore Roofing
(904) 241-8842 www.shoreroofingjax.com
929 12th Ave S, Jacksonville Beach, Florida
5.0 from 5 reviews
Shore Roofing Company is a locally owned and family-operated business. Owner Tom Shore has over 40 years of experience in roofing. Our office is staffed by mature and knowledgeable professionals. Our sales representatives have over 22 years of experience in the home improvement industry. Shore Roofing Company team is led by a production supervisor with over 28 years of experience. Our jobs foremen are skilled and experienced in their respective fields. All contracted work is completed in a clean, courteous and professional manner by our own trained installers. Job sites are cleaned daily and all debris is removed. Shore Roofing Company only uses top quality materials - America's Finest Brands! We obtain all building permits.
Apex Roofing & Contracting
(904) 867-7574 apexroofingfl.com
Serving
4.7 from 15 reviews
We are a fully licensed, insured, and certified Roofing and Contracting company with extensive experience meeting the roofing, building & contracting needs of single/multi family residential & commercial complexes. We pride ourselves in our superior workmanship, quality employees, and relationships with homeowners and local management companies.

Sunjax - Residential Roofing, Roof Restoration, Roof Repair Service
2833 Sunland Dr Apt 143, Jacksonville Beach, Florida
5.0 from 1 review
Sunjax is a professional roofing service company which operates in Jacksonville Beach, Florida. Call us now for discounts and free estimates.

Ecobuild Roofing
(904) 643-3686 ecobuildjax.com
Serving
5.0 from 155 reviews
We've been handling roofing work in Jacksonville and surrounding areas for over 7 years. At Ecobuild Roofing, we know roof problems are stressful - whether it's storm damage, leaks, or needing a full replacement. That's why we work to make the process smooth. We offer 24/7 emergency repairs because damage won't wait for business hours. We also do maintenance, repairs, complete replacements, and new construction. Our free inspections help catch problems before they become major headaches. If severe weather has damaged your property, we respond quickly with storm restoration services. We use quality materials and proven techniques because your roof needs to protect your home for years. At Ecobuild Roofing, we prioritize exceptional servic.
Romano Brothers Roofing
(904) 246-5649 www.romanobrothersroofing.com
Serving
4.5 from 85 reviews
Romano Brothers Roofing Complete Residential & Commercial Roofing Solutions
League Roof Restoration
(904) 451-2016 leagueroofrestoration.com
Serving
5.0 from 9 reviews
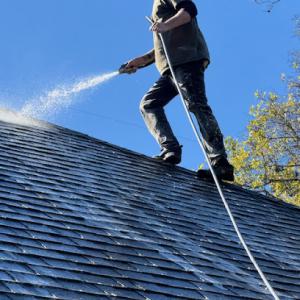
Restore, don't replace your roof. We can eliminate all black mold and organic material before it destroys your roof. We can add at least 7 years to your roof life guaranteed.
Wofford Roofing
(904) 490-7369 woffordroofing.com
Serving
5.0 from 26 reviews
Wofford Roofing is proud to be your local roofing company on the First Coast & Suncoast of Florida. Contact our team today to schedule a Free Estimate!
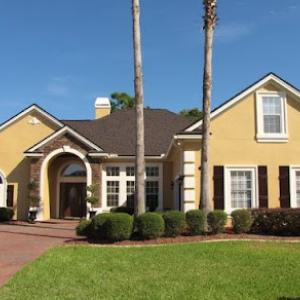
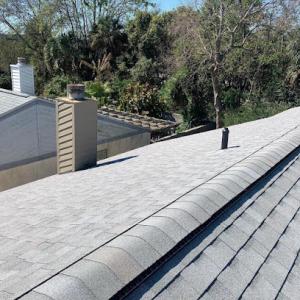
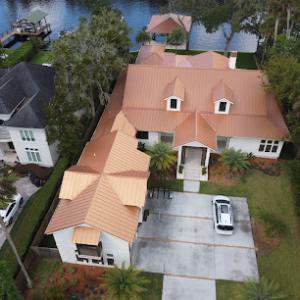
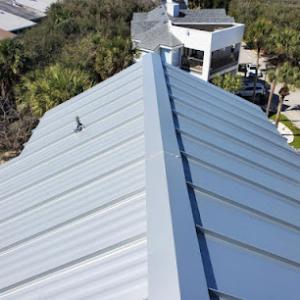
Asphalt shingles and metal roofing are the most common practical choices in this market, while tile appears on higher-end coastal homes and some Mediterranean-style properties near the beaches. When considering these options, think about how salt air, humidity, and strong seasonal winds will interact with your roof materials. Asphalt shingles provide straightforward patchability and a familiar look, while metal systems offer standout wind resistance and a leaner profile for salt-laden air. If you lean toward elegance and long-term curb appeal, tile can be a striking option-but it brings additional weight and maintenance considerations that pay attention to.
Metal systems in Jacksonville Beach need special attention to corrosion resistance because ocean air can shorten the life of vulnerable trims and fasteners. Look for metal roofs with corrosion-resistant coatings and stainless or hot-dip galvanized components for exposed hardware. Workshop-style details, like ridge caps and trims, should be specified with coastal-grade finishes and ongoing maintenance in mind. During replacement or repairs, verify that sealants and connectors are rated for high-salt environments and frequent storm exposure. Regular inspections in the wake of tropical storms help catch fastener corrosion before leaks or panel distortion develop.
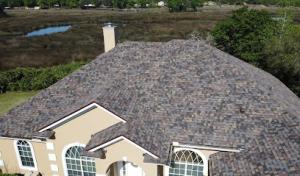
Tile roofs in this area add weight and repair complexity, and sourcing matching pieces after storm events can be slower than for standard shingles. If choosing tile, plan for a reinforced structure to handle the load and budget for longer lead times when replacement pieces are needed. Concrete tile tends to be more durable in wind-driven rain, but clay tile can be fragile in hail and wind gusts. Develop a maintenance plan that includes inspecting for cracked or displaced tiles after storms and keeping a small stock of matching pieces or an established supplier with a coastal network for quick replacements.
A hurricane-season mindset is essential. A roof that ages without attention can become a liability during a storm. Inspect for loose fasteners, loose flashing, and wear on the edge of the roof where it meets walls. In all material choices, prioritize wind-resistant detailing-sturdy underlayment, well-sealed penetrations, and robust lightning protection where appropriate. For metal roofs, pay extra attention to the integrity of ridge caps and fastener seals; for tile, scrutinize hip and ridge areas and ensure there is adequate underlayment beneath the tiles to prevent water intrusion.
When comparing options, balance initial install realities with post-storm resilience and serviceability. Asphalt offers simplicity, metal offers longevity with careful coastal detailing, and tile offers a premium aesthetic with added weight and repair complexity. If choosing metal, insist on coastal-grade coatings and corrosion-resistant fasteners. If tile is appealing, work with a contractor experienced in coastal builds and ensure structural reinforcement is accounted for in the design. Each route benefits from a commitment to proactive maintenance, timely repairs after storms, and a clear plan for sourcing replacement pieces that are compatible with the existing roof profile. This approach helps protect the home from salt-air wear, wind damage, and the unique challenges posed by Jacksonville Beach's coastal environment.
Fall and winter are the most favorable windows for a roof replacement on the coast, because the dry season gives crews steadier conditions and safer tear-off and installation. In a neighborhood where humid air and salty spray meet every afternoon, that reliable dry stretch helps decking stay true and attic ventilation stay clear. If you're lining up a project, plan for a schedule that targets late September through February when you're less likely to face sudden, soaking rain or scorching heat that can push materials and crews off the job.
Summer afternoons bring quick, sharp storms and humid air that can complicate a tear-off and dry-in. A typical Jacksonville Beach afternoon storm can pause work, and lingering humidity can impact roof decking and sheathing if moisture sits in the attic longer than expected. Build in buffer days for weather breaks, and coordinate with the crew to prioritize a dry-in window when the house and attic are in the best shape to handle new underlayment and flashing without moisture creeping into pockets you can't easily reach later.
Hurricane season can shift the typical rhythm of replacements. Post-storm demand spikes as debris cleanup and urgent repairs take priority, and material lead times can stretch when supply chains tighten after a tropical system. If a tropical event brushes the First Coast, expect your replacement date to move and the crew to juggle several urgent projects. Have a backup plan for staging, including a nearby secondary site or a temporary project hold, so you're not left waiting when the weather or the system overloads the supply chain.
Block out a target stretch in the fall, with a built-in fallback week or two in early winter in case of early-season storms. Talk to the contractor about anticipated storm timing and how it could affect your window; request a contingency plan that includes dew point awareness and ventilation checks once the new roof is laid. When a storm fronts approach, have a clear, pre-arranged rain-guard protocol so the crew can secure the job quickly, protect exposed decking, and minimize delays that threaten the integrity of the installation. If a tropical system detours your project, stay in touch with the crew for updated timelines and any necessary material holds.
Get a clear picture of your project costs upfront - no commitment required.

Asphalt shingles typically run from about $350 to $750 per square, a spread you'll be juggling when a roof needs quick replacement after a storm. Metal options sit higher, roughly $700 to $1,200 per square, reflecting their corrosion resistance and foundation hardware. Clay tile commands a broad range from $1,200 to $2,600 per square, with concrete tile at $900 to $1,900, driven by heavier weight and longer install times. Wood shingles or shakes you'll commonly see around $650 to $1,200 per square. Synthetic or composite shingles come in closer to $450 to $900 per square, often chosen for lighter weight and easier coastal maintenance. These bands align with expectations in this market and help you compare bids without getting lost in feature extras.
Coastal corrosion resistance is not an afterthought here. Fasteners, flashing, and accessories near the ocean must stand up to salt air, humidity, and occasional spray. That means higher-quality stainless or coated steel, specialty sealants, and sometimes upgraded underlayment, which pushes each square upward from the base material price. If your home sits up close to dune lines or along an exposed corridor, expect quotes to include additional corrosion-resistant hardware and more robust flashing details. The result is a higher initial cost, but with longer life and fewer salt-induced failures.
First Coast storm activity can tighten labor availability quickly, especially for full re-roofs or emergency dry-in work following tropical weather. When a storm churns up the forecast, crews shift priorities, and you may see bidding pressure or shorter scheduling windows. If a roof is getting wrapped for a fast dry-in to prevent interior leaks, costs can edge upward due to expedited material delivery, after-hours work, and potential temporary protection measures. In practice, plan for a buffer in both price and timing when a storm looks likely, and coordinate with a contractor who has a track record of rapid dry-in and weather-ready flashing.
Don't let upfront costs delay a critical repair - these contractors offer payment plans to fit your budget.

A full re-roof in this coastal area typically requires a permit, usually handled by the contractor through the City of Jacksonville Beach or Duval County depending on project jurisdiction. The local building department expects the project to follow wind mitigation standards suited to salt-air exposure and hurricane-season winds. When planning, confirm whether the project falls under city or county rules to avoid delays at the permitting counter. Coordination with the contractor ensures the right forms are pulled before any roof work begins and that the selected roofing system aligns with local wind and moisture considerations.
Permit submissions commonly include project details such as roofing material, deck attachment method, underlayment type, and ventilation, along with wind mitigation information relevant to this coastal Florida market. Expect documentation that demonstrates attachment strength for higher wind zones, corrosion-resistant fasteners, and any additional measures to protect the deck edge and eaves from salt exposure. For a hurricane-season-ready roof, the paper trail should show compliance with current Florida Building Code amendments for wind loads, plus any manufacturer requirements for coastal environments. Having precise product data on deck sealing, fastener corrosion resistance, and underlayment in the packet can streamline review and help prevent back-and-forth requests.
Inspections typically cover roof deck attachment, underlayment installation, flashing details, and final workmanship. Scheduling and review are handled through the local building department, which often requires door-to-roof access, verification of nailing patterns, and confirmation that the roof-to-wall connections meet wind-mindful standards. In Jacksonville Beach, inspections may occur at several milestones, including after deck preparation and after final installation, to ensure joints, penetrations, and terminations remain water- and wind-tight in salt-affected air. Expect a final inspection to confirm compliance with both structural and aesthetic requirements before the certificate of occupancy or final permit release.
Jacksonville Beach sits in Florida's high-claim wind environment, where insurers often request wind mitigation documentation and roof photos for underwriting and claims. That reality isn't theoretical: a single hurricane season can shift a policy from stable to scrutinized overnight. If your roof has a history of repairs, or if its age shows through missing shingles or uneven seams, expect questions about how it was maintained and updated to resist wind uplift. Having clean, organized records ready-photos that show the roof's exact condition before a storm and after repairs-can smooth the path when an insurer asks for proof.
Detailed before-and-after documentation is especially important here because adjusters may scrutinize storm-related roof work during active hurricane periods. A sharp eye from a third party or a trusted local contractor documenting every nail, seam, and attachment detail can prevent disputes about what was done versus what was claimed. Keep a simple, timestamped photo log that aligns with service dates and contractor notes. In a market where storm activity can cluster, this kind of attention isn't extra-it's practical defense against delayed claims or coverage gaps.
Florida's strained property insurance market affects Jacksonville Beach homeowners directly, making roof age, permit history, and mitigation paperwork central to coverage decisions. The underwriting calculus often weighs whether the roof system has been upgraded with wind-resilient components or retrofits, and whether documentation supports those upgrades. If something looks routine or undocumented, adjusters may view it as higher risk, which can influence approval and terms. Consistency between what's on the roof and what's in the file can prevent slowdowns when a claim arrives.
Connect with contractors who help homeowners navigate the claims process from damage assessment to final approval.

Heritage Roofing of North Florida
(904) 962-7663 heritagenfl.com
14841 Bonefish Dr, Jacksonville Beach, Florida
5.0 from 135 reviews
Neligan Construction & Roofing
(904) 247-3777 www.neliganconstruction.net
910 11th Ave S, Jacksonville Beach, Florida
4.9 from 141 reviews
Weatherlock Roof Systems
(904) 204-4650 www.weatherlockroofsystems.com
3948 3rd St S Unit 195, Jacksonville Beach, Florida
5.0 from 84 reviews
In this beachside environment, corrosion often shows up first at exposed metal details and penetrations rather than across the entire roof field. Metal flashings, vents, and gutters near the eaves take a beating from salt-laden air and rising humidity, so you may notice rust spots or pitting long before the shingles or tiles fail. If flashing around skylights or vent stacks looks dull, blistered, or started to lift, that's a warning sign to inspect those connections closely. Regularly check metal-to-roof transitions after storms and after the off-season, because a small corrosion pit can evolve into a slow leak that travels along the deck and into the attic.
Wind-driven rain during coastal storms can expose weaknesses around skylights, flashing transitions, and low-slope tie-ins even when the main roof covering remains intact. A roof that looks solid from the street may still suffer behind the scenes if sealants have aged or if lap joints on tile or shingle rows have shifted with the wind. Pay particular attention to the edge of the roof where it meets walls, around dormers, and at step-flashings. If you notice membranous squinting at fastener heads or gaps that widen after a gust, address those issues promptly to avoid interior leaks that can flood ceilings and damage insulation.
Humidity and frequent rain make attic ventilation and moisture management especially important after leaks or delayed storm repairs. A damp attic fosters mold and wood rot that can silently weaken the roof structure and rafters. Check for condensation on sheathing, stained or warped boards, and a persistent musty smell after a rain event. Ensure eyewash-tight attic vents and soffit baffles are in place to promote airflow. After any leak, dry the space quickly and consider a dehumidification plan to prevent lasting moisture damage that undermines insulation and interior finishes.
Find contractors experienced in skylight installation, flashing, and leak repairs to bring natural light into your home.
Heritage Roofing of North Florida
(904) 962-7663 heritagenfl.com
14841 Bonefish Dr, Jacksonville Beach, Florida
5.0 from 135 reviews
K&D Roofing & Construction Company
(904) 541-1700 www.kanddroofing.com
74 6th St S Suite 104, Jacksonville Beach, Florida
4.9 from 224 reviews