Last updated: Apr 19, 2026
Algonquin homeowners commonly face a two-part damage cycle: winter ice damming and snow-related moisture intrusion followed by spring hail and high-wind claims. The winter phase is quiet but dangerous, as eave ice buildup can trap meltwater behind shingles and around flashing details. The spring phase arrives with storm-driven hail and gusty winds that can aggressively test weakened roof assemblies. Treat these cycles as a connected sequence: damage that starts in winter rarely resolves on its own and often compounds into larger claims come spring. Planning around this rhythm is essential to protect your home and your wallet.
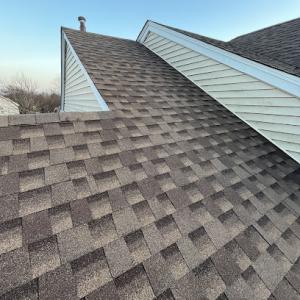
Cold, snowy winters in Algonquin increase the chance of eave ice buildup that can force water back under shingles and around flashing details. If you see ice dams forming along the eaves, or you notice stained ceilings and damp spots inside your attic, you are likely dealing with a developing failure point. Start by removing excess snow from the roof with a roof rake from the ground, never from the edge of a ladder. Do not attempt to poke at ice along the gutters or near flashing. Protect interior spaces with tarps or plastic sheeting to channel any water into a bucket or basement drain while you arrange professional service. If you have visible water at penetrations or ceiling leaks, place buckets and towels under the drips and document the damage with photos-your insurance timeline often hinges on timely, clear records. Schedule a roofing professional to evaluate ventilation, insulation, and flashing details, because improper venting or heat loss can perpetuate ice dam formation year after year.
Spring storm activity in the Algonquin area raises replacement demand and can delay scheduling, making post-storm documentation and temporary protection especially important. Hail can dent, crack, or push moisture past the protective layers you rely on, while high winds can lift shingles and expose underlayment. After a storm, walk the roof only if safely accessible from the ground; otherwise, rely on a licensed roof inspector to assess shingle integrity, flashing, and vent connections. Photograph all exterior damage from multiple angles, including the roof edge, hips, valleys, and any visible gutter or fascia damage. Inside the attic, look for fresh signs of moisture, staining, or mold growth near eave lines and around roof penetrations. Keep a timestamped record of wind events, hail size, and any debris that struck the property. The combination of hail-driven damage and wind-induced track failures often changes the replacement decision timeline, so timely professional evaluation helps you map the right course of action.
In Algonquin, the gap between storm damage and a full roof replacement can be turbulent due to weather windows and contractor demand. Prioritize temporary protective measures to prevent further intrusion: install sturdy tarps over compromised areas where safe to do so, secure loose shingles with temporary fasteners if recommended by a pro, and ensure gutters are clear to prevent standing water from backflow. Maintain clear access for emergency services and adjust indoor humidity to minimize condensation on any exposed sheathing. If you must delay a full replacement because of the insurance process or weather, continuous temporary protection and ongoing documentation are your best defense against a postponement turning into a long-term water problem.
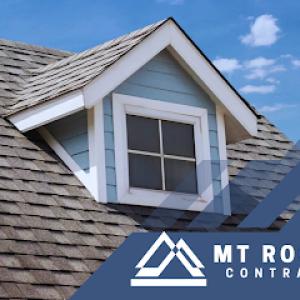
MT Roofing Contractor
(224) 509-6756 roofingalgonquin.com
1347 Geringer Rd, Algonquin, Illinois
5.0 from 42 reviews
At MT Roofing Contractor we are well known for our expert shingle roofing Algonquin services, low prices, and highly trained roofing contractors Algonquin based. Our professional services are available for residential and commercial properties and include roof repair, roof replacement, and gutter installation Algonquin services. Our shingle roofing contractors have extensive roofing experience and have the skills and expertise needed to provide a solution for any roofing issues you may have. Regular maintenance of your roof will help to extend the time before it needs to be replaced. Annual roofing inspections will allow you to catch any problems in the early stages and help prevent expensive future bills. Contact us today!
MJC Contracting
(847) 469-7663 www.mjccontracting.com
923 S Main St, Algonquin, Illinois
4.8 from 19 reviews
Local family own an operated residential remodeling corporation. Primary focus on roof and siding installation. Customer satisfaction is our top priority, fulfilled with quality workmanship and excellent customer service.
Capeesh Construction
(847) 620-9165 www.capeeshconstruction.com
203 N Main St, Algonquin, Illinois
4.6 from 38 reviews
If your premiums go up as a result of our advise while under the care and protection of our company, we'll pay your additional premium for up to 3 years.

Elevation Restoration
(847) 989-3239 elevationrestorationinc.com
Serving
5.0 from 42 reviews
Elevation delivers top-quality roofing, siding, and gutter services for residential and commercial properties. Our expert contractors are highly trained and fully licensed, ensuring your home or business is safe, secure, and looks its best.

Joshua Mcnutt Roofing
(847) 458-2537 www.joshuamcnuttroofinginc.com
Serving
4.9 from 53 reviews
Joshua Mcnutt Roofing has been in business since 2008, we have over 35 years of experience! We take great pride in exceeding each of our customer's expectations. We service shingle and flat roofs! Our services include roof repair, leak detection, gutter cleaning and so much more. Call us today!

FlatRoof Commercial Roofing
(779) 220-8085 crystallakeflatroofing.com
Serving
5.0 from 40 reviews
At FlatRoof Commercial Roofing, more customers consistently trust. We are proud of our quality reputation. We offer our commercial roofing services with professionalism, honesty, and quality finished products that set us apart from other roofing companies in Crystal Lake. We offer roof repair and roof replacement at reasonable prices. Our roofing contractors always work above and beyond their job to provide the highest quality standards without ever compromising the services we provide. We understand that choosing the right commercial roofing contractor is a huge decision that you’ll have to live for a decade. We would love to provide references if you wish so you can learn more about us. Make the quality choice, and call us today!

Amsterdam - Roofing, Siding, Windows, Doors & Masonry Contractor
(847) 439-1814 www.amsterdamcontractor.com
Serving
5.0 from 24 reviews
Amsterdam Enterprises, an established Crystal Lake roofing contractor, has been proudly serving Crystal Lake and its surrounding areas for 44+ years. Our expertise, craftsmanship, and dependability are unmatched. We offer a wide range of services for both residential and commercial properties, delivered by the best in the industry. Our services include: Roofing (shingles, cedar, slate, copper, and flat roofs), Siding installation / siding repair, Tuckpointing, Window installation / window repair, Soffit and fascia work, Gutter installation / gutter repair, Historical building restoration. No matter the project size, we'll take care of it. Count on Amsterdam Enterprises for top-notch expertise and unwavering quality. Contact us today!
Legacy Home Repair & Exteriors
(224) 514-3150 legacyhomeandrepair.com
Serving
5.0 from 10 reviews
At Legacy Exteriors we fully understand the value of an exterior being done right the FIRST TIME. Our Quality We are constantly striving to improve our quality and we outperform our current competition. Our Technicians From our Founder to our on-site workers, we have extensive experience in exteriors work, More than 25 years and counting... Our Accuracy We will be done with your home at the projected due date. Attention to Detail will result in less warranty issues and less repairs. Warranty We guarantee our work and will respond promptly if and when you have a warranty claim on any of our projects.
New Era 180 Restoration
(224) 508-0015 www.newera180.com
Serving
5.0 from 54 reviews
New Era 180° Restoration has been helping home owners in the Chicagoland area for over 15 years now, with a level of expertise that few others can match. From roofing to siding and everything in between, you can count on us to provide the quality service your home deserves. Our specialty lies in the repair, replacement, and renovation of suburban homes. So if you're looking for a trusted and experienced team to help give your house the facelift it needs, then you're in the right place. Let us show you why we're the preferred choice for homeowners across the region! Local Roofing Experts.

Stanley Roofing
(847) 250-2642 stanleyroofingchicago.com
Serving
4.9 from 211 reviews
Stanley Roofing is the premier roofing company in West Dundee, IL and Chicagoland area. With years of experience at our backs, We pride ourselves in providing each and every one of our customers with exceptional customer service, professional installation, and unmatched craftmanship. Stanley has completed hundreds of jobs in the area and knows everything there is to know about the roofing industry. In terms of installation, our teams are friendly, prompt, and clean - we treat your home with as much care as we treat our own. If there's an exterior home improvement project that you've been putting off, but would like to get the ball rolling, give us a call and we'd be happy to help.

CJM Roofing
Serving
5.0 from 39 reviews
Residential and commercial roofing contractor serving Chicagoland. CJM Roofing provides professional roofing services at competitive prices. We streamline the process for you from estimation through issuing final warranty.
Fiji Construction
(847) 462-0990 www.fijiconstructioninc.com
Serving
4.8 from 162 reviews
Fiji Construction, Inc. was founded in 2009 by Chad Hagen. Chad has been in the remodeling industry for the last 15 years. His years of experience in the exterior trades have catapulted the company to the leader in the Chicagoland area, the surrounding suburbs and Southern Wisconsin. Fiji’s commitment to customer service and quality craftsmanship has clearly separated themselves from the competition. Their strong reputation comes from giving homeowners a great experience from the initial meeting with a Professional Representative all the way through the final clean up and inspection from our qualified licensed Production Manager.
Asphalt shingles remain the dominant value choice in the local housing stock, delivering solid performance at a familiar price point. In this market, the typical range reflects common home sizes and the mix of 3-tab and architectural profiles homeowners install. However, the winter freeze-thaw cycle, followed by spring storm activity, can shorten replacement cycles compared with milder climates. Freezing conditions stress shingle tabs and underlayment, and wind-driven hail during those spring events can leap-frog surface damage across the roof quickly. When you look at a replacement, you're weighing not just the sticker price but the likelihood of accelerated wear if the attic is poorly vented or if wind uplift challenges are present on gabled sections or near roof-to-wall transitions. In practical terms, you often see a slightly higher total cost after a major storm cycle because crews are busier and supply-demand dynamics tighten.
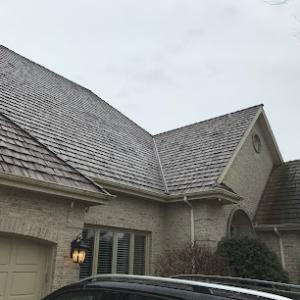
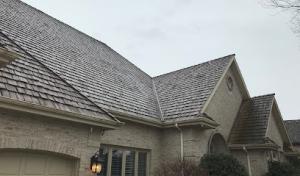
Metal roofing, clay tile, concrete tile, wood shakes, and synthetic shingles each demand more upfront capital but bring specific advantages under Algonquin's mix of snow loads and storm exposure. Metal offers clean snow shedding and robust hail resistance, but the installed system must be evaluated for how it handles seasonal temperature swings and potential metal-to-wood expansion gaps. Tile surfaces-whether clay or concrete-tack on substantial weight and typically come with excellent hail resistance and dramatic snow-shedding performance, but require careful installation to avoid ice dam risk at eave lines and in transitions. Wood shakes bring a distinctive look and good insulation value, yet their performance under repeated freeze-thaw cycles depends heavily on proper sealing and maintenance. Synthetic or composite shingles aim to mimic traditional looks while offering enhanced impact resistance and better performance in temperature swings, but their long-term behavior in local freeze-thaw cycles and under heavy snowfall deserves close inspection, especially in regions where temperature extremes are common.
When you compare these options, consider not just curb appeal but how the system interacts with snow shedding and wind uplift. A roof that sheds snow efficiently reduces ice dam risk and protects the attic from rapid humidity changes that can accelerate deck and sheathing wear. Hail resistance matters more here than in milder climates, given spring storm activity, and the ability to withstand seasonal swings without cracking or delamination can influence long-term value. In practice, you may find that a higher upfront cost pays back in fewer maintenance calls and steadier energy performance after a harsh winter.
Project pricing in Algonquin can rise after regional storm events when contractor demand spikes and lead times stretch. In the wake of a significant hail or wind event, you'll notice not only higher labor rates but faster scheduling pressures, which can push quick-turn replacements into more costly windows. Full replacement costs are also affected by how the roof is vented and flashed, even if the core materials are the same. If upgrades are needed to bring venting or flashing into code-adjacent practice-such as ensuring ridge vents, soffit intakes, and properly sealed penetrations align with the existing structure-this can add to the total. For many homes, getting the right balance between robust storm resistance and an affordable, reliable installation comes down to choosing materials with proven performance in cold, fluctuating conditions and selecting a profile that minimizes vulnerable edge details where ice damming can form. In Algonquin, that means prioritizing systems and installation detail choices that support dependable weather resilience year after year.
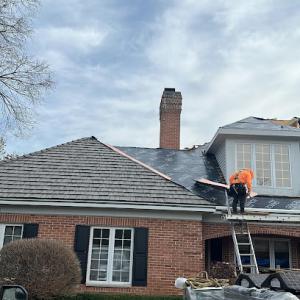
Before any full roof replacement starts, a building permit through the Village of Algonquin Building Department is typically required. The process begins with submitting the replacement plan, including details on roof venting, flashing, and material choices. The village will review the plan for compliance with local standards and install details, not just to satisfy a state code but to ensure proper venting and flashing for Algonquin's winter conditions. Expect that the review may prompt adjustments to meet clear requirements on how attic ventilation is integrated with the ridge and soffit vents, and how step-flashing interacts with chimneys, skylights, and wall penetrations. Submitting a complete and organized package helps avoid back-and-forth delays.
During plan review, the Building Department will focus on how the replacement addresses ventilation, flashing details, and drainage. If the current roof has inadequate venting, or if flashing around dormers, chimneys, and vent pipes doesn't align with local standards, additional drawings or notes may be requested. The village may require verification that the chosen venting strategy will handle ice dam risks and regulate moisture movement in the attic. Plan submissions should clearly show how soffit vents, ridge vents, or other intake/exhaust configurations will function together with the chosen roofing system. Providing precise dimensions, product data, and installation notes helps the reviewer approve the project without unnecessary resubmittals.
Algonquin commonly uses rough and final inspections for permitted roof replacement work. This means the project will not be treated as a same-day administrative task. Rough inspections typically occur after roof deck removal and underlayment installation, while final inspections confirm that ventilation, flashing, and drip-edge placement meet code, and that penetrations are properly sealed. Contractors should schedule these inspections with the village in advance and anticipate possible weather-related delays. Homeowners should expect access coordination with the building inspector, as the process relies on sign-offs that confirm the installation complies with both the permit and the local standards.
On the day of the rough inspection, have the sheathing, underlayment, and current stage of ventilation visible to the inspector. For the final inspection, ensure that all penetrations, flashing at chimneys and skylights, drip-edge details, and venting configurations are fully installed and accessible for review. Keep a log of material approvals and installation notes on site in case the inspector asks for documentation. If the village requests changes during review, respond promptly with revised drawings or specifications to keep the project moving toward final sign-off.
Because the permit and inspection cycle hinges on municipal sign-offs, coordinate schedules with the contractor to align with anticipated inspection windows. Factor in possible weather-driven scheduling shifts, especially after severe spring storms or during periods of heavy ice and snow management concerns. A well-documented plan that clearly shows venting strategy and flashing details reduces the likelihood of revisits and keeps the project progressing toward a compliant, durable roof that stands up to Algonquin's winter and spring weather.
Storm season in this Fox River-area village often puts roofing on homeowners' minds for longer stretches of the year. Illinois homeowners in Algonquin generally depend on standard wind and hail coverage, making storm-season roof claims a routine part of the local replacement market. When a severe event hits, the claim flow tends to unfold in a recognizable pattern: first, an onslaught of phone calls and emails, then a field adjuster review, and finally a decision window that can stretch depending on the scope of damage and the contractor's availability. Expect the process to feel urgent but grounded in careful documentation, especially after a harsh spring.
After severe storms in the Algonquin area, adjusters commonly request photos, contractor bids, and confirmation that installation met permit and code expectations. Photos should capture the roof from multiple angles, any interior water intrusion, attic conditions, and the surrounding structure where visible. Bids need to be detailed enough to show material types, square footage, and the proposed scope, not just a dollar figure. Documentation that demonstrates proper ventilation, flashing, and ice-dam mitigation can influence the appraisal outcome. Having these pieces ready reduces back-and-forth and helps avoid delays that can complicate replacement planning.
Tighter underwriting in storm-prone periods can influence deductibles and whether Algonquin homeowners repair isolated damage or move forward with full replacement. If the damage appears localized and isolated from severe events, some carriers may favor targeted repairs. Conversely, evidence of widespread wear, repeated events, or compromised attic ventilation may push the claim toward a full-roof replacement strategy. In both paths, timing matters: the longer the claim drags, the more exposure exists to rising debris-related risks and potential secondary damage.
Keep a current directory of trusted local contractors who can provide quick, thorough assessments. Before debris cleanup begins, document the roof's condition with timestamped photos, then coordinate with the adjuster to schedule a coordinated inspection. If you anticipate a lengthy claim review, ask about temporary protection options to prevent further water intrusion while decisions are pending. Remember that accurate, timely documentation can make the difference between a smooth adjustment and a drawn-out process with uncertain outcomes.
Connect with contractors who help homeowners navigate the claims process from damage assessment to final approval.
MJC Contracting
(847) 469-7663 www.mjccontracting.com
923 S Main St, Algonquin, Illinois
4.8 from 19 reviews
Capeesh Construction
(847) 620-9165 www.capeeshconstruction.com
203 N Main St, Algonquin, Illinois
4.6 from 38 reviews
The Fox River area brings a combination of winter ice and snow loads, spring hail, and frequent wind events in autumn. These conditions shape how a roof ages and how a roof system should be designed and installed. In Algonquin, the critical goal is to minimize the risk of ice dams and wind-driven damage while ensuring the roof remains robust through rapid temperature swings. Materials should tolerate thermal cycling, provide solid sealing around penetrations, and support a long-lasting underlayment strategy suited to cold-season demands.
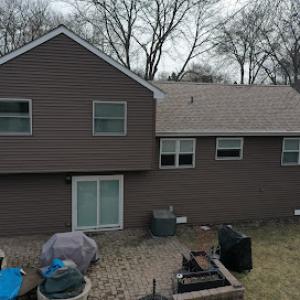
Algonquin's dominant roofing mix includes asphalt shingles, metal roofing, clay tile, concrete tile, wood shingles or shakes, and synthetic or composite shingles. Each material brings different performance traits under the local climate. Asphalt shingles offer straightforward sealing behavior and ease of repair, but their life can hinge on proper ventilation and a well-detailed drip edge. Metal roofs excel in shedding snow and resisting wind-driven impacts, yet installation details and expansion joints matter for long-term performance. Clay and concrete tiles bring excellent durability in hot weather and a distinctive look, but require a solid deck support and careful flashing to handle ice dams. Wood shingles or shakes deliver a traditional appearance and warmth of character but demand meticulous maintenance against moisture and UV exposure. Synthetic or composite shingles provide a flexible, hail-resistant option that can mimic other materials while often balancing weight and installation ease.
Warm to hot summers in Algonquin can stress underlayment and adhesives, while winter cold and snow accelerate aging in materials that are vulnerable to thermal cycling. Choose underlayment and flashing assemblies designed for seasonal swings, with appropriate breathability and moisture venting. Look for membranes and sealants that maintain elasticity through freezing temperatures and repeated thaw cycles, and ensure that roof decks are clean, dry, and properly vented prior to installation to maximize sealant life.
Autumn wind events in Algonquin can displace shingles before full sealant cure, so installation timing matters more here than in climates without a sharp cold-season transition. Favor installations that complete sealant and shingle seating before considering high-wind forecasts, and coordinate with drafts and temperature schedules to avoid wind-lift risk during the critical early curing window. Proper nailing patterns, alignment, and edge protection are essential to withstand seasonal wind pressures and maintain long-term performance.
The most popular roofing material in the US. Find pros who install, repair, and replace asphalt shingles.


Amsterdam - Roofing, Siding, Windows, Doors & Masonry Contractor
(847) 439-1814 www.amsterdamcontractor.com
Serving
5.0 from 24 reviews

In the freeze-thaw climate you deal with, roof penetrations are the natural weak points when snow lingers and backed-up ice holds moisture at transitions. Skylights and chimney flashing sit at the edges where water tends to seep, and that moisture can back up into the curb or flashing joints long before shingles show their first sign of trouble. The repeated expansion and contraction of cold months makes those metal transitions brittle over time, so small gaps turn into slow leaks that travel along the flashing plane before you notice a stain inside.
Leak tracing should start at flashing interfaces rather than chasing only visible field shingles. Pay close attention to the perimeter around skylights, the chimney base, and any vent stacks. Look for loose or lifting flashing, overwhelmed or weathered sealant, and misaligned counter-flashing. In areas with heavy snow, ice buildup can mask a slow drip that travels behind fascia or under shingles at the edge; tracing should follow the moisture path from interior staining back to the flashing junctions. Remember that sometimes the problem isn't the shingle itself but the way the flashing integrates with nearby curb details and vent terminations.
Ensure skylight curb flashing and chimney flaunches have continuous, properly integrated flashing with clean, compatible sealant. Use metal step flashing around chimney sides and pack counter-flashing tightly into mortar joints. At skylights, verify the sealant bead is fresh and that the flashing sits flush with the curb. Regularly inspect transitions after heavy snows and thaws, and maintain attic ventilation to reduce condensation that feeds ice dam formation at these penetrations.
Find contractors experienced in skylight installation, flashing, and leak repairs to bring natural light into your home.
Capeesh Construction
(847) 620-9165 www.capeeshconstruction.com
203 N Main St, Algonquin, Illinois
4.6 from 38 reviews

Although the market here is primarily pitched residential, local contractor demand shows meaningful need for flat and low-slope work on additions, porches, garages, and mixed-use structures. When shingles or metal wraps meet a low-slope corridor, tight flashing details and careful edge treatments become essential to prevent moisture intrusions. You should expect more frequent attention to drainage boards, edge outlets, and parapet terminations in these areas. Choose installers who understand the transition from a steep main roof to a flatter tie-in and who plan for continuous waterproofing across the change in plane.
Snow retention and slower drainage on low-slope sections can compound winter moisture problems compared with the main steeper roof planes. In Algonquin winters, you want to verify that any low-slope surface has effective snow guards, proper slope for meltwater flow, and adequate scuppers or downspout connections. Regular seasonal checks after heavy snows help prevent ice dam formation near transitions and at the base of low-slope interfaces. Consider dedicated ice protection strategies for these areas, since prolonged moisture exposure can creep under edge flashing if drainage is obstructed.
When homes have both steep shingle roofs and low-slope tie-ins, replacement planning should account for transition flashing and drainage behavior across both roof types. Ensure the flashing is continuous across the two planes without gaps that could trap runoff. Pay attention to how water routes from the steep field into the low-slope, and confirm that the drainage plan directs flow toward reliable outlets. Poor coordination at these junctions is a common source of leaks after replacement or repair.
Find specialists in TPO, EPDM, and built-up flat roofing systems for residential and commercial properties.

Amsterdam - Roofing, Siding, Windows, Doors & Masonry Contractor
(847) 439-1814 www.amsterdamcontractor.com
Serving
5.0 from 24 reviews