Last updated: Apr 19, 2026
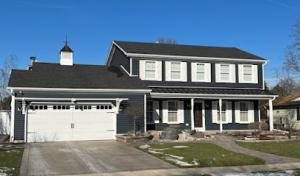
Winter ice dams are a real headache for Villa Park homeowners. Snow builds up on older Chicago-area stock roofs, and cold snaps push meltwater back under shingles, then refreeze at the eaves. The result is hidden leaks that show up only after an active thaw or a heavy wind event. This pattern lands most homes already fragile from aging underlayment, flashing corners, or marginal attic ventilation. When attic air is not vented properly, warm ceiling heat meets cold roof decking, widening the dam risk and accelerating rot behind the scenes. If your roof is already showing soffit or gable vents that aren't pulling air through, the problem compounds quickly, turning a minor ice dam into an expensive repair that your insurer will scrutinize during any claim. The consequence for Villa Park families is timing - leaks can worsen faster in the cold months, and replacement decisions become more sensitive once a roof has persistent ventilation or flashing weaknesses.
Storm season here often triggers insurer inspections that can determine the urgency of replacement. After a significant snow event followed by a warm spell, ice dam damage may prompt a claim that needs a professional assessment of attic ventilation, underlayment, and flashing. In spring, hail and wind drive a surge of claims, and insurers may request rapid documentation, photos, and a formal roof condition report before approving full replacements. This means waiting on a contractor to complete a thorough attic and roof assessment, then aligning with the insurer's expectations for a proper, code-conscious install. The risk in Villa Park is not only the damage itself but the scheduling bottlenecks created when multiple claims pile up after a regional hail event. Inspections can pause work, and material access can tighten as crews pivot to high-priority repairs and largescale replacements.
Local replacement work often gets pushed into spring and fall windows, precisely when volatile weather stuff happens. Storm-driven demand spikes can squeeze crews, extend lead times for materials, and slow inspections after a big hail event. That means delays that ripple into the best-laid plans for a full-roof replacement, especially if underlying issues like ventilation and flashing are not up to par. The time to act is when damage is evident or when insurer signals point toward a full replacement. Proactive planning helps avoid last-minute scrambles after a major storm. Coordinating a comprehensive assessment now-covering attic ventilation, flashing detail, and underlayment integrity-positions a homeowner to ride out the spring spike with fewer hold-ups and a clearer path to a secure, weather-tight roof.
Material options and cost ranges in this market reflect the mix of aging homes and modern upgrades found in the area. The dominant replacement mix includes asphalt shingles, metal, clay and concrete tile, wood shakes, and synthetic shingles, so conversations about cost aren't limited to basic shingle tear-offs. When framing a bid, expect asphalt shingles to sit on the lower end of the spectrum and premium materials to push higher, with metal and tile often making up the higher middle to upper ranges. The numbers below are per square (100 square feet) and include typical install considerations for a complete roof replacement in this climate and housing stock.
Asphalt Shingles: On most mid-century and newer houses, asphalt remains the baseline option. Practical performance for winter ice-dam exposure, solid decking, and standard flashing keeps this material competitive. Expect bids that fall in the range of roughly 350 to 700 USD per square, depending on shingle quality, underlayment, and any required ventilation upgrades. In areas with older roofs, the cost can rise when more extensive decking repair or underlayment reinforcement is needed to satisfy the local inspection expectations.
Metal Roofing: Metal shows up frequently on the higher end of the practical spectrum due to longevity and resistance to ice-dams, yet installation complexity can raise the price. Typical projects run about 650 to 1,100 USD per square. If a home has a lower slope, tall venting, or intricate ridge work, the premium can push higher. In some neighborhoods with stricter flashing detail expectations, metal jobs bookmark additional flashing and seam work that can nudge the total above standard estimates.
Clay Tile and Concrete Tile: Tile is common on several of the older and newer homes alike, particularly where a durable, long-lived roof is favored. Clay tile tends to run higher, roughly 900 to 1,800 USD per square, while concrete tile often lands around 700 to 1,300 USD per square. The price spread reflects weight considerations, structural assessment needs, and the extra labor involved in proper underlayment integration and flashing at penetrations. In Villa Park, tile projects frequently require careful matching of color and profile with existing facades, which can add scheduling and material coordination steps.
Wood Shakes and Synthetic Shingles: Wood shakes bring a traditional look that pairs well with certain architectural styles found locally, with costs commonly around 550 to 1,000 USD per square. Synthetic shingles offer a lower-to-mid price point that still supports long-term durability and a fire-resistant profile in many installations, typically running 450 to 900 USD per square. The choice between these two often hinges on aesthetic goals, maintenance expectations, and how aggressively the home's ventilation and flashing details are planned to align with the local rough and final inspection criteria.
Storm-driven pricing dynamics: Chicago-area storm surges can raise pricing pressure in this market by tightening labor availability and extending lead times after hail and wind events. In practical terms, when a dialing-in window for crews tightens, bids may reflect ready-to-go scheduling and expedited material sourcing, potentially increasing the per-square cost slightly and adding a premium for faster material procurement and crew mobilization. Conversely, a calm stretch can help keep pricing closer to the base ranges listed above.
Decking, ventilation, and flashing considerations: Costs in this area can move up when older homes need decking repairs, upgraded ventilation, or more detailed flashing work to satisfy local rough and final inspections. Even if the visible surface looks straightforward, upgrading these components often becomes the deciding factor in meeting performance expectations for winter ice-dam resistance and long-term roof integrity. Plan for a step where the contract itemizes decking repair, venting improvements, and flashing detailing as separate line items to avoid surprises at midway through the project.
Aegis Construction Group
851 N Villa Ave, Villa Park, Illinois
4.9 from 70 reviews
Welcome to Aegis Construction Group in Villa Park, IL! As a family-owned and operated business, we specialize in a variety of exterior restoration services. Proudly licensed as an Illinois roofing contractor and a General Contractor in the City of Chicago, we cater to residential, commercial, and industrial needs across the Illinois suburbs, including Villa Park. With a steadfast commitment to service and quality, we've delighted over a thousand customers in the Chicagoland area. Our dedication to excellence is backed by a 10-year craftsmanship warranty on all our work. We offer complimentary property inspections and strive to make the process hassle-free for homeowners, whether it's an insurance claim for storm damage or simple updates.
GC Roofing Company
(331) 267-8166 roofingcompanyvillapark.com
402 W St Charles Rd, Villa Park, Illinois
4.9 from 54 reviews
GC Roofing Company Villa Park based, specializes in providing top-tier roofing solutions tailored to meet the specific needs of each client. Our skilled team, equipped with the latest technology and materials, ensures every project is completed with the highest standards of quality. We take pride in our commitment to customer satisfaction and our ability to deliver exceptional results, whether it's for residential or commercial properties. Our services include new roof installations, repairs, maintenance, and inspections, all delivered with unmatched professionalism. Trust our company for reliable, efficient, and cost-effective roofing services. For a free consultation or to discuss your roofing needs, don't hesitate to contact us.
Chicagoland Exteriors
(630) 847-7863 chicagolandexteriorsinc.com
Serving
4.9 from 162 reviews
Roofing, Siding, and exterior remodeling contractor
Elite Exteriors
(312) 599-1032 www.eliteext.com
Serving
4.9 from 114 reviews
ELITE EXTERIORS - Residential & Commercial Roof Installation, Replacement & Repair Experts- has more than 30 years of experience in the construction industry. Not only are we a licensed roofing contractor, but we can also handle your insurance claims in-house. Our team of professionals has the experience to tackle any residential or commercial projects resulting from property damage caused by natural events. Elite Exteriors is Elmhurst’s top choice for exterior repair projects when Mother Nature causes damage to your home or business. Roofing, siding, gutters, decks, and almost any other exterior repairs you could ask for — Elite Exteriors can handle them all.
Feze Roofing
(630) 530-5944 www.fezeroofing.com
Serving
4.8 from 78 reviews
Feze Roofing, services the Residential, Commercial and Industrial Markets in Oak Brook, Elmhurst, Villa Park, Burr Ridge and all throughout the Chicagoland Suburbs. We have specialized in applications such as shingles, hot asphalt, single-ply roof systems and modified bitumen in the DuPage and Cook County areas for more than 35 years. Our Installers and foremen are certified Commercial Master Installers of GAF Materials Corporation and Carlisle Roofing Systems, Inc. Our team is factory trained and certified. We have an ongoing educational program in residential and commercial roofing as required by GAF. In addition, we are one of the first roofing companies in the Chicagoland area to be designated as Master Elite Contractors by GAF.
Sealed Tight Roofing
(630) 631-7496 www.sealedtightroofingandpaving.com
Serving
4.9 from 82 reviews
Here at Sealed Tight Roofing and Paving, we provide comprehensive roof installation, roof repair, modified bitumen, TPO roofs, flat roofs, asphalt shingles, snow removal, roof coating, gutter installation & repair services for homeowners and business owners across Chicago, Illinois and the surrounding communities. We are experts in our field and are dedicated to providing superior workmanship and customer support. With over 30 years of professional experience, customer satisfaction is always our top priority.
Aegis Construction Group
(773) 812-3447 www.aegiscgi.com
Serving
5.0 from 291 reviews
Aegis Construction Group in Elmhurst, IL delivers trusted exterior contracting and restoration services for homeowners and businesses throughout DuPage County and the Chicagoland area. As a family‑owned and Illinois licensed roofing and general contractor since 2015, we specialize in premium roofing replacements, roof repairs, siding installation, seamless gutters, windows, and garage doors backed by industry‑leading workmanship and materials. We manage storm damage repair, insurance claims, and offer free property inspections. Our team prioritizes quality, communication, and customer satisfaction, delivering durable, energy-efficient solutions that enhance curb appeal and long-term protection for your commercial or residential property.
Royal Reserve Roofing
(630) 822-4370 royalreserveroofing.com
Serving
5.0 from 198 reviews
General contracting for all exterior repairs, damages, and restoration.
Anytime Roofing
(630) 376-8391 www.anytimeroofing.net
Serving
5.0 from 76 reviews
Our mission has been to deliver roofing solutions that’ll bring your home’s curb appeal to life. We hope to accomplish that by providing our clients with professional workmanship, highest quality roofing repairs/replacements, and excellent customer service. It is our primary goal to restore your roof to like-new condition in the shortest time possible, using the finest materials, and without breaking the bank. What We Do Backed by close to two decades of expertise and an avid team of roofing pros, we offer you a full suite of roof repair and replacement services with a dedication to full customer satisfaction.
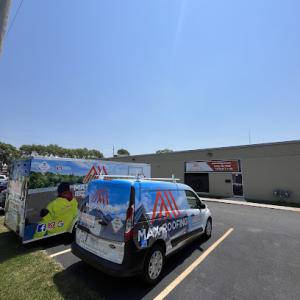
Max Roofing
(773) 766-9988 www.maxroofings.com
Serving
5.0 from 79 reviews
LICENSED MAX ROOFING COMPANY ADDISON, IL. Residential and commercial emergency roofing replacement services contractors in Addison, IL, Glencoe, IL, Elmhurst, IL, Norridge, IL, Naperville, IL, Lake Forest, IL, Northbrook, IL 60062, Lake in the Hills, IL, South Barrington, IL, Glen Ellyn, IL, Hinsdale, IL. Certified GAF Master Elite Roofing Chicagoland. Chicago Certified Installers of Da Vinci Roofscapes near me. Get a Quote for Roof Repair from local roofers. Insurance Claims Roof Installation Contractors in Addison Illinois. As trusted local roofers, we offer extensive roof repair services, even specializing in the challenging task of repairing flat roofs near Addison, Glencoe, Elmhurst, Norridge, Naperville, Lake in the Hills, Barrington.
Benchmark Exteriors
(833) 708-7663 www.benchmarkexteriors.com
Serving
4.8 from 71 reviews
Benchmark Exteriors is a veteran-owned company specializing in insurance restoration. We are your premier choice for top-notch exterior remodeling, serving Oak Brook, IL & nearby areas. As a full-service exterior contracting company, we specialize in roofing, siding, gutters, solar energy & 24/7 emergency services. Our dedication to quality is supported by acknowledgment from Owens Corning and the Vinyl Siding Institute. Our team is dedicated to providing modern solutions and top-rated products for your home improvement needs. We believe in transparent pricing and customer satisfaction. Take advantage of our 0% interest and zero payments for a limited-time 12-month financing program. Explore our gallery, let us bring your vision to life.
In N Out Exteriors
(847) 899-9212 innoutexteriors.com
Serving
4.9 from 62 reviews
In N Out Exteriors understands how important your home is. As a reputable and professional General contractor with a focus on roofing, siding, gutters, windows, doors and storm damage restoration we offer years of experience that includes a complete and comprehensive range of exterior services that are designed to enhance curb appeal, provide energy efficiency and increase the value of your home. We have extention insurance claims experience. We know that it is difficult to choose a contractor, but want you to understand that our biggest goal is to make you a very satisfied customer. We know that in order to make an impression that big, we have to work for it, we look forward to working with you, and hope to hear from you soon.
Full roof replacements require a permit through the village before work begins. That means the project can't start with a casual "do-ityourself" kick-off or a quick weekend crew without paperwork. The village's review process is designed to catch ventilation, flashing, and underlayment issues before major work starts, since those details matter for long-term performance and winter ice dam concerns. Before any shingles come off, you should submit drawings or plan notes that show attic ventilation, underlayment type and thickness, and flashing details around valleys, chimneys, and walls. If the plan misses a few key details, the village will slow you down with requests for corrections. Planning ahead saves the frustration of reworking already installed sections.
Villa Park schedules rough inspections during the project and a final inspection after completion. The rough inspection is your window to confirm ventilation flows, attic air exchanges, and the installation's foundational elements, such as underlayment alignment and flashing placement, meet code expectations. The final inspection is a comprehensive check of the finished roof and related penetrations, ensuring the installation matches the permit package and that nothing undermines long-term performance in snow and ice conditions. Expect that inspectors will verify that ventilation is balanced, underlayment is continuous and properly sealed at edges, and flashing is secure against wind-driven water intrusion. The village does not view a completed look alone as sufficient; the method and quality of installation get scrutinized as part of the permit closure.
During rough inspection, the focus centers on whether attic vents and soffit lines provide adequate intake and exhaust. The inspector will examine whether the underlayment is continuous around eaves, dormers, and valleys, and whether flashing around chimneys and vent pipes is correctly integrated with the roofing system. If any gaps, folds, or misalignments are found, corrections will be requested before the project proceeds. In the final inspection, the village checks that all flashing details are firmly secured and that the overall installation appears uniform and properly sealing against water intrusion. Missing or substandard fasteners, poorly seated shingles, or inconsistent stair-stepping in shingles can trigger re-inspection requirements or additional work orders.
Because the permit process emphasizes ventilation, flashing, and underlayment, it is not uncommon to encounter a re-inspection if corrections are required. A single overlooked detail-like a missing underlayment seam or a misaligned valley flashing-can delay a project, particularly when winter weather tightens the schedule. To avoid delays, coordinate closely with the project team to address any village feedback promptly, keep copies of permit plans handy, and document updated details as corrections are implemented. If a re-inspection is needed, schedule it quickly to minimize exposure to ice-dam risks and weather-related setbacks. Being proactive with documentation and timely corrections helps keep the project moving toward a compliant, durable replacement.
Storms in this area, especially hail and strong winds, drive a steady flow of roof claims and adjuster involvement. When a major event hits, the first reaction is usually to document damage and call in a professional to confirm what's truly affected versus what's cosmetic. In practice, those with older or mid-century homes often see more ice dam trouble and water intrusion around the eaves, which can complicate the claim timeline. If a replacement becomes likely, the decision hinges on whether the insurer views the damage as widespread and structural, rather than scattered surface wear.
Homeowners commonly encounter requests for photos, contractor estimates, and warranty information, particularly when the roof has aged or when the carrier scrutinizes material condition. Start gathering clear, date-stamped photos from multiple angles: attic signs of moisture, interior staining, and visible exterior damage after a storm. Keep copies of any prior roof work and supplier warranties. When a claim moves forward, an adjuster will want a recent, itemized estimate from a licensed contractor, plus material details (shingle type, underlayment, flashing). If a manufacturing warranty exists, have that document ready as it can influence coverage decisions or the timing of a replacement.
Some carriers tighten terms for aging roofs or certain materials, making documentation before and after storms more important in replacement decisions. In practice, that means timelines may tighten once the claim is opened, with more emphasis on confirming pre-storm condition versus post-event changes. Be prepared to explain any pre-existing issues such as prior ice dam damage, soffit or fascia wear, or venting concerns. Insurers may request a professional opinion on ventilation, flashing, and underlayment quality as part of the claim package.
When a storm hits, quickly start a damage log: date the event, describe the damage, and photograph it in a consistent sequence. Secure a trusted local contractor for a written assessment that includes both damage from the event and any pre-existing conditions that could affect the claim decision. If there is a dispute over replacement timing, request a second opinion from another contractor, focusing on the roof's ventilation, flashing, and underlayment-areas that are closely examined in this market. This approach helps keep the process clear and prepares you for conversations with the insurance carrier.
Connect with contractors who help homeowners navigate the claims process from damage assessment to final approval.
Aegis Construction Group
851 N Villa Ave, Villa Park, Illinois
4.9 from 70 reviews

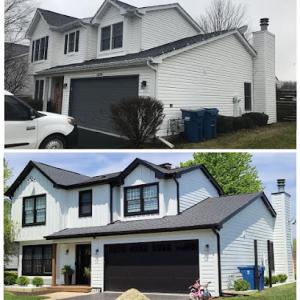
Asphalt shingles remain the most practical fit for many homes in this area, offering a balanced mix of durability and cost, and they are widely available in multiple profiles to suit older Chicago-west-suburb stock. However, metal, tile, wood shake, and synthetic options are all active parts of the local market, giving you choices that can improve curb appeal or performance depending on your home's direction to sun, shade, and wind exposure. In towns with colder winters and humid summers, you'll benefit from choosing a material that handles freeze-thaw cycles without excessive expansion or contraction, while still performing well during hot spells.
Villa Park's freeze-thaw winters and warm humid summers make ventilation and fastening quality especially important regardless of material choice. Proper attic ventilation reduces ice dam formation and helps preserve your roof deck. When selecting a roof system, ensure underlayment and flashing transitions are coordinated with the chosen material-for example, metal and tile installations often demand more precise flashing details around skylines, chimneys, and vent penetrations. A well-ventilated attic also supports longer shingle life and more reliable fastening, which matters whether you're installing asphalt, metal, or heavier tiles.
Heavier materials such as clay and concrete tile are part of the local material mix, so structure, flashing transitions, and replacement complexity can differ sharply from a standard shingle project. If your home has a wood-framed roof or older support members, a professional assessment may reveal the need for reinforcing or reworking rafters, especially where long spans meet eaves or corners. Tile and shake options benefit from meticulous detailing at rakes and hip lines, where wind uplift and weight transfer are most critical. Even with asphalt or synthetic options, ensure the deck and anchor points are designed for your chosen system's load requirements.
Choosing the right material involves weighing aesthetics against climate resilience and the upgrade path for aging structures. Asphalt shingles offer reliable performance with familiar installation practices, while metal can provide longevity with clean lines and strong wind endurance. Tile variants bring distinct textures and heat resistance, though they demand careful framing and flashing strategies. Wood shakes deliver traditional character but require moisture management. Synthetic shingles can mimic other looks with often easier installation and improved impact resistance. The common thread across all options is meticulous attention to ventilation, continuous insulation interfaces, and precise flashing details to withstand Villa Park's seasonal shifts.
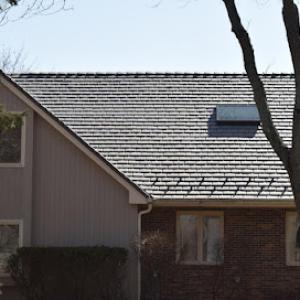
Explore specialists in steel, aluminum, and standing seam metal roofs built to last 50 years or more.
Greater Chicago Roofing - Bloomingdale
(630) 283-8173 www.greaterchicagoroofing.com
Serving
5.0 from 42 reviews
In the village's older housing stock, leak investigations often center on flashing transitions rather than field shingles alone, especially around chimneys and skylights. If a chimney cap or skylight curb shows rust, loose metal, or gaps where mortar meets flashing, water can follow those lines more readily than it appears on a sunny afternoon. A simple interior drip is often the first sign, but the hidden path may run along counterflashing behind siding where you can't see it from ground level.
Snow, ice, and spring rain in the western Chicago suburbs tend to expose weak curb, step-flashing, and counterflashing details quickly. Freeze-thaw cycles push flashing seams apart, and relentless moisture behind cracked sealant can travel down into soffits and attic spaces. In Villa Park, this means a leak may travel several feet from a chimney or skylight before it shows at the ceiling. The consequence is often supplemental damage that isn't obvious until a full inspection or interior staining occurs.
Start with a careful surface check after storms: look for loose metal edging, missing sealant, or stained areas around chimneys and skylights. If you notice any gaps, have a local roofer verify that the step-flashing, curb flashing, and counterflashing meet and overlap properly. Ensure any flashing transitions are integrated with proper sealant and flashings rated for standing water. Remember that the goal is to prevent water from tracking behind outer layers into the roof deck and attic.
Because flashing detail often drives leaks, replacement decisions hinge on the condition of those transitions as much as the visible shingles. A thorough inspection will prioritize chimney and skylight interfaces, checking for rust, loose fasteners, and misaligned flashing. When a project proceeds, the flashing plan largely dictates how effectively the roof remains watertight through the next few winters.
Find contractors experienced in skylight installation, flashing, and leak repairs to bring natural light into your home.

GC Roofing Company
(331) 267-8166 roofingcompanyvillapark.com
402 W St Charles Rd, Villa Park, Illinois
4.9 from 54 reviews
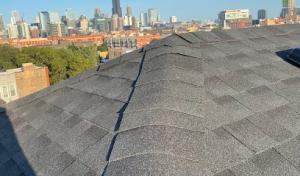

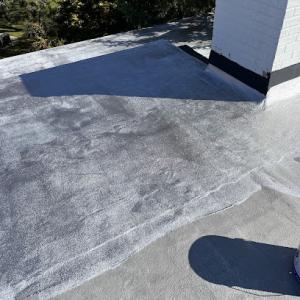
In this market, flat and low-slope areas show up on additions, porches, garages, and mixed residential-commercial buildings. They are a common focus for local contractors because they carry a higher risk of standing water, snow that doesn't shed quickly, and flashing failures at transitions during freeze-thaw cycles. These roof areas often need to be evaluated separately from the main steep-slope roof during replacement planning. The goal is to prevent leaks where water tends to pond and where flashing meets walls, skylights, vents, and roof-to-wall joints.
Begin with a careful water-test approach on any low-slope surface, looking for soft spots, raveling membranes, and blisters in the underlayment. Check edging and terminations at parapets, gutters, and drains, since those are common failure points after a harsh winter. Pay close attention to the transitions where the flat section meets the steeper roof or other elements like dormers or porches. In cold snaps, inspect for ice dams at those transitions and for any signs of water backing up under the flashing. Ensure the underlying deck is solid, flat, and properly vented to avoid trapped moisture that can compromise the entire assembly.
Select membrane systems that address cold-season performance, with emphasis on robust sealing at penetrations and reliable flashing into existing wall assemblies. For attached or emerging low-slope areas, coordinate with the main roof plan so flashing, underlayment, and slope compatibility are continuous across the whole roof run. In mixed-use or single-family homes with additions, ensure the new low-slope segment ties into the existing attic ventilation and vapor controls without creating a cold-bridge that invites condensation. Discuss transitions with the installer to minimize potential for differential movement and water ingress at seams.
When a roof is replaced, plan the low-slope portion as a coordinated sequence with the steep-slope work, rather than as a separate project. Heavy snowfall years or subsequent freeze-thaw cycles can exacerbate water intrusion if the flat section is left to a rushed install. Use the opportunity to reseal around penetrations, reflash wall joints, and verify that drip edges and edge metal are integrated with the new system for a cohesive, long-lasting result.
Find specialists in TPO, EPDM, and built-up flat roofing systems for residential and commercial properties.
GC Roofing Company
(331) 267-8166 roofingcompanyvillapark.com
402 W St Charles Rd, Villa Park, Illinois
4.9 from 54 reviews
Spring and fall are the preferred windows for installing replacement windows in this area. Crews avoid peak ice-dam risk and the hottest summer installation conditions, which helps keep sealants and flashing from failing under stress. If you've just taken a loss or suspect storm damage, plan a spring or autumn install to align with milder temps and more predictable exterior conditions. In winter, snow cover and freezing temperatures can slow work and complicate sealant performance, so a winter schedule should be treated as a secondary option unless an urgent repair is needed after a storm.
Summer humidity in the Chicago suburbs challenges shingle handling and attic ventilation dynamics that feed into window work. When planning, consider how the attic area breathes during an installation. Poor ventilation can trap heat and moisture, affecting interior temperatures and the long-term performance of new windows. A practical approach is to stage work so interior finishes aren't exposed to peak afternoon heat, and to coordinate with any roof or flashing work that might be happening concurrently to avoid overlapping moisture exposure.
In Villa Park, replacement windows should be approached with an eye toward ventilation as a whole-house system. Proper nailing fin alignment, flange seating, and flashing integration with the existing siding and roofline matter, especially where ice dams have been a concern in the past. Ensure a weather-tight seal around openings and verify that the attic and soffit vents remain clear after installation. The goal is to prevent any new moisture pathways that could contribute to condensation or ice-dam risk near the eaves.
Schedule window work in a window-friendly season, ideally spring or fall, and coordinate with any adjacent roofing or exterior work to minimize moisture exposure. Have the contractor perform a quick assessment of attic ventilation prior to installation and request a brief post-installation check to confirm seals and flashing are properly integrated with the roof and siding. Communicate any prior storm damage so the crew can address underlying issues that could affect long-term performance.