Last updated: Apr 19, 2026
Norwood's roofing calendar is constrained by cold, snowy winters that create repeated freeze-thaw stress and make late spring through early fall the common replacement window. Ice dams aren't theoretical here-they're a real, recurring problem that damages edges and gutters, forces water under shingles, and can trigger structural concerns when the attic breathes poorly or insulation sits under-protected. Heavy snow adds weight to rafters and complicates safe access for repairs, so every storm compounds risk for the entire season. Massachusetts roof claim activity in this area is strongly tied to wind, ice, and winter storms, making winter-driven damage the most locally relevant trigger for inspections and repairs. The takeaway is simple: treat winter as a high-alert period for edge failures, moisture intrusion, and delayed response times.
Watch for damp patches along interior ceilings near exterior walls after a thaw, or staining that appears alongside new icicles along the roof edge. Listen for cracking or creaking sounds from roof sheathing during cold snaps; that can signal borderline ice damming or shingle lift. Gutters packed with ice, ice dams forming at the eaves, or visible granule loss on shingle surfaces are strong indicators that the roof is under freeze-thaw stress. If wind-driven snow piles against the eaves and soffits without a clear melt path, fragile edges are being stressed and the risk of wind-driven water intrusion rises. When these signs show up, treat them as a readiness alert for a professional assessment before the next thaw cycle.
Winter limits access for reliable repairs, so schedule inspections as soon as weather allows, even if a small problem seems minor. Crews will prioritize edge flashing, gutter lines, and shingle seal integrity since these areas are most prone to ice dam damage. Expect no-nonsense triage: stop the water penetration first, then verify attic insulation and ventilation to reduce future freeze-thaw cycles. A typical Norwood repair window follows the seasonal pattern-storm recovery, then a narrow stretch of workable days between nor'easters. Having a plan ready with photos, a clear access path, and a safe staging area helps crews move quickly and safely, which matters when cold snaps return and access becomes constrained again.
Heavy snow and ice restrict ladder use and ground access, so ensure a safe pathway to the affected roof line. If demolition or partial removal is required, it must be timed for when temperatures cooperate enough to prevent rapid re-freezing of exposed edges. Power and water lines near the eaves should be checked for freezing risks, as damaged lines can complicate repairs and extend the duration of vulnerability. Clear the area of ice build-up along driveways and walkways to prevent slip-and-fall injuries, since crews move equipment and materials across potentially slick surfaces. Outdoor work should be minimized during peak freeze-thaw cycles, favoring early-morning sessions when conditions are more predictable.
Because late spring through early fall are the common replacement window, use the downtime of winter to gather contractor recommendations, document roof conditions, and confirm a staged plan that aligns with your calendar. Edge deterioration and ice dam build-up can accelerate damage once the melt begins, so having a proactive plan reduces the chance of urgent, emergency repairs that complicate insurance claims and shorten the available replacement window. A cautious, informed approach now helps secure a safer roof next season and minimizes the risk of hidden damage surfacing after snow piles up again.
In Norwood, full replacements are commonly scheduled from late spring through early fall because freeze-thaw conditions and moisture exposure shorten workable installation periods. The window aligns with milder temperatures, lower humidity, and more predictable dry spells, which help crews finish a complex re-roof without weather-induced delays. If a project needs multiple roof surfaces, planning to stack crews in the late spring can help hit the narrow warm-weather sweet spot. Weather forecasts become a practical work tool for pacing the schedule.
Spring showers and high humidity are a known local scheduling issue because they can slow tear-off and affect adhesive performance during installation. Contractors often stagger tear-off phases to avoid back-to-back heavy rain days, and they may use moisture barriers more aggressively to protect underlying structures. You should expect temporary disruptions if sudden downpours hit during a critical stage. Clear communication about anticipated rain windows helps homeowners plan around partial roof exposure and potential interior drying needs.
Fall windstorms and leaf debris are listed local risks that can disrupt timelines even before winter weather returns. Leaves clog gutters and valleys, increasing the risk of water backup and ice dam formation once temperatures drop. A pre-winter gutter and attic vent inspection becomes a practical step to reduce debris-related delays. Contractors often adjust crew rotation to accommodate gusty days, and they may prioritize secure detailing at edges and penetrations to withstand the first cold snaps.
While the core replacement season is spring to fall, occasional mid-to-late fall or very early spring work can occur if conditions allow, especially on milder, wind-sheltered elevations. In practice, projects parked for winter should be kept under protective coverings to guard against moisture intrusion and ice formation on exposed decking. If a winter window becomes unavoidable, expect tighter scheduling, more rigid weather buffers, and temporary protective measures at eaves and vents to mitigate ice dam risk once the first significant freeze settles in.
Effective sequencing helps reduce the chance of late-season weather pushing work into a rushed finish. For older steep-slope roofs, coordinating with neighbors to minimize street debris and equipment traffic adds practicality to the plan. Leaf cleanups before starting and after completion limit debris-induced moisture pockets, which is a small but meaningful step toward longer-lasting results. If a fall deployment runs late, having a contingency plan for storage and protection of sensitive interior finishes becomes a prudent move.
Get a clear picture of your project costs upfront - no commitment required.
O'LYN Roofing
(781) 725-6795 www.olynroofing.com
916 Pleasant St STE 4, Norwood, Massachusetts
4.8 from 494 reviews
O’LYN Roofing Contractors is a family-owned and operated roofing company that has provided the reliability and tradition of quality craftsmanship to New Englanders for over 50 years. We’re fully licensed and insured, professional roofers specializing in the most challenging and intricate roofing work. Whether it’s an elaborate Victorian, a historic renovation, or a sturdy cape, we take enormous pride in every project and have one of the highest customer referral rates in the industry.

Brown Bros. Roofing
(781) 329-2895 www.brownbrosroofing.net
Serving
4.9 from 71 reviews
Your home is your castle and needs to be protected from the elements. Since 1932, homeowners have been turning to Brown Bros to keep their families safe and warm. You can trust our experienced contractors to do the job right on all roofing, gutters, siding, windows, and deck work. Give us a call or shoot us an email.
Kilraine & Son Roofing
(781) 762-7663 www.kilraineandsonroofers.com
Serving
5.0 from 16 reviews
Kilraine & Son Roofing is family- owned and operated roofing company that has been providing high quality roofing services for over 40 years. We pride ourselves on providing excellent workmanship, and affordable roofing solutions while keeping quality our top priority. We're fully licensed and insured roofers that work quickly and do the job right the first time. Whether you have a small cape or large victorian you can depend that you will receive the highest quality every time!
Kavanaugh Roofing
(781) 326-0096 kavanaughroofing.com
Serving
4.9 from 62 reviews
Kavanaugh Roofing is a well established business specializing in residential roofing. We have received the highest possible credentials from the Certainteed Corporation. From the time you contact us for a FREE Estimate to the time your roof is complete, you deal directly with the owner. When the project is underway we take all necessary precautions to make sure your home is weather-tight and protected from falling debris.
Willard Roofing Company
(781) 326-2807 www.willardco.com
Serving
4.6 from 16 reviews
Willard Roofing in Dedham, MA is your go-to source for superior roofing solutions, providing consistent results since 1873. Contact us today for a free quote. 781-909-4349
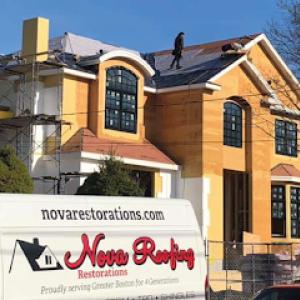
Nova Roofing & Restorations
(781) 407-9112 www.novarestorations.com
Serving
5.0 from 12 reviews
For 4 generations, Nova Roofing and Restorations have been trusted by homeowners, developers, commercial property managers and historical renovators throughout Massachusetts. From the old school, tar and gravel experience to the newest technology used today in all materials related to roofing, Nova has you covered. Certified, insured, licensed and trusted for quality and service.
Admiral Roofing & Home Improvement
(781) 706-2132 admiralroofingma.com
Serving
4.9 from 17 reviews
Admiral Roofing and Home Improvement is a trusted roofing and remodeling company serving Braintree, MA and surrounding areas. We provide quality service for all roofing and remodeling needs, including repairs, installation, maintenance and inspections. Our experienced team of roofers use the latest techniques to ensure your roof is in top condition. You can trust us to make sure your home is safe from the elements.
Able Roofing Company
(617) 327-7000 ableroofingcompany.com
Serving
4.7 from 40 reviews
ABLE ROOFING has been providing superior, high-quality service to families and businesses in the greater Boston area. Now in our 4th generation as a family-owned business, Able Roofing offers a wide selection of professional services, including the installation and repair of roofs, siding, gutters, doors, windows and decks.
Otukan Roofing Company Boston
(781) 798-9009 otukanroofing.com
Serving
5.0 from 21 reviews
Otukan Roofing is the top roofing company in Boston, MA, offering a wide range of expert services to protect and enhance your home. Our skilled professionals specialize in any flat roof repair, replacement, and inspection, as well as gutter cleaning, repair, and replacement. We also provide expert skylight installation and repair services. Whether you need routine maintenance, emergency repairs, or a complete roof overhaul, our team is dedicated to providing exceptional customer service and top-quality workmanship. Count on us for prompt, reliable, and affordable solutions to all your roofing needs. Contact Otukan Roofing today to schedule your appointment!
GN Exteriors
(781) 436-2234 randolph-ma.gnexteriors.com
Serving
5.0 from 71 reviews
GN Exteriors is a local leader among roofing companies in Randolph, MA, providing residential and commercial roof replacement, inspections, and roof repair for over 2 decades. Aside from roofing, we also offer solar panel sales, gutter installation, and vinyl siding in Randolph, MA, and nearby areas. With our high level of attention to detail and quality materials, you can rest assured you’re getting the best roof possible for your home or commercial building. We are a certified roofing crew with the following credentials: CertainTeed ShingleMaster, Owens Corning Preferred Roofing Contractor, and Velux Certified Skylight Installer.

Interlock Metal Roofing - New England
(508) 257-7859 www.newenglandmetalroofing.com
Serving
4.4 from 142 reviews
Interlock Metal Roofing is your trusted source for high-quality metal roofing solutions in Walpole, MA, and across New England. With thousands of successful installations in Connecticut, Massachusetts, Maine, New Hampshire, Rhode Island, and Vermont, we pride ourselves on being one of the largest installers of durable residential metal roofing systems in the region. Contact us today to explore our wide range of roofing options!
Marios Roofing
(781) 344-2420 mariosroofing.com
Serving
4.9 from 441 reviews
Since 2005, Mario’s Roofing has been providing high quality roofing services throughout southern Massachusetts. Over time we have expanded our services and now offer solutions to all your home improvement needs, inside and out. From a single window installation to a complete roofing replacement we have the tools and expertise to get each job completed correctly.
For asphalt shingles, you'll typically see the local price band around $350 to $700 per square. In Norwood, winter damage and the freeze-thaw cycle tend to push demand into the late spring through early fall, which can nudge prices upward as crews shift from emergency fixes to full replacements. If you're replacing a steep-slope roof with asphalt, expect a straightforward installation but plan for contingencies like attic vent checks and ice dam mitigation, especially after a harsh winter. The mid-range projects that balance quality underlayment and a 25-year warranty often land near the $450 to $600 per square mark, with higher-end shingle lines climbing toward the top of the range.
Metal roofs run roughly $650 to $1,200 per square in this area. Metal can be attractive when snow load and ice dam risk are top concerns because it sheds snow more predictably and stands up better to freeze-thaw cycles. In practice, Norwood homes with existing steeper pitches or metal-compatible decking can keep from ballooning costs, but heavy installers will still factor in glare, corrosion protection, and panel spacing. If you're upgrading from shingles, you might encounter a modest premium for flashing, insulation, and color-matched fasteners. Expect the seasonality effect to compress options and timing, with bidding often tighter in late spring as winter damage becomes visible.
Clay tile typically sits in the $1,000 to $2,400 per square range. Heavier materials like clay tile are common in the local mix and bring notable labor and staging challenges. In Norwood, the existing roof structure and deck must be assessed for the added weight, and transport of large tile bundles can affect crew scheduling. The heavier the tile, the more careful the crew must be with attic clearance and roof access. You'll pay a premium for proper underlayment and for careful installation that resists freeze-thaw cracking and edge chipping during cold snaps. If you're considering clay, budget for a robust insulation check and a more intricate ice dam strategy.
Concrete tile runs about $900 to $1,900 per square. This material shares the weight and staging considerations of clay tile, often requiring structural reinforcement and specialized mounting. In winter-heavy climates, concrete tile's strength is a plus, but the installation window can be narrower for curing and sealing in cold weather. Local crews will weigh the cost of custom cuts, additional fasteners, and potential trenching for drainage. Expect to see a higher baseline compared to standard shingles, with the final bill reflecting the specific tile profile and warranty terms chosen.
Synthetic or composite shingles typically land in the $400 to $800 per square range. They can offer a good balance of durability and ease of installation, which is helpful during the late-spring surge after a tough winter. In Norwood, these products often provide a lighter-weight option that still grips well against ice dam risk and freeze-thaw cycles. You'll notice cost variability tied to color, embossed texture, and warranty length, with a practical, mid-range solution for many three-tab or architectural profiles.
Slate commands the widest range, about $1,400 to $2,600 per square. It's a locally common heavy choice that significantly elevates labor and staging costs. In addition to ballast management and careful handling, slate requires specialized crews for after-install adjustments and potential crack repairs from winterborne stresses. If you're weighing slate, plan for longer lead times on scheduling and a higher prorated cost for repairs or replacements in the first few seasons after install.
A full roof replacement requires a building permit in Norwood, reflecting the town's careful approach to aging rooflines and winter-related stress. The application is submitted to the Norwood Building Department by the contractor or homeowner with project details, including the roof's square footage, proposed materials, venting plan, and flashing details. Submittals should show roof ventilation strategy that addresses the region's freeze-thaw cycles and potential ice dam risk. Accurate project sketches and a proposed timeline help avoid delays once the permit is under review.
In practice, most homeowners team up with a licensed roofer to ensure the permit packet is complete and compliant. The department values clarity on the materials, fasteners, underlayment, and any attic alterations that affect ventilation. Expect requests for elevation photos or a simple plan illustrating existing conditions and the intended configuration. Since Norwood homes vary from older steep-slope roofs to modern updates, the plan should explicitly address vent placement, soffit vents, ridge venting, and any necessary ice and water shield details at eaves and penetrations.
Inspections are scheduled during and after completion, with local verification focused on proper installation and compliance with venting and flashing requirements. The inspector checks that the roof edge is sealed to manage snow load and that all penetrations-such as vent pipes and skylights-are flashed correctly to prevent ice dam formation. Venting adequacy is a priority, especially for homes with compact attic spaces or attic kneewalls where poor venting can exacerbate freeze-thaw damage. Weather conditions can influence inspection timing, so align the schedule with forecasted cold snaps or heavy snowfall for the most meaningful review.
Coordinate closely with the contractor to ensure the permit address appears on all correspondence and inspection notices. Incomplete permit packages or mismatched details between the plan and field workmanship often trigger re-inspections, delaying the project. If any changes occur mid-project-material substitutions, altered venting strategy, or revised flashing details-update the permit record promptly to maintain compliance and smooth the inspection process.
Understanding that ice dams and freeze-thaw cycles challenge Norwood roofs helps homeowners prepare. The permit process not only documents the replacement but fosters adherence to proper venting and flashing that defend against winter damage. Keeping lines of communication open with the Building Department and the licensed contractor shortens timelines and supports a durable, code-compliant result.
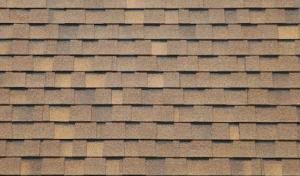
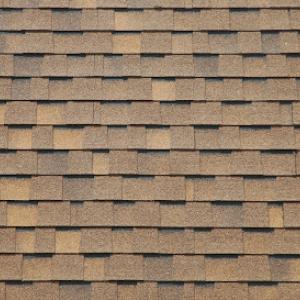
The slate of common roof materials in this area includes asphalt shingles, metal roofing, clay tile, concrete tile, synthetic or composite shingles, and slate. Each material comes with its own balance of appearance, durability, and maintenance needs, and the mix reflects older steep-slope homes alongside newer replacements. Asphalt remains the everyday baseline, but you'll find metal roofs that rise above the garage or porch, clay and concrete tiles on more visible elevations, and higher-end synthetic shingles that imitate natural textures without the weight. The dominant materials are chosen not just for style, but for how they weather the regional freeze-thaw cycles and moisture exposure.
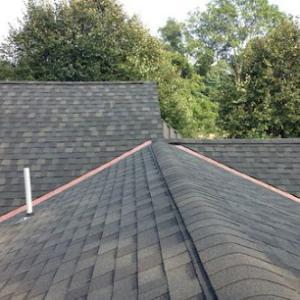
Norwood winters bring recurring ice and snow, with quick swings between freezing days and thawing nights. That pattern stresses flashing, valleys, and roof edges, so you should think of material selection as a lifespan decision. Clay and concrete tiles offer long life but come with substantial weight and a different repair dynamic if winter freezing causes cracks or movement. Slate provides extraordinary longevity but demands structural tolerance for heavy loads and careful fastening to resist ice dam pressure. Metal can shed snow more effectively and respond well to freeze-thaw cycles, yet it may require careful detailing at joints and penetrations to prevent moisture intrusion. Synthetic shingles aim to bridge the gap between performance and weight, offering decent resilience in cold, moisture-rich conditions while preserving curb appeal.
Because both economical asphalt systems and premium heavy materials are active in this market, homeowners need to compare repairability, weight, and winter performance before replacing. If a roof experiences ice dam risk, lighter systems with robust underlayment and modern venting options may be easier to retrofit. Heavier tiles and slate demand a structural check to ensure the supporting deck can carry the load through multiple snow seasons. In practice, consider how easy it is to access and repair common problem areas-valleys, penetrations, and flashing-on each material. For Norwood homes, aligning material choice with the existing roof slope and pitch matters, since steep slopes are common and influence both performance in snow and ease of repair after ice-related incidents.
Find contractors experienced in skylight installation, flashing, and leak repairs to bring natural light into your home.
O'LYN Roofing
(781) 725-6795 www.olynroofing.com
916 Pleasant St STE 4, Norwood, Massachusetts
4.8 from 494 reviews
Massachusetts homeowners insurance generally supports roof-claim documentation, and adjusters commonly ask Norwood-area homeowners for photos plus a contractor estimate. Start gathering clear images of all affected areas-attack the problem from attic and exterior angles, showing both the damage and any preexisting conditions. Keep a dated record of any temporary measures you take to prevent further damage, and store contractor estimates in a format the insurer can easily review ( PDFs or printed bids). Being methodical about documentation helps prevent disputes later in the process.
Local claim patterns are influenced by wind, ice, and winter storms rather than hail-driven loss patterns common in other regions. Ice dams, snow buildup, and freeze-thaw cycles can create diagonal leaks that mask the real extent of damage. If you notice water staining on ceilings after a thaw or freeze, investigate exterior eave lines and penetrations first, then check attic temperatures and insulation gaps. An adjuster will look for how well the roof structure withstood those winter stresses, so documenting both the exterior roof and interior effects matters.
Coverage specifics and depreciation treatment can vary by carrier, so Norwood homeowners need documentation before temporary repairs and before full replacement decisions. Do not rely on memory or informal notes; keep a organized folder with photos, dates, and contractor input. If a claim moves toward replacement, ensure the insurer reviews a complete record of the damage, the repair plan, and the anticipated life of the new roof, so depreciation handling and eventual payout are clear from the outset.
Connect with contractors who help homeowners navigate the claims process from damage assessment to final approval.

In the Norwood market, the priority is getting a crew on site fast after winter storms, ice dam events, or wind damage. Homeowners expect a contractor who can arrive, tarp or secure exposed areas, and begin temporary mitigation within hours, not days. A local team with on-hand crews and a track record of clear communication tends to win praise when a roof needs urgent attention and cleanup work follows soon after.
The typical Norwood roof is a mix of older steep-slope lines and practical modern replacements. Homeowners pursue roofers who can handle standard re-roof jobs efficiently, without chasing high-specialization niches that slow down timelines. Look for a firm that can sequence roof removal, underlayment, flashing, and a clean, thorough final inspection in a logical flow. Clients value crews that minimize disruption to living spaces and finish with tidy job sites.
The local contractor market is filled with long-established, family-owned firms that compete on dependable service and straightforward workmanship. Homeowners tend to favor teams with visible local roots, consistent crews, and repeatable scheduling. Request references from nearby homes with similar roof types and ages, and verify that past projects were completed with minimal haul-off time and predictable finish dates.
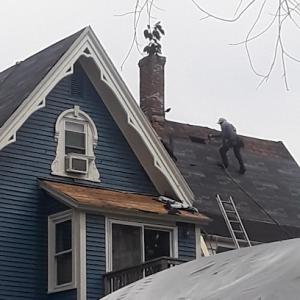
Chimney-related work shows up often enough to matter when evaluating flashing and roofline detailing. In Norwood, a robust assessment of how flashing around chimneys, valleys, and joints ties into the overall roof health is essential. Expect clear explanations of what is needed, including how to prevent future leaks at these trouble spots, and a plan that aligns with the house's age and construction.
Homeowners appreciate written scope, predictable timelines, and transparent communication. A reputable local roofer provides a step-by-step plan from initial assessment to final walk-through, with documented warranties and a realistic schedule that accounts for winter freeze-thaw cycles and potential ice-dam risks.