Last updated: Apr 19, 2026
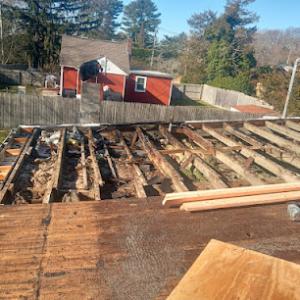
Massapequa sits on Nassau County's South Shore, so roofs face the full brunt of coastal storm tracks, nor'easters, and wind-driven rain sweeping off the Atlantic. Those gusts slam against attic vents, ridge caps, and flashing where the roof meets walls, pushing moisture into vulnerabilities. A loose seam or cracked boot can become a conduit for water during a 60-70 mph gust sequence, especially when storm cells ride the shoreline. The consequence is not just small leaks-it's accelerated wear on underlayment, faster shingle lift, and the potential for interior damage that compounds over a season. If the exterior looks solid after a passing front, the interior envelope may still leak behind soffits or at corner penetrations that weathered multiple storms.
Winter in this area brings repeated freeze-thaw cycles that bite at every edge of a roof. A minor flashing out of alignment or a gutter drainage issue can snowball into an ice dam problem along eaves and roof valleys. Ice dams back up meltwater, refreeze, and force water under shingles where it sneaks into fascia, soffits, and interior ceilings. In Condensed terms: a seemingly small fault becomes a persistent leak source as temperatures swing above and below freezing. Valleys that carry water to downspouts, and roof-to-wall transitions that are already stressed from seasonal wind, are the most common failure points. When a storm dumps heavy precipitation and then a cold snap locks it in place, the resulting moisture can be active for weeks, not days.
Spring coastal storms arrive with renewed wind and rain that can rattle new gaps into roofing material or loosen fasteners picked at the crest by winter winds. Fall wind events reassert that older flashings and degraded gutters require immediate attention before they repeat the pattern of shingle uplift and water intrusion. In this environment, scheduling becomes a driver of damage-unexpected heavy winds or unseasonable warmth can accelerate deterioration of flashing, edge metal, or valley seals. Each season brings its own set of stressors: winter's freeze-thaw, spring's rain-driven blowouts, and autumn winds that expose vulnerable eave and chimney transitions. The recurring pattern is moisture intrusion following a storm, then a slow drip that grows into a larger problem if ignored.
Start with a focused walk-around after every major storm or Nor'easter. Look for lifted shingles, granule loss in the gutter, and any dark staining at eaves or valleys that signals moisture intrusion. Inspect flashing around penetrations: vent stacks, skylights, chimneys, and plumbing stacks. If ice dams are present, avoid chipping ice aggressively near edges; instead, seek professional remediation to protect underlayment and prevent structural damage. Gutters should be clear, with downspouts directing water away from the foundation. If you notice damp ceilings, make a temporary patch to slow water entry, but plan a professional assessment promptly. Coastal exposure means small issues become large quickly when winter weather retriggers the same path of entry.
Develop a rapid-response approach to post-storm checks, prioritizing attic ventilation, flashing integrity, and gutter drainage. Schedule proactive resealing of roof penetrations before the next cycle of winter weather, and keep an eye on any areas where wind-driven rain tends to accumulate. A neighborly, timely inspection saves interior damage and reduces the chance of emergency repairs when a nor'easter hits. In Massapequa, readiness is the difference between a minor seasonal nuisance and a costly, disruptive roofing failure.
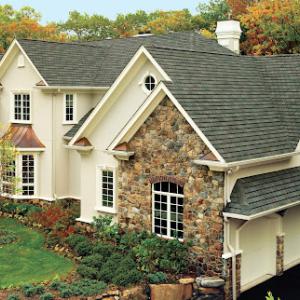
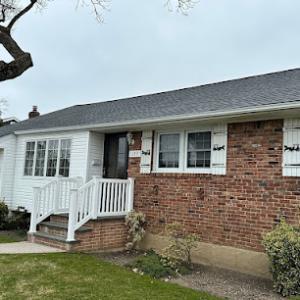
Massapequa's housing stock is dominated by detached suburban homes, where asphalt shingles are the default replacement choice, but metal, tile, wood shake, and synthetic products are also active parts of the local market. That mix matters because the coastal climate isn't kind to any one option in a vacuum. The choice of material should align with how well it handles salt-laden air, moisture from sea-driven winds, and the season-to-season temperature swings that stress fasteners, underlayment, and flashing details. When you're weighing options, you're not just picking a look-you're choosing performance in a salty, damp environment with a predictable freeze-thaw cycle.
Coastal moisture and temperature swings push flashing details to the front of the decision. In this market, you'll see a lot of complex intersections around dormers, porches, and overhangs where salt spray and wind-driven rain converge. For asphalt, standard felt underlayment can suffice, but many Massapequa jobs benefit from upgraded underlayment with a higher moisture tolerance and a longer warranty. Metal roofs historically shrug off moisture better, but the flashing transitions and panel seams become critical in winter when salt and ice can intrude at joints. Tile and wood shakes demand precise flashing at eaves, hips, and rake edges to prevent salt-laden condensation from sneaking under the seam lines. Ventilation is often overlooked, yet it matters here: proper soffit and ridge ventilation helps relieve moisture buildup in attic spaces that heat and humidity can otherwise trap. If a home has a porch roof or a rear addition with a low-slope, ensure the plan explicitly addresses drip edge, terminations, and transitional membranes to avoid slow leaks that freeze into ice dams.
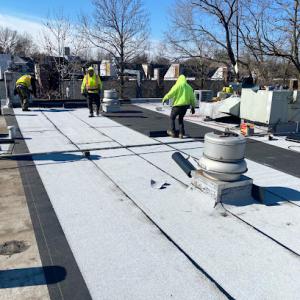
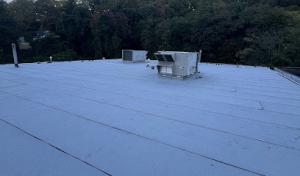
Low-slope sections over porches, additions, and rear dormers are common enough in this market that flat-roof expertise appears frequently among local contractors. The South Shore climate magnifies the consequences of poor drainage on these surfaces. For flat or near-flat areas, pay close attention to drainage plane materials, edge detailing, and the compatibility of any membrane with adjacent steep-slope roofing. In these spots, a robust and continuous flashing plane, paired with a well-adhered waterproof membrane, pays dividends during winter thaws and spring rains. In practice, expect more frequent inspections of flat sections than you would on a fully pitched roof, especially after winter storms that leave salt and moisture perched in corners and along transitions.
Because Massapequa features a mix of traditional asphalt and higher-end materials, the best path is to match your product with a contractor who understands coastal exposure. A local roof crew will know how to adapt installation practices for salt air, wind-driven moisture, and the way underlayment and ventilation must function in concert with your chosen material. If your home pairs a low-slope addition with a steeper main roof, ensure the crew treats these areas as a connected system rather than separate projects. Finally, consider the long-term performance story: a material that handles moisture well and has a proven track record in this climate will minimize maintenance cycles and preserve the roof's integrity across freeze-thaw seasons.
When you price a roof replacement, use these local ranges per square in Massapequa: asphalt shingles 450 to 800, metal 700 to 1200, clay tile 1100 to 2100, concrete tile 1000 to 1700, wood shingles or shakes 750 to 1200, and synthetic or composite shingles 500 to 900. These figures reflect the South Shore coastal exposure, winter freeze-thaw cycles, and the mix of classic ranches and more intricate, dormer-filled roofs you'll often see in the neighborhoods.
Costs in Massapequa can rise when coastal storms create regional demand spikes across Long Island and crews are pulled into emergency repair work. If a heavy storm sorts of events hit the area, you'll notice part shortages, longer lead times, and higher crew rates. Plan ahead for this by requesting a firm written schedule with your contractor and a staged payment plan that aligns with the actual progress on your job. Having a backup supplier for commonly used materials can also blunt some of the price swings.
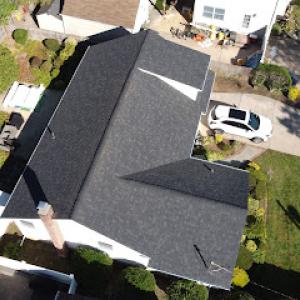
Pricing shifts with the area's mix of simple ranches and more cut-up suburban rooflines that include dormers, chimneys, skylights, and low-slope transitions. Each dormer or skylight adds flashing, drip edge, and flashing around penetrations, which meaningfully increases labor time. A low-slope transition requires specialized waterproofing and may demand extra underlayment or a different membrane system. If you have a chimney chase or multiple skylights, expect a noticeable jump from the basic per-square rate. In practice, you'll see overall project totals creep higher not just from material costs, but from added labor, flashing, and sealing requirements unique to these Massapequa layouts.
Asphalt shingles remain the most budget-friendly per square and are widely available in the local market. Metal roofs offer durability against coastal salt and wind but come with a higher initial price. Clay and concrete tiles bring a long lifespan and a distinctive look, yet their weight and installation complexity can raise both labor time and structural considerations. Wood shingles or shakes provide a traditional aesthetic but demand extra maintenance against moisture and pests. Synthetic or composite shingles aim to balance cost with durability, particularly in windy, damp environments.
Ask your contractor to break out costs by material type and to show how roof shape, penetrations, and flashing work affect the total. Get multiple detailed bids that specify per-square pricing, waste disposal, and any assumed conditions (like insulation upgrades or underlayment improvements). If coastal storms are expected to influence your timeline, request a clear contingency plan and a phased replacement option to spread the impact on your budget.

Long Island Precision Roofing
(516) 850-5500 liprecisionroofing.com
4665 Merrick Rd, Massapequa, New York
5.0 from 199 reviews
Welcome to Long Island Precision Roofing where our staff is committed to providing our customers with the highest level of service, quality, and reliability in the roofing industry. We believe that every home and business deserves a roof they can trust, and we operate with a steadfast dedication to integrity, transparency, and excellence in all we do. Our mission is simple: to always do right by our customers, delivering honest, straightforward solutions, and maintaining open communication every step of the way. With us, you can count on a job well done, with no surprises—just dependable, top-quality craftsmanship you can trust!
NY's Finest Roofing & Siding
(833) 476-6369 nysfinestroofingsiding.com
3 E Maple St, Massapequa, New York
4.9 from 114 reviews
Roof Repair & Replacement Experts in Long Island & Queens! Worried about leaky roofs or outdated exteriors? NY's Finest Roofing & Siding, Inc. delivers peace of mind, lasting value, and superior craftsmanship for your home. We specialize in: Roof Repair Roof Replacement Flat Roof Repair & Replacement Siding Installation Why choose us? Nearly 30 years of experience serving Long Island, Queens, Brooklyn, Manhattan & Westchester. Skilled and certified roofing contractors who use the best materials. Fast and thorough appointment setting to job completion. Highly recommended by satisfied clients. Let us help you fix your roof leak with our roof repair or roof replacement solutions. Long Island's best roofing & siding Contractor!

Rapid Roofing
(516) 212-2275 www.rapidrestoreny.com
Serving
5.0 from 78 reviews
Getting a new roof or roof repair shouldn’t be a headache – that’s why at Rapid Roofing, we make it easy. As a roofing company built on trust, our expert roofer contractors deliver seamless roofing services with zero hassle and no shortcuts. Whether it’s routine maintenance or emergency roof repair, our residential and local roofers get the job done right – every time. We don’t just claim to be the best roofers, we prove it! From affordable roofing solutions to BBB-accredited roofing contractors, we’re the good roofing company homeowners rely on. A roofing business that stands behind its work, delivers results, and redefines what it means to hire top-rated roofers.
The Way Renovations
(516) 751-4002 thewayrenovationsinc.com
Serving
5.0 from 94 reviews
Are you looking for a reliable and experienced roofer to protect your home from the elements? Welcome to The Way Renovations, your premier roofing contractor in North Bellmore, NY. Licensed and insured with over 40 years of roofing experience, we pride ourselves on transforming homes with precision and a keen eye for detail. Established in 2020, our family-owned and locally operated business has dedicated itself to delivering exceptional craftsmanship with every project. Whether you need reliable asphalt shingle roofing, resilient flat roofing, or stylish metal roof installations, our skilled team is equipped to handle your needs.
Long Island Flat Roof IslandWide Commercial Roofing
(631) 838-9285 www.longislandflatroof.com
Serving
4.9 from 108 reviews
IslandWide Commercial Roofing is full service commercial roofing company located in Amityville NY and have been proudly serving customers throughout the Greater Long Island Area since over 10 years . From urgent flat roof repairs to complete flat roof replacements, we have become one of the most trusted industrial and commercial flat roofing contractors across the li. We believe that offering quality commercial and industrial roofing systems is simply not enough. We also set out ensure that all of our industrial roofing contractors are highly trained to a standard of excellence, and can offer an unprecedented level of customer service."
Long Island Roofing
Serving
4.9 from 369 reviews
Long Island Roofing is an award winning roofing contractor that provides residential, commercial, and industrial roofing installation and around-the-clock emergency repairs in Long Island, Queens, Brooklyn, New Jersey, and Connecticut. With over three decades of experience, they specialize in roof removals and installations completed within a day, as well as custom copper and metalwork, gutters, downspouts, skylights, and all roof repairs, making them a trusted choice for all your roofing needs.
Four Seasons Roofing & Exteriors
(631) 249-3377 fourseasonsroofingny.com
Serving
4.9 from 683 reviews
A Division of Four Seasons Enterprises, Inc.
Marvin Construction Services
(631) 639-6419 marvinconstructionservices.com
Serving
4.9 from 250 reviews
If you’re looking for a new roof installation or siding repair for your home, we are the construction company for you! For 15 years Marvin Construction Services has been dedicated to providing superior workmanship that is second to none. We have always been focused on high-quality results, excellent customer service, and reliable work ethic. Customers in Lindenhurst, New York and surrounding areas rely on us for professional roofing, siding, and gutter services. Our team has the experience, skills, and proper equipment to guarantee your home has the best outcome. We ensure all of our customers that we are a trustworthy company and that we always deliver the best results.

Nisi Home Improvement Inc. Roofing & Siding
Serving
5.0 from 223 reviews
"NISI Home Improvement is a trusted, family-owned business proudly serving Nassau and Suffolk counties. As a Google Guaranteed company, certified by Directorii, and fully licensed in both counties, we provide top-quality roofing, siding, windows, skylights, and more. Our experienced team is committed to delivering exceptional craftsmanship, backed by trusted warranties and a focus on customer satisfaction. Whether you're repairing, replacing, or upgrading, NISI Home Improvement is your go-to partner for transforming your home with confidence."
Selective Homes Roofing & Siding
(631) 736-5301 www.selectiveremodeling.com
Serving
5.0 from 20 reviews
Selective Homes Roofing & Siding is Long Island’s trusted exterior remodeling contractor, delivering expert roofing, siding, windows, and complete exterior upgrades that protect your home and elevate curb appeal. As a family-driven company rooted in craftsmanship and transparency, we specialize in roof replacement, roof installation, siding replacement, siding installation, and energy-efficient window installations. Our exterior specialists focus on durable materials, clean workmanship, and a homeowner-first experience—from initial inspection to final walkthrough. Whether you need a full roof replacement, new siding, upgraded windows, or a complete exterior renovation, we provide reliable, long-lasting solutions tailored to Long Island h...
All American Home Improvement
(516) 986-3979 www.allamerican-hi.com
Serving
4.8 from 55 reviews
3rd & 4th generation family owned and operated residential roofing company. Specializing in roof leak detection, roof repairs and full roof replacements at affordable prices. Our other services include Siding, Windows and Gutter systems. Call us today to experience why its better to go with a local knowledgeable company as opposed to a large corporate sales organization.
Marcor Construction
(631) 321-0593 www.marcorny.com
Serving
4.9 from 381 reviews
Marcor Construction Roofing & More has been providing high-quality home improvement services to Long Island for over 30 years. We provide expert roof repair, roof replacement, siding installation, and more, and we can give you the perfect solution for your home's exterior improvement needs. We have installed thousands of roofs over the years, and we service a variety of roofing materials for both residential and commercial properties. We always put customer service first, and we will work with you to ensure that you are completely satisfied.
In a town like this, a full re-roof is treated as a formal project rather than a casual upgrade. A building permit issued through the local building department is typically required, and skipping that step can bite you later when inspections catch up. The process is designed to protect your home from the effects of coastal moisture, freeze-thaw cycles, and the nuances of the local climate, but it also means scheduling and paperwork can influence how quickly a project moves. Entering the permit requirement with eyes open helps prevent a setback that could stall a re-roof when you least expect it.
Inspections are not a theoretical afterthought; they usually happen during rough-in and again after completion. This means you need a contractor who treats municipal sign-offs as part of the job, not something to "handle privately" after the roof is laid down. If a contractor tries to close out the project without the proper sign-offs, you could face repercussions ranging from rework orders to delays that stretch into bad weather windows. The right partnership aligns installation milestones with the city's inspection schedule so your roof passes smoothly and legally.
Part of Massapequa's patchwork character is the mix of Town of Oyster Bay oversight and incorporated-village rules. Some addresses sit inside villages that add their own review steps, notifications, or local procedures beyond the base town permit. Those extra hoops aren't just bureaucratic noise-they can affect scheduling, required documentation, and final approvals. A diligent contractor will check the address against village boundaries early in the planning stage and communicate any additional steps before breaking ground. If a village review is triggered, expect an extra period for approvals and potential coordination with village building or planning departments.
Start with a frank conversation about permitting timelines with a licensed contractor who understands the local landscape. Confirm who submits the permit, who coordinates the inspections, and how changes mid-project are handled to avoid last-minute hiccups. Request a written plan that maps out the sequence of approvals, the rough-in inspection, and the final completion sign-off. For flood-prone or freeze-thaw-prone seasons, align the schedule so inspections can occur during workable weather windows rather than forcing a delay into winter. By anticipating village and town requirements, you protect your home and keep the project moving with fewer surprises.
Coastal storms and winter moisture routinely stress roofs in this area, and Massapequa homeowners often pursue partial insurance coverage when damage is present, especially after events that affect broad parts of Nassau County. The insurance claim landscape reflects that pattern: you may receive a partial payout aligned with what the adjuster sees as repairable damage rather than a full replacement. Understanding this dynamic helps you plan the next steps without surprises.
Insurers commonly want photo documentation that shows both the extent of damage and the condition of surrounding roof areas. Take clear shots of wind-driven or storm-related damage on multiple elevations, close-ups of blown-off shingles, granule loss, and any interior signs of moisture intrusion near ceilings or attic spaces. Along with photos, prepare a written scope of work that outlines what needs to be repaired or replaced, including materials and approximate quantities. An adjuster review is typically scheduled before any replacement-related payments are approved, so timely scheduling and responsiveness matter.
New York policy terms and depreciation handling can materially affect what a Massapequa homeowner actually receives versus the contractor's full replacement proposal. Expect that the insurer may apply depreciation to the new materials or components and then release funds for the replacement after you complete the work or after a subsequent inspection. If you see a difference between the approved scope and the contractor's plan, you'll need to reconcile those gaps with the adjuster and the insurer, making sure the final payout aligns with what is physically needed to restore the roof to its pre-storm condition.
Start by documenting all damage with dated photographs, noting the exact locations and severity. Contact your insurer promptly to initiate the claim and request a claim number for reference. Provide the written scope of work prepared with input from a licensed roofer, and arrange a mutually agreeable inspection window for the adjuster. Stay engaged through the process: if the adjuster identifies items you believe are missing or overlooked, request a re-inspection or submit additional documentation. In coastal areas with patchwork permitting, the eventual replacement plan may hinge on aligning the insurer's requirements with the actual repair needs and the scope outlined by the contractor. Keep a record of every communication and uploaded document in one organized folder for easy reference during reviews.
Connect with contractors who help homeowners navigate the claims process from damage assessment to final approval.

Clearview Roofing & Construction Babylon
(631) 827-7088 longislandroofs.com
Serving
5.0 from 50 reviews

Massapequa homes face a unique rhythm of weather that can reshape a re-roof timeline. The South Shore shoreline brings coastal moisture and Nor'easters that can interrupt otherwise solid weather stretches. Shoulder seasons-the brief moments between winter and spring, or between summer heat and early autumn winds-often offer the most reliable windows for tear-off and installation, provided the forecast stays reasonably dry and not too windy. Planning with a realistic buffer helps avoid losing a good window to an unexpected coastal pattern.
Winter work in Massapequa can be slowed by cold temperatures and ice conditions that affect material handling and safe tear-off timing. Freezing mornings or overnight frost can bind shingles and underlayment, and frozen surfaces increase slip risks for crews. If a cold snap is forecast, scheduling should allow for warmer daytime temperatures or a temporary pause to protect installed materials. Snow accumulation or ice dams on the roof also demand careful sequencing, so anticipate a few design pauses rather than a rushed job.
Spring nor'easters and coastal rain patterns can interrupt open-roof schedules more than homeowners expect during otherwise mild weather windows. Even when the calendar suggests fair weather, a late-season storm can push work back several days. Build flexibility into the project plan, and align start dates with a weather-informed forecast that emphasizes dry, wind-light periods for tear-off and shingle application.
Summer heat and fall wind events both create local scheduling pressure, making shoulder-season planning especially valuable on Long Island. High heat can affect asphalt shingle handling and worker safety, while windy fall days complicate material staging and debris control. Target mid-season transitions-late spring or early fall-when there's a better balance between tolerable temperatures and calmer coastal winds, and expect the schedule to respond to the Atlantic weather cycle.
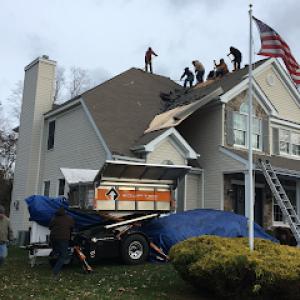
In this coastal suburb, homeowners look for solid re-roofing service, fast response, and cleanup-included work more than flashy, luxury installs. The market favors established residential firms that can handle chimneys and offer practical documentation, sometimes including drone inspections for photos before and after a project. You'll notice a tendency toward family-owned or long-standing companies, with emphasis on licensing, insurance, and solid warranty options from manufacturers.
Start with firms that publicly showcase residential experience and a straightforward service menu-re-roofing, chimney work, and post-storm moisture checks. Look for teams that can perform weather-resilient detailing, such as proper deck-to-shingle transitions and venting checks, which matter after coastal storms and freeze-thaw cycles. If you see drone inspection capabilities, that's a sign of organized documentation you'll appreciate when sharing photos with insurers.
Confirm active licensing and current liability and worker's compensation coverage. Ask about manufacturer-backed warranties and the exact coverage terms for both materials and workmanship. For homes with asphalt, metal, or tile options, ensure the contractor can match local wind and moisture challenges with proper underlayment choices and flashing details. Long-standing crews often deliver steadier scheduling and cleaner job sites.
Ask for a written scope, a clear timeline, and a definitive cleanup plan. Inquire about site protection, weekly progress updates, and concrete milestones for storm-damaged or moisture-prone roofs. Prefer contractors who can provide a dedicated point of contact and prompt follow-up, especially during peak re-roof seasons.