Last updated: Apr 19, 2026
Storm-driven wind, rain, and salt-air corrosion can turn a small flashing issue into a full interior leak in a hurry. Nor'easters along the South Shore push spray through attic vents, soffits, and eaves, then drive water toward weak points in the roofline. If you hear rain running inside or see darkened ceilings after a gusty shower, treat this as an urgent repair. Start by safely relocating belongings away from the leak path and placing a temporary tarp or the largest available plastic sheeting over the affected area to buy time until a pro can arrive. Do not climb onto a saturated roof during or immediately after a storm; the combination of slick decking, wind gusts, and salt-encrusted fasteners creates a high slip risk.
Coastal wind brings a rate of damage that often demands immediate tarping and active leak control rather than a long-term fix. If a leak is actively dripping, place buckets under the flow and push aside insulation only if it's safe to do so. Use roof patching tape or heavy-duty tarps secured with contractor-grade fasteners, weighted with sandbags if available. The goal is to seal the most vulnerable seam or flashing until a local roofer can seal the gap properly. In Seaford, wind-driven rain can find the smallest opening-around chimney flashing, skylight frames, vent stacks, or overhanging eaves-so focus on the obvious entry points first but do not ignore small gaps along the roof edge. After tarping, document the damage with photos and note the time of onset, wind direction, and any visible water intrusion to share with the repair team.
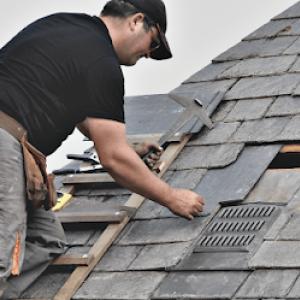
The salt-air corridor along the South Shore accelerates corrosion on exposed metal components and fasteners. Flashings, nails, screws, and vent collars may corrode faster here than inland locations, weakening the roof's protective barrier. In older homes or in areas with continuous salt spray exposure, small surface rust can be a precursor to flashing failure and subsequent leaks. If you spot rust around metal flashings, notice loose or missing screws, or see staining along lines where metal meets roofing, mark these areas for the contractor as priority targets during the assessment.
When a contractor arrives after a storm, provide a focused briefing: location of the leak, how long water has been present, and whether activities such as wind gusts or heavy rainfall precede the drip. Highlight flashing joints, chimney and vent penetrations, skylights, and edges where sheets meet decking. Emphasize that this is a coastal context problem-salt exposure, wind-driven rain, and rapid post-storm demand spikes are the norm here, not exceptions. Request a rapid, on-site assessment with a clear plan for temporary stabilization and a permanent fix, prioritizing sealed flashings and weatherproofing around any penetrations that appear compromised.
After tarping, take steps to minimize interior damage: lay down plastic sheeting on floors to catch any residual moisture, move furniture away from affected walls, and use dehumidifiers or fans to dry the interior air if accessible without creating safety hazards. If a ceiling liner or drywall shows signs of soaking, monitor for mold risk and alert the contractor to address interior containment and remediation in the plan.
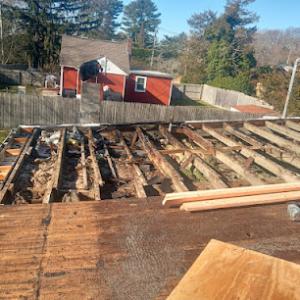
As soon as the weather allows, arrange a thorough roof inspection to identify flashing failures, loose shingles, compromised underlayment, and signs of wind uplift. Seaford homes along the coast often benefit from upgraded flashing systems and more robust edge protection to withstand repeated storm cycles. Prioritize a path to a waterproof, code-resilient repair that minimizes future leak potential: secure flashings, replace degraded fasteners, renew undershield materials where needed, and consider upgrades that improve wind resistance and salt durability.
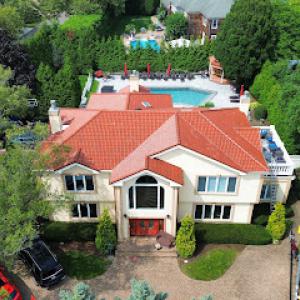
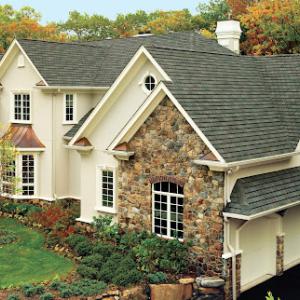
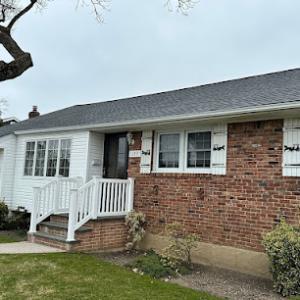
The postwar Long Island capes, ranches, and split-level homes that define Seaford's streets often wear medium-slope asphalt rooflines. These roofs routinely bow under coastal humidity and salt exposure, with multiple valleys, dormers, and chimney intersections creating a network of potential leakage points. The pattern you'll see year after year is a roof that looks straightforward from the curb but reveals its vulnerabilities once winter winds and Nor'easters push on the South Shore. Understanding how these shapes come together helps in spotting trouble early and planning effective repairs.
Those common roof shapes create recurring leak points at step flashing, valley transitions, and around front dormers added during cape expansions. Step flashing sits where slope meets vertical walls or chimneys, and in Seaford you'll often find sections where salt air and humidity have accelerated corrosion or lifted the metal. Valleys are the rails that carry water across two planes; when shingles wrinkle, misalign, or the surrounding flashing fails, water can shoulder into the deck. Front dormers that were added later can introduce a second roof plane that intersects the main slope, bringing a double set of valleys and more corner flashings to inspect. In practical terms, every time a storm hits, pay attention to signs of granule loss on shingles near these features, and to any staining or damp spots along interior ceilings near dormers.
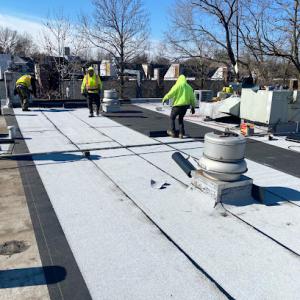
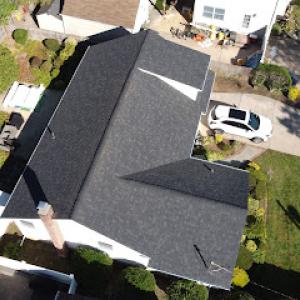
South Shore remodels frequently introduce low-slope or flat sections over porches, extensions, and rear additions. These areas act differently from the main roof and demand specialized attention. Water stands more easily and can creep under edges if the edge details aren't tight, the membrane is punctured, or the flashing around connections to the higher main roof isn't continuous. The local contractor market recognizes this, so expect more frequent flat-roof evaluations for these zones. When planning a repair, confirm that the low-slope surface has a compatible membrane product and that transitions to steeper sections are flashed correctly to prevent edge leaks from bypassing the primary roof.
If a cape expansion added a dormer or a new half-story, you'll want a focused inspection around the intersections: where the dormer meets the main roof, where old chimney chase flashings butt against modern materials, and where two roof planes converge in a valley. Check for loose or lifted shingles at the edges, peeled- back sealant in the flashing joints, and any dark staining indicating moisture intrusion. For a proactive approach, schedule semiyearly checks after winter and after heavy coastal storms. Pay particular attention to asphalt shingle edges near valleys and around dormers, where small failures can escalate into noticeable leaks during a heavy rain event.
Seaford's common roof forms respond well to roofs that maintain solid flashing continuity at all transitions and provide reliable drainage across multiple planes. When selecting materials, focus on those that tolerate coastal humidity and salt exposure without excessive maintenance. For capes and splits, a system that integrates sturdy step and counter flashing, reinforced valley membranes, and compatible sealants around dormer intersections tends to perform best in this specific environment. If a contractor emphasizes a single, uniform approach for every house, question how that method handles the frequent step-throughs, corners, and dormer interfaces that define most Seaford roofs.

Rapid Roofing
(516) 212-2275 www.rapidrestoreny.com
Serving
5.0 from 78 reviews
Getting a new roof or roof repair shouldn’t be a headache – that’s why at Rapid Roofing, we make it easy. As a roofing company built on trust, our expert roofer contractors deliver seamless roofing services with zero hassle and no shortcuts. Whether it’s routine maintenance or emergency roof repair, our residential and local roofers get the job done right – every time. We don’t just claim to be the best roofers, we prove it! From affordable roofing solutions to BBB-accredited roofing contractors, we’re the good roofing company homeowners rely on. A roofing business that stands behind its work, delivers results, and redefines what it means to hire top-rated roofers.

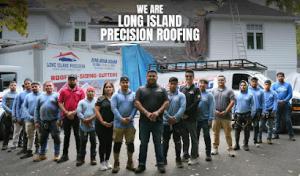
Long Island Precision Roofing
(516) 850-5500 liprecisionroofing.com
Serving
5.0 from 199 reviews
Welcome to Long Island Precision Roofing where our staff is committed to providing our customers with the highest level of service, quality, and reliability in the roofing industry. We believe that every home and business deserves a roof they can trust, and we operate with a steadfast dedication to integrity, transparency, and excellence in all we do. Our mission is simple: to always do right by our customers, delivering honest, straightforward solutions, and maintaining open communication every step of the way. With us, you can count on a job well done, with no surprises—just dependable, top-quality craftsmanship you can trust!
The Way Renovations
(516) 751-4002 thewayrenovationsinc.com
Serving
5.0 from 94 reviews
Are you looking for a reliable and experienced roofer to protect your home from the elements? Welcome to The Way Renovations, your premier roofing contractor in North Bellmore, NY. Licensed and insured with over 40 years of roofing experience, we pride ourselves on transforming homes with precision and a keen eye for detail. Established in 2020, our family-owned and locally operated business has dedicated itself to delivering exceptional craftsmanship with every project. Whether you need reliable asphalt shingle roofing, resilient flat roofing, or stylish metal roof installations, our skilled team is equipped to handle your needs.
Long Island Roofing
Serving
4.9 from 369 reviews
Long Island Roofing is an award winning roofing contractor that provides residential, commercial, and industrial roofing installation and around-the-clock emergency repairs in Long Island, Queens, Brooklyn, New Jersey, and Connecticut. With over three decades of experience, they specialize in roof removals and installations completed within a day, as well as custom copper and metalwork, gutters, downspouts, skylights, and all roof repairs, making them a trusted choice for all your roofing needs.
NY's Finest Roofing & Siding
(833) 476-6369 nysfinestroofingsiding.com
Serving
4.9 from 114 reviews
Roof Repair & Replacement Experts in Long Island & Queens! Worried about leaky roofs or outdated exteriors? NY's Finest Roofing & Siding, Inc. delivers peace of mind, lasting value, and superior craftsmanship for your home. We specialize in: Roof Repair Roof Replacement Flat Roof Repair & Replacement Siding Installation Why choose us? Nearly 30 years of experience serving Long Island, Queens, Brooklyn, Manhattan & Westchester. Skilled and certified roofing contractors who use the best materials. Fast and thorough appointment setting to job completion. Highly recommended by satisfied clients. Let us help you fix your roof leak with our roof repair or roof replacement solutions. Long Island's best roofing & siding Contractor!
Long Island Flat Roof IslandWide Commercial Roofing
(631) 838-9285 www.longislandflatroof.com
Serving
4.9 from 108 reviews
IslandWide Commercial Roofing is full service commercial roofing company located in Amityville NY and have been proudly serving customers throughout the Greater Long Island Area since over 10 years . From urgent flat roof repairs to complete flat roof replacements, we have become one of the most trusted industrial and commercial flat roofing contractors across the li. We believe that offering quality commercial and industrial roofing systems is simply not enough. We also set out ensure that all of our industrial roofing contractors are highly trained to a standard of excellence, and can offer an unprecedented level of customer service."
Four Seasons Roofing & Exteriors
(631) 249-3377 fourseasonsroofingny.com
Serving
4.9 from 683 reviews
A Division of Four Seasons Enterprises, Inc.

Nisi Home Improvement Inc. Roofing & Siding
Serving
5.0 from 223 reviews
"NISI Home Improvement is a trusted, family-owned business proudly serving Nassau and Suffolk counties. As a Google Guaranteed company, certified by Directorii, and fully licensed in both counties, we provide top-quality roofing, siding, windows, skylights, and more. Our experienced team is committed to delivering exceptional craftsmanship, backed by trusted warranties and a focus on customer satisfaction. Whether you're repairing, replacing, or upgrading, NISI Home Improvement is your go-to partner for transforming your home with confidence."
Marvin Construction Services
(631) 639-6419 marvinconstructionservices.com
Serving
4.9 from 250 reviews
If you’re looking for a new roof installation or siding repair for your home, we are the construction company for you! For 15 years Marvin Construction Services has been dedicated to providing superior workmanship that is second to none. We have always been focused on high-quality results, excellent customer service, and reliable work ethic. Customers in Lindenhurst, New York and surrounding areas rely on us for professional roofing, siding, and gutter services. Our team has the experience, skills, and proper equipment to guarantee your home has the best outcome. We ensure all of our customers that we are a trustworthy company and that we always deliver the best results.
Mk Best Roofing
(516) 615-1791 mkbestroofing.com
Serving
4.9 from 57 reviews
MK Best Roofing is a trusted GAF certified roofing company based in Roosevelt, NY. Since 1998, we have proudly served all of Long Island, especially Nassau County, along with nearby neighborhoods such as Merrick, North Merrick, South Hempstead, Freeport, and Uniondale. Whether residential or commercial, we handle every roofing need such as installation, repair, maintenance, and replacement. Our roofing options range from metal, flat, and shingle to solar and cedar roofs. We are also specialize in providing professional siding and gutter installation for your house. All of our work is fully licensed, insured, and backed with 100% financing options. LICENSED & INSURED
All American Home Improvement
(516) 986-3979 www.allamerican-hi.com
Serving
4.8 from 55 reviews
3rd & 4th generation family owned and operated residential roofing company. Specializing in roof leak detection, roof repairs and full roof replacements at affordable prices. Our other services include Siding, Windows and Gutter systems. Call us today to experience why its better to go with a local knowledgeable company as opposed to a large corporate sales organization.
Selective Homes Roofing & Siding
(631) 736-5301 www.selectiveremodeling.com
Serving
5.0 from 20 reviews
Selective Homes Roofing & Siding is Long Island’s trusted exterior remodeling contractor, delivering expert roofing, siding, windows, and complete exterior upgrades that protect your home and elevate curb appeal. As a family-driven company rooted in craftsmanship and transparency, we specialize in roof replacement, roof installation, siding replacement, siding installation, and energy-efficient window installations. Our exterior specialists focus on durable materials, clean workmanship, and a homeowner-first experience—from initial inspection to final walkthrough. Whether you need a full roof replacement, new siding, upgraded windows, or a complete exterior renovation, we provide reliable, long-lasting solutions tailored to Long Island h...
Asphalt shingles dominate in Seaford because they fit the area's cape and ranch roof geometry and are easier to replace after wind events than heavier tile systems. The lightweight nature of asphalt makes practical sense for postwar wood-framed homes common in the area, where long-term wind resilience hinges on a flexible, easy-to-repair roof surface. When choosing asphalt, look for improved granule adhesion and reinforced mats that help resist wind-driven uplift. A reflective or cooling granule option can also help manage summertime humidity and heat buildup that can accelerate aging around exposed eaves and soffits. Pair asphalt with a robust underlayment and well-sealed fasteners to maximize performance after coastal storms.
Metal roofing is viable in Seaford but needs attention to coating quality and compatible fasteners because South Shore salt exposure can be harder on unprotected metal components. If metal is selected, favor aluminum or galvanized steel with a corrosion-resistant coating and a continuous, integrated seal around joints. Pay particular attention to fastener materials and color-matched flashing to prevent galvanic reactions with nearby fasteners and fastener heads. Regular nail and screw upkeep matters here, since salt-scented air accelerates corrosion at penetrations. In harsher coastal zones, a metal system with a factory-applied protective coating and a simple, clean panel design tends to perform most consistently, reducing maintenance points after heavy winds.
Clay and concrete tile are available in this market, but their weight and detailing needs are less aligned with postwar wood-framed housing than asphalt or composite systems. Heavier tiles place greater load on older roof structures and require careful site assessment of rafter capacity, joist spacing, and potential seismic considerations. Tile systems also demand precise underlayment and flashing around chimneys, vents, and valley intersections to avoid water intrusion in storm-driven downpours. For the typical Seaford home built on lighter framing, a modern composite or higher-end asphalt option often delivers similar longevity without the added structural burden. If tile is still desired, ensure a structural evaluation accompanies the plan and that a skilled tile contractor adapts detailing to reduce wind uplift risk and weathering from salt-laden air.
Late spring through early fall is the preferred replacement window in this area because Long Island's winter freeze-thaw pattern and spring rain make tear-off scheduling less predictable. If a storm rolls through, you'll typically see crews bumped to the next available slots, which can push timeline and labor costs higher. Planning a start date in the stable shoulder of spring or early summer helps you avoid weather-induced delays and keeps materials from sitting exposed during heavy winds or rain.
Costs in Seaford can rise after regional storm events when South Shore demand spikes and contractor calendars fill across Nassau County. The main covering choice matters, but the actual billed price will reflect crew efficiency, attic access, and how much detailing the roof requires. Common layouts with dormers, valleys, chimneys, and occasional low-slope tie-ins can push labor above a simple straight-gable replacement even when the main covering is standard asphalt shingle. A builder's typical asphalt replacement is still a solid baseline, but expect added line items for flashing, vent work, and any waterproofing details around dormers and chimneys.
In Seaford, the installed cost per square (100 square feet) varies by material. Asphalt shingles remain the most affordable option, while metal, clay tile, and concrete tile bring higher price tags and longer installation times. Synthetic or composite shingles sit between asphalt and taller material choices in cost and ease of installation. When you compare bids, closely review the scope: some roofers include re-flashing or minor decking work, while others itemize those services separately. If you're weighing a retrofit on a roof with multiple penetrations, ask whether the quote assumes full flashing replacement around vents, chimneys, and dormers.
A standard gable might look simple, but Seaford homes often hide complexity. Dormers, valleys, and low-slope tie-ins require careful shingle layout and precise detailing to prevent leaks. In practice, the extra labor for these features can nudge the price up by a meaningful amount compared to a plain roof. If a roof has 옵션 low-slope sections, be prepared for additional material costs and more meticulous installation to ensure water shedding works reliably in coastal humidity and through Nor'easters.
Start with a candid assessment of the roof's age, current leaks, and visible wear after the winter and spring. Get at least three bids, and verify crews' ability to handle dormers and valleys without compromising warranty terms. Schedule the work for late spring to early fall, and build in a small buffer for storm-driven delays. Have the contractor outline the sequence: tear-off, decking inspection, underlayment, flashing around penetrations, and the final roof-covering installation. This clarity helps align expectations with the calendar realities and the coastal climate Seaford residents navigate each season.
Get a clear picture of your project costs upfront - no commitment required.


In this coastal corner of Long Island, a full re-roof is more than selecting shingles and calling a contractor. Seaford homeowners typically deal with the Town of Hempstead building permit process for full re-roofs rather than a village-specific roofing department. That means the project is reviewed through a broader municipal channel, and timing can hinge on the town's current workload as much as on your schedule.
A successful permit submission starts with solid documentation. You will need a clear project scope that outlines the scope of work, the number of layers to be removed, and the proposed roofing system. Along with that, provide detailed contractor information, including licensing status and a verifiable business address. If the plan includes any structural changes-such as altering roof pitch, venting, or stiffer decking-be prepared for an added layer of review. The town's review is not a mere formality; it checks for compliance with structural safety, drainage, and compatibility with existing elevations near the coast. Any questionable modification can trigger additional scrutiny or a resubmission.
Because the Town of Hempstead oversees the permit process, inspections follow a multi-step cadence rather than a single touchpoint. Expect a rough-in inspection once framing and ventilation details are in place, followed by a final inspection after the new roofing is installed and all accessories are in place. It helps to align your timeline with the inspector's anticipated schedule, understanding that inspections can be delayed by heavy storm activity, staffing fluctuations, or backlog. Do not assume a one-visit signoff will suffice; the sequence is designed to verify that critical steps meet code and that drainage and ventilation are properly addressed before the project is deemed complete.
Coastal conditions shape what the permit and review focus on as well. The review will scrutinize details that affect moisture management, wind resistance, and seal integrity against salt air and humidity. If your plan involves specialty materials or engineered components, ensure they are clearly described and compatible with Nassau County and town requirements. Weather-driven delays can compress the window for inspections, so coordinate with your contractor to prepare documentation ahead of time and to keep records organized for quick reference during town reviews.
Finally, because permit compliance is a long-term investment in your home's resilience, proceed with transparency. Provide accurate diagrams, maintenance considerations, and a realistic post-installation plan. When in doubt, contact the town's permit office early to confirm required forms and avoid last-minute holds that can push the project beyond a convenient window.
Seaford's South Shore storm exposure means homeowners should keep dated roof photos and maintenance records ready before a claim, since New York carriers often want condition evidence and prior-loss history. Keep a running folder in a weatherproof location, with dates for major repairs, shingle replacements, flashing checks, and attic ventilation. Take wide photos of each plane, chimney, and dormer, plus close-ups of damaged areas after storms. This helps the adjuster understand the roof's baseline and any pre-existing wear.
After wind or storm events, adjuster timing can affect when you can move from emergency dry-in to full replacement, especially during wider Nassau County claim surges. Plan for a rapid, but safe, dry-in if leaks threaten interiors, but avoid unnecessary repairs that could misrepresent damage. Document when inspectees arrive, what they do, and any weather-driven delays. Keep notes on access restrictions and neighborhood road closures that slow crews.
Pre-work and post-work documentation matters in this market because insurers may ask for both damage proof and completion proof on weather-related roof claims. When a contractor begins work, photograph the site-loved ones can help-show progress, and preserve waste removal logs. After work, collect warranty cards, product SKUs, and photos of completed flashing, vent boots, and ridge lines. If a claim lingers, periodic photos through the restoration phase help support final settlement.
A Seaford-area roofer who understands coastal humidity, salt exposure, and nor'easters can coordinate with insurers more smoothly. Ask for a written scope that distinguishes temporary repairs from permanent fixes and keeps the change orders clearly labeled. Ensure the contractor provides a concise damage recap and a completion certificate when the job ends. This helps claims.
On capes and splits along the coastal plain, those familiar trouble spots-chimney flashing, dormer sidewalls, and valleys where runoff concentrates during coastal rain events-show up sooner than you expect. Salt air and high humidity work on flashing seams, allowing slow leaks to creep into underlying sheathing and attic spaces. If you notice staining around a chimney or see low-lying damp patches near a dormer, you're not imagining it: these areas face the brunt of salt-laden spray and heavier rainfall during nor'easters. The consequence isn't always dramatic at first, but repeated exposure accelerates deterioration and can lead to interior water intrusion during a storm.
South Shore humidity can keep shaded roof sections damp longer, which can accelerate granule loss, algae staining, and underlayment deterioration on older systems. Valley laps are especially susceptible because runoff pools there, pulling granules and moisture into vulnerable seams. If you've got a roof that's mostly shade or has a few deep-angled valleys, expect more moss or algae growth and faster granule wear on those shaded faces. The practical signal is simple: inspect valleys for exposed underlayment or damaged metal edging after heavy rains, and address any signs of granule loss before the waterproofing layer becomes compromised.
Skylight repair is a meaningful local specialty signal, suggesting that aging skylight perimeters and curb details are a real maintenance issue in this market. Skylights sit on roof sections that can be shaded, humid, and exposed to salt spray during coastal storms. Watch for cracked glazing, deteriorating curb seams, or rubber flashings that crack with seasonal temperature swings. When a skylight starts weeping or shows shimmering reflections along its perimeter after a storm, treat it as a warning rather than a novelty leak-perimeter integrity matters for keeping the entire roof system dry.
Given the coastal humidity, you'll want to schedule seasonal checks that focus on flashing joints, valley integrity, and dormer interfaces. A proactive approach, catching early signs of water intrusion and micro-cracking in sealants, can prevent larger damage to sheathing and insulation. In practice, that means a careful visual tour after storms, with attention to high-traffic roof zones and any newly damp areas indoors that align with a roofline.
Find contractors experienced in skylight installation, flashing, and leak repairs to bring natural light into your home.
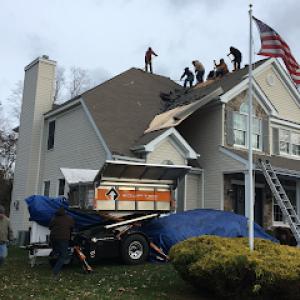
In this coastal South Shore setting, homeowners gauge a roofer by practical, tangible outcomes: cleanup included, a quick response when leaks pop up, and a clear plan for re-roofing when necessary. You'll notice that the strongest local hiring signals point to crews that can move fast, leave tight suburban lots clean, and wrap up work without leaving a mess behind. From the drive-by look of a finished project to the post-work cleanup, these crews earn trust by showing they respect the neighborhood's footprint and the weekly rhythms of busy suburban life.
Long-established and family-owned firms have a visible presence in the market, which matters in a community where homeowners prefer contractors with local tenure on Long Island. Those firms tend to bring depth of experience with common local issues-salt exposure, humidity, and older roof lines that have learned the rhythm of Nor'easters. When you see a familiar family name on a truck or in a neighborhood queue, it signals accountability, consistent communication, and a track record of standing by workmanship after the storm season has passed. For many homeowners, that local continuity translates into smoother scheduling, reliable warranty expectations, and relationships that last.
Chimney capability is a common capability among the local roofing crews, matching the older housing stock you'll find around town. Masonry penetrations are a frequent part of roof replacement scope, so you want contractors who can handle flashing, crown interfaces, and waterproofing around brick, stone, and mortar joints without compromising venting or insulation. Expect seasoned crews to anticipate these penetrations, bring along the right materials, and coordinate any masonry restoration needs that coexist with reroofing. This approach saves surprises and ensures a cohesive, long-lasting seal around every vent, chimney, and chimney chase.
When you're vetting bids, ask how a crew handles debris mitigation, response times for storm-related calls, and their approach to re-roofing projects in older homes with chimneys and masonry. Look for clear communication about site protection, waste removal, and post-installation checks. In this market, you'll benefit from crews that demonstrate a readiness to manage small-structure nuances alongside larger roofing goals, delivering both solid coverage and neighborhood stewardship.