Last updated: Apr 19, 2026
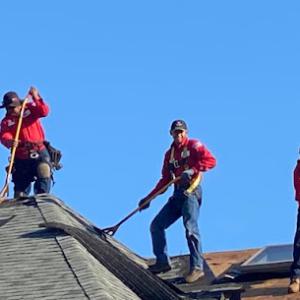
Bethpage homeowners face a tight window for roof work due to the local climate: spring and fall typically offer the best installation weather, while winter freezes and hot summer days complicate schedules. The result is a narrow, high-stakes season where delaying a repair can turn a minor leak into major interior damage. When the forecast calls for wind-driven spring rain or a cold snap that hardens ice dams, the risk rises quickly. This section outlines how to spot trouble, choose the right timing for tear-off and replacement, and act fast to protect the home.
Winter in this area brings variable temperatures that push snow melt against the eaves, then refreeze into ice dams. Those dams can back up under shingles, lifting edges and forcing water into the attic and ceiling once a thaw begins. The combination of freezing nights and thawing days can interrupt orderly tear-off schedules, since crews may be delayed by unsafe work conditions or frozen substrates. If a roof shows consistent signs of damming, or if attic insulation and ventilation appear insufficient, plan for the earliest feasible spring replacement. The goal is to avoid waiting until a late-season thaw when rain-on-snow conditions complicate water intrusion and complicate interior mitigation.
Spring storms in this area bring wind-driven rain that can exploit even small weaknesses in flashing, roof penetrations, or trailing edge details. A minor flashing seam that once seemed stable can become an active leak when driven water finds a path under the underlayment. Similarly, aging shingles or compromised edges on low-slope sections can start to drip into the interior during a storm without obvious surface damage. The key action is to treat any new damp spots along ceilings or attic rafters as a potential active leak, not a cosmetic issue. Address flashing and edge failures promptly, and schedule a replacement before the peak of the spring storm season if a visible weakness exists.
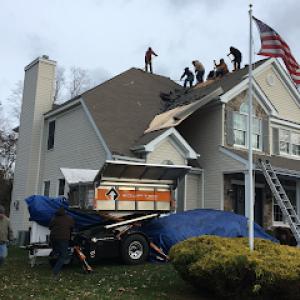
Bethpage typically presents the most reliable installation conditions in spring and fall, with moderate temperatures and calmer weather than winter's freeze cycles or summer's heat. When a credible assessment identifies ongoing deterioration, prioritize scheduling a tear-off during one of these windows. If winter ice dams are suspected but not yet fully formed, monitor forecasts for a stretch of dry days with mild temperatures to minimize risk during removal and reinstallation. Delays beyond early spring or late fall increase exposure to heavy rain events that can disrupt progress and amplify interior water intrusion.
If a leak is detected, act quickly to limit interior damage. Move furniture and valuables away from the affected area, place a bucket under the drips, and document all signs of moisture with photos. Cover exposed rafters or the interior with plastic sheeting to slow additional water penetration if safe access is available. Contact a qualified roofer with experience in Bethpage conditions and request an urgent assessment of whether temporary tarping or a more durable fastened cover is appropriate while awaiting a scheduled tear-off. Ensure the chosen contractor can align the work with the spring or fall window so the full replacement can proceed without a prolonged interruption.
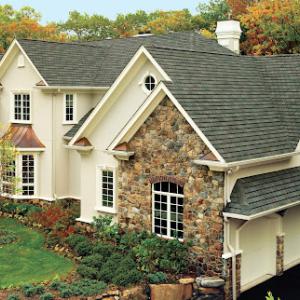
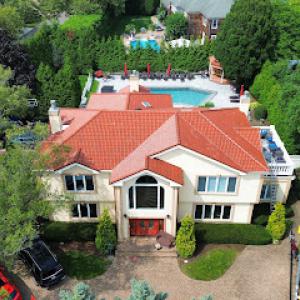
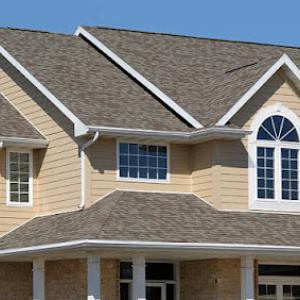
The dominant roofing materials used around Bethpage include asphalt shingles, metal roofing, clay tile, concrete tile, slate, and synthetic slate. In a neighborhood where many homes sit on modestly pitched roofs and some features such as skylights or low-slope sections are common, your material choice directly shapes how the roof responds to repeated wetting, thermal movement, and the timing of a replacement. Heavier systems like clay tile, concrete tile, and slate are part of the local mix, but they create different structural and repair considerations than the asphalt shingle roofs common across Nassau County. This means your decision should balance wind-driven rain, freeze-thaw cycles, and the ability to address leaks quickly after a storm.
The winter season brings freezing temperatures and thaw cycles that stress roof joints and fasteners, while warm summers create expansion and contraction throughout the roofing assembly. Regular precipitation is the rule, not the exception, so each material reacts differently to moisture uptake, drainage, and drying potential. Asphalt shingles remain the most forgiving option for leakage mitigation and rapid repairs on a tight schedule, but the heavier systems can offer extended longevity if the structure is prepared for their weight and bulk. In Bethpage, it's not just about the roof deck; it's about how the chosen material interacts with underlayment, flashing, and penetrations around skylights and dormers during cycles of wetting and drying.
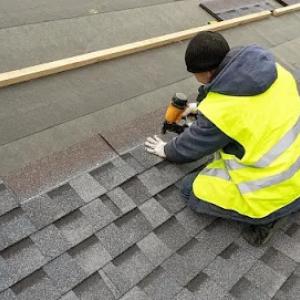
Storm-driven leaks tend to reveal themselves first around vents, chimneys, and edge details. With asphalt shingles, leaks often appear where granules are worn or where wind-driven rain penetrates the underlayment. Metal roofs shed water quickly and resist leakage at the surface, but require precise flashing at valleys and penetrations to avoid hidden corrosion or pinhole leaks. Clay and concrete tiles can provide strong weather resistance, yet their joints and underlayment need careful attention due to thermal movement. Slate and synthetic slate offer a high-end, long-lasting option, but the heavy panels demand a reinforced deck and proper support to prevent sagging or tile breakage during freeze-thaw cycles.
Timing a replacement around the wet-season window matters. Aim to complete major work during a stretch of drier days in late spring or early fall when temperatures are moderate and there's less risk of rapid freeze after installation. If storm season arrives with flooding or heavy rain, temporary waterproofing and meticulous flashing become essential to minimize leaks while crews address install or patch work. For heavier systems, coordinate structural checks at the outset of any project to confirm the deck can carry the load and that shear or rafters are not stressed by winter movement. A well-coordinated plan reduces the chance of mid-project weather delays and keeps repairs focused on sealing against moisture rather than chasing nocturnal leaks after a rain pulse.
Choose asphalt shingles for quick-to-install, reliable leak resistance when the schedule is tight and the budget is a consideration. Metal roofing provides robust performance with strong wind resistance and faster water shedding, but requires precise edge detailing and flashing in high-wind zones. Clay or concrete tiles deliver long life with a classic look, yet require structural verification and careful maintenance in valley regions and around penetrations. Slate or synthetic slate pairs a premium appearance with durability but demands a solid substructure and careful handling during installation. For homes with skylights or low-slope sections, emphasize high-quality underlayment and reinforced flashing details to improve resilience against wet-season leaks.
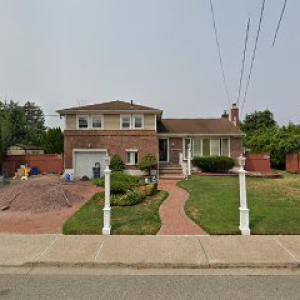
Bethpage's mix of aging ranch- and split-level homes often includes low-slope sections that were never upgraded with modern flashing or insulation details. These areas age differently from the main pitched roof, so leaks tend to surface first along flat or gentle-sloped patches, especially after winter's freeze-thaw cycles and spring winds. The telltale sign is a damp ceiling or a soft, spongy edge along a seam where the low-slope meets skylight or chimney transitions. If these patches are ignored, bulkier damage can creep into attic spaces and structural members, quietly costing more than a simple patch later.
Skylights are a frequent sight in Bethpage homes, and the way they're integrated matters as much as their age. Curb flashing around these penetrations often shoulders the brunt of repeated winter rain and wind-driven downpours. When flashing drifts or seals degrade, water finds paths along the curb and into the roof deck. The problem is compounded on low-slope sections where a small misalignment or a missing step in the flashing ladder allows moisture to bypass the interior ceilings. Regular checks for staining around skylight edges and soft spots in the ceiling can prevent a larger episode, but repairs must address the flashing, the curb seal, and the mating surface with the surrounding roofing.
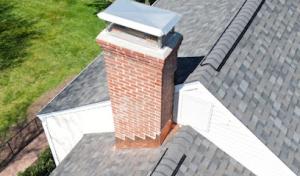
Chimney work is highly prevalent in this market, and leaks often masquerade as roof failures when the real culprit is flashing around the chimney or the masonry transitions nearby. In Bethpage's winters, mortar joints can crack and deteriorate, allowing water to migrate under shingles and into the roof deck via the chase or the sidewalls. Homeowners may see a drip near the chimney during a storm but the root cause sits in compromised counter-flashing or a failed step flashing along the masonry. A thorough inspection should trace moisture to its entry point-whether it's the chimney cap, the flashing apron, or the sealant at the brick/roof interface-before choosing a fix.
Because low-slope areas behave differently, homeowners frequently misread a leak as just a shingle issue and miss the flashing problem. Look for repeated staining along the joint lines where flat sections meet slopes, and test for water seepage during a controlled rain or a hose-down of suspect seams. Do not concentrate only on the obvious wet spots in the attic; inspect the exterior around skylights, chimneys, and any vent stacks, as moisture can travel along sheathing before appearing indoors. A careful, methodical tracing of the leak path saves both time and future call-backs.
The wet-season windows and freeze-thaw cycles shape when repairs must be done to avert recurring leaks. If a low-slope patch shows persistent dampness after storms, address the flashing transitions first-skylight curbs, chimney flashing, and the joints where flat and pitched sections meet. Delaying fixes invites accelerated damage during another thaw or wind event, turning small patches into larger, more invasive failures that complicate later replacement decisions. Keeping these trouble spots tight and properly sealed reduces the chance of storm-driven leaks marching through the roof line.
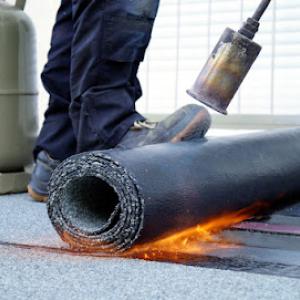
Find specialists in TPO, EPDM, and built-up flat roofing systems for residential and commercial properties.
Universal Construction NY
61 Cheshire Rd, Bethpage, New York
5.0 from 6 reviews
Universal Construction NY is a roofing contractor / roofer serving the Queens, Nassau, and Suffolk NY area since 2000. Services include Roofing, Roof Replacement, Roof Repair, Roof Installation, Shingle Roofs, Tile Roofs, Metal Roofs, Painting & Staining, Gutters & Downspouts, Commercial Roofing, Flat Roofs, Hail Damage, Storm Damage and Roofing Prices.
All American Home Improvement
(516) 986-3979 www.allamerican-hi.com
Serving
4.8 from 55 reviews
3rd & 4th generation family owned and operated residential roofing company. Specializing in roof leak detection, roof repairs and full roof replacements at affordable prices. Our other services include Siding, Windows and Gutter systems. Call us today to experience why its better to go with a local knowledgeable company as opposed to a large corporate sales organization.

Nisi Home Improvement Inc. Roofing & Siding
Serving
5.0 from 223 reviews
"NISI Home Improvement is a trusted, family-owned business proudly serving Nassau and Suffolk counties. As a Google Guaranteed company, certified by Directorii, and fully licensed in both counties, we provide top-quality roofing, siding, windows, skylights, and more. Our experienced team is committed to delivering exceptional craftsmanship, backed by trusted warranties and a focus on customer satisfaction. Whether you're repairing, replacing, or upgrading, NISI Home Improvement is your go-to partner for transforming your home with confidence."
Nust Construction Nyc
(917) 302-6149 nustconstruction.com
Serving
5.0 from 17 reviews
Services Areas: Bronx, Queens, Syosset, Brooklyn, Plainview, Nassau County. Roofing, waterproofing, new roof, Gutter, chimney
Four Seasons Roofing & Exteriors
(631) 249-3377 fourseasonsroofingny.com
Serving
4.9 from 683 reviews
A Division of Four Seasons Enterprises, Inc.
Brickstone Construction & Renovation
Serving
4.6 from 79 reviews
Brickstone Construction & Renovation is your trusted partner for high-quality construction services. Specializing in waterproofing, roof replacement, masonry, and concrete sidewalk texture, we deliver durable, fast solutions for both small and large projects. Our experienced team stays updated with the latest trends to offer top notch services in home building, renovation and roofing. Whether you need a general contractor, flooring or waterproofing, we tailor our services to fit your needs. From water damaged ceiling repairs to full home renovations, Brickstone has you covered. Contact us today for expert construction solutions near you!
County Roofing Systems
(631) 400-7663 countyroofingsystems.com
Serving
4.9 from 95 reviews
Established in 1987, County Roofing Systems is a licensed contractor offering comprehensive roofing solutions for residential and commercial properties across Suffolk and Nassau Counties, . services include Roof replacement, siding, and window installation, Dormers and extensions exterior work.
The Way Renovations
(516) 751-4002 thewayrenovationsinc.com
Serving
5.0 from 94 reviews
Are you looking for a reliable and experienced roofer to protect your home from the elements? Welcome to The Way Renovations, your premier roofing contractor in North Bellmore, NY. Licensed and insured with over 40 years of roofing experience, we pride ourselves on transforming homes with precision and a keen eye for detail. Established in 2020, our family-owned and locally operated business has dedicated itself to delivering exceptional craftsmanship with every project. Whether you need reliable asphalt shingle roofing, resilient flat roofing, or stylish metal roof installations, our skilled team is equipped to handle your needs.
Klein Contracting
(516) 259-4444 klein-contracting.com
Serving
4.9 from 29 reviews
Long Island's #1 Trusted Home Improvement Company. Licensed and Insured with Over 30 Years Experience. Exterior Services Include: Roofing, Siding, Windows, Gutters, Chimneys, Decks & Porches, Masonry, Waterproofing and Painting. Interior Services Include: Basement Waterproofing and Refinishing, Bathrooms, Carpentry, Flooring, Closets, and Painting.
Built Right Commercial Roofing Long Island
(631) 646-2681 www.builtrightcommercialroofing.com
Serving
4.9 from 55 reviews
Built Right Commercial Roofing provides commercial flat roof repair, restoration, and replacement across Long Island, Nassau County, Suffolk County, and all NYC boroughs. We specialize in TPO, EPDM, and silicone roof coating systems for warehouses, shopping centers, office buildings, schools, and multifamily properties. Our team responds quickly to active roof leaks, storm damage, and emergency repairs, helping property owners prevent costly interior damage. We also offer maintenance programs, roof inspections, and full system upgrades designed for long-term durability and energy efficiency. Commercial-only roofing. Fast response. Strong warranties. Call now for a free inspection.
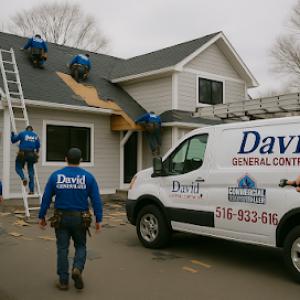
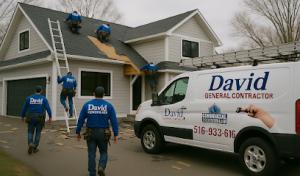
David General Contractors
(917) 295-5598 davidgeneralcontractors.com
Serving
4.9 from 115 reviews
With over 20 years of experience, David General Contractors INC is your trusted partner for high-quality residential and exterior remodeling work across Long Island and New York City. We specialize in roofing, siding, blacktop and concrete driveways, extensions, dormers, and full interior renovations. Our skilled team is known for fast response, reliable service, and superior craftsmanship on every job. Whether you’re planning a small upgrade or a major renovation, we bring professionalism, transparency, and results you can count on. Contact us today for a free estimate , We do not accept advertising or marketing calls. All solicitation will be ignored.
JJM Roofing & Waterproofing
(516) 508-3781 jjmconstructioncorp.com
Serving
4.9 from 93 reviews
Wether you're looking for a residential or commercial roofing project, JJM Construction is your top quality resource. Contact us today and get a free quote on your next roof, siding or waterproofing job.
For Bethpage properties, full reroof projects are generally handled through the Town of Oyster Bay building permit process rather than as a purely contractor-side paperwork issue. The local process is designed to ensure safety, zoning compatibility, and long-term performance within Nassau County's regulations. The permit workflow typically starts with an initial plan submission, followed by any necessary zoning checks, and concludes with a final inspection after the roofing work is completed. Understanding this sequence helps homeowners coordinate scheduling with weather windows and contractor availability so that the project progresses without unnecessary delays during the wintery months or spring wind events.
The plan submission step is where your contractor will gather the technical details of the reroof, including roof geometry, material selections, and fastener specifics. In Bethpage, it is common for the reviewer to request documentation that demonstrates compliance with local wind design provisions and attic ventilation standards. If your home has unique features-such as a low-slope section, multiple skylights, or a dormer-be prepared to provide precise measurements and roof pitch information. Zoning checks, when needed, ensure that any additions or changes harmonize with setbacks and roofline relationships to neighboring properties. Anticipate a short turnaround period for these checks, which helps you align the project with the winter-to-spring windows favored by deep freeze to thaw cycles.
Some Bethpage reroof projects require documentation showing wind-rated materials or attic ventilation updates as part of permit review or closeout. Wind-rated material verification can come from manufacturer specifications or third-party testing results, while ventilation updates may involve confirming the presence of appropriate soffit and ridge ventilation or the addition of attic vents to meet code requirements. Since Nassau County and the Town of Oyster Bay emphasize proper ventilation to mitigate moisture buildup during wet-season cycles, having these details prepared in advance can smooth the permit review and reduce back-and-forth with the inspector.
After the roofing work is completed, a final inspection verifies that the installation adheres to the approved plan and applicable codes. This inspection is not merely a formality; it confirms that the roof is correctly flashed, that ventilation requirements are met, and that materials chosen for wind resistance and performance are properly installed on the roof. Schedule the inspection promptly once the project nears completion, especially when weather windows are closing. Timely closeout helps ensure that any remaining items identified by the inspector are addressed quickly, reducing the risk of weather-related complications during the transition to a fully sealed roof.
In Bethpage, typical local pricing is commonly discussed per square, with provided ranges of $400 to $800 for asphalt shingles, $700 to $1200 for metal, $1200 to $2500 for clay tile, $1000 to $1800 for concrete tile, $2000 to $6000 for slate, and $700 to $1400 for synthetic slate. That per-square mindset matters because roof sizes and roof shapes across Long Island subdivisions translate directly into project totals. When you're pricing a mid-size asphalt job, expect the price spread to reflect the quality of underlayment, ventilation, and any upgrades that improve wind resistance or moisture management.
In Bethpage, costs can rise when weather compresses the spring and fall work calendar, creating demand spikes after winter damage or storm-heavy periods across Long Island. If your roof needs attention after a heavy storm or after a winter thaw with wind-driven rain, you'll often see bids that are higher than the quiet shoulders of the season. Contractors may also push for quicker turnarounds to avoid scheduling conflicts, which can add a modest premium. Plan for potential delays and price shifts if your project lands during those busier windows.
Asphalt shingles remain the workhorse for most Bethpage homes, but the decision matrix changes if you're replacing a low-slope section, adding skylights, or addressing wind zones. Metal roofs, while pricier upfront, can offer longer service life and superior wind performance, typically $700 to $1200 per square. For authentic longevity with a distinct look, clay or concrete tile elevates costs-clay in the $1200 to $2500 per square range, concrete $1000 to $1800. Slate and synthetic slate sit at the premium end, with slate up to $6000 per square and synthetic slate around $700 to $1400.
Beyond the roof covering itself, administrative and scope-related cost factors can surface. Wind-rated materials, improved ventilation, and roof-to-wall flashing updates may require additional materials or labor. These upgrades matter in Bethpage where seasonal weather stress tests can expose vulnerabilities in older assemblies. If your plan includes upgrading ventilation, attic insulation, or addressing moisture control, allocate a portion of the budget for those enhancements alongside the base roofing material.
Get a clear picture of your project costs upfront - no commitment required.

Across Long Island, insurers generally still provide broad coverage for standard roofing changes, but severe storm years can lead to higher deductibles or closer scrutiny of roof claims. In Bethpage, that means your claim may get a more detailed review if the weather suddenly shifts from the usual freeze-thaw cycle to a rush of wind-driven damage or hail. If a storm seems to have created a significant and localized impact, expect the adjuster to compare what was there before the event with what exists after, and to press for strong evidence that a replacement is necessary rather than a repair. Knowing this helps you prepare for a careful, paper-driven process rather than a quick, informal settlement.
For storm claims in Bethpage, adjusters often want contractor affidavits, before-and-after photos, and material specifications to support replacement tied to wind or hail events. That means you should plan to have a licensed contractor document the condition of the roof immediately after the event, then track the restoration steps in a transparent, dated timeline. If the claim involves multiple issues-low-slope sections, skylights, or storm leaks-you may be asked to show how each area was affected by the wind, rain, or freeze-thaw cycle. The more concrete your documentation, the smoother the discussion about whether replacement is warranted.
Because Bethpage sits in a market where storm damage and emergency leak response are common contractor specialties, homeowners should document damage immediately before temporary repairs obscure the original condition. Take clear photos from multiple angles, note the date and weather conditions, and keep records of any temporary fixes you apply to stop leaks. Temporary measures are important to protect the home, but they can complicate later assessments if not clearly labeled and dated. Share all documentation with your adjuster and your chosen contractor to maintain a transparent trail that supports the claim.
Approach conversations with adjusters and contractors as a joint effort to establish facts. Ask for precise material specifications, including shingle or metal types and ventilation details, and request written affidavits that confirm the event caused the deterioration. If a dispute arises over the scope of replacement versus repair, rely on the documented pre-event and post-event conditions to frame the discussion. In practice, the strongest outcomes come from consistency between the claim file, the contractor's reports, and the homeowner's notes.
Connect with contractors who help homeowners navigate the claims process from damage assessment to final approval.