Last updated: Apr 19, 2026
Hudson Valley winters bring regular freeze-thaw cycles that bite harder here than in milder downstate areas. In Wappingers Falls, the combination of cold snaps and late-season thaws means the snow on the roof doesn't just melt-it refreezes at the eaves, creating ice dams that push against shingle edges and water barriers. That stress concentrates at the outer perimeter where gutters, fascia, and roof deck meet, and it can seep under shingles, lift flashing, or pry up edge nails. The result is accelerated wear on the first few feet of the roof, accelerated granule loss, and hidden leaks that show up only after a warm spell or heavy spring rain. The urgency is real: once ice dams form, the cycle of melt-freeze repeats, potentially widening gaps and loosening the protective layers.
Older homes in this area often feature masonry chimneys that extend through the roof line, creating stubborn leak paths if step flashing isn't properly bedded or if cricket areas aren't adequately sloped and flashed. Snow and ice tend to back up around these features, pooling where flashing meets shingles and where the cricket diverts water away from the chimney. In Wappingers Falls, that means a frequent hotspot for moisture intrusion, even when the rest of the roof appears sound. If step flashing or cricket transitions aren't sealed well, or if mortar joints have deteriorated, freeze-thaw pressure finds a path into the attic or ceiling. Expect more frequent staining, musty odors in the attic, and occasional ceiling water marks after thaws or heavy rain in spring. The risk isn't distant-it's concentrated around these structural junctions that many older homes share.
Spring in Dutchess County arrives with rain and lingering humidity after a long winter, so roofs transition quickly from ice-dam risk to moisture exposure risk for decking and underlayment. If ice dams kept water from properly draining, moisture can linger in decking, underlayment, and insulation layers. Once temperatures stay above freezing, that trapped moisture challenges wood and synthetic underlayers, accelerating rot, delamination, or mold growth. In addition, hidden moisture can compromise ventilation, trapping heat and dampness that invites further damage to sheathing and rafters. The warning is precise: a roof that endured ice dam stress without adequate drainage and ventilation will show elevated risk for interior leaks and costly repairs as the season shifts.
Address ice dams and moisture risk with a plan that targets both the symptoms and the causes. Begin by removing built-up snow from the roof perimeter with careful, non-abrasive methods or professional help to reduce dam formation, while avoiding damage to shingles. Inspect attic spaces for signs of poor ventilation: consistently warm or humid air in the attic during winter suggests insufficient intake or exhaust, which feeds ice dam formation and accelerates deck drying issues after melt events. Check for daylight visible through rafters or sagging insulation that indicates heat loss and potential moisture migration. For chimneys and flashing, focus on visible gaps or loose flashing strips along the chimney base and around cricket work. Any signs of rust, lifted shingles at edges, or loose nails warrant prompt attention.
When planning follow-up work, prioritize symptoms tied to Wappingers Falls' climate: ice dam remnants, interior attic staining after melt events, corrosion or lifting around flashing, and any sagging or mushy deck areas visible from the attic hatch or through vent openings. A qualified roof technician should check shingle edge integrity, re-flash around chimneys, verify cricket slopes and drainage, and assess underlayment condition after dormancy. Insist on a thorough moisture assessment that includes a check of attic ventilation, insulation levels, and any signs of wood rot or mold. For homes with chimneys or expansive flashing networks, a careful inspection of all step flashing transitions and valley treatments is essential, as these are the most common failure points in this climate. The aim is to eliminate lingering ice dam risk and establish a robust moisture barrier before the next winter sets in.
Warm, humid Hudson Valley summers can speed shingle aging while also making attic ventilation performance more important during replacement planning. Hot days push roof temperatures up, which affects adhesive bonding for certain shingle types and can shorten the window for safe, efficient installations. Attic ventilation plays a direct role in controlling moisture buildup inside the roof assembly, reducing the risk of warped sheathing or accelerated insulation degradation after a replacement. Understanding the interplay between heat, humidity, and the structure of older homes helps homeowners choose timing that supports long-term performance.
Fall wind events in the mid-Hudson region can interfere with installation scheduling and expose already-loosened shingles before winter arrives. If a crew has to pause for storms or gusty days, small issues can become larger problems as weather shifts toward winter. With older housing stock often featuring chimneys and potential historic-review quirks, scheduling during calmer stretches is worthwhile. A plan that anticipates a few contingency days for autumn windshowers helps keep the project on track and minimizes the chance of a mid-renovation setback leaving the roof vulnerable to early-season freezes.
Because winters are snowy and inspections may need short scheduling windows, many homeowners benefit from planning full replacements before late-fall weather closes in. Snow accumulation complicates staging and can delay material delivery or access. By aiming for a completed or near-completed project before the first big snow, the homeowner reduces the risk of weather-induced delays that push critical inspections or components into the spring thaw. This is especially true for homes with multiple roof planes, where coordinating tarps, flashings, and chimney details requires steady, dry days.
Moisture management should be addressed in the schedule, not after the first snowfall. Older roofs often have fixed vents, plaster ceilings, and attic spaces that respond to humidity differently than new builds. A replacement plan that prioritizes upgraded attic ventilation, properly sealed eaves, and integrated ice dam protection can dramatically reduce winter moisture issues. When choosing a time for replacement, consider how the attic will breathe during the hottest days of summer and how a well-ventilated roof deck will behave once fall moisture returns. The goal is a roof that sheds both rain and meltwater efficiently, with a ventilation strategy that remains effective through the transition from humid summers to snowy winters.
P J Exteriors
(845) 463-2220 www.pjexteriors.com
1589 NY-376, Wappingers Falls, New York
4.9 from 38 reviews
PJ Exteriors has offered commercial, residential, and industrial roofing services for over 50 years in the Dutchess, Ulster, & Orange County regions. Call the roofing experts at PJ Exteriors inc. for reliable and trusted roofing services. We offer 24/7 emergency repair services.
Vanguard Roofing
(845) 298-2926 www.vanguardroofing.com
1839 South Rd, Wappingers Falls, New York
4.8 from 38 reviews
Vanguard Roofing offers exclusive commercial and industrial roofing services to businesses across various sectors. We specialize in single-ply roofing, coatings, metal roofing, slate and shingle systems, retrofits and repairs, restorations and replacements, and new construction projects. Our comprehensive B2B offerings include installing and maintaining EPDM, PVC, shingle, and metal roofing systems. We also provide specialized services such as commercial snow removal for flat roofs and installation of roof accessories, including roof hatches, & safety rails. With over 50 years of experience, our family-owned company is built on client satisfaction and delivers unparalleled roofing services with industry-leading business practices.
Roofer of Wappingers Falls
(845) 617-9899 roofingcontractor-wappingersfallsny.com
1560 Albany Post Rd Unit 108, Wappingers Falls, New York
5.0 from 13 reviews
Roofer of Wappingers Falls is your premier destination for top-quality roofing services in Wappingers Falls and surrounding areas. With years of experience and a team of skilled professionals, we take pride in delivering exceptional craftsmanship and customer satisfaction. Whether it's roof repairs, installations, or inspections, we've got you covered with reliable solutions. Using only the finest materials and the latest techniques, we ensure long-lasting and durable results for both residential and commercial properties. Trust Roofer of Wappingers Falls to protect your property with a strong and reliable roof. Contact us today for all your roofing needs and experience top-tier service at its best.
ZFJ Contractor
(845) 440-3535 www.zfjcontractorcorp.com
Serving
5.0 from 20 reviews
At ZFJ Contractor, we specialize in roofing, siding, and gutter solutions that protect and enhance your home. Proudly serving Dutchess, Ulster, and surrounding counties in New York, we bring quality craftsmanship, clear communication, and reliable service to every project. In addition to our core exterior services, we offer a range of residential improvements to meet your property’s needs. Whether it’s a full replacement or detailed repairs, our team is dedicated to delivering results that last.
Christopher James Roofing
(845) 440-8922 www.christopherjamesroofing.com
Serving
4.8 from 70 reviews
Roofing repairs and replacements Commercial and Residential
Honest Reliable Roofing
(845) 590-6824 honestreliableroofing.com
Serving
4.7 from 13 reviews
HR Roofing is a superior quality roofing company with 30 years of experience in the Hudson Valley, Westchester and Connecticut. Our residential and commercial expertise spans shingle, metal and flat (incl EPDM) roofs. We enjoy providing service that is tailored to the specific needs of our clients - homeowners, architects, landlords, investors, general contractors and designers.
CT Hunt & Sons Building & Remodeling Specialist
Serving
5.0 from 4 reviews
CT Hunt & Sons: Wappingers Falls, NY experts in roofing, siding, decks, remodeling. Seniors save 10%! Your trusted home transformation specialists.
GKontos Roofing & Exterior Specialists
(845) 593-8152 www.gkontosinc.com
Serving
4.9 from 117 reviews
At GKontos Roofing & Exterior Specialists, we have been dedicated to providing exceptional roofing solutions to The Hudson Valley and Westchester areas since 2005. Our experienced team offers a wide range of services, including roof repair, replacement, and maintenance. We are GAF Certified Master Elite roofing contractors, offer free estimates, and provide 0% financing options. We understand the time and thought that goes into making investments in your home. We strive to provide the best customer service and ensure a stress-free experience from start to finish. With a focus on quality workmanship and superior materials, we deliver long-lasting and durable roofing systems that protect your home for years to come.
Angel's Renovation
(845) 549-8595 www.angelsrenovationinc.com
Serving
4.9 from 71 reviews
General Contractor specialized in Roofing and Home Improvements. With over 10 years experiences.
Lyndsey Roofing
(845) 849-1641 lyndseyroofing.com
Serving
4.9 from 83 reviews
Bill Reilly founded Lyndsey Roofing in 2015. We are a GAF Master Elite Certified Roofing Contractor, a 2-Star Master Elite President's Club award winner and a certified GAF Energy Timberline Solar shingle installer. That is right, a shingle that makes electricity. We are licensed with GAF Commercial Roofing, Elevate for EPDM, Metal Roofing, PVC and TPO. We have a dedicated flat & pitched roof, and siding repair team. We also install James Hardie cement board siding, vinyl siding, metal & wood siding. We have ProVia windows, Andersen, Marvin & Pella windows too. We offer financing and do business in Dutchess County, Orange County, Putnam County, Eastern Ulster County and Westchester County, NY. Give us a call.
Cpg General Services
(845) 245-3072 www.cpgroofing.com
Serving
4.9 from 92 reviews
CPG Roofing And Siding, established in 2012, is a premier roofing company in Newburgh, NY. As a locally-owned business, we specialize in residential roofing, offering new installations, emergency repairs, and maintenance with unparalleled quality and service. Our team of experienced roofers in Newburgh is committed to excellence, ensuring every project meets our high standards. Whether it's a repair or a complete roof overhaul, CPG Roofing And Siding is your trusted partner for durable, high-quality roofing solutions. Choose us for reliable, professional roofing services in Newburgh.

All Seasons Roofing & Siding
(845) 377-4339 roofallseasons.com
Serving
4.9 from 585 reviews
All Seasons Roofing & Siding is a family owned business that performs Residential roof repair and roof replacement services as well as gutter installation and repair, siding repair, siding replacement, and home renovation. We are the trusted roofing contractor in your neighborhood of Newburgh, Woodbury, New York City, and other southern New York communities. We pride ourselves in performing the best in the services that not every roofing company can offer. Our goal is to leave your home with a functioning and safe roof that fits the quality of your home. Our roofing contractors pride themselves on the work they do for your home. Book with All Seasons Roofing & Siding Today for a Free Estimate!
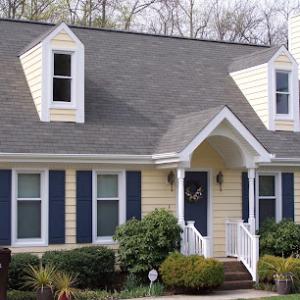
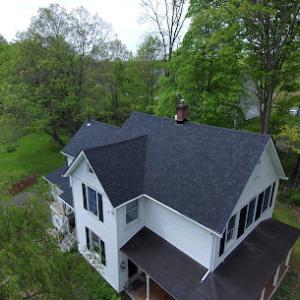
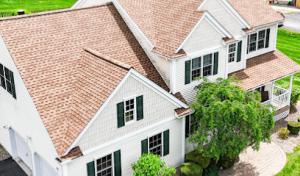
Asphalt shingles remain the dominant choice for many pitched roofs in this area. They fit existing conventional roof lines found on a large portion of older homes, and their ease of replacement after winter wear is a practical advantage when snow and ice accumulate. In the Hudson Valley climate, a solid asphalt system paired with proper underlayment and venting can handle freeze-thaw cycles relatively well. When selecting asphalt, prioritize dimensional or architectural profiles that provide better shedding edge protection and longer life in humid summers and fluctuating moisture. A high-quality underlayment and careful installation around chimneys and sidewall flashings help reduce moisture buildup and ice dam risk on aging structures.
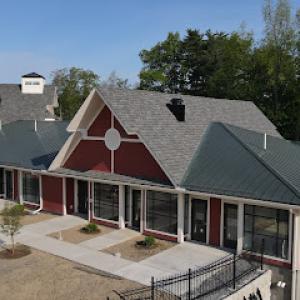
Metal roofing has strong relevance for homes with pronounced seasonal moisture swings and varying snow loads. In this area, metal panels or standing-seam configurations excel at shedding snow, which helps minimize ice dam formation along eaves and near roof-to-wall transitions. Metal also resists the repeated expansion and contraction caused by rapid temperature changes typical of cold winters and humid summers. For older local homes, ensure the roof deck and framing can support the load, and pay attention to flashing details where metal meets brick or chimney structures. A thoughtful metal choice, correctly sealed and vented, can deliver long-term resilience with less maintenance in the Hudson Valley climate.
Clay tile and concrete tile can be aesthetically appealing on select home styles in the area, but they demand careful assessment of structural load bearing and roofing support. These materials are heavier and may require reinforcement or a rebuilt substructure to handle the weight safely, especially on older stock. Flashing around chimneys, skylights, and vent penetrations must be designed to accommodate tile movement and moisture behavior to prevent leaks in freeze-thaw cycles. Wood shakes bring a distinct look but require diligent maintenance to prevent rot and moisture-related issues in humid summers. Synthetics and composites offer versatility, yet similar attention to flashing and moisture management remains essential for older homes where prior repairs may have altered roof lines or drainage paths. In all cases, consider how the moisture in spring thaw and winter melt interacts with these surfaces and plan for robust ventilation and drip edges.
Foam or membrane underlayments beneath any chosen material play a critical role when dealing with moisture behavior on older local homes. Prioritize careful attic ventilation to reduce attic condensation that can worsen ice dam formation on historically routed eaves and cornices. Pay close attention to the roof's horizontal transitions, chimney flashing, and valley configurations, where moisture tends to accumulate after heavy snowfall or extended cold spells. A proactive approach-paired with material choices that suit the structural reality of the house-helps mitigate common Hudson Valley issues such as warped decking, rusted metal details, or moisture intrusion around ornamented roof lines.
Selecting a roof material in this market means balancing local climate resilience with the building's heritage and structure. Asphalt shingles offer practical, reliable performance for many older homes without demanding structural changes. For homes where snow shedding and long-term durability matter most, metal roofing provides strong value if the supporting structure is sound and flashing is properly executed. For specialty layouts or stylistic goals, tile and synthetic options require a closer look at load paths, flashing design, and moisture behavior to ensure the roof remains durable through many winters to come.
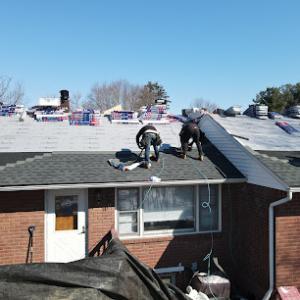
In this setting, replacement projects for older homes often involve tear-off work and more chimney penetrations than newer subdivisions. That combination raises labor time and waste handling compared to simple overlays, so the price tag tends to sit higher than a straightforward re-cover. Material choices still drive the bulk of the budget, but expect crew hours to reflect the extra flashing, vent work, and potential scaffold/setup needed around historic features. Typical per-square costs (100 square feet) fall into familiar ranges, but with the local realities pinching margins slightly on the high side when tear-offs are required or if antique framing needs temporary shoring. Asphalt shingles remain the most common baseline, with metal, clay, concrete, wood, and synthetic options offering longer life, but at higher upfront cost. As a practical guide, plan for the material cost range and add labor when chimney penetrations or old valley details demand more care during removal and reinstallation.
Choosing a roof covering in this area means balancing performance in freeze-thaw cycles with the realities of older houses. Asphalt shingles can be the most economical path, but you'll still pay a premium for a full tear-off and full replacement rather than a patch or overlay. Metal roofing improves longevity and sheds ice better, yet the fasteners and flashing around chimneys in older structures add to a tighter install and higher upfront price. Clay and concrete tiles deliver superb durability but impose weight considerations and structural checks; many older homes in this area require reinforcement, which drives up both material and installation costs. Wood shingles or shakes provide a traditional look but demand careful maintenance in humid summers and can be more costly to install on existing roofs with complex contours. Synthetic or composite shingles blend durability with cost, often offering a middle ground for a roof facing long Hudson Valley winters. Each option carries a different likelihood of requiring additional flashing or reinforcement where chimneys and dormers meet the main plane.
Seasonal demand spikes after severe winter storms or high-wind events in the Hudson Valley can tighten the schedule and pressure pricing, even though this market is not a constant high-claim environment. If a storm creates multiple urgent replacements nearby, plan for possible delays in material delivery and crew availability. To minimize disruption, aim for a mid-spring or early-fall window when temperatures are moderate and the risk of rapid freeze-thaw cycles is lower, and confirm your contractor's ability to stage a controlled removal and reinstallation around existing chimney lines and attic penetrations.
Older housing stock often features multiple penetrations and irregular rooflines that complicate a straightforward replacement. Expect higher labor hours for flashing around chimneys and vent stacks, plus the need to carefully match transitions where the roof meets dormers or parapets. Tear-off work also means more waste disposal, which factors into overall project cost beyond the base material price. When budgeting, account for these realities alongside the chosen material, and discuss with the contractor how they plan to protect historic features and maintain proper moisture management through the critical spring melt and autumn freeze cycles.
A full roof replacement in this village typically requires a permit handled through the local building department rather than being treated as a no-paperwork maintenance item. The permit process exists for safety, drainage, and electrical/ventilation considerations, and skipping it can bite you later when selling or renewing insurance. Expect initial plan review, especially if the roof line or ridge vents interact with historical features or nearby structures. The department will want to see basic information about the roof materials, underlayment, and ventilation strategy, along with contractor credentials. Treat the permit as a formal step, not a formality, because it sets the project timeline and responsible parties.
Local review commonly includes inspections at tear-off and after installation, so contractors need to coordinate timing instead of treating the project as a one-visit closeout. A tear-off inspection confirms that the old roof has been removed to the deck and that the proper underlayment and proper deck conditions exist. The post-installation inspection verifies that the new roof has been installed to code, with flashing, ventilation, and hatch access checked. Delays can arise if the contractor misses a required inspection window, or if a misalignment occurs between shingle installation stages and the inspector's schedule. Plan for a minimum buffer between tear-off completion and material delivery windows, and confirm with both contractor and building department that the required inspections are scheduled in advance.
Historic status or neighborhood-specific review quirks can affect approval in some cases, which matters more on older properties than on straightforward modern re-roofing jobs. Some homes in older districts may trigger additional review for roof color, material, or the appearance of chimneys and eave lines. If your home sits in a zone with historic overlays or in a district with design guidelines, the building department may require a formal review or a quick consultation with a local historic board. The consequence is a longer lead time and a need for revised plans or addenda before work can proceed. Clear documentation of materials, flashings, attic ventilation, and drainage paths helps prevent back-and-forth revisions and keeps the project moving.
After severe storms, insurers commonly expect photo documentation, a written scope of work, and invoices, and may send an adjuster for on-site review before approving the replacement scope. In this market, claims tend to follow standard storm-event patterns rather than constant catastrophe-driven replacement cycles. Your documentation should clearly show where shingles or flashing failed, where ice damming or wind uplift caused damage, and where interior moisture appears following a thaw. Keep a dated, organized photo log from multiple angles and record any visible sagging, lifted shingles, or missing components that are easy to misinterpret without context.
Because local weather threats are more often snow load, wind, and seasonal storm damage than coastal catastrophe loss, claim documentation should focus on event-specific damage rather than age alone. Highlight damage tied to a particular storm or sequence, such as wind-stripped valleys, damaged gutters, or compromised chimney flashing. If snow or ice damming caused staining or rot on eaves, document with close-ups and location notes. Insurers respond best to a coherent narrative that links observed damage to a specific weather event, supported by timestamps and weather data when possible.
Prepare a clean, written scope of work that names the roof sections affected, emergency measures taken, and reasonable repair or replacement steps. Coordinate with the adjuster for an on-site review if requested, and ensure the scope aligns with the photos and invoices. Keep labeled, dated records organized in one place and share them promptly to avoid delays. If questions arise about flashing around chimneys or valleys, provide clear diagrams or sketches to accompany your written notes.
Connect with contractors who help homeowners navigate the claims process from damage assessment to final approval.
Chimneys are a common source of trouble on older roofing in this market, where masonry sits directly against shingles or underlayment. The leak risk often starts not with a missing shingle but with the joint where brick or block meets roofing materials. Over time, mortar joints settle and flashing corrodes, creating slow drips that can go unnoticed until a cold snap reveals a wet attic. If a chimney is tied into a roof valley or a high-traffic eave, the flashing must be meticulous, and every daylight opening sealed with materials suited to sustained freeze-thaw cycles.
Skylights are a meaningful local specialty. Freeze-thaw movement can nudge flashing out of position, and aging curb mounts or seals allow moisture to work between panes and decking. In older assemblies, the operating life of flashing and gasket seals is shorter than expected, so skylight leaks tend to recur after winters. A robust approach focuses on preserving the surrounding roof plane while renewing the skylight envelope-curb, flashing, and glazing-together rather than chasing leaks from one seam to another.
On homes with several penetrations, replacement quality relies less on field shingles and more on flashing execution around chimneys, skylights, and valleys. In practice, this means coordinating flashing steps as a continuous system: backer rod, sealant, counter-flashing, and proper integration with the roofing material. The goal is a cohesive, layered barrier that remains watertight through multiple freeze-thaw cycles, rather than patching one leak at a time. If a project touches several penetrations, insist on a unified flashing strategy for lasting reliability.
Find contractors experienced in skylight installation, flashing, and leak repairs to bring natural light into your home.
GKontos Roofing & Exterior Specialists
(845) 593-8152 www.gkontosinc.com
Serving
4.9 from 117 reviews
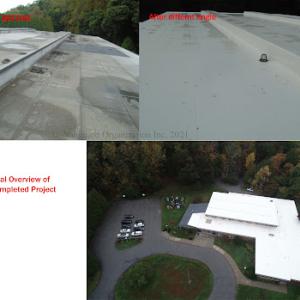
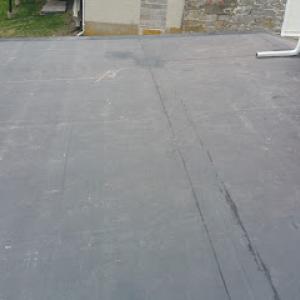
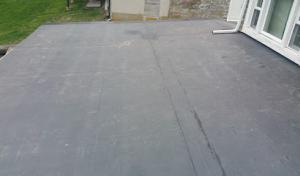
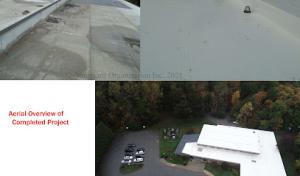
Although pitched residential roofs dominate locally, the contractor market shows meaningful flat-roof specialization, indicating a real need on porches, additions, garages, and some mixed-use buildings. In the Hudson Valley climate, low-slope sections are especially vulnerable when winter snowmelt is followed by spring rain, making drainage details more critical than on steeper main roofs. Pay close attention to drip edges, scuppers, and interior drainage paths. Ensure that parapets and transitions between a main steep roof and a low-slope deck or porch are sealed with compatible flashing and a robust waterproof membrane beneath the surface finish. In practice, this means detailed inspection of sealant joints and flashing at any porch, attic access, or bay addition where meltwater can back up toward living spaces.
Homes in and around Wappingers Falls often have mixed roof geometries, so replacement planning may involve different materials and detailing standards on the same property. When a high-slope main roof sits above a low-slope section, consider using compatible underlayment systems and transition details that accommodate differential movement and thermal expansion. On older structures, flashing around chimneys, dormers, and skylights should be reviewed for compatibility with the chosen roof type. If a portion of the roof is being replaced mid-life, match the new materials to the existing character while ensuring that drainage and moisture barriers meet current performance expectations.
The local market's flat-roof expertise is especially relevant for porches and additions. Plan for a deliberate slope where practical and specify a membrane that resists algae and ice dam formation. Ensure edge detailing protects against wind-driven moisture and that termination at ledger boards or perimeter walls is solid, with proper drainage outlets that won't back up during heavy winter thaws.
On mixed rooflines, drainage paths must be clear year-round. Regularly clear debris from gutters and scuppers, and verify that downspouts direct water away from foundations. In winter, ensure that snow guards and roof-to-wall transitions are maintained so that snow sheds or slides do not accumulate where they can cause damage or create hidden ice pockets behind parapets or dormer walls. A proactive maintenance cadence minimizes moisture risks across multiple roof planes.
Find specialists in TPO, EPDM, and built-up flat roofing systems for residential and commercial properties.
P J Exteriors
(845) 463-2220 www.pjexteriors.com
1589 NY-376, Wappingers Falls, New York
4.9 from 38 reviews
Vanguard Roofing
(845) 298-2926 www.vanguardroofing.com
1839 South Rd, Wappingers Falls, New York
4.8 from 38 reviews