Last updated: Apr 19, 2026
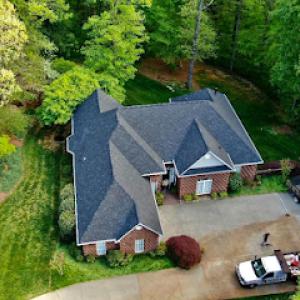
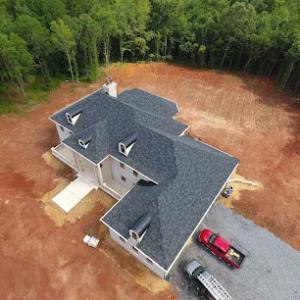
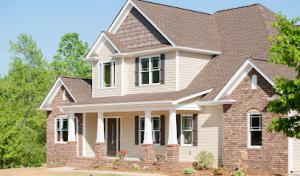
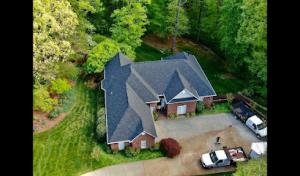
Taylorsville sits in the North Carolina foothills, where spring storms and wind-driven rain are a recurring roofing concern rather than a coastal hurricane-only pattern. The roof faces sudden gusts, sharp downpours, and rapid temperature swings that loosen shingles, uncover flashing, and stress ridge lines. Autumn weather can include remnants of tropical systems reaching inland, bringing wet days and gusty conditions that expose vulnerable shingles, flashing, and ridge areas. Occasional winter freezes and some snow in higher nearby elevations can turn small moisture-entry points into active leaks through freeze-thaw expansion. The risk isn't constant, but when it hits, the damage can escalate quickly if left unaddressed.
If a storm has just passed, your first goal is to minimize further entry points. Safely inspect from the ground for obvious signs: lifted shingles, torn flashing, or granule loss in gutters and downspouts. Do not climb onto a roof during or after a storm when shingles are wet or slick; wind gusts can cause slips and injuries. If you spot active dripping inside, place a bucket under the leak and protect valuables with towels or plastic coverings. For attic access, look for damp insulation, dark staining, or condensation on sheathing, which signals active intrusion. If you must go up to check, limit time on the roof, wear sturdy footwear, and avoid stepping on felled or loose areas.
Kits designed for temporary tarping can be a lifesaver when a severe wind event tears open a seam or vents a ridge cap. Use a tarp or heavy-duty plastic with secure fasteners, ensuring the edges are weighted down and protected from wind uplift. In the attic, seal around penetrations with painter's tape or foam as a short-term barrier to slow intrusion while awaiting a professional assessment. Important: temporary fixes are for immediate risk reduction, not a replacement for a proper roof repair. Long-term protection relies on a professional evaluation of the affected area.
After a foothills event, document everything thoroughly. Take clear photos from multiple angles, including close-ups of damaged shingles, flashing, and ridge vents, plus wide shots that show the roof's overall condition. Note dates of the storm, wind directions, and rain intensity if possible. Preserve damaged materials and avoid replacing roofing components yourself unless you have the proper training and safety setup. When filing an insurance claim, your records should tell a precise story of what happened, when it happened, and how it progressed, helping an adjuster understand the scope of needed repairs.
Storm damage often presents more clearly in spring, after winter wear and early-season rainfall, or in autumn when lingering tropical moisture can test roof joints. Plan roof repairs promptly after an assessment, prioritizing leaks that threaten insulation, interior ceilings, or electrical systems. For high-wear areas-near valleys, seams, and around dormers-expect a quicker need for replacement or resealing to restore wind resistance. In colder months, freeze-thaw cycles can reopen marginal entries; addressing those promptly minimizes escalating damage and further interior moisture.
Choose a local roofer who understands Taylorsville's climate patterns and typical housing stock. Look for experience with storm-related damage, proven leak-resolution success, and a clear communication style. A thorough inspection should identify hidden leaks that may not be obvious from indoors, including underlayment wear, flashing integrity, and ridge vent performance. The goal is a dependable fix that restores weather resistance through the next spring's rains and the following season's freeze-thaw cycles.
Trivette's Roofing & Guttering
(828) 639-4258 trivettesroofing.com
321 NC-16, Taylorsville, North Carolina
4.9 from 88 reviews
Trivette's Roofing and Guttering is a local roofing contractor in Taylorsville, NC that is committed to excellence in every aspect of our business. We uphold a standard of integrity bound by fairness, honesty, and personal responsibility. Our distinction is the quality of service we bring to our customers. Accurate knowledge of our trade combined with ability is what makes us true professionals. Above all, we are watchful of our customers' interests and make their concerns the basis of our business. We offer a variety of services such as gutter installations, residential roofing, shingle roofing, and much more.
S&S Roofing
(828) 495-1805 www.s-sroofingnc.com
134 Bolick Ln, Taylorsville, North Carolina
5.0 from 18 reviews
S&S Roofing is a veteran-owned, locally operated roofing company proudly serving Taylorsville, NC since 1995. We specialize in roof installation, repair, and replacement with a commitment to honesty, quality, and 1-on-1 customer service. As certified partners with CertainTeed, Owens Corning, and TAMKO, we offer premium shingle options and extended manufacturer warranties. We stand by our work—if we make a mistake, we fix it. At S&S Roofing, your satisfaction and protection are always our top priorities.
Blue Sky Roofing
(828) 202-1021 blueskyroofingnc.com
Serving
5.0 from 43 reviews
Blue Sky Roofing is a certified roofing contractor in Western North Carolina. We provide shingle roofs, metal roofs, composite roofs, roof repairs, and roof replacement. Contact us now for a free estimate!
Providence Roofing Hickory
(704) 883-6052 providenceroofs.com
Serving
4.9 from 83 reviews
Based in the heart of Hickory, North Carolina, Providence Roofing is a veteran-owned and operated company built on a foundation of integrity and craftsmanship. We provide a full range of services for homes and businesses in the Hickory area along with all of Catawba, Burke, Alexander, and Caldwell counties. Specializing in roof replacements, repairs, and inspections. Our team is committed to delivering exceptional quality with every project, using premium GAF Timberline HDZ shingles and offering comprehensive warranties for lasting protection. From storm damage to new builds, our crews ensure a seamless and professional experience from start to finish.
MBA Roofing of Hickory
Serving
4.9 from 129 reviews
MBA Roofing proudly serves the Hickory area with expert residential and commercial roofing and gutter solutions. As an Owens Corning Platinum Preferred Contractor, we provide top-tier workmanship, materials, and service—whether it’s a repair, replacement or new build.
Northwest Roofing
(844) 766-3762 northwestroofingnc.com
Serving
5.0 from 122 reviews
Northwest Roofing - North Carolina's Trusted Roofing Experts Since 1997 Licensed NC General Contractor specializing in residential & commercial roofing. Insurance claims experts helping homeowners maximize storm damage coverage. Services: Roof installation/repair, emergency storm response, free inspections, shingle/metal/composite roofing, flat roofs, seamless gutters. Why Choose Us: A+ BBB rating, 25+ years experience, insurance specialists, manufacturer warranties. Service Areas: Alexander, Avery, Burke, Caldwell, Catawba, Davidson, Gaston, Iredell, Lincoln, Mecklenburg & Surry Counties including Charlotte, Hickory, Statesville, Gastonia, Boone, Mooresville, Concord, Lincolnton, Morganton, Lenoir, Mount Airy, Banner Elk & more.
Roof Worx
(828) 490-9581 roofworxpros.com
Serving
4.9 from 59 reviews
Roof Worx: Your Top-Rated Roofing Contractor in Hickory, NC 🏠 Looking for a reliable & professional roofing contractor in Hickory, NC? Look no further than Roof Worx! We are proud to offer exceptional residential roofing services and commercial roofing services to the Hickory, NC Community. Our commitment is to prioritize our customers and deliver the highest quality of service. Whether you require roof repair, roof replacement, or new roof installation, we have you covered. Book your FREE Roof Inspection directly with us today to get started. Our team of experts is ready to assess your roofing needs and provide the best solution tailored to your requirements.
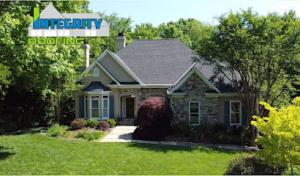
Integrity Roofing
(828) 448-0855 integrityroofingnc.com
Serving
4.8 from 254 reviews
We provide complimentary roofing quotes and inspections for homeowners and property owners in NC. Our services cover residential and commercial roofing, including asphalt, metal, slate, and flat roofing systems. Additionally, we offer roof maintenance, power washing, siding, and gutter services. As a locally owned and operated business, we pride ourselves on delivering quality service and are A+ accredited by the BBB.
A Plus Roofing - Hickory
(828) 851-6440 aplusroofingnc.com
Serving
5.0 from 152 reviews
A Plus Roofing, established in 2021, offers high-quality residential and commercial roofing installation and repair services in Hickory, NC and surrounding areas. Our skilled team specializes in standing seam metal roofs and shingle roofs, ensuring durability and longevity for your property. We provide seamless gutter installations, repairs, and replacements, along with reliable gutter guards to prevent debris accumulation. When storm damage strikes, A Plus Roofing responds quickly—arriving at your doorstep the next day after you contact us. Experience exceptional customer service and unparalleled roofing solutions that prioritize both satisfaction and efficiency.
Premiere Roofing & Gutters
(828) 640-7320 premiereroofingnc.com
Serving
4.9 from 237 reviews
Many homeowners experience issues with their roofing system that leave them overwhelmed. Instead of neglecting potentially serious damages, hire a professional roofer to handle repair and replacement services. Premiere Roofing & Gutters is a commercial and residential roofing company in Hickory & Blowing Rock, NC. We also offer seamless gutter installation, and repair services. You can trust our eight years of industry experience for your roof repair, replacement, metal roofing installation and more. We appreciate our troops and veterans. That’s why we’re proud to work with Operation Homefront in keeping our veterans employed.
Elite Roof & Solar - Hickory
(828) 333-4818 eliteroofandsolar.com
Serving
4.8 from 134 reviews
The Elite Roof and Solar team is driven by a singular purpose – to put a smile on our neighbors’ faces by protecting their families and homes with a safe, beautiful, and innovative roof over their heads. We are the premier Roofing Contractor in the Carolinas driven to provide exceptional service and workmanship. We are a Master Elite GAF contractor and 3-Star President's Club Award Winner (1 of only 2 in NC). We offer free inspections, multiple financing options, & require no down payment. Elite Roof and Solar will serve you in a trustworthy and professional manner ensuring you are happy and secure in your home with an attractive and long-lasting roof. Give us a call to see why over 5,000+ customers have trusted us for their roofing needs.
Powerhouse Construction
(828) 202-9527 www.pwrhouseconstruction.com
Serving
5.0 from 38 reviews
Powerhouse Construction offers expert roofing services, specializing in residential and commercial projects. From roof repairs to full installations, our experienced team delivers high-quality craftsmanship and reliable solutions. We use top-grade materials to ensure durability and safety, all while providing exceptional customer service. Trust Powerhouse Construction to protect your property with a roof built to last!
For Taylorsville roofs, spring and fall are the preferred replacement seasons because the local temperate pattern avoids the worst summer thunderstorm interruptions and winter freeze delays. If you are coordinating a window project to address wind-driven moisture and potential leaks, plan for weeks when daytime temperatures are moderate and humidity is lower. Early planning with your installer helps lock in a window schedule that minimizes rollbacks due to sudden storms and keeps tear-out and dry-in sequences on track.
When selecting replacement windows, prioritize models with robust weather sealing and reinforced frames that can handle the foothills wind loads. Look for multi-point locking systems, weatherstripping that remains effective after repeated cycles, and reinforced glass options for impact resistance during severe spring storms. Consider windows with exterior cladding that resists hail and rapid temperature swings, and ask about flashing details around rough openings to reduce the risk of interior leaks after a heavy rain event.
Summer installation schedules in this part of North Carolina are often affected by frequent afternoon thunderstorms, which can slow tear-off and dry-in sequencing. If a contractor needs to complete both removal and installation in a single day, confirm that weather contingency plans exist: extended workdays, protected indoor storage, and quick-dry sealants. It helps to align project milestones with a forecast window of several dry days in a row, so flashing and interior drying are not rushed during the hottest hours of the day.
Winter work can be delayed by freezing conditions and occasional snow impacts tied to the higher-elevation terrain nearby, even when lower-elevation days look workable. When temperatures dip, glazing and sealants can take longer to cure. If winter installation is unavoidable, request short daily targets and access to heated spaces for curing times, along with a clear plan for protecting open framing from snowfall and moisture infiltration.
In the event of wind or heavy rain, prompt inspection of existing openings is essential. Prioritize windows with signs of moisture intrusion, condensation between panes, or warping around frames. For homes with older siding or compromised flashing details, sealing upgrades during replacement can prevent recurring leaks near roof-to-wall junctions. As weather shifts through spring and fall, maintain a record of the replacement timeline, contractor communications, and any storm-related damage assessments. When insurance documentation is needed after a foothills wind and rain event, keep a dated log of photos, measurements, and a summary of affected openings, plus the installation dates and product specifications. A clear, organized file helps streamline claims and supports a smoother transition from mitigation to rebuild.
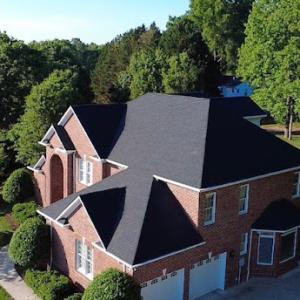
Asphalt shingles and metal roofing are the most practical mainstream choices for homes in this foothills area because they fit the local mix of rainfall, occasional freezes, and storm exposure. Asphalt shingles offer solid value and ease of repair after a wind or hail event, while metal systems provide enhanced resistance to wind uplift and rapid drainage during heavy rain. When considering either option, look for Class 4 impact resistance and good wind ratings to stand up to the seasonal gusts that sweep through the foothills.
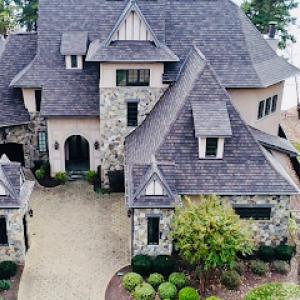
Heavier systems such as clay tile and slate appear in the market but require careful structural consideration on homes in this region, where many residential roofs are more commonly built around lighter coverings. Clay tile and slate can perform beautifully and long-term if the roof deck and framing were designed to carry the extra weight. If your structure isn't engineered for heavier materials, upgrading rafters, posts, or adding additional support should be weighed against the long-term durability and the risk of more extensive repairs after severe storms. For a typical foothills residence, weighing the trade-offs between aesthetics, weight, and wind performance is essential before choosing a heavier system.
Wood shingles and shakes in the foothills climate need close attention to moisture management because regular rainfall and shaded conditions can shorten service life compared with drier regions. Proper underlayment, solid flashing, and sound ventilation are crucial to prevent splitting, curling, and moisture-related deterioration. In shaded spots or on roofs with limited sun exposure, anticipate more frequent maintenance to address moss, mildew, and edge wear. If wood is a preferred style, consider treated options or engineered wood products that resist decay while still delivering the natural look.
Across all popular materials, effective moisture management is the common foundation for longevity. In this region, consistent maintenance before the wet season helps catch minor leaks that could expand during a heavy rain event. Prioritize clean gutters, sound flashing around chimneys and vents, and timely resealing of any compromised seals after storms. A proactive approach to seasonal inspections-especially after severe weather-can prevent small issues from becoming costly leaks that jeopardize attic ventilation, insulation, and interior finishes.
Foothill winds and rain stress roofs in abrupt shifts of weather, so having documented storm damage response plans matters. Keep a current set of photos, dated notes, and a log of any temporary repairs after wind events. This record supports insurance discussions and helps determine whether there are hidden vulnerabilities in the roof system that could fail with the next storm. Regularly review your roof's material performance with a local contractor who understands how your chosen covering interacts with the local climate, shading patterns, and seasonal precipitation.
Local pricing can swing after regional storm activity, when demand for re-roofing and repair crews rises across inland western North Carolina communities like Taylorsville. After a spell of heavy rains or a strong wind event, crews may be in higher demand and supply chains tighten, pushing both material and labor rates for a short period. Plan for a brighter travel window after the worst of the season to lock in more stable pricing, and build a small contingency into your budget for potential price bumps caused by storm-driven demand.
Metal roofing is a meaningful part of this market, so homeowners comparing bids in Taylorsville often weigh higher upfront cost against durability in a rain-and-storm-prone foothills setting. In practice, metal panels can run noticeably higher per square than asphalt, but they often yield longer service life and better wind resistance. If your home sits on a hillside with frequent wind gusts, the long-term value of metal may offset the initial premium, especially when local storms are a regular consideration. For many homes, asphalt remains the most common, with synthetic or composite shingles offering a middle ground of cost and durability.
Project timing matters locally because weather interruptions from spring storms, summer thunderstorms, and winter freezes can affect labor efficiency and staging costs. Scheduling a replacement during a drier shoulder period can reduce days of work stoppage due to rain or frozen ground, lowering crane or ladder setup time and minimizing delays to adjoining tasks like underlayment or flashing. If a storm front is forecast, bring the project forward a bit to avoid a prolonged staging period that inflates daily labor rates.
After foothills wind and rain events, insurers often require thorough documentation of damage and completed work to finalize claims. Expect to allocate time for photos, measurements, and contractor correspondence before and after re-roofing. Clear, itemized bids and a documented record of storm-related damage can streamline the claim process and keep your replacement on track despite shifting market conditions.
Get a clear picture of your project costs upfront - no commitment required.
When planning a full roof replacement, you should expect a building permit under the local North Carolina permitting framework used by municipalities and counties in this area. The process is designed to ensure the new roof meets current codes and weather-related performance needs for the foothills climate, where regular rain and freeze-thaw cycles can stress decking and flashing. Delay or gaps in permitting can lead to compliance questions from insurers and future buyers, so getting the permit filed early helps keep the project on track and avoids later recertification headaches.
The local process typically includes an inspection after tear-off and another at final completion, which is especially relevant when decking repairs or code-related corrections are uncovered mid-project. If the existing decking shows moisture damage or structural concerns, inspectors may require repairs or reinforcements before the new roof is applied. Expect the inspector to verify underlayment and venting, as well as proper fastening and flashing details around chimneys, valleys, and penetrations. Scheduling the mid-project inspection promptly once tear-off reveals issues can prevent delays and ensure you're addressing code requirements as you go.
Because Taylorsville is the county seat, homeowners commonly deal with county-level administration and should confirm whether their property falls under town or county inspection handling before work starts. The distinction matters: some parcels near incorporated boundaries follow town procedures, while others default to the county for permit issuance and inspections. If your address sits near a boundary line, contact Alexander County Building Standards or the Taylorsville town hall to confirm the correct jurisdiction. Clarify who signs off on final completion, who handles any required corrections, and the timeline you should expect for each stage. Staying proactive on where to file and who to contact helps prevent miscommunications, which are a frequent source of costly delays after a foothills wind or rain event.
The foothills setting brings its own flavor of roof damage: wind-driven hail, sudden rain from passing storms, and recurring freeze-thaw cycles that can stress shingles and flashing. This means claims here are more about inland wind and storm impact than the coastal insurer dynamics some neighboring counties see. Being prepared to explain how a roof behaved during a specific storm, rather than during a slow deterioration, can shape the scope of what's covered.
You should gather clear, dated evidence of roof age and any prior repairs, along with notes on when the damaging storm actually occurred. Photos taken from ground level and from the attic during or after a event help establish what failed and when. Keep records of previous leaks or repairs, including contractor names and types of work done. If a contractor recommended a certain repair timeline or method, have that documented as well. This documentation helps a carrier understand baseline conditions and whether new damage aligns with the latest weather event.
After a widespread storm, multiple foothills communities may file at once, stretching inspection timelines. You can expect delays, and adjusters may need to verify claim details across several properties. Stay proactive: confirm receipt of your claim, provide requested photos quickly, and maintain a single point of contact-ideally your contractor or a trusted restoration professional who understands local roof assemblies. Expect questions about wind direction, hail size, and rain intrusion patterns, and answer comprehensively to avoid back-and-forth that slows coverage decisions.
Be concise but thorough in your explanations of storm timing and observed leaks. If your roof shows hail impact marks or wind-driven displacement, document with close-up photos and a calendar reference of the event. Keep a simple file with all correspondence, receipts, and measurements so that when the adjuster arrives, the documentation speaks clearly to the condition of the roof before and after the storm.
Connect with contractors who help homeowners navigate the claims process from damage assessment to final approval.
Trivette's Roofing & Guttering
(828) 639-4258 trivettesroofing.com
321 NC-16, Taylorsville, North Carolina
4.9 from 88 reviews

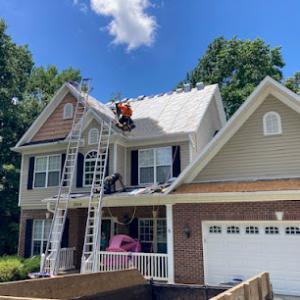
When a foothill storm hits, the first priority is a roofer who can mobilize quickly, document damage, and set expectations for cleanup. In this market, contractors with a proven track record of rapid response and thorough tear-off and debris removal are highly valued. A long-established firm often signals reliability and steady follow-through that neighbors notice.
Seek a crew whose primary work is residential steep-slope roofing. While some firms handle commercial projects, your shingles require experience with pitch, underlayment, ventilation, and attic details common to homes in Alexander County. Ask for recent local jobs, especially after freeze-thaw cycles, and request photos of recent projects from storms that resemble your situation. Avoid assuming all roofers are interchangeable.
Storm damage documentation should be precise. Take clear photos of all affected areas, including attic leaks and interior spots, and log storm dates. A reputable roofer will help assemble an insurance-ready damage claim, distinguish wind-driven damage from hail marks, and provide a line-by-line scope of work. Expect a written assessment that outlines safety steps and temporary protections if rain is forecast.
Expect a thorough assessment that prioritizes safety, then temporary protections if rain is impending. Reputable crews tarp exposed roof sections, seal gaps, and protect landscaping. In a foothills setting, crews should have equipment and procedures to manage debris without disturbing nearby properties or streams. Proper cleanup should leave the property as it was found, aside from the repaired roof.
Because the local market strongly signals demand for quick response, re-roofing experience, and cleanup, ask for written timelines and a single point of contact. Verify that the estimator and crew leader can discuss shingle types, underlayment choices, and the sequence from tarping through final cleanup. A clear plan reduces miscommunication after a storm. Also check that the crew uses fall protection and maintains continuity of contact for post-install inspection and warranty follow-up.