Last updated: Apr 19, 2026
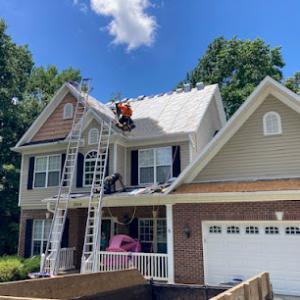
Piedmont storms bring wind-driven shingle loss and hail-related granule damage that can hide under a routine inspection. In this climate, a roof can look fine from the street while missing granules and fingernail-thin, curled edges are already letting moisture into the decking. If you notice bald patches, asphalt shingle tabs blown loose, or a gritty sandy feel in gutters and downspouts after a severe thunderstorm, treat it as urgent. Wind and hail damage in fall can appear quickly but show up only after micro-misses in a post-storm walk-around. Don't delay a careful, ground-level inspection and a second look from the attic to check for hidden leaks or moisture staining on rafters and sheathing.
North Carolina carriers expect wind and hail documentation, and adjusters in this market often want pre-work and post-work photos plus a clearly itemized scope. In practice, that means you need a calm, organized dossier: dated photos of the entire roof from multiple angles, close-ups of damaged shingles and granule loss, and evidence of any prior repairs. Take timestamped photos after storms while the roof is still dry, then again after any temporary repairs. Keep a simple, itemized list of affected areas, including skylights or vents that show damage, plus notes on any interior water intrusion you've seen inside the attic or ceilings. If possible, include weather reports showing the storm's path and wind speeds, since insurers increasingly use those details to support wind-driven claims.
Local project timing is frequently disrupted by spring rain and heightened wind risk during fall hurricane season, so you'll want to plan for temporary dry-in measures before a full replacement can be scheduled. Start with a professional assessment from a roofer who understands how to document impact overload, then implement a temporary tarping or weather-resistant barrier that keeps water out while you organize the claim. Quick action minimizes interior damage and buys time for the adjuster to review your file. If your roof has overwhelmed flashing, ridge vents, or valleys, address those areas first with a professional so interior spaces stay protected during the claims process.
Expect a process that begins with an inspector visiting your property, often followed by a two-stage claim review: an initial estimate, then a final scope after more measurements and potential replacement considerations. This market leans on a clearly itemized scope, showing exact materials, counts, and labor responsibilities. You'll want to provide the contractor's proposed scope to the insurer, along with your pre-work photos, to illustrate the condition before any remediation. If the adjuster is delayed or underestimates damage, push for a supplemental review with new photos, especially if additional hail impact or wind damage becomes evident after initial work begins.
Walk the roof with a trusted roofer within a few days of a storm and document every affected area, including the drip edge, fascia, and gutters, which can carry secondary damage indicators. Schedule a temporary dry-in if rain is anticipated or if there is ongoing wind risk before a full replacement window opens. Keep a dated binder with all communications, photos, and notes from inspections, and share those consistently with your insurer. If you've already filed, monitor the claim portal regularly and respond promptly to requests for additional documentation. In this climate, timely, well-documented action is not just helpful-it's essential to protect your home from further damage and to ensure you're positioned for a faster, smoother replacement when the weather finally cooperates.
Northwest Roofing
(844) 766-3762 northwestroofingnc.com
Conover, North Carolina
5.0 from 122 reviews
Northwest Roofing - North Carolina's Trusted Roofing Experts Since 1997 Licensed NC General Contractor specializing in residential & commercial roofing. Insurance claims experts helping homeowners maximize storm damage coverage. Services: Roof installation/repair, emergency storm response, free inspections, shingle/metal/composite roofing, flat roofs, seamless gutters. Why Choose Us: A+ BBB rating, 25+ years experience, insurance specialists, manufacturer warranties. Service Areas: Alexander, Avery, Burke, Caldwell, Catawba, Davidson, Gaston, Iredell, Lincoln, Mecklenburg & Surry Counties including Charlotte, Hickory, Statesville, Gastonia, Boone, Mooresville, Concord, Lincolnton, Morganton, Lenoir, Mount Airy, Banner Elk & more.
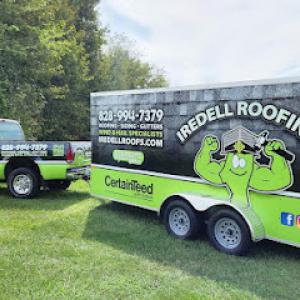
Iredell Roofing & Gutters
(828) 994-7379 www.iredellroofs.com
805 Conover Blvd W, Conover, North Carolina
4.9 from 42 reviews
Roofing Contractor, Gutter Cleaning, Installation & Repair, Home Remodeling/Painting and Improvements, Concrete Work...All Your Roofing & Home needs.
Hallman Roofing
4476 County Home Rd, Conover, North Carolina
4.9 from 8 reviews
Hallman Roofing is a full service roofing and siding company. Founded in 2014 Hallman Roofing operates out of Hickory NC and Wilmington NC. All quotes are provided within 24hrs and there are no sales pitches appointments needed unless requested. All installations are supervised and our work carries a 10 year labor warranty. We offer Roof Replacement, Roof Repair, New Home Roofing, Emergency Roofing Repairs, Metal Roofing, Vinyl Siding, Hardie Siding, Cedar Siding and Wood Siding. Call us today for a free quote.

Piedmont Metal Roofing
(828) 465-0054 www.piedmontmetalroofing.net
Serving
4.7 from 34 reviews
We are a local contractor that specializes in metal roofing. Having over 40 years of experience we have seen all types of roofs. Just give us a call for a free quote today.
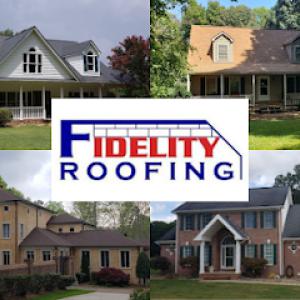
Fidelity Roofing
(828) 708-7663 www.fidelityroofing.net
Serving
4.9 from 269 reviews
𝐅𝐢𝐝𝐞𝐥𝐢𝐭𝐲 𝐑𝐨𝐨𝐟𝐢𝐧𝐠 𝐈𝐧𝐜., a 𝐭𝐫𝐮𝐬𝐭𝐞𝐝 𝐫𝐨𝐨𝐟𝐢𝐧𝐠 𝐜𝐨𝐧𝐭𝐫𝐚𝐜𝐭𝐨𝐫 in 𝐍𝐞𝐰𝐭𝐨𝐧, 𝐍𝐂, offers expert 𝐫𝐨𝐨𝐟 𝐫𝐞𝐩𝐥𝐚𝐜𝐞𝐦𝐞𝐧𝐭, 𝐫𝐨𝐨𝐟 𝐫𝐞𝐩𝐚𝐢𝐫, and 𝐬𝐭𝐨𝐫𝐦 𝐝𝐚𝐦𝐚𝐠𝐞 𝐫𝐞𝐩𝐚𝐢𝐫. We 𝐢𝐧𝐬𝐩𝐞𝐜𝐭, 𝐦𝐚𝐢𝐧𝐭𝐚𝐢𝐧, and 𝐢𝐧𝐬𝐭𝐚𝐥𝐥 all 𝐭𝐲𝐩𝐞𝐬 of 𝐫𝐞𝐬𝐢𝐝𝐞𝐧𝐭𝐢𝐚𝐥 𝐫𝐨𝐨𝐟𝐢𝐧𝐠 𝐬𝐲𝐬𝐭𝐞𝐦𝐬. As 𝐩𝐫𝐞𝐟𝐞𝐫𝐫𝐞𝐝 𝐢𝐧𝐬𝐭𝐚𝐥𝐥𝐞𝐫𝐬 of 𝐎𝐰𝐞𝐧𝐬 𝐂𝐨𝐫𝐧𝐢𝐧𝐠 and 𝐌𝐚𝐬𝐭𝐞𝐫 𝐀𝐩𝐩𝐥𝐢𝐜𝐚𝐭𝐨𝐫𝐬 of 𝐂𝐞𝐫𝐭𝐚𝐢𝐧𝐓𝐞𝐞𝐝 𝐬𝐲𝐬𝐭𝐞𝐦𝐬, we serve 𝐇𝐢𝐜𝐤𝐨𝐫𝐲, 𝐂𝐨𝐧𝐨𝐯𝐞𝐫, 𝐌𝐨𝐨𝐫𝐞𝐬𝐯𝐢𝐥𝐥𝐞, 𝐍𝐂, and nearby areas.
Moses Roofing & Decks
1987 August St, Conover, North Carolina
5.0 from 1 review
Family owned & Operated Licensed & Insured Over 100 years of experience!!!
Rooftek
2194 Emmanuel Church Rd A, Conover, North Carolina
5.0 from 1 review
Roofing and Construction Contractor
A Plus Roofing - Hickory
(828) 851-6440 aplusroofingnc.com
Serving
5.0 from 152 reviews
A Plus Roofing, established in 2021, offers high-quality residential and commercial roofing installation and repair services in Hickory, NC and surrounding areas. Our skilled team specializes in standing seam metal roofs and shingle roofs, ensuring durability and longevity for your property. We provide seamless gutter installations, repairs, and replacements, along with reliable gutter guards to prevent debris accumulation. When storm damage strikes, A Plus Roofing responds quickly—arriving at your doorstep the next day after you contact us. Experience exceptional customer service and unparalleled roofing solutions that prioritize both satisfaction and efficiency.
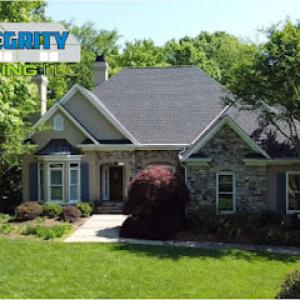
Integrity Roofing
(828) 448-0855 integrityroofingnc.com
Serving
4.8 from 254 reviews
We provide complimentary roofing quotes and inspections for homeowners and property owners in NC. Our services cover residential and commercial roofing, including asphalt, metal, slate, and flat roofing systems. Additionally, we offer roof maintenance, power washing, siding, and gutter services. As a locally owned and operated business, we pride ourselves on delivering quality service and are A+ accredited by the BBB.
Providence Roofing Hickory
(704) 883-6052 providenceroofs.com
Serving
4.9 from 83 reviews
Based in the heart of Hickory, North Carolina, Providence Roofing is a veteran-owned and operated company built on a foundation of integrity and craftsmanship. We provide a full range of services for homes and businesses in the Hickory area along with all of Catawba, Burke, Alexander, and Caldwell counties. Specializing in roof replacements, repairs, and inspections. Our team is committed to delivering exceptional quality with every project, using premium GAF Timberline HDZ shingles and offering comprehensive warranties for lasting protection. From storm damage to new builds, our crews ensure a seamless and professional experience from start to finish.
MBA Roofing of Hickory
Serving
4.9 from 129 reviews
MBA Roofing proudly serves the Hickory area with expert residential and commercial roofing and gutter solutions. As an Owens Corning Platinum Preferred Contractor, we provide top-tier workmanship, materials, and service—whether it’s a repair, replacement or new build.
Conover Construction & Roofing
(828) 304-0103 conoverroofing.com
Serving
5.0 from 7 reviews
Serving the commercial roofing needs of Hickory, NC and the surrounding areas since 1995.
Conover's humid subtropical climate accelerates algae staining, moisture retention, and heat aging on roof surfaces, making ventilation and underlayment choices especially important for long-term performance. In this area, summers push roof temps high and humidity keeps moisture in the attic longer, which can magnify any small defect in insulation or airflow. A roof that breathes well and wicks away moisture during the muggiest months helps prevent premature deterioration and keeps upstairs living spaces cooler. When planning a new roof, think beyond the surface material to how the system behaves with the local humidity and strong seasonal storms.
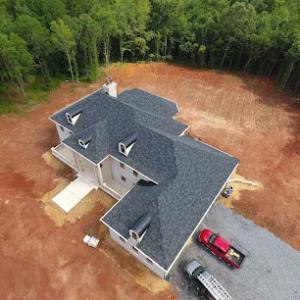
Asphalt shingles and metal roofing are the most practical mainstream choices locally. Asphalt shingles offer straightforward installation, a broad selection of colors, and good life expectancy when paired with a solid ventilation plan and a proven underlayment. In a wet, hot climate like this, ensuring a sealed, breathable underlayment and a reliable drip edge helps manage moisture movement from the roof deck into the attic. Metal roofing, on the other hand, stands up well to wind and hail events common after Piedmont storms. A well-installed metal roof can shed heat more efficiently and reflect more sun, which helps reduce attic temperatures. For homes with limited roof slope or existing structures not built to carry heavy tile, metal provides a practical, durable alternative that still preserves curb appeal.
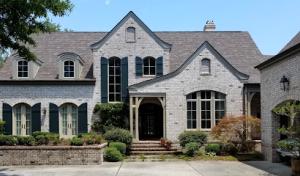
Clay tile and concrete tile appear less often here because they add weight and cost that do not match most area housing stock. If a home has the structure to support tile and the budget aligns, tile can offer excellent weather resistance and a long service life. However, consider the extra roof load, the need for a reinforced framing plan, and potential attic heat gain. Tile systems also demand careful installation details for underlayment and flashing to avoid vulnerability during heavy storm cycles. In short, tile can be a solid option for suitable homes, but it is not the default path for most Conover residences.
Wood shingles and shakes face added maintenance pressure in this part of North Carolina because repeated summer humidity and rainfall increase the risk of moisture-related deterioration compared with drier climates. If choosing wood, look for treated shakes or shingles with rot-resistant finishes and ensure a robust ventilation strategy to keep the deck dry and minimize warping. Synthetic or composite shingles offer a middle ground: they mimic the look of traditional materials while often delivering better moisture resistance and faster installation. For many homeowners, these options provide a practical compromise between aesthetics, performance, and maintenance in the humid climate.
Regardless of material, prioritize a strong ventilation plan, a high-quality underlayment, and proper flashing details to handle heavy rains and wind. Algae resistance matters in this area, so consider shingles or coatings with algae-resistant properties or reflective granules to curb staining. Inspecting the attic for signs of moisture accumulation after storm season helps catch issues early. With Conover's mix of storm exposure and summer humidity, a well-ventilated, moisture-aware roof system delivers the best balance of performance and value over time.
In Conover, pricing doesn't sit still. After a Piedmont wind or hail event, the local market lights up with demand, and re-roofing crews scramble to fit the surge. That spike tends to push lead times and drivetrain costs higher for a couple of reasons: more roofs to replace means tighter scheduling across Catawba County, and crews may need to mobilize sooner, sometimes with less flexibility on material choices. If you're facing an insurance-triggered project, expect a faster-than-average pace once a claim is approved, but also be prepared for possible price shifts if the storm arrives during peak season or when multiple storms hit in quick succession. In this market, it's common to see decking inspect-and-repair needs surface during tear-off, which can ripple into the overall timeline and budget.
Humid summer weather isn't just uncomfortable; it reveals hidden deterioration once the old roof is torn back. Rough decking inspection is part of the local replacement process, and damp conditions can expose wood rot or other issues that weren't visible before. This means you should expect a potential bump in cost and scheduling if decking repairs are required. A thorough contractor will itemize decking work separately, so you can see exactly what's being replaced and why. That transparency matters in Conover, where a number of homes have older, weathered roofs with deck layers that aren't up to the load once the new covering goes on. Plan for a contingency in your project budget for decking repairs, especially if the roof is being replaced after a significant wind or hail event.
Material choice in this market ranges from asphalt shingles at 350 to 800 USD per square, metal at 600 to 1100, clay tile at 1200 to 2400, concrete tile at 1000 to 1800, wood shingles or shakes at 800 to 1400, and synthetic or composite shingles at 450 to 900. The spread reflects both current supply dynamics after storms and the practical realities of installation teams in this region. Asphalt remains the most budget-friendly option for many Conover homes, but if you're weighing long-term resilience against the humid climate and potential wind exposure, metal or synthetic options can offer better performance without skyrocketing costs. Clay or concrete tile brings long life and strong wind resistance but comes with higher upfront costs and a heavier roof load - something to verify with the existing structure. In practice, homeowners often start with the budget floor for shingles and then layer in decking repairs and any necessary underlayment upgrades as dictated by the roof's condition after tear-off. In storm-affected periods, the cost delta between a basic replacement and a premium system can widen quickly if expedited scheduling compresses labor windows or if material shipments are delayed. Consider how your chosen material aligns with both today's budget and expected durability through several seasons of Piedmont weather.
Get a clear picture of your project costs upfront - no commitment required.
A full roof replacement in Conover typically requires a building permit, with the contractor usually handling the application through the City of Conover or Catawba County building department depending on jurisdiction. Before any shingles get lifted, confirm that your contractor has current credentialing and is familiar with the local permitting workflow. The permit process isn't just a checkbox; it affects inspection timing, required setbacks, and how the project communicates with the county's storm-damage response track during insurance-driven re-roofs after wind and hail events. Keeping the permit status clear helps prevent delayed refunds or unexpected hold-ups if an insurance adjuster visits.
Inspection sequencing commonly includes a rough decking stage before the roof is fully covered and a final inspection after completion, so scheduling must account for municipal availability. The rough decking check ensures the underlying plywood or oriented strand board is properly secured, ventilated, and free of moisture damage before shingle installation proceeds. After the roof is fully decked and underlayment is in place, the next milestone is the roof-covering inspection, which confirms proper nailing patterns, ventilation, drip edge installation, and weatherproofing details. Finally, the final inspection verifies overall workmanship, flashings, chimney and vent terminations, and any necessary repairs identified during earlier inspections. The sequence matters not only for code compliance but also for keeping insurer documentation aligned with the project's actual progress.
Inspection timing in Conover can shift because of weather delays and department workload, which matters in a city where frequent rain can already compress roofing calendars. Heavy rain or moisture can stall decking and underlayment work, pushing subsequent inspections back. Plan contingencies for short weather windows and coordinate with the building department about the earliest available inspection slots. If a delay occurs, your contractor should proactively reschedule the required inspections rather than letting the project drift. In insurance-driven projects, timing is especially critical, as adjuster timelines may hinge on documented inspection milestones and the permit status. Keeping a transparent log of inspection dates, permit numbers, and the inspector's notes helps maintain consistency across the project, the insurer, and the contractor.
Ask the contractor to flag any weather-related risks to the permit timeline in advance and secure written approval for temporary protective measures when inspections are postponed. Maintain clear communication with the building department about occupancy or staging areas if the job site interferes with nearby driveways or utilities. If a wind or hail event triggers expedited reviews, confirm whether the department allows expedited services and what documentation is required to avoid last-minute scrambling. By aligning permit tasks, inspection milestones, and weather realities, the re-roof process proceeds with fewer surprises and a clearer path to code compliance.
In this area, roof claims tied to wind and hail are common enough that documentation quality can directly affect claim handling. Carriers may vary in how they evaluate storm exposure, so keeping a clear, date-stamped trail helps establish what happened and when. A homeowner should treat the roof as part of a storm event, not a vague aging issue, to avoid delays or disputes during claim review.
Start with a simple, dated photo log that shows the roof before any work, during the process, and after completion. Taken from multiple angles, these images should capture missing shingles, granule loss, and flashing conditions. Notes from the adjuster should be copied and stored alongside photos, with questions or discrepancies highlighted in writing. Build a written scope that clearly separates storm damage from age-related wear; this distinction helps prevent misclassification and pended claims when inspect-and-repair decisions are made by adjusters.
Because many local jobs rely on insurance funding, expect requests for before-and-after images as part of the claim file. Before work begins, collect high-resolution shots of the entire roof, attic indicators like ridge vent conditions, and interior signs of weather exposure around ceilings or walls. After roofing is complete, photograph the finished system from all sides, including close-ups of new flashing and vent boots. Keep these images organized by date and linked to the corresponding claim number for easy reference during any follow-up inquiries.
Keep a written record of every inspection note, including dates, the names of involved parties, and any recommendations. If an adjuster documents wind or hail exposure, compare those notes with your own photos and scope. When a contractor's assessment or proposed scope differs from the insurer's interpretation, you'll have a concrete comparison to guide discussions and potential negotiations. The clearer the documentation, the smoother the claim flow and the faster the re-roof can proceed.
Store all claim-related materials in a dedicated, organized folder-digital copies with time-stamped backups are ideal. Maintain an index that ties photos, adjuster notes, scopes, and any communication with the insurer to a single root claim number. Should a second storm event occur, this organized archive helps distinguish existing damage from new issues, reducing confusion during re-inspection and potential coverage questions.
Connect with contractors who help homeowners navigate the claims process from damage assessment to final approval.
Northwest Roofing
(844) 766-3762 northwestroofingnc.com
Conover, North Carolina
5.0 from 122 reviews
Iredell Roofing & Gutters
(828) 994-7379 www.iredellroofs.com
805 Conover Blvd W, Conover, North Carolina
4.9 from 42 reviews
Although this area is primarily a pitched-roof market, some homes and mixed-use buildings still have low-slope sections where standing water and seam failures become more noticeable during repeated spring rain. In these spots, water can creep along seams between panels or under flashings that aren't designed for prolonged wet periods. The consequence is not just dampness on the ceiling but faster deterioration of sealants and subtle mold growth in attic spaces if leaks aren't caught early. If a low-slope area shows any bubble, ripple, or staining after a heavy shower, inspect the seam edge where panels meet and where the roof meets the parapet or parapet-cap details. Over time, repeated wet cycles can loosen fasteners and widen seam gaps, creating a slow drip that goes unnoticed until interior damage becomes visible.
Skylight leak complaints in this region often become visible during prolonged wet periods rather than only during single downpours, making flashing condition a key inspection point. In Conover's climate, the sky window frame endures seasonal humidity swings that can cause the sealant around the skylight to lose elasticity or fail entirely. Look for corrosion on metal flashings, hairline cracks in the sealant bead, or discoloration along the interior edge where the skylight frame meets the roof. A skylight that looks tight in dry months can still develop leaks after a long storm due to swollen shingles pressing against the frame and compromised flashing. For ongoing reliability, check the alignment of the skylight with the surrounding roofing plane and ensure that the flashing apron and counter-flashing are properly interlocked with any chimney or vent flashings nearby.
Humidity and repeated wet-dry cycles in the western Piedmont can make older sealants and flashing details fail sooner around roof penetrations than homeowners expect. Around vents, plumbing boots, and roof-to-wall transitions, the combination of moisture, temperature swings, and aging can cause sealant to lose adhesion and flashings to curl or lift. In practice, inspect these points after heavy rain and again after several dry days; look for darkened roofing fibers near penetrations, corroded nails, or gaps at the base of step flashings. If any feature appears suspect, address the flashing and reseal with materials rated for high-moisture environments. Delays in remedy can permit interior water intrusion that compounds attic insulation and sheathing damage.
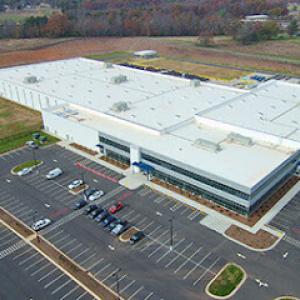
Find specialists in TPO, EPDM, and built-up flat roofing systems for residential and commercial properties.
Northwest Roofing
(844) 766-3762 northwestroofingnc.com
Conover, North Carolina
5.0 from 122 reviews
Storm-driven re-roofs are common after Piedmont wind and hail events, so timing and tidiness carry real weight. The local market shows a strong preference for specialists who can start promptly, protect the interior during work, and leave the site broom-clean at day's end. Homeowners often hire after storms, so a contractor's ability to schedule promptly and tidy up after each visit is as important as the initial roof install itself.
Established and family-run contractors have a visible presence in the area, and that matters when punch lists or warranty items come up. Look for a company with a steady, local team that can return for touch-ups without hesitation. Prioritize residential re-roof experience over purely high-end renovations. While manufacturer-certified options exist locally, they are not the deciding factor; responsiveness, affordability, and proven re-roof know-how win more often in Conover's market.
Request a written, itemized proposal and ask for a timeline that aligns with weather windows typical to summer humidity and storm season. Insist on a clear plan for protecting landscaping, drainage, and entryways, plus daily cleanup expectations. Call references, especially for projects completed after storms, and probe how issues were handled-delivery delays, missing materials, or warranty follow-up. If a contractor can explain their process in plain terms and commit to specific cleanup standards, that's a strong signal you've found a reliable local partner.
Consider the long game: a contractor who stands by their work with a straightforward warranty and a simple path to address punch-list items will save headaches later. Ask who handles warranty service, what is covered, and how quickly any post-install concerns are addressed. In this market, a dependable crew that can return for a timely warranty visit often outweighs the lure of a marginally lower up-front price.