Last updated: Apr 19, 2026
Canfield roofs endure repeated freeze-thaw cycling that quietly widens small defects in shingles, flashing, and masonry-adjacent areas long before spring arrives. Those tiny cracks and micro-leaks may not show up as dramatic failures, but they quietly erode the roof's protective layers and create vulnerable spots for wind-driven rain and ice buildup. When temperatures swing from cellar-cold to sun-warmed, moisture penetrates every seam and fastener, then freezes again, pushing apart fasteners and loosening sealants. The result is a higher risk of accelerated aging, accelerated granule loss on asphalt, and more persistent leaks once the warm rains begin. Those early signs are your warning: don't wait for a loud drip or a sagging edge to act.
Variable spring and fall storms in the area shape when a roof will be stretched to its limit. You'll notice that often the window for effective repairs or replacement tightens around unsettled weather patterns. A windy, hail-laced afternoon can bend flashing, shove shingles out of alignment, and drive water into attic spaces before you even realize what happened. In those moments, small, affordable fixes-ridge vent resealing, loose shingle reattachment, or flashing readjustment-can stop a cascade of damage. The longer you let a suspected issue sit, the more likely you'll confront a larger, more expensive repair that interrupts your life during a storm season. Planning for the right moment, not the first sunny day, is crucial here.
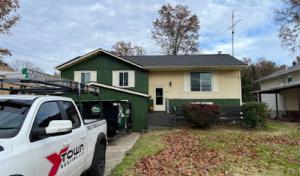
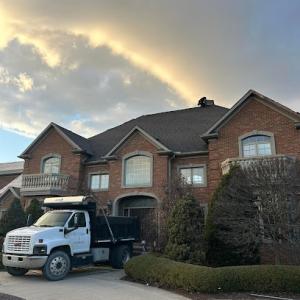
Emergency repairs, storm damage, and insurance claims are among the most common requests seen in this market. Homeowners often discover that what looks like a simple shingle lift after a heavy gust hides hidden rot, compromised underlayment, or vent line damage that only becomes evident with a more thorough inspection. The practical takeaway: when a storm has passed, schedule a professional roof check as soon as possible. A quick assessment by a trusted local contractor can separate the immediate, fixable patchwork from the larger, more durable solution your home needs to withstand future cycles. If an active leak is present, don't delay-temporary measures to divert water while arranging a proper repair can minimize interior damage and reduce further exposure to the winter wear cycle.
Start with a careful walk around the house after each significant storm or strong wind event. Look for lifted edges, loose flashing near chimneys or vents, and granule loss in visible areas. If you see any shingles cupping, cracking, or curling, treat it as a red flag rather than a cosmetic issue. Pay attention to flashing at walls and chimneys, where ice damming and water entry often begin. Document all findings with photos and note dates and conditions; this will smooth the way for any insurance conversation and help a contractor prioritize work. When a repair is needed, prioritize fixes that restore a continuous, weatherproof barrier-seals around penetrations, proper flashing corners, and secure underlayment where exposed. Proper ventilation and attic moisture control can also dramatically extend roof life through a difficult Canfield winter.
A local roofing professional will assess both the visible surface and the underlying structure for signs of freeze-thaw damage. Expect them to check decking integrity, underlayment condition, flashing continuity, and venting adequacy. They'll also evaluate how recent storm activity may have affected the roof's sealing and overall performance. The aim is to identify conditions that could worsen with the next freeze-thaw cycle and to prescribe repairs that prevent recurrent problems rather than offering a one-off patch. In Canfield, timely action after storm events and as warmth returns can preserve your roof's life, reduce future risk, and keep interior spaces dry during the most volatile seasons.
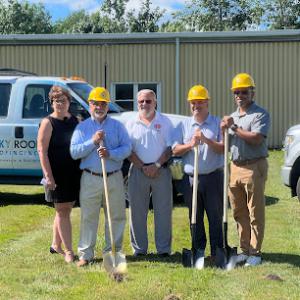
Aim Roofing & Construction
(330) 533-0291 aimroofingandconstruction.com
8575 S Salem-Warren Rd, Canfield, Ohio
4.6 from 82 reviews
AIM Roofing & Construction provides dependable, trustworthy services to homes and businesses throughout the Tri-County Area. We specialize in a number of exceptional construction services aimed at improving the exterior of your home or business, and much more. Our services include: Maintaining residential roofing systems Installing new roofing systems Expert siding product installation New window installation Custom deck construction Rain gutter and rain gutter guard installation Inspections for insurance claims processing.
A & J Roofing & Siding
550 E Main St #4, Canfield, Ohio
4.5 from 113 reviews
A & J Roofing and Siding provides Commercial and Residential roofing, siding, and gutter installations and repairs to Youngstown, Cleveland, Pittsburgh, Sandusky, Toledo, Columbus and all surrounding areas.
Sky Roofing
(330) 702-8000 www.skyroofinginc.com
5071 W Western Reserve Rd, Canfield, Ohio
4.4 from 59 reviews
Sky Roofing is celebrating 25 years of offering the best service under the sky to commercial and residential customers in Ohio and surrounding states. Family owned, Sky Roofing has four offices across Ohio. These offices are in Canfield, Cleveland, Cincinnati and Columbus.
Blair Roofing
Serving
4.9 from 8 reviews
Formerly known as World’s Greatest Roofing At Blair Roofing, we strive to do beautiful work, done the right way. We use quality materials from local suppliers and install to manufacturers requirements. We are professional, fully insured and bonded. Certifications Certainteed Master Shingle Applicator Wizard Certainteed Flintastic Applicator Certainteed Shingle Quality Specialist Lomanco Ventilation Certified

Cover Pro Construction
(330) 509-5617 coverproroofing.net
Serving
5.0 from 199 reviews
Our desire at Cover Pro Roofing , LLC is to deliver work you can feel good about. You work hard for your money and we want you to have the confidence of knowing your money is well spent. Our roofing contractor stands behind our work and provides a 5yr. workmanship warranty to prove it. We handle both residential and commercial roofing which includes roof replacements, roof repairs, roof inspections, flat roofing, gutter installations, and chimney masonry work when needed. We are proud to be 100% recommended on HomeAdvisor and we believe that satisfied customers are our best advertisement. Call us for more info or to schedule a free estimate.

DiazRoofing
(330) 531-1296 diazroofing.info
Serving
4.9 from 42 reviews
“DiazRoofing is a top-rated residential and commercial roofing contractor serving Youngstown, Akron, and all of Summit, Mahoning, Trumbull, and Columbiana counties. We specialize in roof replacement, storm and wind damage inspections, metal roofing, shingle roofing, and full insurance claim assistance. Our team installs premium systems including Owens Corning, Tamko Titan XT, and Conklin commercial coatings. We offer same-day estimates, emergency tarping, and fast, reliable service for homeowners and property managers. If you need a trusted roofing company in Akron or Youngstown, DiazRoofing delivers quality, speed, and unbeatable customer care.”
Boak & Sons
(330) 366-1415 www.boakandsons.com
Serving
4.8 from 160 reviews
Boak & Sons uses cutting edge technology, equipment and expert service in each commercial and residential service department, which helps us provide the highest quality service. We specialize in the premium installation of roofing, insulation, siding, gutters, and sheet metal for commercial and residential projects. As a local company, we use in-house crews to complete on-site installations for projects from Cleveland, Ohio to Pittsburgh, Pennsylvania. This allows us to focus on providing an exceptional exterior contracting experience all across northeast Ohio and Western Pennsylvania.
Revival Contracting
(330) 518-5665 revivalcontractingco.com
Serving
5.0 from 104 reviews
Revival Contracting provides expert roof repair in Youngstown, OH. As a trusted roofing contractor, we specialize in roof replacement, residential roofing, and commercial roofing projects. Our team works with shingle roofing, flat roofing, metal roofing, and aluminum roofing to ensure long-lasting protection for your property. We also provide professional gutter and siding installation. Serving Youngstown, Austintown, Canfield, Boardman, Poland, Niles, North Jackson, and Liberty, we are committed to quality workmanship and top-tier materials. Whether you need roofing repair, siding services, or complete exterior upgrades, Revival Contracting is your reliable partner for residential and commercial projects across Northeast Ohio.
M&J Roofing & Home Improvements
(330) 799-6980 mandjroofingllc.com
Serving
4.8 from 35 reviews
M&J Roofing and Home Improvement is a family-owned business that has been providing reliable roofing services to the local area of Mahoning County in Ohio for over 40 years. Our experienced team is committed to providing the highest quality workmanship and customer service. We are licensed and insured, and strive to make sure all of our customers are satisfied with our services.
New Harvest Construction
(330) 662-5138 www.newharvestroofing.com
Serving
5.0 from 13 reviews
New Harvest Construction provides roofing replacements, gutter installations, interior and exterior paint services, and other home improvement services to Youngstown, OH, and surrounding areas.

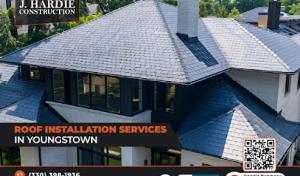
J Hardie Construction
(330) 398-1936 jhardieconstruction.co
Serving
4.9 from 55 reviews
We have a well-earned reputation as the most notable roofing contractor in Youngstown, OH, delivering top-notch services that meet the diverse needs of our clients. With a reputation built on integrity, quality, and reliability, we handle all aspects of roofing projects. From new installations to complete replacements, our professionals use the finest materials to ensure long-lasting durability and superior aesthetics. Moreover, hiring us for timely and effective roof repair in Youngstown, OH, can keep your roof in top condition. Whether it's a small leak, missing shingles, or significant storm damage, our team's expertise ensures efficient repairs that restore your roof's functionality and integrity.
The Roof Troops
(330) 787-2213 therooftroops.com
Serving
5.0 from 2 reviews
Protect your largest investment with our reliable roofing services. We are a locally owned and operated roofing company currently serving Youngstown, OH and surrounding communities. If you want to make your roof last as long as possible, it is vital that you never put off a roof repair. Small issues with roofing become big issues in a hurry. No matter how major or minor the repair you need, we are here to help. We offer roofing contracting, siding installation, and roof repair.
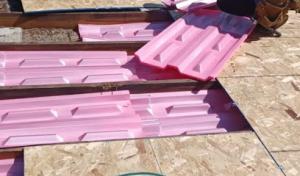
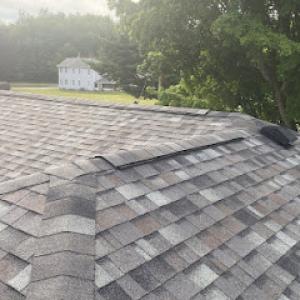
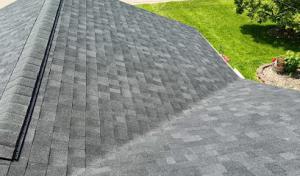
Typical Canfield pricing runs about $350-$700 per square for asphalt shingles. This remains the most common choice for homes here, balancing upfront cost with reliable wind resistance and a straightforward install. In practice, a straightforward tear-off and replacement tends to stay near the lower end, but storm activity and scheduling quirks in spring can push prices upward if crews stack jobs or if material lead times tighten after big storms. If your home has a relatively standard roof line with no special ventilation or structural changes, you'll often see faster turnaround and steadier pricing, which is why asphalt shingles stay the practical workhorse for most Canfield repairs and replacements.
For metal, Canfield pricing runs $550-$1100 per square. Metal brings longevity and energy efficiency, which can pay off over time in this climate, where freeze-thaw cycles and midseason storms stress the roof. The higher end of the range can appear when the roof is complex, requires hidden fasteners, or there are bonus features like standing-seam systems. When a winter storm loosens or damages multiple homes in a neighborhood, labor scheduling can become tight, and that competition for crews may push quotes toward the upper end for a few weeks. If you're replacing on a smaller scope or with a simple slope, expect the lower end of the range.
Clay tile runs $900-$1700 per square in Canfield. This material suits homes with a historical look or strong curb appeal, but it comes with weight and fragility considerations that can complicate installation in freeze-thaw zones. A backlogged spring or fall rainy window can extend project timelines, affecting both price and scheduling. Tile roofs often require careful detailing around penetrations and vents, potentially increasing the complexity beyond a straightforward tear-off. If your structure needs reinforcement or a venting upgrade, costs can drift toward the higher end as specialty trades are brought in.
Concrete tile is estimated at $750-$1300 per square here. It offers a middle ground between weight, durability, and price. In Canfield, concrete tile installations may become more expensive during busy fall rain periods or spring storm backlogs, when crews are juggling multiple projects and material supply lines. A standard tear-off with a straightforward substrate typically sits near the lower portion of this range, but any additional work-like reinforcing existing decking or adding underlayment upgrades-can push totals up quickly.
Synthetic or composite shingles run $450-$900 per square locally. They can mimic the look of slate or wood while delivering easier maintenance and lighter weight. In Canfield, these options often hit a favorable balance during shoulder seasons when demand for skilled carpenters and shingle specialists spikes after winter storms. If you choose a premium profile or enhanced wind rating, prepare for the higher end of the band, but you'll still generally find a predictable, value-driven option compared to natural variants.
Slate sits at $1100-$2300 per square in this market. Slate roofs reward with lasting performance but demand careful handling and specialized installation. In weather-dependent Canfield seasons, scheduling can be challenging when storms arrive or forecasts shift, which may push projects into tighter windows and influence price quotes. If you're upgrading to slate with any structural changes, expect a more complex process that can extend timelines and elevate the overall cost.
A full roof replacement typically requires a permit handled by the Canfield Building Department. The permit process is not a formality; it tracks full replacements, structural changes, venting work, and debris disposal. Before any new shingles go on, you or your contractor should file the permit application, have the plan reviewed if required, and wait for approval to proceed. In Canfield, the department closely watches how the old roof is removed and how the new system is vented and fastened, especially after freeze-thaw cycles.
Reroofing in this area isn't treated as a no-contact administrative approval. On-site inspections are commonly used during and after roofing work to confirm compliance with code, venting, and proper disposal. Expect at least a mid-project check to verify soffit, ridge vents, and attic insulation details, and a final inspection once the job is complete. Your contractor should schedule these through the Building Department, and you should be prepared to address any noted corrections on the spot to keep the project moving.
Permit approval in Canfield is tied to proper disposal of old roofing material. Debris containment matters: those piles of old shingles, nails, and underlayment need a plan for containment, transport, and final disposal. The department will look for clean disposal bags or bins, covered containers, and a documented cleanup plan. During and after storms, debris management also ties into the permit record, so keep receipts and photos as proof of compliant disposal.
Some jobs require plan review when structural or venting changes are involved. If your project includes upgrading decking, altering roof structure, adding or repositioning vents, or changing attic insulation or ventilation strategy, expect a formal plan review. This step helps ensure that the roof system will perform under Canfield's freeze-thaw conditions and storm patterns, and that venting aligns with attic moisture management requirements.
Coordinate closely with your contractor to align permit timing, inspections, and debris disposal. Have a clear communication trail with the Building Department in case an inspector flags a detail. After the final inspection, keep the approved permit card and any amendments as part of the home's records for future maintenance and potential insurance review. In Canfield, this documentation supports a smooth post-work transition through the winter and reduces the chance of rework due to compliance gaps.
When a storm rolls through Mahoning County and the damage is visible, you face the double challenge of nature and paperwork. In Ohio, insurers commonly want documentation of roof age and condition, which matters in Canfield when homeowners are filing after hail or wind events. That means your best move is to have a current, professional assessment ready shortly after the storm. Photos alone can help, but a written roof-age determination and condition note from a qualified roofer can make the difference when the adjuster sits across from you.
After storms affecting the Canfield area, adjusters may request photos and a professional roofing estimate, making early documentation especially important when contractor schedules tighten. Take wide shots of all elevations and close-ups of fasteners, flashing, and any signaling damage like dented shingles or lifted edges. A dated record written by a roofer-confirming the roof's age, last re-cover or major repair, and current venting or decking state-helps establish a baseline for what the claim should cover, rather than what an adjuster might assume.
Some carriers are more selective with older roofs or certain materials, so Canfield homeowners with aging systems may face coverage limitations even before visible storm damage becomes severe. If the roof is near the end of its expected life or uses options such as slate or concrete tile, expectations should align with the reality that coverage could be narrower. In such cases, you'll want clear documentation of any preexisting issues, prior repairs, and recent maintenance so the claim can be evaluated on the current condition rather than age alone.
Storm windows in Canfield can compress the time you have to respond to an adjuster's requests. Keep a centralized file with storm date, photos, the professional estimate, and the roofer's notes. When requests come in, you'll be ready to reply promptly, reducing back-and-forth and helping the claim move toward a timely resolution.
Connect with contractors who help homeowners navigate the claims process from damage assessment to final approval.
Aim Roofing & Construction
(330) 533-0291 aimroofingandconstruction.com
8575 S Salem-Warren Rd, Canfield, Ohio
4.6 from 82 reviews
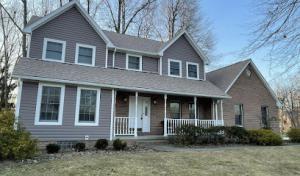
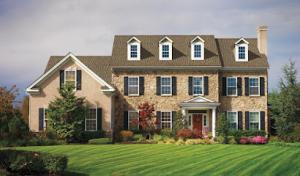
In this area, asphalt shingles and metal roofing dominate practical choices due to their balance of performance and cost. You'll also encounter slate, clay, concrete, and synthetic products, but those stay on the higher-cost side and are less common on the typical Canfield home. Understanding how each option handles the area's typical wear helps you pick a roof that lasts beyond the next winter.
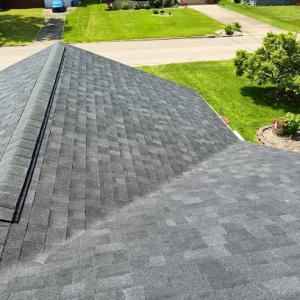
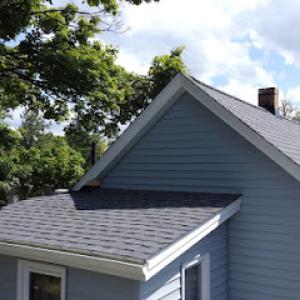
Canfield's pronounced freeze-thaw cycle makes water-shedding details a frontline concern. Roofs need reliable drainage edges, well-seated flashing around chimneys and vents, and continuous sealant lines that won't crack with repeated freezing and thawing. Whatever material you choose, ensure the installation emphasizes accurate shingle alignment, robust drip edges, and proper valley and ridge detailing. A small water entry point left unchecked can become a big problem after a cold snap.
Warm, humid summers can stress underlayment and slow the installation process if humidity spikes or rain interrupts an outdoor schedule. If you're leaning toward asphalt or metal, verify the underlayment choice supports Canfield's heat and moisture profile and that crews have a plan to manage roof deck drying between layers. For metal, confirm that panel seams, fasteners, and sealants are rated for high humidity and temperature swings to prevent fasteners from loosening or purlins from warping over time.
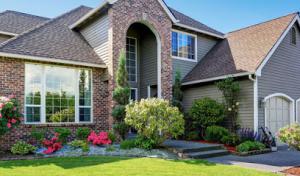
Asphalt shingles are a versatile match for many Canfield homes, with straightforward replacement paths if winds or hail nudge the roof's edge. Metal roofing offers enhanced wind resistance and longer life, but it requires precise flashing and panel alignment to maintain water-shedding efficiency through freeze-thaw cycles. If slate, clay, concrete, or synthetic options are pursued, plan for enhanced edge detailing and more frequent maintenance checks, since these heavier or more fragile choices place extra demand on structural support and attic ventilation.
Regardless of material, the installation quality defines long-term performance in this climate. Prioritize properly vented roofs to manage attic humidity in summer and to reduce condensation that can otherwise accelerate decking deterioration. Pay attention to flashing around penetrations and transitions, and set up a maintenance routine that reviews shingle or panel integrity after severe storms. A well-executed install with durable flashing and informed material selection delivers the best protection against Canfield's winter shocks and summer humidity.
Explore specialists in steel, aluminum, and standing seam metal roofs built to last 50 years or more.
Aim Roofing & Construction
(330) 533-0291 aimroofingandconstruction.com
8575 S Salem-Warren Rd, Canfield, Ohio
4.6 from 82 reviews
Sky Roofing
(330) 702-8000 www.skyroofinginc.com
5071 W Western Reserve Rd, Canfield, Ohio
4.4 from 59 reviews

Chimney-related work shows meaningful prevalence in the local contractor market, pointing to frequent homeowner concern where roofing meets masonry penetrations. If you notice staining, peeling interior paint, or musty smells near a chimney line, treat it as a sign to inspect rather than to assume. In Canfield, the combination of brickwork and roof deck edges creates a common weak point where flashing, mortar joints, and vent collars meet the roof plane. A small overlooked crack can become a big problem after a harsh winter or a heavy spring storm, so plan for a careful assessment whenever you're dealing with a roof refresh.
Freeze-thaw conditions in the Canfield area can worsen flashing and seal failures around skylights and chimneys, especially after winter moisture intrusion. Ice dam development and repeated freeze cycles push against sealant joints and metal flashings, nudging them loose or allowing tiny leaks to creep behind the shingles. Skylight curb flashings and chimney step-flashings are particularly vulnerable because they sit at the intersection of two different materials and a potential moisture trap. If you've got a dim, hazy skylight or a damp area around the chimney during warm spells, that's a cue to check the perimeter for hairline gaps and softened sealant.
Because inspections may involve venting-related review on some reroof projects, penetrations and roof accessories deserve closer planning than a simple shingle-only replacement. Vent stacks, attic exhausts, and chimney cricket or saddle installations should be coordinated with the roof replacement plan to avoid burying a lingering issue under new shingles. In practice, that means confirming whether sealant beads, flashing membranes, and counter-flashing have been upgraded or reseated during the project. If an inspector flags venting concerns, address them before finishing touches-even a small delay here can save downstream leaks and interior damage after the next heavy rain.
Find contractors experienced in skylight installation, flashing, and leak repairs to bring natural light into your home.
Sky Roofing
(330) 702-8000 www.skyroofinginc.com
5071 W Western Reserve Rd, Canfield, Ohio
4.4 from 59 reviews
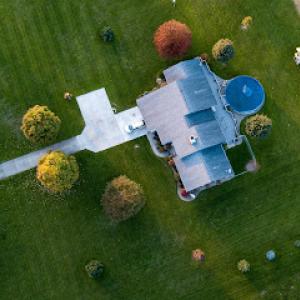
Flat and low-slope roofing is present but not dominant in the market, suggesting it remains a secondary concern compared with steep-slope residential reroofing. In Canfield, the freeze-thaw cycle, coupled with late-season snow events, can push edge flashings and transitions harder than you expect. When you see a detached garage or an addition, expect mixed-slope sections that demand careful inspection of flashing, absorption, and drainage paths. Treat any low-slope area as a potential leak source, even if it looks small from the ground.
Snow holdover and slower drainage during freeze-thaw periods can make low-slope sections more vulnerable to leak development than the main pitched roof. In the heart of winter, you may notice damp spots along interior walls near gutters or under eaves where meltwater backs up. Prioritize proper slope, adequate edge detailing, and robust membrane details at transitions from steeper to flatter sections. If a low-slope area shares a canyon between roof planes, ensure the fall line remains unblocked by debris or seasonal ice dams.
Detached garages, additions, and porch sections in Canfield area often create mixed-slope roof systems that need different materials and inspection attention on the same property. When planning repairs, verify compatibility between any patch sections and the primary roof, especially where venting, decouplers, or counterflashings meet. On older garages, look for sunken spaces at eave lines that can trap moisture. A proactive approach in inspection notes where slopes converge helps prevent small leaks from becoming bigger issues after a thaw cycle.
During clear days, walk the transitions between flat, low-slope, and pitched sections with a hand-held mirror to spot subtle membrane wear. Clean debris from drip edges and scuppers before storms, and seal any compromised seams promptly. When a storm hits, monitor for sudden changes at garage or porch connections, because mixed-slope zones tend to reveal trouble first.
Find specialists in TPO, EPDM, and built-up flat roofing systems for residential and commercial properties.

Winter snow and freeze-thaw cycles in Canfield can slow tear-offs and impact installation quality. If a cold spell hits, crews often shift to emergency stabilization rather than full replacement until conditions improve. That means planning a project for the coldest months may involve shorter workdays, frost-heave checks, and more frequent weather pauses. If your roof is significantly damaged or you're navigating siding and attic stabilization, expect some work to focus on temporary safety measures rather than a full, uninterrupted replacement. Scheduling during a dry spell in late winter or early spring can help crews complete the project more efficiently while still addressing urgent damage.
Spring brings a mix of wind-driven storms and hail that can drive insurance activity and demand for roof work upward in a hurry. Even homeowners who had a replacement on the calendar can find lead times extended as local crews respond to a surge. In this season, accurate measurements, documentation for claims, and material availability become critical. If you anticipate filing an insurance claim, coordinating with your contractor early in spring helps align inspection timelines, coverage approvals, and shingle delivery slots before peak demand hits. Expect possible fluctuations in schedule as crews balance weather days with project milestones.
Fall rain and shorter daylight hours in Canfield can compress project timelines as the window to complete before winter narrows. Storm deliveries, windy days, and early dusk can push crews to accelerate certain phases, potentially affecting sequencing and ventilation work checks. If you want to finish before winter, start conversations with a contractor in late summer or early fall and set a realistic phased plan that accounts for weather interruptions, debris management, and attic venting checks. A well-structured fall schedule helps avoid last-minute delays when cold compares with wind-driven seasonal shifts.
Get a clear picture of your project costs upfront - no commitment required.