Last updated: Apr 19, 2026
Spring in Clover can hit hard and fast. Frequent spring storms bring heavy rainfall and wind that expose weak spots and reveal leaks you didn't notice during the dry days. The risk ramps up quickly when gutters clog, shingles curl, or attic insulation shifts under pressure. When those sudden leaks hit, the clock starts ticking toward further interior damage, mildew, and higher repair costs. Stay ready to respond within hours, not days, and keep a clear plan for post-storm inspection, temporary fixes, and a solid game plan for when insurance involvement becomes necessary.
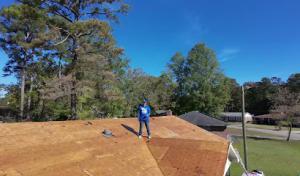
The crucial first move after a wind-blown rain is to locate the source of the leak and prevent additional damage. If water is actively dripping, place a bucket under the stream and move valuables away from the water path. Use a tarp or plywood to cover a visibly damaged area only if you can do so safely from the ground or with a ladder stabilized by a partner. Do not crawl onto a damaged roof during a storm unless you are trained and equipped; a fall or slipping on a slick surface can compound the risk. In Clover, many homes sit under mature trees that shed branches during wind events, creating hidden punctures or blown-off shingles that can fail silently for hours before a noticeable leak shows up inside.
Document everything the moment it happens. Take timestamped photos of shingles damaged by wind, granule loss, or missing flashing, and photograph interior staining at multiple angles to show depth and progression. If you can safely access the attic, check for compressed or damp insulation, visible daylight through roof penetrations, and any signs of roof decking exposure. These visuals are invaluable for a repair-focused conversation with a contractor and for insurance documentation. Use a simple log to track dates, weather conditions, and the steps you've taken; this keeps you organized through the stress of a post-storm week.
When the rain stops, move quickly to secure a temporary repair that buys you time until full replacement can be scheduled. A properly placed tarp or heavy-duty roofing membrane can stop additional water intrusion and limit interior damage, especially for exposed eaves, vents, or chimney gaps. This is a no-nonsense, temporary measure that buys leverage with your insurer and your contractor-without pretending that a tarp is a final fix. The idea is to reduce exposed roof areas, not to cover over a dangerous, structurally compromised section that needs immediate attention. If you handle this yourself, prioritize steady, secure placement and avoid sharp tools or loose edges that could cause more harm.
The insurance conversation is a Clover-specific rite of spring and fall. Post-storm markets skew toward claims-driven work, so be prepared with documentation, a precise timeline, and a list of prior repairs. Contact an experienced local contractor who regularly handles storm damage for an on-site assessment within 24 to 48 hours of a loss notice. Be ready to provide the insurer with before-and-after photos, a detailed damage estimate, and a repair timeline. In York County, adjusters appreciate a clear, well-organized packet that shows the scope of wind-related damage, including shingles, underlayment, flashing, and any deck or fascia impacts. Timely communication keeps the claim moving and reduces the risk of denial due to delays or missing information.
For homeowners with older shingle roofs or homes nestled among trees, autumn wind and debris pose a persistent risk even after the spring rush passes. Fallen branches and pine straw can abrade a surface, trap moisture, and accelerate aging of the roof system. Treat fall as a second storm season-inspect gutters, downspouts, and the first row of shingles after gusty days. If aging shingles show curling or missing tabs, plan a targeted replacement rather than a full rebuild whenever possible. Early planning with a trusted local roofer helps you map out a repair or replacement strategy that aligns with seasonal weather patterns and insurance timelines.
Choosing the right emergency response partner means prioritizing reliability, rapid on-site presence, and a transparent path from temporary fix to permanent repair. A Clover contractor who handles storm damage understands the quirks of local roofs-common asphalt shingle wear from tree cover, and the particular way York County boards and crews schedule after a major event. Favor contractors who provide clear, itemized post-storm repair plans, explicit tarping standards, and a documented communication routine that keeps you updated on every step from initial assessment to final warranty. In the right hands, quick action after a spring flood of wind and rain is not just about stopping leaks; it's about preserving the value of your home and easing the stress that follows a rough storm season.

Catamount Roofing Group
(704) 787-4110 www.catamountroofing.us
510 Bethel School Rd, Clover, South Carolina
5.0 from 3 reviews
Catamount Roofing Group is a trusted family-owned business specializing in top-tier commercial roofing services. Our team of skilled experts is dedicated to protecting your investment with reliable solutions, from new installations to meticulous repairs and preventative maintenance. We pride ourselves on exceptional craftsmanship, superior materials, and personalized service, ensuring every project meets the highest standards of quality and durability. Based in Clover, SC, we are committed to serving businesses throughout North and South Carolina with professionalism and integrity.

Edgewater Roofing & Construction
(704) 879-1669 www.edgewaterroofingandconstruction.com
Serving
5.0 from 26 reviews
Edgewater Roofing and Construction is a premier service provider specializing in comprehensive roofing solutions and construction services. Known for our commitment to quality and customer satisfaction, we offer a wide array of services ranging from roof installation, repair, and maintence to complete construction projects. Our team of seasoned experienced professionals are dedicated to delivering top-notch workmanship. Whether you’re in need of a simple residential roof replacement or a full-scale construction endeavor, Edgewater Roofing and Construction is your trusted partner, providing reliable, efficient, and high-quality services to meet all your needs. Our Goal is to Elevate the roofing standards one Roof at a Time!
Ronnie's Roofing & Construction
(803) 493-4395 www.ronniesroofing.com
Serving
4.9 from 41 reviews
Ronnie's Roofing is a family-owned and operated roofing company that has been providing quality roofing services to the Carolinas area for 20+ years. We offer a wide range of roofing services, from repairs to new installations, along with bathroom and kitchen remodeling services. We always use the highest quality materials available. We are fully licensed and insured and we offer free estimates. We also offer 24 hr EMERGENCY Services.

Eason Roofing
(803) 631-4505 easonroofing.com
Serving
4.9 from 77 reviews
From fixing minor problems to installing complete new roofs, our professional roofers are known for using only the highest quality materials and the most impressive workmanship you can find from a roofing contractor. We have built strong relationships and alliances with trusted roofing manufacturers, which is how we are able to provide our clients with state of the art materials at affordable prices. Our roofing company has taken a great interest in staying up to date with current roofing techniques through constant education and setting the bar for the roofing industry. This allows us to offer you a satisfaction guarantee upon completion. Call today for roof repair, a roofing inspection, roof replacement on asphalt and metal roofs.
Roofing Hero
(866) 430-4376 www.roofinghero.biz
Serving
5.0 from 35 reviews
Stylish brand new roofs, all within a week, and a contractor on-site during install!

Liberty Roof Group
(980) 287-6352 libertyroofgroup.com
Serving
5.0 from 64 reviews
Whether you need a local roofing contractor to patch a tiny part of your roof or replace the roof entirely, you can count on us. We offer: Residential roof replacement Commercial roof replacement Residential roof repairs Commercial roof repairs Roof insurance claims Roof damage claims Residential storm damage roof repair Commercial storm damage roof repair Plus, we can provide specialized roofing services after a storm or a hurricane. Call 980-287-6352 now to get a free estimate on professional roofing services. You can also use the form on the Contact Us page to email us.
Paul Browns Roofing Company
(803) 980-7663 brownsroofingcompany.com
Serving
4.9 from 58 reviews
Paul Brown's Roofing Company, a cornerstone in residential and commercial roofing since 1989, stands as a testament to reliability and excellence. Our craftsmen, armed with three decades of honed skills, provide exceptional solutions for roof repairs, replacements, gutters & siding across North and South Carolina. Boasting superior attention to detail, our passion for customer service, and competitive pricing are what truly set us apart. Experience the Brown's Roofing Company difference today and discover why we are the name that homeowners and businesses trust for their roofing needs.
Carolina Roofing Pros
(803) 903-3161 www.carolinaroofingprosllc.com
Serving
4.9 from 100 reviews
Carolina Roofing Pros is a reputable roofing company serving various areas in South Carolina and North Carolina. We offer a range of services including roofing, siding, gutters, windows, soffit and fascia. Our team of skilled professionals is committed to providing top-notch craftsmanship and exceptional customer service. Whether you need a new roof installation, siding repair, gutter replacement, or window installation, we have the expertise to meet your needs. Contact Carolina Roofing Pros for all your roofing and exterior improvement projects.
Gaston Roofing
(704) 861-8166 gastonroofing.com
Serving
4.8 from 486 reviews
Established in 1990, we specialize in high-quality roofing, siding, gutter, window, and door installations, as well as impeccable repair and maintenance services in Gastonia, North Carolina, and the surrounding communities. We also offer General Contracting & Electrical Services. We are committed to employing skilled professionals who strive to provide exceptional craftsmanship and utilize top-of-the-line materials to enhance the curb appeal and overall protection of homes and businesses. Schedule your free consultation online or obtain a personalized quote in under a minute through our website.
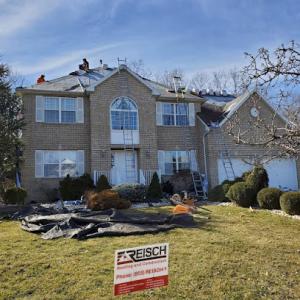
Reisch Roofing & Construction NC
Serving
5.0 from 20 reviews
Reisch Roofing and Construction was founded on the principles of fast, friendly service, and quality workmanship. They noticed a void for honest contractors who will work hard, say what they do, and do what they say. Therefore, they set out to fill that void by opening Reisch Roofing and Construction Reisch Roofing and Construction LLCs size and stability allows them to have professional roof inspectors at your property to inspect the roof before and after every job. This ensures the highest level of quality and workmanship. Customer satisfaction is Reisch Roofing and Construction LLCs top priority.
Paradise Roofing
(980) 320-1864 www.paradiseroofingllc.com
Serving
4.9 from 138 reviews
Locally Owned & Operated, Fully Licensed & Insured Serving Gaston County & Surrounding Areas. Specializing In Residential & Commercial Roofing Free Inspections & Estimates Storm Restoration Specialist & Insurance Claims.

Cathey Roofing
(704) 460-4885 www.catheyroofing.com
Serving
4.9 from 141 reviews
Cathey Roofing has been serving customers in NC and SC since 1981. We strive to satisfy our customers. Our knowledgeable and experienced crew of roofers are the best at what they do. We have an A+ Rating with the Better Business Bureau. You can trust us to do commercial and residential roofing the right way each time.
This region sees frequent hail and wind events, so insurers commonly ask Clover-area homeowners for photo documentation, damage reports, and evidence separating new storm damage from pre-existing wear. When a storm hits, take clear, dated photos from multiple angles of the roof, gutters, fascia, vents, and any interior signs of leakage. Keep a chronological trail of damage through subsequent days: first notice of loss, any temporary fixes, and the progression of visible issues. If a prior leak or aging shingles exist, document them with close-ups and a dated note explaining when those conditions were first noticed. Insurers often want to see that the claim reflects the latest storm effects rather than long-standing deterioration.
Adjusters in this market may closely review prior deterioration because hot, humid summers in Clover can age shingles in ways that complicate storm-versus-age claim decisions. From cracked shingles after a hail event to blistered or cupped edges from sun exposure, both factors can appear similar at a glance. Before sending photos or opening a claim, prepare a simple record of the roof's known condition: last full inspection date, any prior leaks, and obvious wear patterns. If possible, obtain a professional assessment that clearly separates newly damaged areas from age-related wear. This separation helps prevent later disputes and speeds up the review process.
Coverage practices vary by carrier and policy type in the region, making documentation quality especially important before temporary repairs or full replacement begin. When a claim is filed, avoid rushing into quick fixes that could be used to imply permanent coverage or mask the real scope of damage. Instead, consider minimal, non-invasive temporary measures that protect interior spaces while preserving the roof's condition for the adjuster's inspection. Keep receipts and records for any materials or services used to protect the property, and document the timing of those actions. A detailed, organized packet that includes photos, notes on weather conditions at the time of the event, and a concise description of observed damage will support a smoother claim review.
Spring and fall wind events coincide with peak storm activity, and delays in reporting can complicate coverage decisions. Promptly notifying the insurer and requesting a dedicated adjuster appointment can prevent misinterpretation of damage onset. If multiple storms occur in a short window, maintain a log that distinguishes which issues appeared after each event. Clear, careful communication with the insurer minimizes the risk of duplicate or missed claims and helps establish a straightforward path to repair once coverage is confirmed.
Connect with contractors who help homeowners navigate the claims process from damage assessment to final approval.

Edgewater Roofing & Construction
(704) 879-1669 www.edgewaterroofingandconstruction.com
Serving
5.0 from 26 reviews

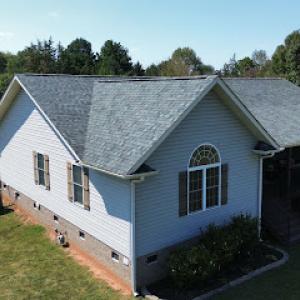
Asphalt shingles dominate the Clover market because they fit the area's common residential re-roofing work and lower entry cost. In practice, you'll find plenty of homes with this material, and a quick turnaround is usually possible if you're sticking with standard dimensional shingles. The upside is straightforward: decent damage resistance for a mid-price option and a broad contractor pool. The down side, specific to Clover's heat and humidity, is accelerated granule loss and seal-strip issues as the system ages. If you go asphalt, plan for more frequent inspections in spring and fall and be prepared for potential early aging signs after hot, humid summers. A focus on correct attic ventilation, proper nail length, and adhesive choice helps extend life in the Piedmont climate.
Metal roofs are a meaningful local option for homeowners trying to reduce storm vulnerability and heat-related wear, especially where long service life matters more than upfront cost. In Clover, metal stands up well to wind and is less susceptible to granule loss and moisture-driven rot. When you choose metal, you're investing in panels, fasteners, and ridge cap that perform reliably through spring storms and humid summers. Look for coatings that resist chalking and fading in direct sun and confirm that the installation includes an appropriate underlayment and ventilation plan. If energy efficiency matters to you, metal's reflective surface can help reduce cooling loads during those long Carolina summers.
Tile systems (clay or concrete) and wood shingles or shakes exist in the market but are much less common locally. Material choice in Clover is usually a balance between storm resilience, humidity performance, and contractor availability. Clay or concrete tiles can handle wind well but require a robust structure and careful installation to prevent wind-driven cracks in the spring. Wood shakes bring a natural look and decent durability when treated and scheduled for timely maintenance, but humidity can promote faster moss growth and rot if gaps aren't precisely managed. Synthetic or composite shingles sit between asphalt and true tile/wood in terms of performance and price, offering more uniform aging and potentially better humidity resistance.
When weighing options, consider how each system handles spring and fall wind events, rapid temperature swings, and humid summers. The best choice often depends on seasonal storm exposure, attic ventilation quality, and the availability of skilled local installers who understand the Piedmont climate quirks. For many Clover homes, starting with a sturdy asphalt or metal system paired with strategic ventilation upgrades provides practical, long-lasting performance tailored to local conditions.
Provided local pricing runs about 350 to 600 USD per square for asphalt shingles, 700 to 1200 for metal, 1000 to 2300 for clay tile, 900 to 1800 for concrete tile, 600 to 1000 for wood shingles or shakes, and 500 to 900 for synthetic or composite shingles. Those ranges reflect typical Clover roof work and should anchor quick comparisons when talking with contractors. Expect higher end figures during active storm periods when demand tightens labor calendars.
In Clover, storm-driven demand spikes after hail and wind events can tighten scheduling and labor availability, which can push project costs and wait times higher during active claim periods. If a contractor is juggling multiple claims at once, the first available start window may slip by a week or more. Planning ahead for the spring and fall rush reduces the risk of delays and keeps weather windows more predictable for a roofing crew. If possible, aim to secure a start date before the peak post-storm rush begins.
Material choice directly affects both cost and install timing. Asphalt shingles remain the fastest and most economical option, with the lower end around 350-600 per square. Metal roofs move up quickly in both price and lead time, typically 700-1200 per square, especially when color-matched panels or specialty finishes are requested. Clay and concrete tiles, while durable, carry the longest lead times and the highest per-square costs, at 1000-2300 and 900-1800 respectively. Wood shingles or shakes sit around 600-1000 per square, but availability can tighten after hail events. Synthetic or composite shingles offer a middle ground at 500-900 per square and generally faster scheduling than tile options.
If storm damage is suspected, document everything with dated photos and notes of affected areas. Insurance documentation should be organized early: photos, claims numbers, and a clear scope request help prevent back-and-forth during the claim process and can keep scheduling smoother. When labor calendars tighten, you may opt for a temporary leak control plan to limit interior water intrusion while awaiting installation. Align color and warranty expectations early, as longer-lead materials can extend project timelines even if the crew is available.
Get a clear picture of your project costs upfront - no commitment required.

A full roof replacement in Clover typically requires a permit, with the local building department issuing it after submission and review. The process begins with a clear scope of work and a plan that shows roof type, underlayment, vents, and any attic modifications. Since York County oversight governs many projects in this area, expect a permit review to look closely at ventilation adequacy, flashing details, and adherence to local code requirements. Staying on top of the permit timeline helps prevent work stoppages and keeps the project moving through the spring and fall windows when storms and wind events often stress roofs.
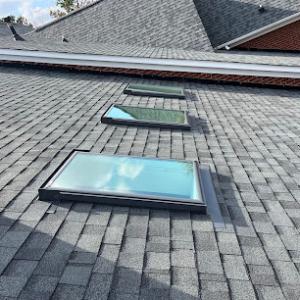
Inspections in this jurisdiction occur during installation and again after completion, with attention to underlayment, nailing, and overall compliance. The first inspection typically targets the roof deck, underlayment quality, and fastener placement, ensuring a solid, code-compliant baseline before shingles or panels go on. The final inspection verifies proper installation of flashing around chimneys, skylights, vents, and any penetrations, along with roof Ventilation and drip edge alignment. In practical terms, expect the inspector to check nail patterns, shingle alignment, and the overall watertight finish. If anything isn't up to standard, a follow-up inspection will be scheduled after corrections are made.
If problems are found, a reinspection may be required, so scheduling and correction time should be built into replacement timelines. Weather variability in spring and fall can complicate the inspection cadence, so plan for a small buffer if an additional visit is needed. Communication with the contractor about inspection windows helps prevent delays that push work into unfavorable weather or into the next permit cycle. A proactive approach-confirming what the inspector will look for and ensuring access to eaves, attic spaces, and the roof line-reduces the likelihood of a second trip and keeps the project on track.
Coordinate early with your contractor to align material delivery, deck preparation, and trim work with the inspection schedule. Have a clear point of contact for permit status updates and any required documents. If a reinspection is anticipated, request a pre-inspection walkthrough to catch potential issues before the official visit. In neighborhoods with older homes or complex roof lines, documenting existing conditions with photos can help the inspector verify that the proposed work meets local standards and avoids unnecessary delays.
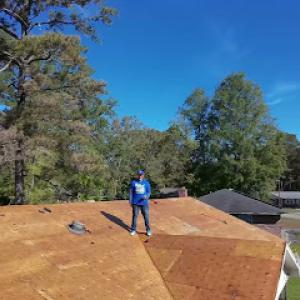
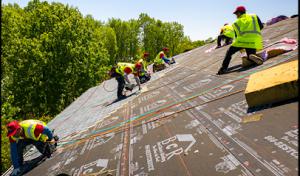
Spring in this area brings pulse-pounding wind events and sudden downpours that can disrupt tear-off and dry-in schedules. When planning, solidify a weather-forward sequence: staged tear-off, proper temporary protective measures, and a clear dry-in window that can tolerate a few wet days without compromising underlayment. Shingle adhesive can behave differently in fluctuating humidity, so choose materials and install during steady, moderate humidity where possible. If a storm rolls in, secure vulnerable edges and ensure tarping or temporary cover boards are in place to minimize wind-driven moisture intrusion. Coordinate with crews to avoid back-to-back rain delays that push projects past favorable temperatures.
Hot, humid summers affect shingle installation conditions and adhesive performance, which is one reason many local replacements are pushed into spring and fall. On hot days, schedule early-morning start times to beat peak sun and heat buildup on the roof deck. Keep an eye on elevated moisture inside attic spaces; stagnant or trapped heat can soften certain shingle products longer than expected. Hydration and break schedules matter: longer days demand short, practical rests to prevent heat-related quality issues. Plan for additional protection around HVAC penetrations and vents to prevent overheating or mis-sealing during highly humid periods.
Fall offers a more stable temperature window but carries the risk of late-season storms. The goal is to lock in a dry-in period that remains dry through the critical sealant phase. Wind events in this season can still challenge staging and material handling, so establish a tight sequencing plan: remove existing shingles, install underlayment, and complete the dry-in as promptly as weather allows. Ensure temporary coverings are ready for sudden showers and that flashing details are installed before colder nights set in.
Mild winters usually allow work to continue, but occasional freezes can still affect material handling and installation timing. When temperatures approach freezing, check product specifications for minimum install temps and avoid extending days with dew points that promote ice formation on roof surfaces. If a freeze lands in a scheduled week, shift to interior tasks like underlayment inspection and fastener checks, and defer active shingle placement until temperatures become consistently above the threshold. Maintain progress with nightly protection to prevent moisture intrusion on any partially completed sections.
Spring storms hit hard in this Piedmont pocket, and asphalt roofs bear the brunt. In Clover's climate, heat and humidity accelerate aging of shingles, so you may notice faded color, curling edges, or granules collecting in gutters long before a leak appears. After a big rain, even a roof that looked fine can reveal hidden trouble as compromised seams or softened spots start weeping from the attic line.
Wind-driven rain and debris are recurring local stressors, so vulnerable roof edges, flashing transitions, and older penetrations often become the first trouble spots after storms. A loose valley, a blown-back step flashing around a chimney, or a forgotten vent boot can allow water to track inward during a gusty shower. Regular inspections after windy days catch these problems early.
Because this is a re-roof-heavy market, many homeowner concerns center on whether an existing roof has enough age or prior wear to justify repair versus full replacement after a storm. If shingles are brittle, granules are gone, or plywood shows moisture staining, a repair may buy time but usually signals nearing the roof's end. Plan for a coordinated replacement to avoid back-to-back failures.
Response plan after a storm should prioritize fast leak control and thorough documentation for insurance and future resale. Cover quickly, photograph damage, and keep records of dates and repairs. Local crews that understand the area's wind patterns and York County rain history can tailor flashing and edge detail to reduce repeat leaks. A cautious approach keeps costs manageable and avoids unexpected failures when storms clash with humid summers. Always verify that any repair plan matches the roof's current exposure and long-term ownership goals here.
Find contractors experienced in skylight installation, flashing, and leak repairs to bring natural light into your home.
Edgewater Roofing & Construction
(704) 879-1669 www.edgewaterroofingandconstruction.com
Serving
5.0 from 26 reviews
When a spring wind event dumps shingles and decor across your yard, neighbors know you want a crew that can be on site quickly, tarp exposed areas, and clean up before the next storm. In Clover, storm calls fill phone lines, so reputable teams keep a predictable arrival window and bring a basic debris removal plan. A good contractor will stage a temporary repair to stop leaks, cover vents, and prevent further interior damage while your insurance is being filed.
Local hiring patterns show homeowners strongly value quick response and cleanup, which fits a market driven by storm calls and occupied-home re-roofing. Look for a long-standing, locally owned and family-owned company that is licensed and insured. Those businesses tend to prioritize minimizing disruption to your family routine and coordinating access when you're living through a roofing project.
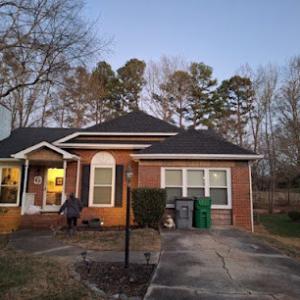
Residential work dominates Clover's contractor mix, so you will encounter crews that specialize in shingle or metal replacements rather than large commercial teams. Expect crews that bring familiar tools, know local shortcuts for attic space, and communicate clearly about ladder placement, roof line access, and interior protection. A practical re-roofing plan emphasizes protecting your ceilings, sealing penetrations, and finishing with neat, weather-ready edges.
After a spring or fall wind event, you want a team that can help organize your damage documentation. Reputable contractors take clear photos, prepare a simple scope, and walk you through the steps for presenting a claim. They coordinate access for adjusters, provide written summaries, and mark temporary repairs clearly so you can review before any permanent work begins.
In addition, you'll notice many Clover crews offer flexible scheduling to fit school routines, with crews arriving after school hours or on weekends to minimize disruption. A clear warranty and follow-up plan lets homeowners know who to call if a leak reappears and how long the repairs are covered.