Last updated: Apr 19, 2026
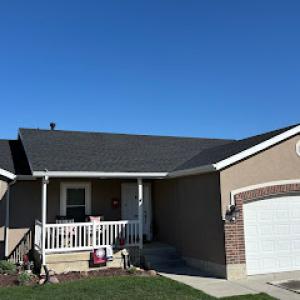
Herriman sits against the Oquirrh bench in southwest Salt Lake County, where exposed neighborhoods can see strong wind events and fast-moving storms crossing the valley. That bite-sized delivery of weather - sudden gusts, hail along the thunderheads, and capricious spring squalls - puts steep-slope roofs and tile-heavy neighborhoods on high alert. The timing matters: most damage from hail and wind occurs during spring storms or early summer blow-throughs, when brittle roof materials have grown tired from winter and the valley heat accelerates wear. If a storm hits during a busy week, leaks and loose flashing can proliferate before anyone notices.
Spring hail is a meaningful local roofing risk in the Salt Lake Valley and often drives sudden inspection demand and claim activity in Herriman. Hail storms move fast, leave bruising on shingles that isn't always visible from the ground, and can dent gutters, ruin seals around skylights, and bend metal edges. The timing is unforgiving: a single afternoon storm can compromise a whole block, and missing a timely inspection means a small issue becomes a big one well before the next melt cycle. After a hail event, target priority inspections for exposed ridges, valleys, and flat spots where wind-driven debris tends to force impact-and don't wait for a rainfall to reveal leaks.
Winter snow and ice can hide shingle bruising, flashing displacement, and underlayment problems until thaw periods reveal leaks. In Herriman, the combination of snow load plus freeze-thaw cycles accelerates the deterioration of seam-caulk, step-flashing, and rafter tails. When the sun returns and the shimmer of meltwater runs down the slope, the true extent of winter damage becomes obvious: concealed bruising on asphalt and concrete tile, moisture wicking behind roof edges, and roof-to-wall transitions showing signs of stress. The moment you notice wet drywall or attic staining after a thaw, treat it as urgent and address the root cause rather than only chasing the symptom.
After a strong wind or hail event, the inspection window is tight. Wind-driven strikes can create micro-failures at joints that look intact but are structurally compromised. If a hailstorm rattles through, the first 48 to 72 hours are critical for spotting hidden damage. In Herriman's climate, an immediate roof assessment should focus on exposed eave lines, ridge caps, valley intersections, and any areas where granules are missing or darker in color. A delayed check can let minor issues evolve into structural concerns, compromising underlayment and inviting ice-dam formation later in the season.
You can reduce risk by scheduling a quick seasonal roof sweep before the peak wind and hail window arrives, especially after clearing winter debris and before the first full-throttle storm. Keep an eye on high-wear areas around skylights, vents, and chimney flashing. If a storm has just passed, walk the property with a flashlight at dusk to catch moisture trails and lifted shingles that aren't obvious in daylight. If you observe curling shingles, lifted flashing, or granule loss, call for a professional roof inspection without delay. Early detection translates into fewer surprises when the thaw comes and the next storm front rolls through.
Find local contractors experienced in assessing and restoring roofs after hail, wind, and severe weather events.
First Stop Roofing & Solar
(801) 706-2556 www.firststoproofingandsolar.com
14753 S Vintage Rose Ct, Herriman, Utah
4.9 from 69 reviews
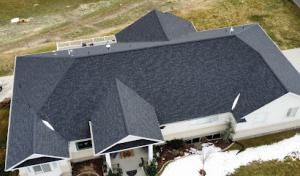
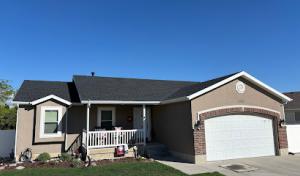
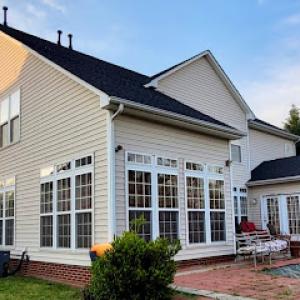
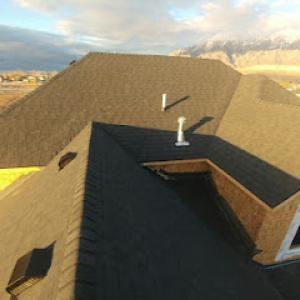
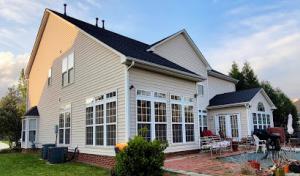
Herriman's residential rooftops are a practical reflection of newer suburban development: asphalt shingles combined with clay and concrete tile, driven by HOA aesthetics and varied architectural styles. That mix means you should think in terms of two reliable performance paths: asphalt shingles for everyday value and tile to meet longer-term durability and the heavier look many neighborhoods prefer. Your choice affects how you handle sun exposure, wind, and snow, so plan around how these two families age differently on your roof.
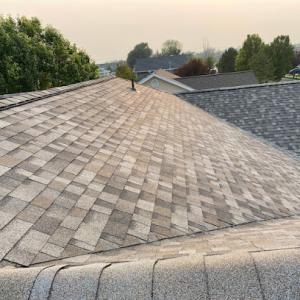
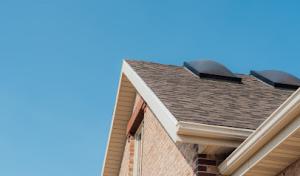
Hot, dry summers in this part of the Salt Lake Valley bite into asphalt shingles, especially on south- and west-facing slopes that soak in the strongest afternoon sun. The result is accelerated aging, more rapid granule loss, and a shorter curb appeal window if you ignore routine care. If your roof sits on the sunnier side of the home, expect faster color fading and a higher chance of surface cracking in high-heat spells. To guard against premature aging, keep tree cover lean and perform annual inspections that focus on shingle edges, granule wear, and signs of curling. When replacing sections, match the existing profile and granule color to preserve the roof's uniform look that HOA guidelines often demand.
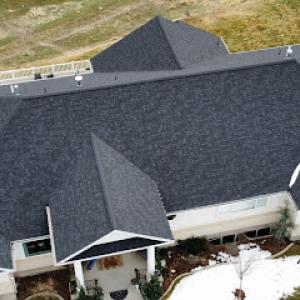
Clay and concrete tiles are a favorite in this climate for their classic silhouette and long life. But when winter arrives, the added dead load from snow compounds the structural demands those tiles place on the roof deck and underlayment. In Herriman, a well-installed tile roof needs attention to the underlayment's age and integrity, since leaks can travel under tile rows before showing on ceilings. Pay particular attention to areas around penetrations, valleys, and flashing where snow sits and refreezes. If your home features multiple slopes, ensure that fasteners, batten spacing, and underlayment type are appropriate for the local snow load expectations. Routine checks after heavy winter storms can catch subtle movement or damaged sealants before they become leaks.
With asphalt and tile sharing the skyline, mixed-roof homes require a coordinated maintenance mindset. Asphalt sections and tile sections age differently, so plan for targeted inspections that separate problems by material. HOA-driven aesthetics often dictate color and texture harmonization, so replacements should respect the existing palette to avoid cosmetic mismatches that draw attention during inspections or resale. When planning edits, prioritize uniform edge lines and consistent underlayment replacement where tiles meet shingles to maintain a cohesive roof plane.
In Herriman, a practical, neighborhood-friendly approach works best. Schedule two key checks each year: a post-winter assessment to gauge snow-driven stress on tile and eave details, and a late-summer walkthrough to catch sun exposure damage on shingles and flashing vulnerabilities near vents or skylights. Keep an eye on sealant joints around chimneys and transitions between different roof planes. For tile roofs, have a qualified roofer verify underlayment condition and tile integrity every few years, adjusting for visible wear, broken or loose tiles, and any subtle movement in the deck framing after seasonal shifts. If hail or high winds pass through, plan a targeted follow-up inspection promptly to address any hidden damage that can escalate with subsequent weather cycles.
The most popular roofing material in the US. Find pros who install, repair, and replace asphalt shingles.

Hot summer installation conditions affect asphalt shingle handling and crew productivity during peak afternoon heat. When you're choosing a re-roof window, plan around the mid-afternoon slump and the burn of sun on stacked bundles. If your project uses asphalt shingles, you'll want to schedule start times earlier in the day or shift to cooler porch-adjacent work hours to keep adhesive temperatures stable and to minimize the risk of heat-related tarp failure. Clay or concrete tiles respond differently to heat, but the crew still benefits from cooler morning temps for lugging heavy bundles up steep stairs and into tight attic access points. In practice, this means locking in a start window that avoids peak heat and coordinating with the crew to pause during the hottest two to three hours.
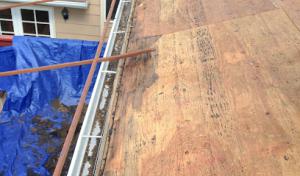
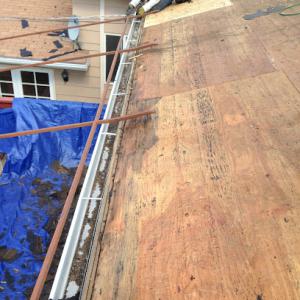
Snow cover and frozen roof decks in winter can delay tear-offs and make it harder to inspect decking, flashing, and ventilation details before replacement. Before a tear-off, expect frost or a light dusting to complicate surface assessment, and plan for a longer morning walkthrough to verify deck condition, nail base health, and the existing ventilation run. If decking shows soft spots or moisture intrusion under snow, address those issues first or be prepared for temporary repairs to stabilize the structure. Snow can hide fasteners and flashing edges, so ensure your contractor dedicates sufficient time to a careful, daylight-appropriate inspection when the sun has softened the ice along eaves.
Late summer monsoon-style wind events along the Wasatch Front can interrupt scheduling even when the forecast looks dry earlier in the day. Herriman homes with steep-slope roofs are particularly exposed to gusts that can shift material handling, tarp placement, and temporary edging. Build a flexible plan that allows for contingency days if a mid-afternoon gust pushes crews off the roof or if debris accumulates around the worksite. Weather windows should be established with a clear threshold for safe work-if winds exceed a conservative speed, postpone teardown to avoid damage to new underlayment or the edges of newly installed shingles.
Understand how the local exposure affects your chosen roof system. Asphalt shingles tend to respond well to the hot sun if installed with proper ventilation and nail placement that respects diurnal expansion. Tile systems (clay or concrete) demand careful handling on manicured ladder setups and steadfast edge protection; the heat can make tiles brittle, while winter freeze-thaw cycles can stress the substrate if underlayment isn't fully dry. Synthetic or composite shingles offer some resilience to fluctuating temperatures and easier handling in heat, but you still benefit from cooler start times and staged fatigue management for crews. Copper or aluminum roofing brings its own considerations: metal edges and fasteners must be checked for thermal expansion, particularly on larger flat-plane runs that catch afternoon heat.
First, coordinate a start time that starts pre-dawn or early morning to beat the heat, ensuring the crew has a quiet path from vehicle staging to the first ridge vent. Second, schedule a thorough decking and flashing inspection if winter conditions allow, with a plan for temporary repairs before layup. Third, review the forecast with the contractor and set a clear weather contingency plan for late-summer wind events, including safe tarp anchoring and edge protection. Finally, confirm ventilation and attic airflow adjustments to mitigate heat buildup under new underlayment and shingles, ensuring the roof breathes properly through the hottest days.
Get a clear picture of your project costs upfront - no commitment required.

First Stop Roofing & Solar
(801) 706-2556 www.firststoproofingandsolar.com
14753 S Vintage Rose Ct, Herriman, Utah
4.9 from 69 reviews
Local Roofing Installer. Local solar installer. We Provide Honest Quality Business.
Sundance Roofing Company
Herriman, Utah
4.9 from 22 reviews
A new roof never has been so easier. Experience, Expertise and Exceeding Expectations Asphalt Shingles - Leaking emergencies / Full tear-off
Raintight Roofing
(801) 792-9969 www.raintightroofing.com
Herriman, Utah
3.5 from 8 reviews
Welcome to Raintight Roofing, a trusted roofing contractor in Park City. Founded by a second-generation roofer, our roofing contractors in Park City have been perfecting their craft for over 25 years. Specializing in residential and commercial roofing projects, we are equipped to handle roofing installation, repairs, and maintenance. Some of our specialty roofing services also include working with flat, membrane, and shingle roofing materials. We are proud to offer melting systems for your roof as well given our community’s weather. Contact Raintight Roofing today, and let us show you why we are a leading roofing contractor in Park City!
Lasting Impressions Roofing & Improvements
(385) 355-4778 lastingimpressions28.wixsite.com
Serving
5.0 from 78 reviews
Roofing and Repair that lasts! Certified Roofing Repair and Home Inspections Est. 2019 in NC and now servicing all of Utah! Services include: -Complete roof renewal -Roofing repair -Roof tune-ups -Home inspections And much more! Call or visit our website for more information Se habla español
Brady Roofing
(385) 317-3659 www.bradyroofing.com
Serving
5.0 from 43 reviews
Brady Roofing, serving South Jordan, UT, specializes in high-quality roof replacements that protect homes from Utah’s intense sun, heavy snow, and seasonal wind. Our experienced team ensures every new roof is built for durability and performance, whether replacing aging shingles or repairing storm-damaged structures. We take pride in delivering precise workmanship and dependable results that stand up to the region’s changing weather. Homeowners across South Jordan and nearby areas trust Brady Roofing as their experienced roofing contractor for professional service and long-lasting solutions.
Far West Roofing
(801) 253-7799 www.farwestroofing.net
Serving
4.6 from 139 reviews
Far West Roofing is a highly trained and experience roofing company serving Salt Lake City and Northern Utah. Well known for our reliable and high quality roofing and repair services. With an A+ BBB rating and over 20 years experience, our warranties are some of the best in the industry. At Far West Roofing, Inc. single family homes are our specialty. And there is no aspect of roofing which is more satisfying than transforming a home with a beautiful new roof. Far West Roofing, Inc. knows Commercial Roofs. From the complexities of management and ownership, to the need to avoid business disruption. We cater to the needs of business owners who need roof repairs, roof replacements, or roof coatings.

SoloTeck Roofing
(801) 245-0430 www.soloteckroofing.com
Serving
5.0 from 18 reviews
Whether you're building a new home or replacing your home's existing roof, work with SoloTeck Roofing! We strive to make our customers happy with our free estimates, easy scheduling, and quick installation.
V3 Roofing & Renovation
(385) 900-4618 v3roofingandrenovation.com
Serving
4.8 from 26 reviews
At V3 Roofing and Renovation, we are more than just a roofing company. We are your whole home and exterior company. We specialize in everything from small roof repairs to extreme storm damage as well as gutters, soffit and fascia, and siding. Additionally, we work closely with your insurance to cover repairs if you have storm damage. When you call on us for repairs, we treat you like family. We are a local company and strive to be the best business ambassadors possible, for the great state of Utah.
Mountain Valley Roofing
Serving
5.0 from 58 reviews
Mountain Valley Roofing is Riverton’s trusted roofing contractor, located at 1262 W 12700 South Suite C, Riverton, UT 84065. We deliver expert shingle, metal, tile, and TPO roofing for homes and businesses across Salt Lake County. With over 20 years of local experience, our certified team provides roof repairs, replacements, gutters, and siding — all built to handle Utah’s climate. We’re fully insured and work with top materials from GAF and Owens Corning. Whether you need storm damage repair or a full metal roof installation, we offer lasting solutions and honest service. Call today for a free estimate.
Legend Roofing & Construction
Serving
5.0 from 69 reviews
Welcome to Legend Roofing, the premier roofing company serving customers throughout Salt Lake City UT and surrounding areas. With years of industry experience, we offer a comprehensive range of roofing services, including installation, repair, replacement, and commercial roofing, all at competitive prices. Our team of expert roofers is dedicated to providing exceptional workmanship and customer service. We use only the highest quality materials to ensure lasting results for your home or business. Whether you need a new roof installation or require repair services, we have the knowledge and expertise to get the job done right the first time. Trust Legend Roofing & Construction for all your roofing needs in Salt Lake City UT and beyond.

The Roofing Contractor
(801) 738-0736 theroofingcompanyinc.com
Serving
4.9 from 79 reviews
Our family-owned roof company has provided residential and commercial roofing services to residents of Utah and beyond for nearly 40 years, so you can rely on our expertise. We are licensed and bonded and have an A+ rating with the Better Business Bureau. There is no need to worry about the quality of our workmanship or the reliability of our staff. Just read our 5-star reviews! Our specialties include roof repair, balcony repair, gutter installation, & roof replacement. We service all types of roofs including shingle, tile, flat & foam roofs.
Intermountain West Contractors
(801) 232-5690 iwcroofingutah.com
Serving
4.9 from 499 reviews
Rise above the rest with Intermountain West Contractors, your Platinum-certified partner in roofing excellence. As Utah's esteemed experts, we bring a legacy of quality that stands as tall as the Rockies themselves. Every shingle we lay is a pledge of trust, and with 25 years of experience, we've built a fortress of reliability with Owens Corning, the most trusted name in roofing materials. Our commitment is ironclad; we're held to the loftiest standards of craftsmanship, a standard confirmed by Owens Corning's own random quality inspections. We don't just cover homes; we elevate them with superior upgrades included at no extra cost. From the resilience of Ice & Water shield to the finesse of ridge vents, we ensure your bid encapsulates ...
Herriman's active storm-repair and re-roofing market can push pricing upward after hail or wind events when contractor schedules tighten across southwest Salt Lake County. That reality matters whether you're resurfacing a tile-heavy home or upgrading to a more durable option for future storms. Timing during busy seasons can affect labor availability, crew staging, and material lead times, so plan for possible cost drift if your project lands shortly after a major hail event.
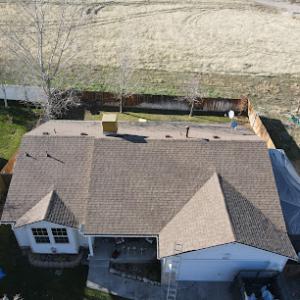
Asphalt continues to be the most common choice in newer neighborhoods with varied rooflines. In Herriman, expect mid-range pricing with a strong value proposition for a quick return-to-service. The labor impact is generally lower on modest slopes and simpler layouts, but during peak storm periods, even asphalt projects can experience schedule compression that nudges total cost upward. A typical project range sits around the low to mid hundreds per square, with installation efficiency often offsetting material costs when crews can secure consistent work days.
Tile-heavy homes are a hallmark of newer Herriman developments, and steeper suburban rooflines elevate both labor time and staging needs. Clay tile carries premium material costs, while concrete tile offers a broader price span but usually similar install complexity. Hail and wind can damage or dislodge tiles, so underlayment and proper re-seating become particularly important; these factors push labor hours higher than flat-slope reroofs. Expect higher per-square costs compared with asphalt, reflecting the added weight, extended scaffolding needs, and careful breakage mitigation during retrofit.
Synthetic or composite options provide a lighter alternative with decent durability for storm-prone conditions. In this climate, these materials balance resilience with cost, offering competitive protection without some of the weight-related challenges of tile. Labor for synthetic systems remains a consideration in steep or irregular sections, where modular components can speed install times but still require careful alignment on complex rafter framing.
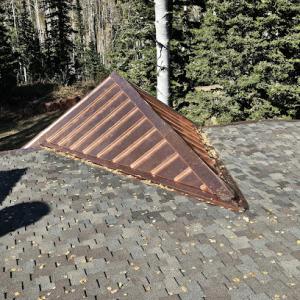
Metal options, including copper and aluminum, command premium pricing due to material quality and long-term performance benefits in high-wind and hail-prone environments. In the local market, these projects typically emphasize meticulous flashing, seam work, and potential coatings to maintain appearance after UV exposure. Expect longer lead times and higher crew safety considerations on steep pitches, with corresponding increases in total cost versus asphalt or synthetic systems.
Across all materials, permit coordination and inspection scheduling add administrative steps that can influence project timing and total cost. While not the focus here, expect these elements to form a meaningful portion of the project plan, especially after significant storm activity when crews are in high demand. Building a contingency for scheduling shifts and material delays helps maintain budget and timeline fidelity in a market that moves quickly after hail and wind events.
Don't let upfront costs delay a critical repair - these contractors offer payment plans to fit your budget.

Before shingle layers fly, you should know that a roofing permit is typically required in this area, and the application asks for a clear project scope and the roofing materials you plan to use before work begins. That scope isn't just bureaucratic paperwork; it helps ensure the right materials and methods are chosen to stand up to Herriman's sun-soaked summers, winter snow loads, and spring hail. If the permit isn't pulled, you risk costly rework, a stop-work order, or trouble when you try to sell the home later. The process can feel like a hassle, but it is your first line of defense against a mismatched roof system that fails under the benchland climate.
Inspections in this area commonly occur during and after the project, with rough and final stages rather than a single sign-off. The rough inspection checks that the roof deck is sound, underlayment is properly installed, and ventilation paths are in place, which matters for attic moisture control and overall roof performance. The final inspection confirms the installation aligns with approved plans and local code requirements, and that the roof system is ready to perform through another hot summer and snowy winter. If a contractor misses a preapproval step or tries to push through a completion without the proper inspections, the city can require costly changes or rework after the fact.
Local inspection emphasis includes venting, underlayment, and flashing details, which is especially important on replacement jobs where visible surface materials may not reveal hidden deficiencies. Proper attic venting and intake balance help reduce attic heat and moisture buildup that can accelerate shingle aging or warp underlayment. Underlayment must be continuous and well-sealed at edges and valleys to prevent leaks during spring hailstorms and winter freeze-thaw cycles. Flashing around chimneys, vent pipes, and where the roof meets walls are common fault lines that can fail under heavy wind or unusual pressure from snow and ice buildup. When a replacement is done, the inspector will look beyond the surface-the integrity of the ridge Vent, the correctness of step and counter-flashing, and the alignment of valleys-to avoid a scenario where hidden deficiencies surface after the rainiest months.
Neglecting permit requirements or rushing through inspections can leave you exposed to hidden failures that show up after a hail event or a windy day. A roof that seems fine on top can harbor moisture intrusion or structural weakness below the surface, especially on steep slopes or tile-heavy neighborhoods. Paying attention to permits and inspections now helps prevent leaks that could jeopardize interior rooms, insulation, and attic framing when seasonal storms arrive. In Herriman, treating the permit and inspection steps as integral parts of the project preserves the roof's long-term performance and your peace of mind.
The benchland climate around the Oquirrh foothills means hail, wind, and snow events can hit quickly and with little warning, and insurers know it. In this market, storm dates and the sequence of events often drive claim outcomes. You should expect that a claim will be evaluated against when the damage occurred, not just when you notice it. A clear timeline helps prevent later disputes when the storm season overlaps busy weeks for adjusters and contractors.
Insurers frequently want pre- and post-work photos or inspection reports to verify what changed as a result of a given event. In practice, that means collecting dated, high-resolution images of every roof plane, flashing, and edge, both before any repair and after work is completed. Keep a simple record of dates, weather notes, and any observed damage like granule loss on shingles, cracked tiles, or dented metal. A professional roof inspection that notes existing conditions and the exact location of new damage can be a decisive reference point when time is tight and decisions move fast.
Coverage terms can shift with recent weather patterns, so it matters whether cosmetic damage, matching, and depreciation factors affect a roof replacement decision. If your roof has older, mismatched sections, the adjuster may scrutinize how replacement materials will blend with the existing deck and surrounding homes. If you're dealing with tiles, metal, or composite options common in this area, confirm how closely new materials must match the existing roof and how depreciation is treated after a hail event. This is a reality check you want to address while the claim is open, not after a contractor has begun work.
In this climate, repeated temperature swings between hot summers and snowy winters can stress flashing transitions and sealants faster than in milder climates. Asphalt and composite shingles expand and contract with the heat, while metal edging and chimney flue flashings flex at different rates, allowing gaps to form. You'll notice thin, hairline leaks near valleys, vent pipes, and transitions after a stretch of hot days followed by sudden cool snaps. If your attic shows more condensation in the shoulder seasons or you see small drips around roof penetrations after a heat wave, those are early signs the sealants and flashing are working hard and may need resealing or re-flashing before a major leak develops.
Tile roofs in this area often fail first at the underlayment and flashings rather than the tile surface itself, making leak diagnosis different from standard shingle roofs. The underlayment acts as the first line of defense against wind-driven moisture and freeze-thaw cycles. Over time, wind can pry underlayment seams and loosen edge fasteners, while flashings around chimneys, skylights, and vent stacks can degrade where the roof plane changes direction. When you inspect, check for soft or bubbled areas under the tiles near hips and valleys, and feel for unevenness along flashing joints. A telltale sign is a leak that seems to appear only after a heavy snowfall or after a windy day-water is finding the path more through the underlayment than through the tile itself.
Wind-driven weather in exposed bench areas can loosen ridge components, disturb flashing edges, and create intermittent leaks around penetrations and skylights. Ridge caps may lift in gusty spring winds, letting moisture push underneath. Valleys where tile meets metal flashing can trap debris, accelerating wear. At first, leaks may seem intermittent or localized to the loft space near roof edges after a storm. Regular checks after high-wind events should focus on ridge lines, edge fasteners, and any gaps where tiles meet flashings. If you notice shingles or tiles shifted, misaligned ridge caps, or peeling sealant along the rake edges after a wind event, address those spots promptly to prevent broader water intrusion.
Find contractors experienced in skylight installation, flashing, and leak repairs to bring natural light into your home.
Lasting Impressions Roofing & Improvements
(385) 355-4778 lastingimpressions28.wixsite.com
Serving
5.0 from 78 reviews
Because heat-related aging and storm-related damage both show up on your roof, you must separate manufacturer material coverage from workmanship coverage when comparing bids. In practice that means asking not only what the product warranty covers, but who backs the installation and for how long. A strong material warranty might look good on paper, but if the installer's workmanship warranty is weak or short, a hail-induced dent or wind strip can become a dispute over whose fault it is. In this benchland climate, where sun exposure accelerates aging and wind gusts test fasteners, the difference between these two protections becomes a real practical matter at claim time.
Inspection focus on venting and flashing in this climate matters more than it might in milder corners of the region. If flashing around chimneys, dormers, and roof-to-wall transitions isn't properly integrated with the venting plan, leaks can surface long after the shingles or tiles themselves have aged. Inconsistent sealants or misaligned vents can undermine a warranty even when the shingles stay intact. When reviewing bids, insist on a detailed installation plan that addresses venting clearances, flashing integration, and how attic ventilation will be maintained to keep the roof performing under hot summers and snowy winters.
In a fast-growth city with many active re-roofing contractors, warranty transferability and who actually services callbacks are especially important questions. A transfer-friendly warranty saves headaches if a new homeowner moves in or a contractor leaves town, and it clarifies who will respond when an issue arises after a big storm. Ensure the contract specifies a dedicated service contact, expected response times, and a path for resolving disputes without immediate escalation. This clarity helps protect the integrity of the roof as seasons shift and the neighborhood evolves.