Last updated: Apr 19, 2026
Layton homeowners face a recurring combination of spring hail, late-summer wind-driven storms, and winter snow loads rather than a single dominant roofing season. This means the roof lives in a near-constant state of wear, with every season delivering its own set of pressures. Hail can pepper shingles and flashing; summer storms can bend and loosen vent stacks or ridge caps; snow loads and rapid melt-time freeze cycles push water toward any weak seam. Planning must reflect this year-round risk rather than chasing a single "best time" to replace or repair. When you understand that timing is driven by weather windows, you can reduce the chance of lingering leaks or secondary damage that worsens after a storm.
Along the Wasatch Front, freeze-thaw cycling after snow events can turn small flashing or shingle defects into active leaks before spring inspection season. A single thaw cycle can push water behind a compromised seam or lift a shingle edge just enough to create a slow drip that looks harmless until it reaches attic insulation or interior drywall. In practical terms, that means you should treat any new damp spot, ceiling stain, or musty odor as a potential crown jewel of hidden damage-don't wait for a full rainstorm to verify. When temperatures swing above and below freezing, moisture moves. If you notice cracking, missing granules, or loose flashing after a storm, act quickly to assess and address those vulnerabilities before they balloon into larger issues.
Because hail and wind claims are common in Utah, Layton roof decisions are often driven by storm timing and claim documentation rather than age alone. A roof that looks near the end of its life may still perform adequately if it avoided recent major hail events, while a newer roof could show accelerated wear after a heavy hail season. This reality means you should keep a precise record of storm dates, hail size reports, and any suspected impacts to your shingles or flashing. If a claim is filed, coordinate with your roofer to capture photos of impact points, deformations, or lifted edges shortly after the event. A well-timed inspection following a storm can prevent small leaks from becoming significant interior damage and can clarify whether a repair, partial replacement, or full replacement best serves your home's layout and roof design. Planning with storm timing in mind helps you avoid being caught in a rush while conditions are unsafe or when crews are booked.
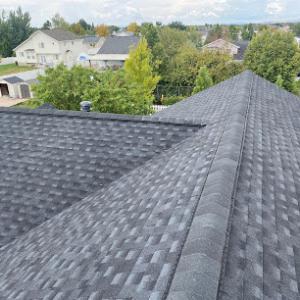
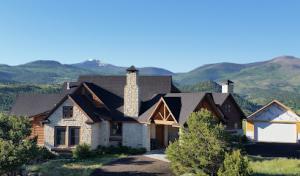
Asphalt shingles are common on the pitched suburban homes that define Layton's streets. They're familiar, easy to repair, and easy to source locally. But the Wasatch Front experience-hot dry summers and regular hail-takes a toll on appearance life and granule retention. When choosing asphalt, look for "impact-resistant" or higher-grade granule blends and stronger nailing patterns to withstand hail impacts and wind uplift. Consider hues that resist fading under long summer sun, and be prepared for periodic granule loss after severe hail events. If a homeowner plans to stay put for a decade or more, a high-impact shingle can pay off in fewer accelerated maintenance cycles.
Metal is a strong local fit because Layton sees both snow shedding concerns in winter and intense summer sun that accelerates aging in conventional roofing systems. Metal sheets or shingles can shed snow more predictably, reducing ice dam risk and related leaks. They also resist hail better than most standard asphalt options, which helps with appearance retention after storms. When selecting metal, focus on panel profiles that minimize exposed fasteners, valuable coatings (such as galvanic or polymer coatings), and a seam design that stands up to freeze-thaw cycles. A metal roof should be paired with adequate attic ventilation and screening to prevent heat buildup in the summer and to manage condensation in the shoulder seasons. If noise during rain matters, ask about added attic insulation or purlin designs that dampen sound.
Tile and wood options appear in the market, but must be evaluated against snow load, freeze-thaw exposure, and the structural realities of existing homes rather than aesthetics alone. Clay and concrete tiles offer excellent longevity and a distinctive look, yet their weight can demand a reinforced structural assessment. Freeze-thaw cycles on the Wasatch Front can create microfractures if installation gaps aren't properly addressed, and heavy loads require a solid roof deck. Wood shingles and shakes deliver a traditional appearance but can suffer more quickly from UV exposure and hail damage unless protected with a resilient underlayment and well-maintained coatings. If a lay-out includes attic spaces with limited exposure or older framing, a careful engineer's review is prudent before committing to a tile or wood system. In areas with heavy snowfall, ensure the chosen tile profile promotes efficient snow shedding while not introducing undue risk to adjoining structures or overhangs.
Start by matching the roof's slope and attic ventilation with the material's requirements. Steeper pitches naturally shed snow more effectively, which supports long-term performance for many material types. For hail-prone periods, prioritize options with proven hail resistance and robust warranty coverage. Inspect a sample or standard installation in a nearby neighborhood to assess how finishes fade under the Wasatch sun and how rapidly granules shed after a hail event. If uncertainty exists about weight, seek a structural assessment that confirms the deck and rafters can support heavier tile or metal without compromising the existing roof lines. Finally, consider maintenance expectations: asphalt offers quick, affordable repairs; metal provides longevity with fewer replacement cycles; tile and wood demand careful care and periodic re-evaluation after harsh winters. These choices should align with how a home sits on its lot, how nearby trees shield or expose it to weather, and the typical wind channels around Layton's neighborhoods.
In Layton, you'll notice price bands for common roof materials reflect local climate and the Wasatch Front's snow, hail, and scorching summer sun. For asphalt shingles, expect roughly $350 to $650 per square. Metal roofing tends to run higher, about $700 to $1,200 per square. Tile options are more costly still: clay tile commonly comes in around $1,200 to $2,400 per square, while concrete tile sits roughly between $1,000 and $1,800 per square. If you're considering wood shingles or shakes, the range is about $500 to $900 per square, and synthetic or composite shingles typically fall in the $600 to $1,100 per square band. These ranges are the baseline you'll see in typical Layton projects, not counting storm-season surges.
During hail and wind events, pricing can rise quickly after the storms. Contractor schedules tighten across the Wasatch Front and insurance-related demand surges at the same time, pushing both availability and material costs higher. If you're facing a fast-moving reroof or storm-repair window, you'll likely see higher bids and more limited crews, which can compress options for choosing an alternative material or a quicker tear-off schedule. It helps to plan with a cushion if your roof is due for replacement in a busy season.
Costs also shift with how a roof sits on the house. Steep suburban rooflines, common in Layton neighborhoods, increase labor and safety requirements, which nudges per-square prices upward. Tear-off depth matters, especially if there are multiple prior roof layers; removing older materials adds to disposal fees and labor time. Winter access adds another layer of challenge, since snow, ice, and cold adhesive behavior can slow crews and modify material handling. All of these nuances can tilt the final total beyond the base ranges listed above.
For material choice, you'll balance performance with price in this climate. Metal and concrete or clay tile tend to resist hail better than some asphalt shingles, but they come at a higher upfront cost and weight considerations. If you're near taller trees or overhangs that shed ice, a tougher surface can reduce long-term maintenance and replacement frequency. When planning, pick a roof system that aligns with your how-long-you-stay horizon, your exposure to high winds, and your willingness to invest upfront for better hail resistance.
To keep budgets realistic, obtain multiple, detailed bids that break out tear-off, disposal, underlayment, flashing, and hardware. Ask each contractor to show what happens if a storm rushes the schedule and they need to adjust material orders or crew hours. With these local considerations in mind, you'll have a smoother path to a durable replacement that stands up to Layton's unique mix of wind, hail, and freeze-thaw cycles.
Kanga Roof
(801) 845-0021 www.roofingcontractorsutah.com
124 S Fairfield Rd E STE A116, Layton, Utah
5.0 from 132 reviews
RW Design, the company behind Kanga Roof, has been family owned and operated for over 30 years. Rex started the business so he could use his skills as a carpenter and make a safe, controlled environment to teach his children the value of hard work. Now Doug, his son, has taken the reins and is working hard to teach his children those same values. Our favorite part of this job is the people we get to work with and for. You can count on a personal touch when you hire us! Our team has been awarded the Technician Seal of Safety. You can have peace of mind when we come to your home. We are a Recommended Roofer, which means you can count on the very best in quality and know that you have a reliable roofing professional on the job.

M.W. Roofing
(385) 243-4458 www.mwroofingutah.com
1133 N Main St #226, Layton, Utah
4.9 from 128 reviews
M.W. Roofing in Layton Utah repairs and replaces residential and commercial roofs in Davis county, Weber county, Box Elder County, and Salt Lake area. We provide free roof assessments. You can trust our judgment when it comes to determining whether you simply need a repair or a whole new roof. Our installers are certified, which means they have been professionally trained on how to conduct a roof inspection, repair, and replacement. If you are using an insurance company, we can help you navigate the insurance claims process and ensure that you don’t pay more out of pocket than is necessary. We do not accept payment until the job is completely finished and you are 100% satisfied with the finished product! Call us today for a free assessment.
J & R Roofing
(385) 303-3450 www.jandrroofingut.com
2075 Clara St, Layton, Utah
5.0 from 47 reviews
J&R Roofing is a trusted roofing company proudly serving Layton, Utah and surrounding areas. We specialize in high-quality Asphalt Shingle Roofing, durable Metal Roofing, and reliable Commercial Roofing solutions. Whether you're facing wind or storm damage or need expert roof repair, our skilled team delivers prompt, professional service with lasting results. At J&R Roofing, we prioritize quality craftsmanship, customer satisfaction, and competitive pricing. No project is too big or small—count on us to protect your home or business with dependable roofing you can trust. Contact J&R Roofing today for a free estimate and experience the difference of working with local experts.
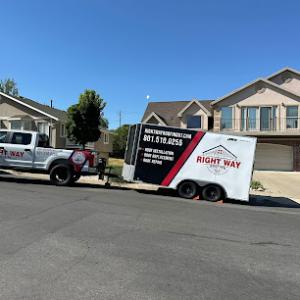
Right Way Roofing
(801) 510-0255 www.rightwayroofingut.com
254 Autumn Breeze Ln, Layton, Utah
4.9 from 74 reviews
Your trusted local roofing experts serving Salt Lake City, Layton, and surrounding Utah communities. Specializing in both residential and commercial properties, we offer comprehensive services from roof repair and replacement to new installations and storm damage restoration. Beyond roofing, we provide gutter services and thorough roof inspections. Whether you need to fix a leak, replace missing shingles, or upgrade to an energy-efficient solution, our certified specialists deliver reliable, high-quality workmanship tailored to your specific needs. Right Way Roofing is committed to ensuring your satisfaction with long-lasting roofing solutions.
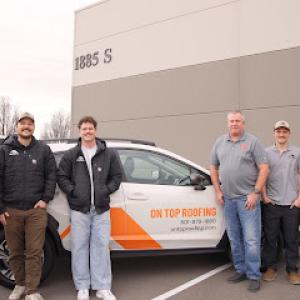
On Top Roofing
(801) 882-2873 ontoproofing.com
199 E 2150 N Suite C, Layton, Utah
4.8 from 86 reviews
We provide durable metal and shingle roofing built to withstand Layton’s fierce canyon winds. On Top Roofing is a local, family-friendly team dedicated to securing your home with a "strong roof for life." We specialize in insurance claims, storm restoration, and proactive maintenance plans to save you money. Don’t let the wind win—choose Davis County’s trusted experts for quality work and a hassle-free experience. We’re excited to serve you!
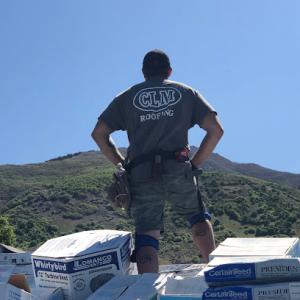
CLM Roofing
(801) 628-7311 www.clmroofingutah.com
252 E 800 S, Layton, Utah
5.0 from 25 reviews
A Trusted Roofing Company in Davis County Are you looking for a licensed, insured, and experienced contractor to tackle a roofing project? Get guaranteed quality results with CLM Roofing, a local roofing company serving customers everywhere from Ogden to Salt Lake City. We offer professional roofing services for both residential and commercial buildings, with the dedication and craftsmanship that has earned us a reputation for excellence. Get in touch for a free estimate today.
Bob Harvey Roofing
(801) 544-5125 www.bobharveyroofing.com
360 S Fort Ln Ste #112, Layton, Utah
4.8 from 51 reviews
Bob Harvey Roofing is a full service roofing company serving Northern Utah for more than 35 years. Our trained roofing maintenance technicians are able to install both commercial and residential roofing systems. We hold ourselves to the highest quality standard, setting the standard by which others are measured. Bob Harvey Roofing serves Davis County, Weber County, Salt Lake County, Utah County, Box Elder County, Cache County and more. We often travel to these areas for new roofing construction or roofing repairs and maintenance! We work with the following roofing materials: Shingles Cedar shakes Metal Low-pitch Asphalt Tile roofing Thermal Plastic Olefin. Receive professional and reliable results from an insured and licensed dealer.

Quality.B.Roofing
(385) 456-9007 www.qualitybroofing.com
3111 N 750 E Unit #4, Layton, Utah
5.0 from 14 reviews
At Quality. B. Roofing we replace, repair, and install roofs on buildings using a variety of materials, including shingles, TPO/PVC, and metal. ask us for a free estimate today.

David Brown Roofing
(801) 782-9157 davidbrownroofinginc.com
Layton, Utah
4.5 from 25 reviews
We are a full service roofing company that specializes in roofing repairs. We also install, clean and repair rain gutters. For new roofs, roofing repairs and remodeling needs, contact David Brown Roofing We serve both commercial and residential customers in Sandy and the surrounding areas. No job is too big or small for us. We will give you honest estimates and finish work on time. We guarantee your satisfaction!
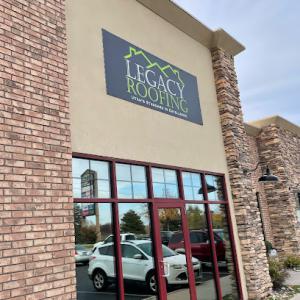
Legacy Roofing Utah
(385) 442-6677 legacyroofingutah.com
Serving
4.9 from 587 reviews
At Legacy Roofing, we don’t just replace roofs, we redefine what homeowners can expect from one. We use only the highest-quality materials, backed by the longest manufacturer warranties in the industry. On top of that, we provide our exclusive systems labor warranty, coverage that is second to none. With our expertise and commitment to excellence, we deliver the ultimate finished roof for your home. Legacy Roofing is Utah’s Standard in Excellence.

Layton Roofers
(801) 701-3276 laytonroofers.com
378 Main St #106, Layton, Utah
5.0 from 1 review
We are Layton Roofers, operating as Profile Roofing. We specialize in New Roofing and Roof Repair in Layton, Kaysville, Ogden, Roy, Syracuse, Farmington, Fruit Heights, South Weber and more. Give us a call or request a free bid off our website!
Roof Utah
Serving
4.9 from 103 reviews
Full service roofing contractor specializing in reroofing. Service residential and commercial clients up and down the Wasatch front. Call us for a free estimate
When a roof in this area needs more than a small repair, the full reroof triggers a building permit process through Layton City and Davis County. This is not considered maintenance that can be left as-is or handled informally. The permit ensures the work meets snow, wind, and freeze-thaw realities of the Wasatch Front and aligns with local drainage and safety rules. Plan for the permit early in the project so scheduling and inspections don't hold up the work.
Most homeowners find that the contractor will submit the necessary permit documents on their behalf. In Layton, it is common for the roofer to coordinate with the city and county offices, obtain plan reviews if needed, and place the permit on file before any material is lifted onto the roof. If a homeowner prefers to manage it themselves, this section is still a helpful reference for what to expect during the process and who to contact.
Rough inspections are part of the local process. Before any tear-off, a rough inspection ensures staging, safety measures, and temporary supports meet code. After the new roof is installed, a final inspection confirms everything is tied into the home's building envelope correctly and that ventilation, underlayment, and flashing meet Layton's standards. The project is not considered complete until that final inspection is passed. Understanding this sequence helps avoid delays, especially during the busy storm-repair season, when inspectors may be coordinating multiple projects in the same neighborhood.
A full reroof with permit oversight is part of maintaining a durable roof in this climate, where snow loads, hail exposure, and temperature swings test every layer. Keeping the permit process and inspection milestones clear helps ensure the job meets local standards and stands up to the region's demanding conditions.
Hail and wind events shape the typical roofing claim experience in Layton more than coastal or wildfire perils. When a storm sweeps through Wasatch Front, shingles, gutters, and vents take the brunt, and a fast-moving re-roof or storm-repair market follows. Understanding that pattern helps you separate functional storm damage from normal aging caused by summer heat and prior winter wear. In practice, this means not assuming everything is storm-related just because a claim is filed; you still need to prove the specific condition caused by weather events.
Insurers commonly want dated photos that show both the pre-loss condition and the post-loss state, so keep a routine photo log from season to season. You should also gather contractor bids that reflect material specifications and installation details, plus clear notes about the scope of work. A crucial item that frequently matters is proof that permit closeout was completed after the project wraps up. Even in a hurry-up repair scenario, missing closeout documentation can stall or complicate payouts. The goal is to present a coherent, traceable record that connects the storm event to the observed damage and the resulting repairs.
Document damage promptly after a hail or wind event, and distinguish it from wear caused by sun exposure and winter freeze-thaw cycles. Schedule a sharp, objective inspection from a reputable local contractor who understands Layton's climate and typical roof assemblies. Have the contractor annotate which areas sustained functional damage (like lifted shingles, edge failures, or compromised flashing) versus cosmetic issues that may not affect performance. When possible, coordinate timelines with the insurer so that photos, bids, and material specs align with the claim's narrative. If a project progresses, ensure that the contractor's scope specifically notes material types, installation methods, and warranty details tied to the observed storm-related damage. A clear, honest record reduces back-and-forth and improves the chance that the claim reflects the true storm impact, not incidental aging.
Connect with contractors who help homeowners navigate the claims process from damage assessment to final approval.

M.W. Roofing
(385) 243-4458 www.mwroofingutah.com
1133 N Main St #226, Layton, Utah
4.9 from 128 reviews
Right Way Roofing
(801) 510-0255 www.rightwayroofingut.com
254 Autumn Breeze Ln, Layton, Utah
4.9 from 74 reviews
Cold snowy winters in Layton create snow-load concerns that affect both replacement timing and the urgency of structural or decking repairs discovered during tear-off. When the attic shows signs of moisture intrusion or the decking feels soft under foot, the snow load adds a layer of risk that can push planning toward bringing on repairs sooner rather than later. If your roof is carrying more weight than it should, delaying a full roof replacement to the next dry window can mean the structure bears the burden longer, increasing the chance of additional damage or uneven deck stress. The practical takeaway is to address structural or decking issues that crop up during tear-off promptly, so the roof can be re-seated on a solid foundation rather than stacking risk on top of existing problems.
Freeze-thaw cycles in this part of northern Utah are especially hard on flashing transitions, exposed fasteners, and brittle aging shingles. When temperatures swing above and below freezing, water can seep into marginal seams and joints, then expand as it freezes, widening gaps and accelerating wear. Exposed fasteners are particularly vulnerable to this stress, and flashing transitions near chimneys, vents, and valleys are common failure points after a harsh winter. If flashing shows any lift, hairline gaps, or corrosion, repairs now prevent leaks later and help the new roof perform through multiple seasons of freeze-thaw.
Winter conditions can also limit safe jobsite access and delay full replacement schedules, making temporary dry-in work more common after active leaks. Slippery eaves, limited daylight, and snow-covered driveways all complicate material handling and rooftop movement. A practical approach is to plan for a temporary dry-in when weather windows tighten, ensuring you still have meaningful protection while crews manage intermittent warmth and daylight. This approach protects interior spaces and buys time to complete the full replacement when conditions permit.
When you can't wait, these contractors offer fast response times to stop leaks and prevent further damage.
M.W. Roofing
(385) 243-4458 www.mwroofingutah.com
1133 N Main St #226, Layton, Utah
4.9 from 128 reviews
On Top Roofing
(801) 882-2873 ontoproofing.com
199 E 2150 N Suite C, Layton, Utah
4.8 from 86 reviews
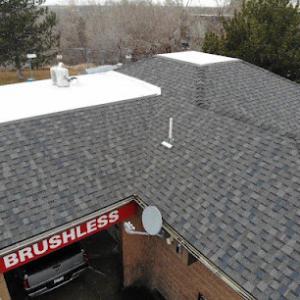
Although pitched residential roofs dominate in the area, the contractor market sees meaningful demand for flat and low-slope work on additions, porches, garages, and mixed residential-commercial properties. On these surfaces, water sits longer after storms and freezes overnight, so small issues can become bigger leaks if not caught early. When evaluating a low-slope section, start with the edge details where the membrane ends and the field of the roof begins. Make sure there is a continuous, properly terminated drip edge and that termination bars or fastener patterns are intact to prevent seam failure during freeze-thaw cycles.
Snow retention and slower drainage on low-slope sections can stress membrane seams more than the main steep roof. Inspect for micro-tears or lifted seams at the highest point of the low-slope run, and pay particular attention to transitions where the low-slope area meets a steeper roof or a wall line. Carry out a careful check after the first major storm and after a heavy melt to confirm runoff pathways are still clear and that valley and edge terminations aren't trapping moisture.
Edge details and transitions are common failure points because they face wind lift and ice dam pressure in winter, and spring storms can push moisture toward these interruptions. Focus on the perimeter flashing, membrane overlaps, and any metal edge channels. If the low-slope portion abuts a taller section, verify that the flashing transitions smoothly without wrinkles or gaps that can channel water inward. Skylights and chimney penetrations matter locally because winter moisture and spring storm exposure often reveal leaks first at these roof interruptions rather than across the entire roof plane.
Schedule targeted inspections after heavy snow events, thaw cycles, and spring rain, with a quick check of low-slope additions and porches at least annually. Maintain a habit of cleaning debris from drip edges and around penetrations to keep water moving in the expected path rather than pooling at transitions. If recurring issues appear at a particular low-slope area, plan a precise restoration of flashing and seam protection rather than a full roof replacement.
Find specialists in TPO, EPDM, and built-up flat roofing systems for residential and commercial properties.
M.W. Roofing
(385) 243-4458 www.mwroofingutah.com
1133 N Main St #226, Layton, Utah
4.9 from 128 reviews

Quality.B.Roofing
(385) 456-9007 www.qualitybroofing.com
3111 N 750 E Unit #4, Layton, Utah
5.0 from 14 reviews