Last updated: Apr 19, 2026
Sandy homeowners face both spring hail exposure and cold-season freeze-thaw cycling, a combination that accelerates granule loss, cracked seal strips, flashing movement, and leak development. The effect isn't uniform across the valley-this is a climate where UV exposure, winter wind, and sharp temperature swings collide with aging roofing. The result: shingles brittle, fasteners stressed, and small failures that quietly grow into big leaks after a spring hail event or a deep freeze. If you're watching the sky or checking gutters, you're already aware that the risk isn't theoretical-it's measurable on most roofs in this area.
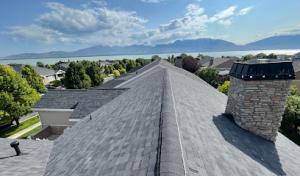
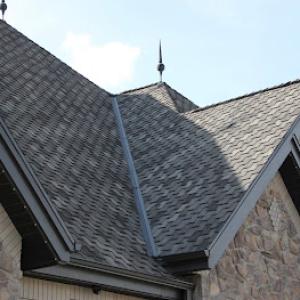
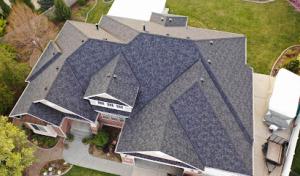
Roofs on the east side nearer the Wasatch foothills can see sharper winter weather swings and snow retention than lower valley locations, increasing stress at eaves, valleys, and roof-to-wall transitions. Snow loads linger longer, and melt cycles drive repeated expansion and contraction at flashings and seal strips. That means valleys and eaves, where water concentrates, are typically the first warners: you may notice lifted granules or a chalking of the shingle surface, plus hairline cracks where sealant has worked over time. If your home sits high on a slope or has a south- or east-facing exposure, you're likely feeling the pressure sooner in the season and more intensely per storm.
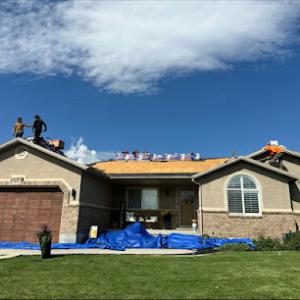
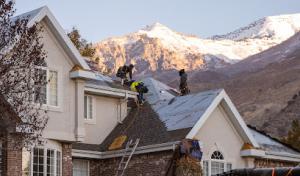
Late spring through fall is the main replacement window because winter snow and ice limit safe tear-off access and summer heat can complicate shingle installation conditions. In practical terms, that means if your roof shows signs of hail impact, granule loss, or compromised flashing, you should plan for repairs or replacement only when the weather allows safe work days and consistent temperatures. Winter work is risky here; roofs retain ice, decks stay slick, and crews lose valuable daylight and control. Schedule with a reputable roofer who can secure a precise plan that avoids freezing cycles and heat-induced shingle warping.
After a hail event, or when freeze-thaw cycles are active, look for exposed or missing granules, dark spotted streaks along ridges, and edges where the sealant is cracked or the flashing shows movement. Small leaks often begin in a hidden corner-under flashing cards, at joins near dormers, or where a valley meets the wall line. If you notice dampness on ceilings, you should assess interior signs like staining around ceiling corners or attic vents. Prompt action matters: a minor intrusion can progress rapidly during spring thaws, heavy rain, or wind-driven hail. Your best move is to call a local roofer who understands how these cycles behave on our type of roof, and insist on a thorough inspection that documents all micro-failures before they compound.
Begin with a careful visual inspection after any hail event or seasonal thaw, focusing on granule loss along shingles, edge lift at seal strips, and any movement in flashing around valleys and roof-to-wall transitions. If you notice loose flashing, lifted shingles, or ceiling dampness, don't wait for a routine maintenance window-secure a timely, in-season assessment. Ask for a detailed report that maps problem areas and prioritizes urgent fixes, especially at eaves and transition points where water first enters. Ensure the contractor uses matching materials and authentic flashing components to preserve weather-tightness through the next cycle of winter and spring.
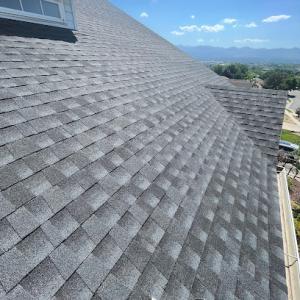
Asphalt shingles dominate because they balance cost with broad availability, and in this market they're easy to source and replace after hail impacts. For this climate, choose shingles with high impact resistance ratings and a reflective granule surface to help with heat tolerance during intense UV exposure. When comparing products, look for impacts resistance measurements (rated for common hail sizes) and warranty terms that cover hail damage and wind uplift. Pay attention to shingle thickness and the presence of microflake or algae-resistant granules, which help keep the roof looking cleaner and performing longer after winter cycles. In a neighborhood mix of homes, standard asphalt can be a reliable base layer, but pairing it with an underlayment designed for freeze-thaw cycles adds durability.
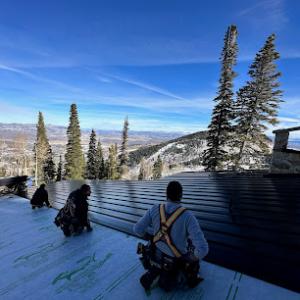
Metal roofing is a strong local fit for shedding snow and resisting sun exposure, which helps explain its meaningful specialist presence in the Sandy market. Metal panels shed ice more readily, reducing ice dam risk and winter weight on the structure. For hail-prone springs, select metal with a stone-coated or impact-resistant finish, and verify the system's fastener pattern is designed to resist wind and hail prying. The panel profile matters: deeper ribs provide stiffness and better load distribution for freeze-thaw cycles, while color choices that reflect sunlight can modestly improve indoor comfort and energy use in hot spells. Ensure the installation includes proper flashing around chimneys, vents, and transitions to maintain a continuous barrier against water and ice infiltration.
Tile, synthetic/composite, and slate appear in the market but require attention to structural load, snow movement, and freeze-related cracking risk in Sandy's winter climate. Concrete and clay tiles add substantial mass; verify the roof structure can bear the additional weight and that the attic space allows for adequate ventilation to prevent condensation. In snowy winters, tile layouts should be designed to encourage safe snow shedding and to minimize perched snow zones where ice can form. Synthetic and composite options offer improved impact resistance with lighter weight and lower maintenance than natural slate or concrete tile, but still demand a compatible underlayment and proper installation to manage freeze-thaw stress. Slate delivers excellent longevity and UV stability, yet its weight and cost require careful evaluation of structural support and roof geometry. Regardless of material, ensure fasteners and flashing are corrosion-resistant and rated for freeze-thaw movement, and check for proper expansion gaps to prevent cracking in cold snaps.
When evaluating options, start with what the roof must endure most: hail frequency, UV load, and winter freeze-thaw cycles. Prioritize impact resistance and heat tolerance in the warranty and product specs, then verify the installation details emphasize snow and ice management for snow-heavy periods. Consider how each material interacts with attic ventilation and attic insulation, because airflow and temperature swings influence shingle or panel expansion and overall service life. Finally, assess the trade-off between weight, load-bearing requirements, and long-term maintenance-heavy tiles or slate may demand structural reinforcement, while lighter options offer easier retrofits in older home stock.
Most reroof projects in this part of the Wasatch Front are best scheduled from late spring into fall, after snow risk drops and before late-season monsoon moisture can interrupt open-roof work. That window aligns with the way freeze-thaw cycling can loosen edges and valleys, and with the way UV exposure accelerates aging on asphalt and metal surfaces. If you're weighing a roof replacement, target a stretch when temperatures are consistently moderate, humidity is manageable, and crews can work without repeated weather delays. A thoughtful calendar here reduces the chance of weather-induced breakages or shingle curling during installation.
Spring hail can create a surge in inspection and replacement demand, so homeowners often need to move quickly to secure contractor availability after major storms. In Sandy, a heavy hail season can fill contractor rosters fast, with crews prioritizing homes that show clear damage or missing shingles. If an inspection flags widespread denting or granule loss, don't let a crowded schedule force you into a rushed choice. Request a written assessment, and line up your preferred contractor early, while storm recovery still has momentum.
Hot, dry summer conditions can speed production but also raise concerns about shingle handling and warranty-sensitive installation temperatures. Asphalt shingles, metal, and tiles react differently under peak heat: asphalt can become soft enough to crease if laid improperly, metal expands, and tile edges can crack if carried or walked on without care. A practical tactic is to plan for morning or late-afternoon work blocks when heat is less punishing, and to confirm that crews are following manufacturer guidelines for temperature limits on the day of installation. Summer timing can shorten total project duration, but the installer must protect underlayment, ensure fasteners hold, and manage attic ventilation during the process.
Begin with a professional inspection that prioritizes wind, hail, and freeze-thaw wear indicators on common failure points: ridge caps, vent flashings, valleys, and chimney penetrations. If multiple roof planes show damage, you'll want to coordinate a single replacement to minimize repeated demolition and weather exposures. When you have a clear replacement plan, align delivery and staging with anticipated weather patterns to avoid a partial roof open during a storm. Finally, choose materials with proven performance in our climate: long-term durability against UV exposure, resistance to cracking from freeze-thaw cycles, and good hail performance ratings. Your contractor should provide you with a plan that accounts for these regional stresses, ensuring the new roof stands up to Sandy's seasonal swings.
Get a clear picture of your project costs upfront - no commitment required.
New Vision Roofing & Landscaping
(801) 420-8746 www.newvisionrnl.net
515 E 9400 S, Sandy, Utah
5.0 from 21 reviews
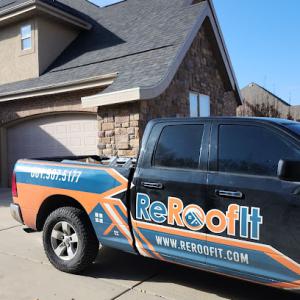
ReRoofIt
9192 S 300 W #24, Sandy, Utah
4.9 from 49 reviews
ReRoofIt is one of the few Salt Lake roofing contractors that is Gephardt Approved. As a full-service roofing company, based in Sandy, UT, we specialize in fixing and replacing old or damaged roofs for both residential and commercial properties. We are experienced with a broad range of roofing types from flat roofs to extreme pitched roofs. We also work with a variety of roofing materials including asphalt shingles, TPO, EPDM, metal, and more. Whether you need roof repairs, roof maintenance, a roof inspection, or a roof replacement, we can help. At ReRoofIt, you can count on the highest quality for both workmanship and materials. We are committed to ending every project with a satisfied customer and a roof you can depend on.
Revive Roofing & Construction
(385) 446-8252 www.reviveroofingut.com
9980 S 300 W #200, Sandy, Utah
4.9 from 39 reviews
Here at Revive Roofing and Construction, we love helping build our community. Our goal is for you to have a stress free experience whenever you run into any roofing or exterior needs. We look forward to doing business with you!
Alta Roofing
(385) 450-7663 www.altaroofing.com
8679 Sandy Pkwy, Sandy, Utah
4.7 from 75 reviews
We are a licensed contractor who specializes in storm restoration. Do you have wind or hail damage to your roof? Most people don't realize that their homeowners insurance can pay to replace their entire roof from hail or wind damage. We can come give a free, no obligation inspection to let you know what damage we see.

New Vision Roofing & Landscaping
(801) 420-8746 www.newvisionrnl.net
515 E 9400 S, Sandy, Utah
5.0 from 21 reviews
New Vision Roofing & Landscaping is your local trusted family company located in the Salt Lake Valley. With more than 20 yrs of experience we’d love to give you a free estimate. No obligation required so don’t hesitate to give us a call!
JLB Roofing Utah
(801) 645-1647 jlbroofingcompany.com
10575 S 420 E, Sandy, Utah
4.8 from 38 reviews
JLB Roofing is a family-owned roofing company based in Sandy, UT, providing quality service for both residential and commercial properties. We’re licensed, bonded, insured, BBB accredited, and GAF certified. Whether you need roof repair, emergency roof repair, or a full replacement, our team delivers dependable results with a focus on safety and craftsmanship. We also offer professional siding and gutter services to protect and enhance your home or business. With a commitment to honest work and long-lasting solutions, JLB Roofing is the name homeowners and business owners in Sandy, UT trust.
Treasure Valley Roofing
(385) 462-7848 treasurevalleyroofing.com
9980 S 300 W suite 204, Sandy, Utah
5.0 from 6 reviews
Treasure Valley Roofing is the premier choice for all your roofing needs in the Utah market, specializing in Utah County, Salt Lake County, Davis County, and Summit County. With a dedication to unparalleled service, we offer comprehensive solutions including roof inspections, maintenance, repairs, and replacements. Our team collaborates with insurance companies to ensure our clients receive cost-effective roof replacements. Trust us to safeguard your home with top-quality roofing expertise and exceptional customer care.
Legacy Roofing
(385) 378-6243 legacyroofingutah.com
688 E Union Square Suite 204, Sandy, Utah
4.1 from 31 reviews
Legacy Roofing is Sandy's best Roof Contactor and Utah's first ever authorized dealer for Tesla Roof sales and installation. We pride ourselves in using the highest quality GAF materials and offering our customers competitive pricing. We have the knowledge and experience to install roofing the way it should be done so your home and family remain protected for years. We are GAF certified and offer up to fifty years warranty on many of our GAF roofing materials. We offer free inspections and we have hundreds of Google 5 star reviews from happy customers. Since roofing is our expertise, it is our job to make sure your home is safe and especially after severe weather. Call us today for free roof inspection or Tesla solar roof.

Superior Roofing Systems
(801) 598-7934 www.superiorroofingsystems.com
195 West 9210 South, Sandy, Utah
5.0 from 4 reviews
Superior Roofing Systems brings over 30 years of roofing experience across California and the Western U.S. to residential and commercial property owners throughout Sandy, Utah and the Salt Lake City area. While our Utah presence is expanding, our expertise is long established through decades of residential, commercial, and industrial roofing across multiple climates and elevations. We provide full-service residential and commercial roofing throughout Sandy, Salt Lake City, and Park City, including roof repairs, leak detection, maintenance, restorations, and roof replacements. We’re experienced with Utah’s wind, snow loads, freeze-thaw cycles, and high-elevation conditions, delivering roofing solutions built for long-term reliability.
Commercial Roofing Experts
3641 Quiet Ridge Cir, Sandy, Utah
4.3 from 6 reviews
Commercial Roofing Contractor - We service all your commercial roofing needs in Salt Lake City, Utah County, and throughout all of Utah. Let us help with your apartment building, condo complex, factory, storage facility, office building, etc. We Specialize in Flat Roofing and Metal Roofing
Capitol Roofing Service
(801) 562-5568 www.capitolroofing.com
9416 500 W, Sandy, Utah
2.9 from 15 reviews
Capitol Roofing Service is focused on providing the best service and performance when installing, repairing, and maintaining commercial roof systems.

Pioneer Roofing
(801) 943-7663 pioneerroofingutah.com
Serving
4.8 from 144 reviews
Pioneer Roofing based in Salt Lake City Utah is a full roof repair and roofing service company. Since 1980, Pioneer Roofing has been helping the local needs of SLC homes and businesses, residential & commercial. We are proud to offer quality roofing installation, repair, and expert service. We are a family & locally owned & operated company, we are proud to serve our awesome local community, and we perform ALL roofing services on time & budget. Our roofers are all knowledgeable & experienced about ALL aspects of the roofing process. We expertly handle repair, installation & standard maintenance for all roofing types. Whether you have shingles, tile, metal, or other, the team at Pioneer Roofing will help with any roofing need. 5 Star Revi...

Utah Roofing Pros
(801) 901-2200 www.utahroofingpros.com
Serving
5.0 from 89 reviews
Utah Roofing Pros in Cottonwood Heights, established in 2017, is a family-owned and operated roofing contractor dedicated to delivering exceptional roofing solutions along the Wasatch front and back, from Provo to Ogden and Tooele to Heber. With a commitment to excellence, they combine skillful expertise with personalized service, earning a reputation for trust, reliability, and integrity in every project they undertake. Specializing in residential repairs and commercial installations, Utah Roofing Pros serves as a trusted partner for homeowners and businesses alike, ensuring the protection and longevity of properties with durable and reliable roofing systems.
Material choice drives the bulk of the upfront cost in this foothill climate. Asphalt shingles sit around 350-650 USD per square, a practical starting point for most homes facing strong sun and freeze-thaw cycles. Metal roofing runs higher, about 700-1100 USD per square, offering durability against hail and snow but with a steeper initial investment. Clay tile is commonly considered for homes with a more permanent look and can run 900-1700 USD per square, while concrete tile sits in the 600-1200 USD range. Synthetic or composite shingles provide a middle path at roughly 450-900 USD per square, and slate-often chosen for long-term durability and curb appeal-ranges 1200-2100 USD per square. Local pricing follows this scale closely, with the potential for adjustments based on roof complexity and chosen underlayment.
In this valley-adjacent foothill environment, hail events spike demand for inspections, dry-in work, and full replacements across the south Salt Lake Valley. After a severe hail season, materials and labor can be in short supply, pushing prices upward briefly. If a repair or replacement is required soon after a hailstorm, expect a tight window for scheduling and a premium on urgent service. For a standard reroof project, plan for the long stretch from spring through early summer when storm activity eases; the same roof might cost noticeably more if a hail event lands just before your contractor's busiest season.
Steeper rooflines common on foothill homes add to the complexity and cost. Snow-related tear-off work can become more involved when crews must manage heavy, compacted snow or ice dam issues before tearing off underlayment. Flashing around chimneys and skylights is a frequent cost driver in this area; improper or aged flashing can lead to leaks after freeze-thaw cycles, nudging projects toward the upper end of local ranges. If the roof features multiple penetrations or unusual geometry, budget additional labor and material allowances to ensure a watertight finish that lasts through freeze-thaw cycles and spring hail alike.
Don't let upfront costs delay a critical repair - these contractors offer payment plans to fit your budget.


In this mountain climate with winter freeze-thaw cycles and spring hail, the city treats a full reroof as a permit item rather than a simple maintenance job. The Sandy City Building Department generally requires a building permit for a full reroof, so start by submitting a complete plan package before any material is lifted from the roof. This helps prevent delays caused by weather-driven access changes or undersized underlayment choices that can fail under such cycles. When you apply, expect to show that the project will replace the entire roof deck surface and include details about fasteners, underlayment, and flashing. The permit process is designed to catch weak points in the planned assembly before they become costly leaks in a high-snow or hail-prone season.
Submittals typically need the reroof scope, contractor details, and the material type being installed, so the city can review the planned assembly for compatibility with local wind loads, freeze-thaw exposure, and hail impacts. Include product data for underlayment, ice and water shield where used, flashing around vents and chimneys, and the intended gravel or mineral-surface layer if applicable. If a metal roof, clay tile, or concrete tile, attach manufacturers' installation guides and details for overlap, nailing patterns, and fastener length. For asphalt or synthetic shingles, provide the shingle model or line and any reinforcement features that improve uplift resistance in gusty spring storms. The goal is to demonstrate a cohesive, weather-ready roof assembly that minimizes vulnerable edges and penetrations.
Inspections commonly occur at the underlayment and venting stage and again after completion. The inspector will look closely at underlayment laps, ice and water shield coverage along eaves, proper venting to avoid condensation, and flashing details around chimneys, skylights, and valleys. They may also verify that you used acceptable fasteners, correct nail placement, and adequate attic ventilation plan. Given Sandy's mix of UV exposure, freeze-thaw cycles, and spring hail, the final check emphasizes installation quality, flashing integrity, and the roof's ability to shed hail impact without exposing the deck. If issues are found, expect a reinspection that targets the specific area before the project can be deemed closed.
Keep a clean channel with the Building Department through every stage, and document weather-related interruptions that could affect installation sequences. Timely communication about access, material deliveries, and partial weather holds helps ensure inspections stay on schedule and the reroof proceeds with fewer interruptions when spring storms loom.
Sandy sits in an active Utah hail and wind claim environment, so insurers commonly expect photo documentation, inspection reports, and clear storm-date evidence. When a hail event hits, your first step is to photograph all affected areas from multiple angles and note the date on a visible object or calendar. Keep copies of any temporary repairs you install to protect the roof until the adjuster arrives. This concrete record helps prevent disputes if the weather turns sunny and the storm aftermath is questioned weeks later.
Adjusters may request independent roof inspections and may scrutinize prior claims history, which matters in a market with recurring spring storm activity. If you've had past hail or wind claims, be prepared for closer questions about whether new damage is storm-related or simply wear from UV exposure and freeze-thaw cycles. A proactive approach-getting a licensed roofer's assessment with clear, dated notes-can streamline conversations with the insurer and support a factual damage narrative.
Coverage remains generally available, but hail-prone years can lead to more discussion around deductibles and closer review of whether damage is storm-related versus wear from UV and freeze-thaw exposure. Understand that insurers may separate incidental wear from newly damaged areas, especially on roofs with age or mixed materials. In a spring driven by unpredictable weather swings, timely documentation, independent inspections, and honest, detailed reports help ensure that legitimate storm damage is recognized while exposure-related wear is appropriately categorized.
Connect with contractors who help homeowners navigate the claims process from damage assessment to final approval.
Revive Roofing & Construction
(385) 446-8252 www.reviveroofingut.com
9980 S 300 W #200, Sandy, Utah
4.9 from 39 reviews
JLB Roofing Utah
(801) 645-1647 jlbroofingcompany.com
10575 S 420 E, Sandy, Utah
4.8 from 38 reviews
In this climate, leak points often show up first at valleys, eaves, and flashing transitions where snow sits longer and repeated thaw-refreeze movement opens pathways for water. You'll notice minor staining or felt bunching before a full roof leak, especially after a heavy snow thaw or a severe hail event. When ice damming occurs, those vulnerable seams become channels for meltwater to push beneath shingles and underlayment. A careful eye on those transitions after winter storms can save costly damage later-look for hairline gaps, loose flashing, or lifted shingles that meet at critical angles. If you see lingering moisture near joints, treat it like a warning flare rather than a nuisance.
South- and west-facing slopes take the brunt of the hot summer sun, which can age asphalt surfaces faster and expose sealant and vent details to more thermal stress. Foam or sealant joints can crack, and vent flashings may loosen with repeated heat cycling. On these slopes, shingles may curl or lose granules sooner, reducing protection against hail impact and UV degradation. Regular inspections after peak heat cycles and prior to winter prep help catch these failures early, before a minor crack becomes a leak.
Skylights, chimneys, and roof penetrations deserve extra scrutiny because storm-driven rain and winter ice movement can exploit weak flashing details. A single poorly seated flashing pan or an overworked mastic joint can turn a fast-moving storm into a slow, creeping leak. After a hailstorm or freeze-thaw sequence, recheck every penetration for pulled sealant, misaligned kickout flashing, or cracked boot surrounds. Tighten, reseal, or replace compromised pieces promptly to preserve the roof's barrier.
Find contractors experienced in skylight installation, flashing, and leak repairs to bring natural light into your home.
Red Star Roofing
(385) 323-3369 redstar-roofing.com
9550 Carriage Chase Ln, Sandy, Utah
4.9 from 52 reviews
Sandy's metal roofing market shows a notable amount of specialized activity, reflecting the area's need for reliable snow shedding and long-lasting UV resistance. If you're considering metal, look for panels and fasteners rated for freeze-thaw cycles and for coastal Utah's spring hail habit. Standing-seam systems often perform well on steeper residential pitches, but the detailing around hips, ridges, and edge details matters just as much as the panel choice. A thoughtful color and coating strategy helps minimize heat buildup during peak sun while preserving surface life through years of UV exposure. In addition, ensure the roof-to-wall transitions are reinforced to handle snow loads and wind-driven debris without compromising drainage.
Flat and low-slope sections appear in the local market even though pitched roofs dominate. Drainage strategy and membrane detailing become critical on additions or modern designs. When evaluating flat segments, pay attention to the slope adequacy, edge terminations, and flashing continuity where new and existing roofing meet. Membrane compatibility with adjacent pitched sections prevents differential movement that can lead to seam failures. In Sandy, the combination of winter moisture and spring hail can push edge details to the limit, so look for robust overlap, UV-stable top layers, and proven warranty coverage on the membrane system.
Solar-integrated roofing matters locally because strong sun exposure makes roof condition, attachment planning, and future reroof timing especially relevant before panel work proceeds. Before installation, inspect for prior hail or freeze-damage that could complicate mounting. Ensure attachment points are reinforced to handle added mechanical load and potential wind uplift. Plan for shading effects on adjacent roof surfaces and confirm that the chosen roof material accepts solar hardware without compromising waterproofing. Regular inspections after installation help catch fastener or flashing issues early, supporting a clean path to long-term performance.
Explore specialists in steel, aluminum, and standing seam metal roofs built to last 50 years or more.

Commercial Roofing Experts
3641 Quiet Ridge Cir, Sandy, Utah
4.3 from 6 reviews

When the spring hail season hits, the market fills quickly with re-roofing and quick-response outfits. You need to separate contractors who actually return calls, assess damage on-site, and schedule a proper tear-off from those who mainly push follow-up calls and generic ads after a hail event. Look for clear communication about on-site evaluation timelines, a realistic plan for wind-driven debris, and a written process for on-site storm damage assessment versus scripted sales pitches.
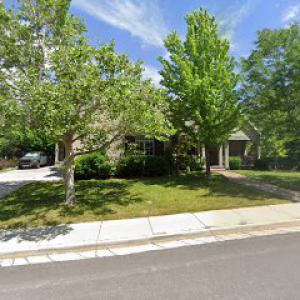
In residential neighborhoods with mature landscaping and varied roof lines, cleanup is a major local concern. Ask for the contractor's method for protecting shrubs, lawn, and ornamentals during tear-off, and for how nails, shingles, and bits will be removed from the yard and driveway. A reputable crew will describe a staged tear-off, daily cleanup, and a firm guarantee that yard waste, nails, and protectors are collected and disposed of before the job ends.
The Wasatch Front foothills bring intense UV, winter freeze-thaw cycles, and spring hail. Contractors with long-standing local experience understand how these factors affect different roof assemblies in Sandy neighborhoods. Favor firms that can document installs on the common residential stock in your area and show examples of successful repairs after seasonal freeze-thaw cycles, not just glossy marketing photos.
In this market, warranty backing and local reroof experience are more useful filters than generic sales promises. Prefer builders who have been operating under the same name for several years, can provide local customer references, and hold manufacturer certifications appropriate to your chosen roofing material. Manufacturer-backed warranties paired with local service history give you confidence that maintenance or warranty items will be honored after harsh weather events.
Ask for a written plan outlining tear-off scope, disposal methods, material delivery, and site protection. Confirm who will manage the project, how quality control is handled day by day, and what happens if weather interrupts progress. A clear, detailed schedule with a verified local contact reduces the risk of miscommunication during a busy spring season.