Last updated: Apr 19, 2026
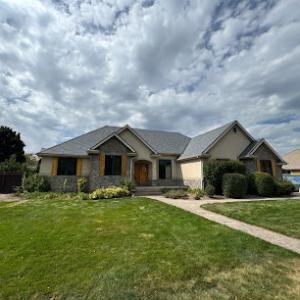
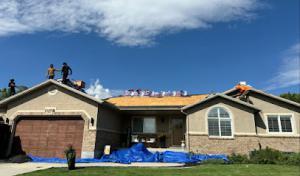
Spring arrives with a punch on the Wasatch Front, and spring hail plus canyon winds are a recurring roofing concern. In this season, your steep-slope roof bears the brunt of hail impacts, wind-driven granule loss, and sudden energy increases inside the attic from cooling air leaks. The moment a hailstorm passes, the risk isn't just cosmetic-granules can loosen, shingles can crack, and flashing can shift. When you see hail-sized dents or pockmarks, treat it as a potential claim trigger, because insurers are watching for both new damage and accelerated deterioration from prior wear. The rooftop stress multiplies on older or mixed-material roofs, where asphalt shingles, metal accents, and vent flashing meet at awkward angles along the eaves and ridges. Act quickly after a storm to assess and document, because a delayed report can blur the line between fresh storm hits and existing wear.
Utah's broader hail- and wind-claim environment bleeds into Draper every year. Carriers frequently require detailed photo documentation that shows both the storm-damaged areas and the surrounding, low-traffic sections of the roof for comparison. Close scrutiny of pre-existing wear is common, especially when the roof has some seasonality marks from previous winters. Shingles that look brittle or granules that have accumulated in gutters aren't automatically new damage, but they do raise flags during adjustments. The best approach is to document with clear, high-resolution photos from multiple angles, timed just after a storm when the damage is freshest. Keep a running log of dates, weather conditions, and any observed changes on the roof or attic space. If a claim is filed, photo timelines can help you establish a coherent narrative for the adjuster, rather than leaving a patchy or uncertain history for review.
Draper sits on the Wasatch Front where winter snow and freeze-thaw cycles have already stress-tested many roofs. Insurers will look for whether new hits coincide with the current season or reflect long-term wear that predated the most recent storm. Fresh hail dents or wind-blown damage must be differentiated from older granule loss, brittle shingles, or long-term flashing wear. This distinction matters for how the claim is evaluated and how much of the roof can be repaired versus replaced. If a storm comes during spring, the transition from snow-melt moisture to dry warmth can also expose moisture intrusion behind the scenes. Check attic spaces for condensation, staining, or subtle mold growth after a hail event, especially if warm spells follow the storm.
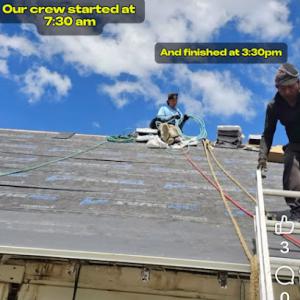
Right after a hail or high-wind event, perform a careful exterior inspection from ground level and, if safe, from a ladder angle that grants visibility of the ridge line and the hips. Photograph all suspected impact points, wearing perspective shots that show surrounding shingles for scale. Document any lifted, curled, or cracked edges, as well as loose flashing around chimneys, vents, and skylights. If you notice interior signs of water intrusion or attic condensation, map the path of any leaks with sketches and dates. When you file or anticipate a claim, prepare a concise summary that includes storm date, wind speeds if known, and observed roof conditions. Maintain copies of all claim correspondence and photo files. Finally, coordinate with a trusted local roofer who understands the typical materials in Draper homes and can provide a pre- and post-storm assessment that aligns with how insurers evaluate damage in this specific climate. Acting promptly and documenting with precision helps ensure the most accurate claim outcome during the season.
Snowy winters and warm, dry summers create a distinctive aging pattern on steep-slope roofs in this area. The bench-to-foothill exposure brings rapid winter loading from snow and ice, followed by harsh summer sun that accelerates UV-related wear. As shingles, tiles, or metal panels cycle through freeze-thaw and sun exposure, you'll see a pattern of early granule loss, flashing corrosion, and softening at edges where snow piles or drifts sit. In a typical Draper year, the rhythm is clear: heavy snow in the cold months, then a long, drying stretch that pushes asphalt, wood, or composite products toward brittleness or warping as temperatures swing from subfreezing nights to hot afternoons.
Freeze-thaw cycles are less forgiving around penetrations, transitions, and roof-to-wall junctions. Where vents, chimneys, skylights, and pipe collars meet the deck and underlayment, water can work its way in during thaws and re-freeze in place, stressing sealants and fasteners. In winter, look for hairline cracks along the valleys, step flashings, and around exhausts. In late winter and early spring, if you notice damp spots on ceilings after warmer days or hear popping noises as ice expands, those are signposts to inspect underlayment condition and transition points. The heat of summer further compounds this by aging sealants and reducing the resilience of roof joints that already carried winter stress.
Late spring through early fall is the generally recommended reroofing window because installation conditions are more predictable than during heavy snow or the deepest cold. Dry air, accessible scaffolding, and lower risk of ice dam formation make a big difference for roof longevity and for the lifespan of new underlayment and fasteners. If you are weighing a reroof, target a stretch with stable shoulder-season weather plus a few warm, dry weeks for completion. Plan ahead for heat, short storms, and afternoon wind shifts that can affect metal work and sealant curing. In practical terms, you'll want to coordinate with your roofing crew to schedule around the warm, clear days typical of the spring shoulder season, and to avoid intervals when hail or high winds are more likely.
Wind-driven gusts through canyons can loosen edge shingles and misalign flashing, especially on exposed ridges and eaves. Spring hail, common in this foothill belt, compounds surface damage that accelerates aging of any roof. A prudent maintenance routine includes proactive inspection after severe events, checking for loosened granules, damaged edges, or exposed underlayment, and addressing small issues before they propagate. When planning for repairs or replacement, align your project with the favorable window described above, and build in a frame for post-storm assessments to catch damage early rather than waiting for deterioration to become visible.
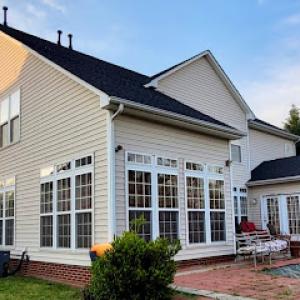
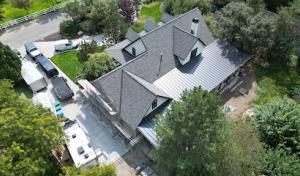
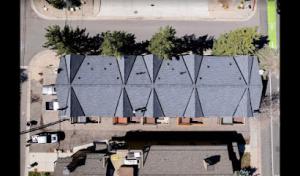
Draper shows a wider steep-slope material mix than many Utah cities, with asphalt shingles, metal roofing, clay tile, concrete tile, wood shingles or shakes, and slate commonly on display. This variety reflects both aesthetic desires and the practical realities of slope, exposure, and wind-driven debris. When choosing materials, consider not only curb appeal but how the roof will hold up to high-altitude sun, rapid temperature shifts, and the spring hail often seen after the winter thaw. The right choice balances ease of repair, weight relative to the structure, and long-term performance under freeze-thaw cycles.
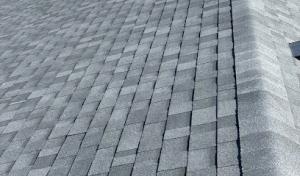
Spring hail and canyon winds can drive impact resistance to the top of the list. Asphalt shingles offer straightforward repairability and good impact resistance in many installations, while metal roofing tends to shed hail better and resist wind uplift if installed with a robust fastener pattern. Clay and concrete tiles bring excellent longevity and a distinct look, but their weight and fragility under severe hail can shift the risk profile. Wood shingles provide a classic texture but exhibit variable performance with moisture and hail impact, and slate stands out for longevity and elegance yet demands a reinforced roof structure and careful installation. In practice, homeowners should intersect these physical traits with existing roof geometry-steep slopes, overhangs, and canyon exposure all magnify wind loads and hail impact potential.
Tile and slate selections are attractive on higher-end homes, but their weight and repair complexity matter more here than in markets dominated by asphalt. Heavier roofs push more load onto framing, which can influence long-term performance and the feasibility of certain replacements or repairs without structural tweaks. Slate, while aesthetically striking, often requires specialized installation and maintenance know-how, increasing the complexity of any patchwork after hail or wind damage. If choosing tile or slate, ensure the underlying structure and fastener strategy are sized for the added weight and that a qualified tradesperson can perform both installation and subsequent repairs with proper access to the attic and drainage details.
Because insurance-driven planning is a common reality after spring storms, focus on selecting materials with documented performance in hail-prone conditions and a straightforward path to professional repairs. Materials with standardized repair methods and widely available spare components tend to minimize downtime after a claim. For many Draper homes, a balanced approach-strong impact resistance, manageable weight, and predictable repairability-gets you a roof that not only looks good but also stands up to the seasonally challenging mix of snow, heat, and hail.
Rocky Mountain Roofing UT
(801) 201-2685 www.rockymountainroofingut.net
1733 Auburn Ridge Ln, Draper, Utah
5.0 from 87 reviews
Rocky Mountain Roofing UT, LLC is a roofing contractor in Draper, UT, and the surrounding areas. We provide residential flat roofing, commercial construction services, new construction, and metal roofing. We also offer roof repair services. We’re proud to be a part of a community that values quality craftsmanship and customer service. We take pride in our work, and we have the experience and expertise to back it up.
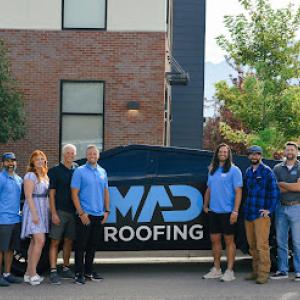
MAD Roofing
12577 S 265 W, Draper, Utah
4.8 from 298 reviews
MAD Roofing is a roofing contractor in South Jordan serving Salt Lake City, Riverton, Sandy, and nearby areas. Our roofing company offers roof repair, roof replacement, and soffit or fascia repair. We also specialize in gutter services. Customers love us because of our comprehensive roof warranties and affordable roof financing options. We also have industry affiliations and certifications such as Owens Corning. Contact your reliable Salt Lake City roofing company for a free estimate!

Patriot Roofing & Construction
(801) 760-7631 prcroofingpro.com
13894 S Bangerter Pkwy Ste 200, Draper, Utah
4.8 from 179 reviews
Patriot Roofing & Construction is a 100% veteran owned company that exists to serve our clients and the community. Choose Patriot Roofing & Construction if you’re looking for an experienced roofing contractor to help you care for your roof or make some much-needed updates. With decades of experience roofing in Salt Lake City, and with a 100%, 5-star rating, we offer an exceptional total customer experience. We’d be happy to take a look at your roof regardless of its age or condition. As a top roofer in Salt Lake City, we can offer you a full inspection to determine the state of your roof. Our team will treat your property with respect and work hard to complete your project as quickly as possible without rushing or cutting corners.

Pride Roofing & Contracting
(385) 235-3988 prideroofing.net
12390 S 800 E, Draper, Utah
4.9 from 44 reviews
Pride Roofing & Contracting, LLC is a trusted, locally owned roofing contractor based in Draper, Utah. With decades of experience and a reputation built on quality, integrity, and customer care, we specialize in residential roof replacement, roof repair, storm and wind damage restoration, and premium Malarkey roofing systems. As certified installers, we deliver high-performance, long-lasting roofing backed by industry-leading warranties. We proudly serve Draper, Sandy, South Jordan, Riverton, Herriman, Bluffdale, Lehi, Highland, and the surrounding Utah communities with reliable service, clean job sites, and craftsmanship that stands the test of time.
Veteran Roofing
(801) 500-3932 www.veteranroofingutah.com
Draper, Utah
5.0 from 20 reviews
We specialize in insurance claims to repair storm damaged roofs. We're a VETERAN owned and operated ROOFING COMPANY. Its time to finally be able to trust your roofer. Here at Veteran Roofing we pride ourselves in Integrity to do the right thing, Grit to get the job done right and Commitment to customer satisfaction. Do you have a leaky roof, give us a call and we'll be there for you. We do Shingle, Tile, Shingle, Cedar Shake, leak mitigation, etc.
UT Roofs
(801) 486-3300 www.utroofs.com
11560 S State St, Draper, Utah
4.8 from 16 reviews
Making Roofing Look Easy! When your roof is damaged, we make it easy to get replaced. With over a decade of experience of replacing roofs for homeowners, we know what it takes to get it done as quickly and affordably as possible. we bring professionalism and precision to each project we undertake. When it comes to handling insurance claims for storm-related damages, we are the trusted choice. Let us protect your home and provide peace of mind.
Legacy Roofing
(385) 342-5720 legacyroofingutah.com
11576 S State St #202-C, Draper, Utah
5.0 from 1 review
Legacy Roofing offers quality roofing products to customers throughout Draper, Utah. Draper is one of the most popular places to live in Utah and is filled with growing families and young professionals. It is a safe place to live and work with a high ranked education system. Legacy Roofing takes pride in serving the Draper community and using our knowledge and experience to make your home as safe as possible. If you have been a longtime homeowner, or you are new to the area and have just purchased a home, we offer roofing services and experienced contractors that benefit your needs. Call us today for a free roof repair or new roof estimate.
The Roofing Contractor
(801) 738-0736 theroofingcompanyinc.com
Serving
4.9 from 79 reviews
Our family-owned roof company has provided residential and commercial roofing services to residents of Utah and beyond for nearly 40 years, so you can rely on our expertise. We are licensed and bonded and have an A+ rating with the Better Business Bureau. There is no need to worry about the quality of our workmanship or the reliability of our staff. Just read our 5-star reviews! Our specialties include roof repair, balcony repair, gutter installation, & roof replacement. We service all types of roofs including shingle, tile, flat & foam roofs.
Lasting Impressions Roofing & Improvements
(385) 355-4778 lastingimpressions28.wixsite.com
Serving
5.0 from 78 reviews
Roofing and Repair that lasts! Certified Roofing Repair and Home Inspections Est. 2019 in NC and now servicing all of Utah! Services include: -Complete roof renewal -Roofing repair -Roof tune-ups -Home inspections And much more! Call or visit our website for more information Se habla español
Dynamite Roofing
(801) 448-0017 www.dynamiteutah.com
Serving
4.9 from 230 reviews
Dynamite Roofing is Utah’s trusted residential and commercial roofing contractor, proudly serving Salt Lake County, Utah County, the greater Wasatch front, and surrounding communities. With decades of proven experience, we specialize in roof repair, replacement, asphalt shingle roofing, metal roofing, and storm damage restoration. Our certified team uses top-rated materials and photo-documented inspections to deliver durable, warrantied results. Licensed, insured, and 5-Star Rated, we complete most projects in one day with clean worksites and transparent estimates. Call Dynamite Roofing for quality, clarity, and protection that lasts.

Pro Roofing Ut
(801) 512-9969 www.proroofingut.com
Serving
5.0 from 39 reviews
Pro Roofing UT is a local, family-owned roofing business that serves the Wasatch Front. With over 20 years of experience, our team excels on all types of roofs. Whether it is for new construction or re-roofing, call our team today for a free estimate.
HAVN Construction
(801) 810-8322 www.buildhavn.com
Serving
4.5 from 291 reviews
HAVN provides a wide range of construction services to all residents in Utah. BUILD. ROOFING. REMODEL.
Provided local cost ranges run from about $350 to $700 per square for asphalt shingles, $700 to $1400 for metal, $900 to $1900 for clay tile, $800 to $1600 for concrete tile, $650 to $1400 for wood shingles or shakes, and $2000 to $4500 for slate. Those figures reflect Draper's mix of steep slopes, exposed terrain, and a market that often sees demand fluctuate after hail storms or windy events. When comparing bids, ensure each proposal accounts for square footage, pitch, roof complexity, underlayment, and any needed roof-to-wall flashing upgrades.
Storm-driven surges in demand after hail and wind events can affect scheduling pressure and replacement pricing more than in calmer roofing markets. In practical terms, a contractor who can start within a few weeks after a hail event might be in high demand, and that can push timelines and prices upward. Anticipate longer waits for hands-on crews with tile, slate, or metal experience, especially after severe spring storms. If a hail event hits, consider requesting a couple of written timelines from bidders and ask how they handle material lead times, especially for heavier systems.
Costs can also shift based on the material mix common in Draper, where heavier systems like tile and slate and more specialized steep-slope work require crews with narrower expertise. For clay or concrete tiles, anticipate higher labor and risk premiums due to breakage potential on steep pitches and the need for precise underlayment and flashing details. Metal roofs can carry higher upfront costs but often offer longer life and better wind performance, which matters in canyon-driven winds. Asphalt remains the most flexible option for price, but even here, the difference between a basic install and a higher-performance, impact-resistant shingle can be meaningful if hail risk is a consideration.
Spring hail and wind events often trigger insurance-driven planning. In practice, this means requesting documentation of hail impact from insurers and vendors, and preparing for deductible-related decisions that can affect the overall project scope. If insurance steps in, ensure the bid itemizes what the policy will cover-including tear-off, disposal, and any required secondary waterproofing layers. Given fluctuations in demand, building a small contingency into the budget for expedited scheduling or material delays can help minimize stress during a busy spring window.
Don't let upfront costs delay a critical repair - these contractors offer payment plans to fit your budget.
Patriot Roofing & Construction
(801) 760-7631 prcroofingpro.com
13894 S Bangerter Pkwy Ste 200, Draper, Utah
4.8 from 179 reviews
In this city, a full reroof almost always requires a building permit, and the process runs through the Draper City Building Department. Before any new shingles or underlayment are lifted, you should confirm which contractor will pull the permit and file the project scope with the department. Missing or delayed permits can cause headaches at closeout, complicate insurance interactions, and slow down project completion. The permit step is not a mere formality; it ties your home's reroof to official reviews that track compliance with local code and neighborhood standards.
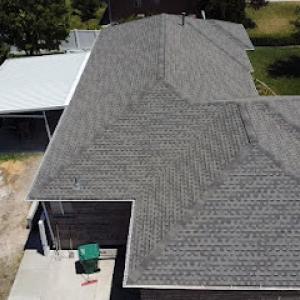
Inspections here follow a practical, project-based rhythm rather than a paper-only checklist. After work begins, a first inspection typically occurs to verify that framing, decking, underlayment, and basic ventilation components meet code and manufacturer requirements. A second inspection is scheduled at final completion to confirm that the installation aligns with the approved plan and is ready for ongoing performance under Utah weather cycles. Expect the inspector to look closely at details that influence long-term durability, especially on steep-sloped roofs common along benches and foothills.
The final inspection places a strong emphasis on underlayment quality, attic ventilation, and correct installation of shingles or other roofing materials. Underlayment integrity matters because Draper's freeze-thaw cycles and spring hail can exploit even minor gaps. Ventilation is evaluated not just for code compliance, but for real-world airflow that prevents moisture buildup in attic spaces during warm months. Installation compliance covers nailing patterns, starter courses, flashing at chimneys and vents, and the way ridge cap shingles are seated. If anything looks out of spec, the inspector will flag it, which can delay final sign-off until corrections are made and re-inspected.
To minimize back-and-forth at the end, ensure the roofing contractor coordinates timing with the Draper City Building Department and provides complete documentation, including deck conditions, underlayment type, and venting details. Have manufacturer installation manuals ready for review and confirm that the chosen materials meet local code requirements and wind considerations typical of canyon winds. Since final approval hinges on installation quality, you should expect a thorough walk-through with the inspector, and you should be prepared to address any minor deficiencies promptly to keep the project moving toward a clean closeout.
Snowy winters and freeze-thaw cycles can turn minor flashing gaps or weak underlayment into active interior leaks during cold-weather storms. You may notice warm, dripping sounds or wet spots that appear after a thaw or a heavy snowfall. On steep-slope roofs common in the area, wind-driven snow can uncover ridge line flashing or valley seams, letting water sneak in where you least expect it. Treat any fresh dampness as an urgent alert that paths of water are pursuing weaknesses that need rapid attention.
Because full replacement timing is usually better from late spring to early fall, temporary stabilization and tarping can be especially relevant when failures show up mid-winter. If you detect active dripping, bring the heat and water under control by diverting flow away from the interior with dry tarps and secure fasteners. Keep a path clear for any emergency crew to access the roof. Avoid walking on fragile areas; call a local emergency roofer if you're unsure about the structural integrity of the roof pitch or surrounding eaves.
The strong local prevalence of emergency repair services reflects a real need for rapid response after storms rather than only planned replacement work. If shingles or flashing have blown free, or if interior ceilings begin to stain under cold-weather pressure, contact a responder who can stage a temporary fix quickly. Prioritize tarping over prolonged exposure, and document the damage with photos for insurance discussions once access to a safe surface is established.
After stabilization, map out the most vulnerable roof sections-valleys, hips, and roof-to-wall flashings-and prepare a plan for mid-winter checks. Keep contact details for trusted emergency roofers handy, along with a flashlight, rope, and tarps stored near the entry points to your attic or crawlspace. Being ready can stop a small leak from becoming a widespread interior problem during another cold snap.
When you can't wait, these contractors offer fast response times to stop leaks and prevent further damage.
Rocky Mountain Roofing UT
(801) 201-2685 www.rockymountainroofingut.net
1733 Auburn Ridge Ln, Draper, Utah
5.0 from 87 reviews
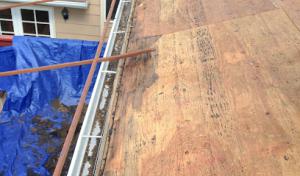
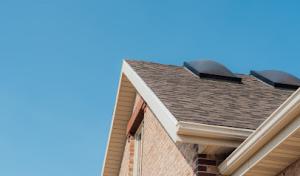
Draper's freeze-thaw cycles stress sealants and flashing where roofs meet penetrations. Skylights, vent stacks, solar mounts, and skylight-tie-ins sit at the vulnerable edge of field shingles, where moisture can wick in and linger. On reroofs, winter moisture intrusion can masquerade as field-shingle failure, while the real culprit is often flashing transitions around those penetrations. Plan for additional scrutiny during planning and after any winter moisture events, and treat flashing integrity as a first-line check alongside shingle condition.
The local contractor signal mix shows meaningful demand for both skylight-related roofing work and solar-integrated roofing support. When selecting skylights or solar mounts, prioritize products with robust flashing systems designed for steep slopes and cold climates. Favor integrated flashing that seals neatly to the roof deck and underlayment, not just the surface layer. For solar, look for mounting hardware that distributes load without compromising underlayment, and consider higher-seating profiles that minimize snow damming around penetrations. Every penetrating detail should be coordinated with the chosen shingle style to avoid mismatched sealing surfaces.
During installation, ensure penetrations are square, properly flashed, and integrated with a continuous underlayment up the slope. On dormers, skylights, or solar racking, confirm that flashing transitions align with venting channels and coping edges to prevent water tracking. If a roof already has complex geometry, demand extra flashing detail at each transition and ensure sealants are rated for freeze-thaw exposure. For mounted components, insist on counter-flashing that overlaps primary flashing and remains accessible for future maintenance without removing shingles.
In spring, inspect all penetrations for hairline cracks, lifted flashing, or sealant deterioration caused by freeze-thaw stress. After heavy snow seasons or hail, recheck the sealant at skylight bases and solar mounts as soon as temperatures allow. Powdered calcium or mineral deposits from winter melt can mask leaks; clean the flashing surfaces and re-seal if any dampness is detected behind shingle lines. Establish a predictable maintenance routine that focuses on transitions and high-stress points rather than only the visible field shingles.
Spring brings hail and wind remnants that can loosen or damage penetrations before shingles show obvious signs of stress. Pair inspections with storm season readiness: reinforce flashing transitions, confirm sealant longevity, and ensure that skylight and solar mounting hardware remains secure after wind-driven impacts. On reroofs, prioritize penetrations first, because remediation there often yields clearer long-term performance gains than chasing field-shingle issues alone.
Find contractors experienced in skylight installation, flashing, and leak repairs to bring natural light into your home.
Lasting Impressions Roofing & Improvements
(385) 355-4778 lastingimpressions28.wixsite.com
Serving
5.0 from 78 reviews
In a Draper market shaped by hail, wind, and seasonal temperature swings, homeowners need clear separation between manufacturer material coverage and contractor workmanship coverage. Materials can carry robust manufacturer warranties, but those guarantees only protect the actual product when installed correctly and not the structure or performance of the roof. The practical consequence is that a claim for hail damage often hinges on whether the installation work itself met industry standards and the warranty terms. Understanding where the product ends and the workmanship begins helps avoid gaps when spring storms test the roof.
Documentation at install completion matters for both warranty support and future storm claims. After a project is finished, you should receive a detailed report that covers what was installed, the exact products, and the workmanship notes. This record is especially important when carriers scrutinize pre-existing wear or contentious wind-driven events. A clear, dated handover with photos and inspection stamps can be the difference between a straightforward claim and a dispute that drags on, particularly after a harsh Utah spring.
The local contractor market shows a meaningful presence of warranty-offering firms, making warranty terms a practical comparison point for homeowners. Not all warranties read the same, and some push the risk onto the homeowner for routine maintenance or obscure exclusions. When evaluating bids, read the fine print on exclusions, transferability, and the duration of both material and workmanship coverage. Ask for real-world examples of how claims were handled under wind and hail conditions, and request third-party inspection options if the claim process becomes contested.
Finally, consider how a warranty aligns with maintenance reality in a high-desert, variable-climate neighborhood. Extreme temperature swings can stress fasteners and sealants differently than wind-driven damage or hail impacts alone. A trusted local contractor should outline a realistic maintenance plan tied to warranty requirements, so you aren't surprised by coverage gaps when a storm test comes in. Clear language and accessible support are the practical differences between protection you can count on and promises that don't weather the next round of weather.
Even in a market dominated by steep-slope shingles and tiles, the flat and low-slope portions tucked into additions, porches, and modern home bays often drive long-term performance. These areas are more than aesthetic choices; they define how water sheds toward drains and how transitions from slope to flat are details that determine durability. In Draper, the local mix of flat-roof specialists means you can find capable teams, but the work must be tailored to the specific edge details, flashing, and membrane choices that fit a canyon-adjacent neighborhood.
Draper's winter pattern brings freeze-thaw cycles that linger on low-slope drainage details, seams, and transitions. Water tends to pool or hover near flashing corners when temperatures swing, creating concentrated stress at fasteners and seams. Over time, that linger of moisture can accelerate edge rot, membrane punctures, or seam failures more than on steeper sections. A flat roof adds complexity because drainage must be predictable and unobstructed, not dependent on gravity alone.
Low-slope sections in this area often fail differently from the city's dominant shingle and tile systems. Repairs may require older or alternative flashing strategies, membrane patches, or seam reinforcements that aren't the same as those used on the main roof. Because the material layering is different, the inspection focus should be on edge transitions, parapet conditions, and details at parapet-to-roof junctions where wind-driven rain can creep in.
You should regularly review flat sections after heavy snows and wind events, paying close attention to seam integrity, flashing corrosion, and sediment buildup near drains. When hiring, prioritize crews with documented experience in low-slope detailing and proven reactions to Draper's seasonal moisture patterns. Clear, consistent drainage paths and well-sealed transitions are the guardrails against spring hail and wind-driven leaks in these spaces.
Find specialists in TPO, EPDM, and built-up flat roofing systems for residential and commercial properties.
Rocky Mountain Roofing UT
(801) 201-2685 www.rockymountainroofingut.net
1733 Auburn Ridge Ln, Draper, Utah
5.0 from 87 reviews