Last updated: Apr 19, 2026
Provo homeowners often move from winter snow-related wear straight into spring hail claim season, so damage assessment timing is unusually important here. The transition brings freeze-thaw cycling, hidden bruising, and sudden hail impacts that may not show up immediately. In this climate, a roof that looks fine after a thaw can deteriorate quickly once a spring storm hits and the heat returns. Tracking the exact timing of damage-when a storm occurred, when the sun returns, and when the next freeze cycles begin-helps you separate what's age-based from what's event-driven. Missing that window can mean that a leak that seems intermittent today becomes a costly, extensive repair later.
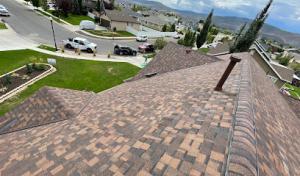
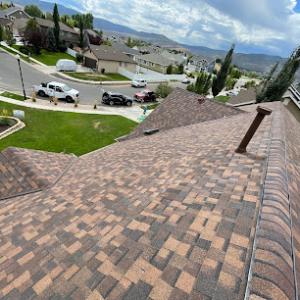
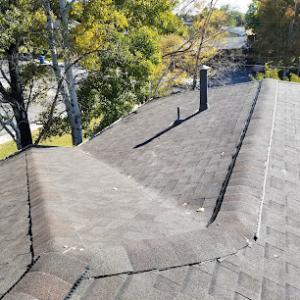
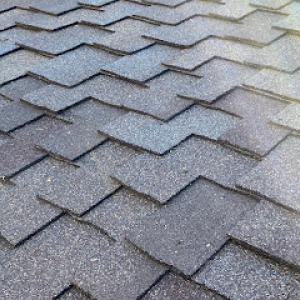
Utah County roofs in Provo can show combined wear from freeze-thaw cycling and hail impacts, which can make shingle bruising, flashing movement, and leak tracing harder to separate. Bruises may form under the protective granules, weakening shingles from the inside out. Flashing around chimneys, vents, and skylights can shift micro-movements with every freeze-thaw cycle, creating tiny gaps that only become obvious after a warm spell and subsequent rain. Hail can ding edges and underlayment that aren't obvious from ground level, especially on steep-sloped roofs or multi-story homes. The timing of when these issues become visible often correlates with the first warm, sunny days of spring when you're tempted to overlook minor marks-don't. Small, early signs can escalate quickly in the next storm cycle.
In this market, contractor signals heavily favor storm damage, emergency response, and insurance support, reflecting how often Provo homeowners seek help after weather events rather than only for age-based replacement. Look for sudden dark streaks or new damp spots on ceilings after a hail event or rapid temperature swings. Granule loss in gutters or along the drip edge, curled shingles, lifted tabs, or a warped vent boot are red flags that should trigger an urgent inspection. If you notice a spike in interior condensation or a new attic cold spot after a storm, treat it as a potential sign of hidden damage. Timing matters: the sooner you identify these symptoms after a storm, the more options you'll have to address it with a proper assessment and documentation.
Respond quickly after a hail event or severe freeze-thaw period. Schedule a roof inspection within 1-2 days of visible weather relief, especially if there's standing runoff or suspicious damp patches. Document the damage with dated photos from multiple angles-roof plane, drip edge, flashing, and interior leaks. Keep a storm log that lists dates, hail size if known, wind gusts, and any notable temperature shifts. When talking to a contractor, request a rigorous assessment that differentiates between storm-caused damage and aging wear, with a clear plan for temporary stabilization if leaks exist. If damage is confirmed, coordinate with your insurer promptly, using the documented evidence to support a smooth, accurate claim. This is how you prevent a small crack from becoming a bigger, costlier problem as spring storms roll through.
Find local contractors experienced in assessing and restoring roofs after hail, wind, and severe weather events.
Signature Roofing Utah
(801) 420-1911 www.signatureroofingutah.com
1641 W 1320 N, Provo, Utah
5.0 from 62 reviews
PowerHouse Roofing
(801) 874-9083 www.powerhouseroofing.com
412 W Rivers Edge Dr, Provo, Utah
5.0 from 59 reviews
Signature Roofing Utah
(801) 420-1911 www.signatureroofingutah.com
1641 W 1320 N, Provo, Utah
5.0 from 62 reviews
Roofing in Northern Utah

PowerHouse Roofing
(801) 874-9083 www.powerhouseroofing.com
412 W Rivers Edge Dr, Provo, Utah
5.0 from 59 reviews
PowerHouse Roofing delivers quality craftsmanship and reliable protection for your home or business. As experienced roofing contractors, we understand the importance of a strong, dependable roof. We serve both residential and commercial clients, ensuring every project is completed with expertise and attention to detail. Discover the PowerHouse difference and safeguard your property with a roof you can trust.
A-Star Roofing & Construction
(801) 830-4557 www.bestroofingbid.com
Provo, Utah
4.9 from 96 reviews
Residential Roofing for 21 years in Utah county.
Mountain West Roofing & Construction
Provo, Utah
5.0 from 32 reviews
Replace your old roof in no time If your roof is beyond repair, Mountain West Roofing and Construction can see that it's replaced safely and quickly. We provide home roof replacement services in the Payson, UT area. You can count on us to upgrade your home with a brand-new roof that will stand the test of time.
Evolve Construction UT
(800) 222-4100 www.evolveconstruction.com
180 N University Ave #270, Provo, Utah
5.0 from 29 reviews
Best Inter-State Roofing Company! If you’re looking to get top-notch roofing services for your property, then you’ve got to hear about Evolve Construction.
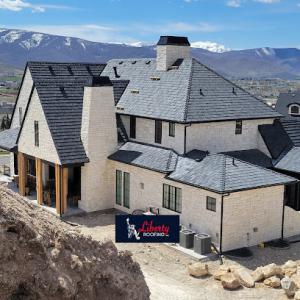
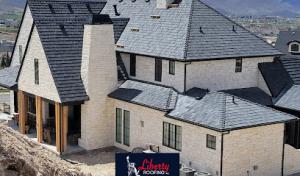
Liberty Roofing of Utah
(801) 377-7720 libertyroofingutah.com
761 N 1890 W, Provo, Utah
4.6 from 68 reviews
Liberty Roofing is a roofing contractor serving Provo & Sandy, UT providing quality roofing services for 35+ years. Liberty Roofing offers an incredible selection of roofing services for commercial and residential properties. No matter what type of roof work you need done, you can trust our skilled roofers to do the job right. Liberty Roofing remains a locally, family owned company who gets to know each of our customers. This is a mutually beneficial situation; you want quality, long-lasting roofing installation and replacement, and we strive for long-term business relationships. Call us today for a free, on-site, estimate.
Provo Roofer
(801) 742-7855 rooferprovout.com
Provo, Utah
4.8 from 19 reviews
Roofing Contractor. We take care of our clients. Roof repairs and roof replacements. Don't wait too long we will be happy to give you a free estimate. If in doubt call us out. Okay that was really dumb but not as dumb as not getting your small leak repaired or looked at. We have seem many small leaks turn to huge property loss all because someone hoped it would go away. We hate to tell you but they never go away they only get worse. We are fast friendly and want to make sure you are safe and keep a roof over your head, a roof that keeps you dry. We work all cities in Utah County, but mostly try to stay close to home in Provo. Thanks for checking us our. Your friends at Provo Roofer.
HM Roofing
(801) 642-4462 www.hmroofs.com
180 N University Ave #270, Provo, Utah
5.0 from 13 reviews
Utah Roofers You Can Trust! Utah’s trusted provider of luxury home and commercial roofing solutions, we have been proudly locally owned and operated for over 12 years. Renowned for our commitment to quality craftsmanship and exceptional service, we specialize in delivering premium roofing systems that combine durability and elegance. Whether it’s for your home or business, we’re dedicated to exceeding expectations and protecting what matters most with precision and care. Experience the expertise and reliability that have made us a leader in the industry.
All X-Terior & Associates
(801) 358-2119 allxteriorinc.com
1765 N 1140 W St, Provo, Utah
4.8 from 19 reviews
Quality Creations by: All X-Terior & Associates, Inc. General Building Contractor, Remodeling, Soffit/Fascia, Gutters, All Types of Roofing, Decks, All Types of Siding, Custom Copper & Metal Work. No Job too small. Family owned and operated.

Good Neighbor Roofing
(801) 471-9582 goodneighborroofingllc.com
1245 N 800 W St, Provo, Utah
4.7 from 15 reviews
At Good Neighbor Roofing, we're your go-to experts for all things roofing. Whether you need a complete roof replacement, a reliable roof repair, or you're embarking on a new construction project, we've got you covered. We take pride in being the roofing company of choice for homeowners building their dream homes and contractors seeking a reliable partner for their projects. Our services extend beyond just roofs – we also specialize in rain gutter and fascia installation, ensuring your entire roofing system is in top-notch condition. With our commitment to quality, affordability, and exceptional customer service, Good Neighbor Roofing is here to safeguard your home or project from the elements.
Young's Roofing
455 N 900 W, Provo, Utah
5.0 from 7 reviews
Family-owned and operated. Founded by David Young in 1996, and proudly continued by his son James Young after his sudden passing on Jan 15, 2025. As a second-generation owner, I’m committed to the same pride, trustworthy, craftsmanship, and quality work.
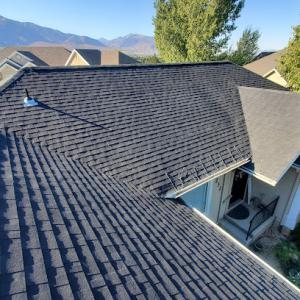
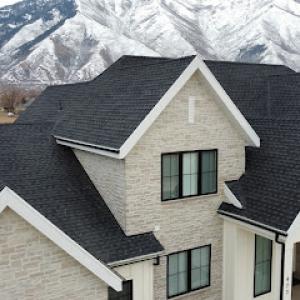
Asphalt shingles remain the dominant choice in this mountain-front climate, where steep roofs and rapid weather swings are the rule. The hot, dry summer sun punishes underlayment and shingle grade if attic ventilation is weak, so prioritize a well-ventilated attic and a high-quality underlayment. When choosing asphalt, look for 30-year or higher shingles and a synthetic underlayment with good moisture resistance. In the Wasatch Front setting, a roof that breathes well in summer and sheds meltwater quickly in spring saves you from repeated freeze-thaw stress. Pay attention to nail-coverage guidance and alignment on steep slopes, where improper nailing can lead to wind-driven lift during spring storms. Regular inspections after hail events or heavy spring precipitation help catch granule loss and potential water intrusion early.
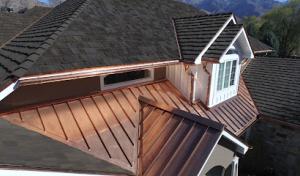
Metal roofing has a meaningful local specialty presence and fits the need for snow-shedding performance on steep residential roofs common along the Wasatch Front. Metal panels or concealed-fastener systems work well with a cold-to-warm season cycle, provided that the installation accounts for thermal movement and proper flashing at valleys and skylights. Consider a standing-seam or interlocking panel design to minimize potential hail-attackable surface exposure. Insist on high-quality paint or coatings that resist chalking and fading through repeated freeze-thaw cycles. Proper attic ventilation remains important, but metal's reflective surface can help reduce attic heat buildup, which translates into gentler expansion and contraction stresses. If you expect frequent hail events, discuss impact-resistant options and edge detailing that prevent denting from stray hail and ice-shielding the gutters and drip edges.
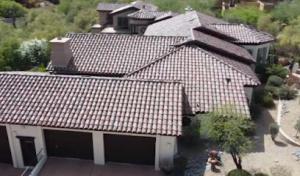
Tile and cedar-style roofs exist in the market but are less prevalent, so you may encounter a smaller pool of specialists for repair matching and detailing. Clay and concrete tiles offer excellent long-term durability in sun and cold cycles, but they require a roof structure and deck that can support the weight and a careful installation to prevent cracking from freeze-thaw cycles. Cedar shakes bring a natural aesthetic and solid insulation, yet they demand rigorous maintenance to resist moisture and rot in the spring thaw and high-humidity years. If selecting tile or cedar, ensure the installer provides a detailed breakdown of fastening patterns, substrate readiness, and hail-resistant tile choices where available. Expect longer lead times for repairs due to fewer local specialists, and plan for periodic resealing or recoating in cedar varieties to preserve their performance in sun-belt heat followed by winter moisture.
In this climate, timing your inspections around the snow-to-spring storm cycle matters. After heavy winter snows, check for ice dam formation along eaves and at roof-to-wall transitions. In spring, hail and freeze-thaw cycling can reveal micro-cracks, loose fasteners, or granule loss on asphalt, denting on metal, or cracked tiles. A proactive maintenance cadence-visuals after major storms, followed by targeted professional evaluations-helps prevent slow leaks from becoming urgent roof repairs. For all materials, ensure proper attic ventilation and a watertight underlayment as baseline protections against the season's rapid changes.
Your choice should align with your roof's slope, exposure, and the typical storm profile of the neighborhood. Steeper roofs benefit from metal or tile with durable fasteners and robust flashing details. Asphalt remains the most forgiving for a broad mix of homes, with upgrades in shingle grade and underlayment delivering notable longevity. If you consider a lighter repair footprint, know that the local repair ecosystem can influence response times, especially for niche materials. When in doubt, prioritize a system that emphasizes attic ventilation, underlayment quality, and a credible warranty that covers hail and freeze-thaw durability for the expected winter-spring transition.
Explore specialists in steel, aluminum, and standing seam metal roofs built to last 50 years or more.
Summit Metal Roofing Contractors
(801) 761-0358 metalroofingprovo.com
418 W Center St, Provo, Utah
5.0 from 30 reviews
All X-Terior & Associates
(801) 358-2119 allxteriorinc.com
1765 N 1140 W St, Provo, Utah
4.8 from 19 reviews
In this market, storm-driven surges in demand after hail and wind events can affect scheduling pressure and pricing more than in calmer markets. After a hail event or a strong spring wind, crews may run short on availability, and prices can spike for a week or two as crews re-balance their calendars. That volatility tends to taper quickly once the weather settles, but it matters for budgeting and planning a replacement window, especially if you're coordinating with other home projects. The goal is to choose a replacement window that minimizes downtime and keeps labor costs predictable, even when storm activity rattles the calendar.
Material choice matters sharply here because asphalt remains the volume option, while metal and tile systems can cost more partly due to specialized labor availability in the local contractor pool. For a typical steep-slope home, asphalt shingles run roughly from 350 to 700 USD per square as installed, making them the most common blend of value, performance, and local labor feasibility. Metal roofing tends to be more expensive, about 700 to 1200 USD per square, reflecting not only material cost but the need for metal-specific installation skills and fall protection setups on steep pitches. Clay tile and concrete tile are premium options in this market, with clay in the 900 to 1700 USD per square range and concrete from 800 to 1500 USD per square, driven by weight considerations, specialty fasteners, and long-term durability expectations. Wood shingles/shakes and synthetic/composite shingles sit between asphalt and tile in the local pricing mix, with roughly 700 to 1100 USD per square for wood and 600 to 1100 USD per square for synthetic options.
Steep-slope residential homes are common in this market, which can raise labor and safety setup costs compared with simpler low-slope work. Expect higher costs for scaffolding, edge protection, and staging when planning a replacement on a two-story or taller home. If you anticipate hail or heavy spring storms, build flexibility into your project window and discuss contingency pricing with the contractor up front. A well-timed replacement-before the next freeze-thaw cycle re-tests weak shingles-helps prevent accelerated wear from ongoing freeze-thaw cycling and spring hail, potentially saving you from incremental damage and future warranty complications.
Because metal and tile options require specialized crews, select a contractor with proven experience on steep pitches and with the specific system you choose. In a market where demand can compress schedules, a locally trusted crew often delivers steadier timelines and safer workmanship, reducing the risk of improper installation that could undermine warranty coverage. Compare not only price but crew readiness, staging plans, and communication responsiveness to lock in a reliable replacement path.
Get a clear picture of your project costs upfront - no commitment required.
Signature Roofing Utah
(801) 420-1911 www.signatureroofingutah.com
1641 W 1320 N, Provo, Utah
5.0 from 62 reviews
Liberty Roofing of Utah
(801) 377-7720 libertyroofingutah.com
761 N 1890 W, Provo, Utah
4.6 from 68 reviews

When replacing a roof in this area, a full roof replacement is typically handled as a permit project through the Provo City Building Department. It's not treated as a simple no-permit maintenance item, and the municipal office will expect you to file the appropriate application before work begins. The city's approach reflects the local climate and housing stock, where steep slopes and substantial snow loads make proper planning essential. Starting the permit process early helps prevent delays that can push a project into peak weather windows and complicate scheduling with crews already busy around the Wasatch Front.
During the review phase, the department focuses on details that matter in a snow-and-freeze cycle. Underlayment quality and installation method are scrutinized to ensure a watertight setup that can withstand freeze-thaw cycling. Flashing around penetrations, chimneys, skylights, and transitions receives particular attention, as improper flashing is a common pathway for leaks when snow melts and refreezes. Ventilation is also evaluated because roof ventilation affects attic temperatures and moisture management, which in turn influence shingle longevity and ice dam risks. A clear plan for attic ventilation, ridge vents, soffit intake, and any mechanically vented systems will help the inspector see that the roof assembly is designed to breathe and dry correctly through Utah winters.
A final inspection is required on completion, with scheduling varying based on department workload and the project's scope. In practice, some projects align the final inspection with line-of-sight milestones such as insulation or ventilation tests, while others proceed to the final check only after visible roof installation wraps up. Because weather, staffing, and the number of simultaneous projects can influence timelines, it's prudent to plan a buffer in your schedule for the final walk-through. A completed permit and a clean final inspection confirm that local code and safety standards have been met, which gives you reassurance when the first spring hail or heavy snow returns.
Coordinate with your contractor to prepare all permit documents in advance, including detailed roof plans, vent layouts, and a proposed underlayment and flashing strategy tailored to a cold-season climate. Before scheduling inspections, perform a thorough on-site review with your contractor to verify flashing transitions, drip edge installation, vent placement, and proper attic ventilation routes. If snow is anticipated, you may want to align ordering and delivery of materials to reduce on-site weather exposure and keep the project moving toward the final inspection window. Finally, keep a copy of all permit-related correspondence and inspection notices handy, since a quick reference can help resolve questions that arise as the project progresses through its winter-to-spring cycle.
In a city shaped by Wasatch Front weather, hail and freeze-thaw cycles can leave roofs with a mix of fresh damage and winter-weather weathering. When a storm sequence rolls from snow to spring showers, the evidence of impact shifts quickly as ice, wind, and new debris mingle with old granules and worn shingles. The result is a diagnosis that hinges on careful documentation and timely reporting, not on memory or assumptions about what was there last season.
Utah's periodic hail and wind losses make Provo a documentation-heavy roofing insurance market where roof age and material type may receive close scrutiny. Carriers often treat the combination of new damage and preexisting aging as a single claim narrative. That means the way a homeowner frames the damage, and the completeness of the file, can affect how repairs are approved and how much is covered. Expect that the insurer will examine whether the roof's composition, whether asphalt shingle, metal, or tile, influenced how the damage manifests and how long it has been deteriorating.
Provo homeowners should anticipate requests for contractor photos, measurements, and estimates, especially when damage appears mixed with prior weathering from winter exposure. Clear, timestamped photos taken from ground level and from the eaves help establish the extent of new impact versus existing wear. Measurements of roof dimensions and visible punch-through or granule loss provide a tangible baseline. An estimate that distinguishes immediate temporary repairs from permanent fixes helps the adjuster separate urgent safety needs from cosmetic or age-related concerns.
Because claim activity rises after spring storms, homeowners in Provo benefit from documenting damage quickly before temporary repairs, foot traffic, or later weather obscure evidence. Begin a concise log noting storm dates, wind gusts, hail size if observed, and any changes in the roof's performance-leaks, attic condensation, or moisture staining. Keep all receipts for emergency tarps or board-ups, and preserve any prior inspection notes or warranty information. A well-kept trail of evidence now reduces ambiguity when the claim moves through processing later.
Connect with contractors who help homeowners navigate the claims process from damage assessment to final approval.
Signature Roofing Utah
(801) 420-1911 www.signatureroofingutah.com
1641 W 1320 N, Provo, Utah
5.0 from 62 reviews
PowerHouse Roofing
(801) 874-9083 www.powerhouseroofing.com
412 W Rivers Edge Dr, Provo, Utah
5.0 from 59 reviews
Provo's cold, snowy winters slow tear-off and installation work, limit safe roof access, and affect how some materials seal or are handled on site. If a re-roof is planned for late fall or early winter, expect shorter work windows and more weather-related delays. Your crew may need to pause during heavy snowfall or when wind picks up enough to create working hazards on steep slopes. Plan for fewer consecutive days of dry, usable weather and be prepared for short, weather-driven shifts rather than large, uninterrupted blocks of progress.
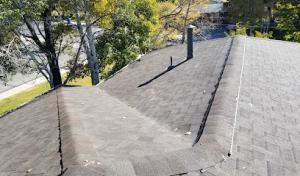
Freeze-thaw cycling in Provo can widen small flashing and penetration issues into active leaks, especially around valleys, chimneys, and roof-to-wall transitions. If a leak is suspected near these areas, don't wait for a storm to test the seal. During dry spells, have flashings checked and reseated as needed, and confirm that sealant remains flexible in the cold. In mixed snow and melt conditions, expansion and contraction of roofing penetrations can reveal hidden weaknesses; address them promptly to avoid compounding damage.
Homeowners trying to finish work before winter often face fall scheduling pressure in Provo as wind, debris, and contractor backlog build ahead of snow season. Start planning early and secure a realistic windows-and-wuff schedule. If you're aiming to wrap up before a snowfall, target completion before the typical fall windstorms and dust-off periods, not just the calendar date. Communicate clearly with your contractor about preferred weather buffers, and reserve time for potential re-sequencing if late-season storms arrive.
When temperatures drop, crews prioritize dry times and proper material handling to avoid sealant and fastener work in freezing conditions. Store materials in sheltered zones to prevent ice formation and use daylight hours efficiently, dedicating morning sessions to roof work while temps rise enough to reduce risk of brittle components. Expect slower progress on higher pitches or when ice is visible on the rakes and in the valleys.
When you can't wait, these contractors offer fast response times to stop leaks and prevent further damage.

Evolve Construction UT
(800) 222-4100 www.evolveconstruction.com
180 N University Ave #270, Provo, Utah
5.0 from 29 reviews

The Wasatch Front setting brings bright sun for much of the year, but winter snow, freeze-thaw cycles, and spring storms mean skylights and solar penetrations must be built to endure repeated moisture exposure. A skylight that seals well at installation can save you from recurring leaks as meltwater refreezes around flashing and rafter tails. Details matter from day one.
Skylight housings should be chosen with cold-weather seals and robust drip edges, since winter moisture can wick under flashing if angles and overlaps aren't precise. In a region with heavy snow carry and thaw cycles, ensure the curb or flush mount sits squarely and is fastened to solid framing. Regular check-ins after heavy snows help catch micro-movements that could shear flashing or crease flashing corners.
Flashing transitions around skylights must handle ice dam potential. Use stepped or continuous metal flashing with reinforced corners, and sealant lines that remain flexible in freezing temperatures. Consider venting options for local swings between sunny days and rapid melt, as condensation can travel along the roof deck and find weakest seams. Proactively address any skylight deck rot or membrane damage before it worsens.
Solar roof penetrations call for precisely sized flashings, especially where rafter tails expose edges to drying winds and blowing snow. In spring storms, higher wind-driven rain can exploit small gaps, so verify sealant compatibility with any rooftop insulation layer beneath. When possible, align racking with existing roof planes to minimize additional rake edges that could trap moisture.
After a heavy snow season, inspect skylight seals and flashing during a clear, above-freezing day. Look for hairline cracks in sealants, loose fasteners, or displaced metal causes. Plan targeted resealing or flashing touch-ups before the next freeze-thaw cycle to prevent recurring leaks rather than chasing symptoms after each storm.
Find contractors experienced in skylight installation, flashing, and leak repairs to bring natural light into your home.
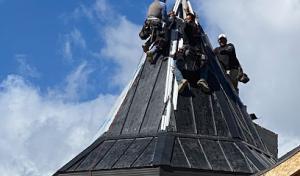
In a town where steep-slope recovers are common and the hail-and-ice cycle hits hard, the crew you hire should excel at more than laying shingles. You want a team with solid tear-off experience, meticulous cleanup, and a plan for working around an occupied home when needed. Focus on crews that can demonstrate a clear sequence: protect the interior during removal, minimize debris on driveways and sidewalks, and restore landscape protection after the job wraps. In Provo, the difference between a good crew and a great one shows up in the details of how they manage the day-to-day disruption of a re-roof project.
Ask for recent jobs with similar roof profiles and conditions to what you have. The crew should provide a written outline of their teardown and installation process, including how they isolate the work zone, manage waste, and prevent stray nails from damaging vehicles or gardens. Cleanup should be thorough-no shards or nails lingering after the crew finishes. If you anticipate living in the home during the work, insist on a plan for avoiding damage to personal belongings and for maintaining access to entry and egress routes. A reputable crew will designate a single point of contact for daily updates and any weather-related adjustments.
Long-established, family-owned, and locally owned firms stand out in neighborhoods where you can watch a crew's work history and response pattern over time. In Provo, homeowners often weigh neighborhood reputation and responsiveness as much as price. Look for a local presence-visible trucks, community referrals, and a willingness to visit the site for a face-to-face discussion. Quick response after hail or winter leaks is a practical signal: a contractor that answers calls promptly and arrives when scheduled tends to perform more reliably during the peak storm-to-spring cycle.
Windows of opportunity in Provo's climate can tighten fast after a severe storm. A capable crew will outline how they coordinate temporary protections if the full replacement must be staggered, and how they communicate plan adjustments if weather disrupts the schedule. The goal is to keep you protected without delaying the core re-roof when conditions permit. You're looking for clarity, steady communication, and a team that can adapt without sacrificing quality.
In Provo, exposure to high summer sun and prolonged winter cold pushes roofs through a demanding cycle. The semi-arid climate means rapid temperature swings, strong freeze-thaw stress, and concentrated hail events. Those conditions accelerate fiber and adhesive fatigue in asphalt shingles and can push metal or tile systems to edge failure earlier than in milder climates. You experience a sharper contrast between blistering heat under clear skies and icy mornings that wake up shingles or panels, so the roof needs materials and detailing that handle both extremes.
Snow loading isn't just about weight-it's about how that load sits on a slope and how it interacts with thaw cycles. In Provo, repeated freeze-thaw episodes push joints and sealants to expand and contract, which can cause fasteners to loosen or flashing to leak after a warm spell. Shallow laps or improper ridge and valley detailing can become weak points as snow shifts and refreezes. When spring arrives, hail-soaked surfaces and already stressed edges can show premature granule loss or micro-cracks that compromise long-term performance.
Spring storms on the Wasatch Front bring hail that can ding exposed roofing surfaces. Asphalt shingles may develop accelerated granule loss in exposed areas, while metal roofs can suffer denting that invites rust at penetrations or fastener sites. Tile and wood systems respond differently: clay and concrete tiles can crack or spall, and wood shingles can warp or cup after repeated moisture cycles. The combination of hail impact plus freeze-thaw cycling means your roof's weakest spots reveal themselves sooner.
Provo's market gravitates toward steep-slope residential re-roofs, where winter work and spring transitions limit big projects to tight windows. Proper installation timing matters: installing during the dry, moderate months reduces moisture entrapment and seasonal stress. When a roof is chosen with those windows in mind, the aging curve stays more predictable, and the roof can better weather the annual cycle of sun, snow, and hail without abrupt failures.