Last updated: Apr 19, 2026
Spring winds and hail storms sweep through Wasatch Front neighborhoods with a sharp hurry. In this stretch, many roofs take direct hits, and the strongest local contractor emphasis lands on storm damage response and emergency repairs. You'll see more rapid referrals, more on-the-spot tarp work, and a rush of replacement calls once a hail event passes. If your roof shows new irregular granules, dented flashing, or loose shingles after a wind-hail episode, treat it as a storm-damaged system even if the damage isn't obvious from the ground. The risk isn't just aesthetic: early post-storm assessments can miss hidden leaks that escalate once rain returns. Act quickly to document impact, secure temporary protection, and line up a trusted local contractor who can prioritize your roof once the weather settles enough to work.
Winter in the area brings snow, freezing temps, and freeze-thaw cycles that stress shingle edges, collars, and flashing. Ice dam formation is a real threat, and even minor existing damage can turn into interior water problems long before replacement season opens. If you notice icicles, ice buildup along the eaves, or damp spots in ceilings during thaw cycles, address the exterior first. Delays amplify risk: a small flashing lift or cracked vent boot can funnel water into the attic and down into ceilings when snow melts or a light spring rain arrives. Don't wait for a perfect day to check for damp shaping in roof lines-start with a quick exterior inspection after a warm spell followed by a cold night, when unseen damage tends to reveal itself.
From late spring through early fall, the installation window is the most predictable, which means contractors schedule quickly and fill slots fast after a major storm. Storm-related demand can compress schedule just as homeowners are trying to lock in replacements, especially after back-to-back hail events or a late-season wind surge. The peak period often aligns with wind-season storms that create reason to replace or retrofit-so timing becomes a tactical consideration. If you're repairing damage mid-season, you'll want to secure a firm start date early, confirm material lead times, and reserve a contingency plan for weather interruptions that push work into the heart of summer.
First, document visible damage with photos from ground level and from any attic entry point if safe. Keep a log of dates when storms hit and when leaks or ceiling stains first appeared. Second, protect the roof with tarps or plywood if you can do so safely; this buys you time and reduces interior risk while you coordinate a timeline with a local roofer who understands storm response patterns here. Third, prepare a prioritized list of damage: compromised flashing, missing or curled shingles, dented vents, and any interior signs of water intrusion. When you call a contractor, tell them you've noted a spring-hail event or winter dam activity and that you need a rapid, staged assessment with a clear plan for a dependable replacement window. Finally, align your expectations with the spring wind season-if a major storm hits, expect scheduling shifts, and establish a firm contingency date to keep your project moving once conditions allow.
Legacy Roofing Utah
(385) 442-6677 legacyroofingutah.com
570 E 1700 S, Clearfield, Utah
4.9 from 587 reviews
At Legacy Roofing, we don’t just replace roofs, we redefine what homeowners can expect from one. We use only the highest-quality materials, backed by the longest manufacturer warranties in the industry. On top of that, we provide our exclusive systems labor warranty, coverage that is second to none. With our expertise and commitment to excellence, we deliver the ultimate finished roof for your home. Legacy Roofing is Utah’s Standard in Excellence.

CCR Roofing & Exteriors
(801) 603-3927 ccrroofingexperts.com
635 N 1100 W, Clearfield, Utah
4.9 from 42 reviews
With over 20 years of experience, CCR Roofing & Exteriors is Northern Utah's premier roofing company, serving Clearfield, Syracuse, Layton, Bountiful, and surrounding communities. We specialize in roof installations, replacements, and repairs, ensuring your home remains protected and visually appealing. Our services extend beyond roofing to include siding, rain gutters, and deck building, providing comprehensive exterior solutions. Our team is well-versed in Utah zoning laws, building permit requirements, and homeowners association guidelines, ensuring your project is completed efficiently and correctly. Contact us today at 801-603-3927 for a free estimate and experience quality service that exceeds expectations.
American Prestige Roofing
(801) 603-4308 www.americanprestigeroofing.com
2387 S 450 W, Clearfield, Utah
4.7 from 58 reviews
American Prestige Roofing is a professional residential roofing contractor in Northern Utah. We specialize in roof repair and roof replacement services throughout the northern Wasatch front, including Brigham City, North Ogden, Ogden, Clearfield, Layton, Kaysville, Bountiful and North Salt Lake. American Prestige Roofing is one of the only roofing companies in Utah to offer services for a metal roof, asphalt roofs, and flat roofs and roofing membrane. Our roofing specialists have over 100 years of combined experience to help take care of all of your roofing needs.
Northern Utah Roofing
(801) 516-4824 www.ensignroofing.com
Serving
5.0 from 15 reviews
Local roofing company that specializes in residential and commercial roofing. We are experienced in all different types of roofs and roofing materials. Call us for a free estimate
Roof Utah
Serving
4.9 from 103 reviews
Full service roofing contractor specializing in reroofing. Service residential and commercial clients up and down the Wasatch front. Call us for a free estimate
Presidential Roofing
(801) 784-5221 www.presidentialroofingutah.com
Serving
4.6 from 22 reviews
We are a locally owned roofing company that focus on residential repair and replacement. Unlike some companies that are brand specific we can offer a wide arrange of products that suites your roofing needs. We proudly support our military buy hiring veterans.
J & R Roofing
(385) 303-3450 www.jandrroofingut.com
Serving
5.0 from 47 reviews
J&R Roofing is a trusted roofing company proudly serving Layton, Utah and surrounding areas. We specialize in high-quality Asphalt Shingle Roofing, durable Metal Roofing, and reliable Commercial Roofing solutions. Whether you're facing wind or storm damage or need expert roof repair, our skilled team delivers prompt, professional service with lasting results. At J&R Roofing, we prioritize quality craftsmanship, customer satisfaction, and competitive pricing. No project is too big or small—count on us to protect your home or business with dependable roofing you can trust. Contact J&R Roofing today for a free estimate and experience the difference of working with local experts.
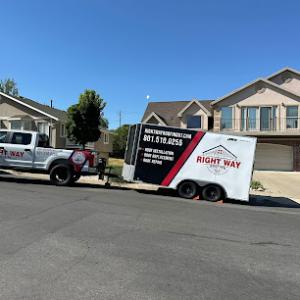
Right Way Roofing
(801) 510-0255 www.rightwayroofingut.com
Serving
4.9 from 74 reviews
Your trusted local roofing experts serving Salt Lake City, Layton, and surrounding Utah communities. Specializing in both residential and commercial properties, we offer comprehensive services from roof repair and replacement to new installations and storm damage restoration. Beyond roofing, we provide gutter services and thorough roof inspections. Whether you need to fix a leak, replace missing shingles, or upgrade to an energy-efficient solution, our certified specialists deliver reliable, high-quality workmanship tailored to your specific needs. Right Way Roofing is committed to ensuring your satisfaction with long-lasting roofing solutions.

M.W. Roofing
(385) 243-4458 www.mwroofingutah.com
Serving
4.9 from 128 reviews
M.W. Roofing in Layton Utah repairs and replaces residential and commercial roofs in Davis county, Weber county, Box Elder County, and Salt Lake area. We provide free roof assessments. You can trust our judgment when it comes to determining whether you simply need a repair or a whole new roof. Our installers are certified, which means they have been professionally trained on how to conduct a roof inspection, repair, and replacement. If you are using an insurance company, we can help you navigate the insurance claims process and ensure that you don’t pay more out of pocket than is necessary. We do not accept payment until the job is completely finished and you are 100% satisfied with the finished product! Call us today for a free assessment.
Optimum Construction & Roofing
(385) 318-5830 optimumproconstruction.com
Serving
4.6 from 10 reviews
Protect what's over your head with the help of Optimum Construction and Roofing, Inc. We specialize in residential & commercial roofing services. Call now!
MSR Roofing Repair & Replacement
(385) 448-5416 www.laytonroofers.net
Serving
5.0 from 64 reviews
MSR Roofing Repair & Replacement is the trusted roofing company in Layton, Utah. Our service area includes Layton, Davis County, Salt Lake County, and the surrounding communities. We specialize in roof installation and replacement, roof repair, storm and wind damage restoration. We offer reliable solutions tailored to both residential and commercial properties. We always focus on quality craftsmanship and honest service. Our team ensures every roof is built to last and ready to withstand Utah’s toughest weather. Whether you're dealing with a minor leak or need a full roof replacement, MSR Roofing has you covered with professional, prompt, and affordable service. We're here you need the best roofing service that you can get. Call us today!
SOS Roofing
(801) 564-2068 sosroofingutah.com
Serving
5.0 from 18 reviews
SOS Roofing is a Residential Roofing Contractor that specializes in roof replacement, roof repairs, and helping customers with insurance claims for their roof
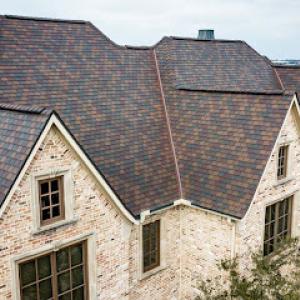
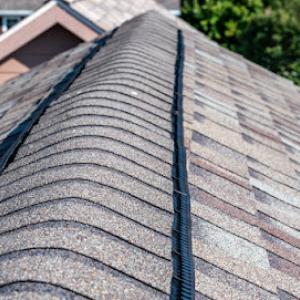
Asphalt shingles and metal roofing are the most locally practical dominant materials because they fit the city's mix of snow exposure, summer heat, and mainstream residential re-roofing demand. In a neighborhood where you see both light insulation upgrades and weather-driven wear, asphalt provides reliable wind and hail performance with straightforward maintenance. Metal, with its fast shedding of spring melt and resistance to repetitive freeze-thaw cycles, often pairs well with attic ventilation upgrades. This combination keeps the roof resilient across Clearfield's variable seasonal temps while remaining a practical choice for typical homes.
Clearfield's freeze-thaw cycles demand attention to underlayment condition, flashing quality, and attic ventilation regardless of the roof type chosen. If the underlayment has dried out or torn, freeze-thaw will exploit those gaps, especially around valleys and penetrations. Flashing must be continuous and bent to resist wind-driven moisture during spring storms, not just installed. Attic ventilation should provide a balance between intake and exhaust so warm, moist air doesn't accumulate above the deck during melt days. When planning a re-roof, verify the deck remains sound and dry, because a compromised sheathing plane compounds every subsequent ice cycle.
Heavier systems such as clay and concrete tile can be used in the market, but local plan review attention to roof sheathing means deck condition matters before installing weightier assemblies. A strong, well-fastened deck is essential to prevent sagging or fastener pull-out under winter loads. If the existing structure shows moisture staining, soft spots, or prior leaks, address those issues first. Tile systems also require precise attic clearance for ventilation around large modules; without that clearance, you can trap heat and accelerate degradation of both deck and substrate in a spring wind year.
Begin with a reality check on the current deck condition and any prior leaks. Schedule a mid-spring inspection to document hail impact and wind-driven damage while the season is fresh, so the evidence supports timely decisions around replacement. Match the chosen system to your attic's ventilation plan: if intake is limited, upgrade soffit and ridge vents before covering the roof. Inspect flashing around chimneys, vent pipes, and skylights and plan for enhanced sealant or metal caps where necessary. Finally, consider a staged plan: if you anticipate heavy weather windows, align replacement timing to minimize exposure to multiple freeze-thaw cycles during the year. In a typical neighborhood, this approach reduces the risk of incidental damage and helps ensure the new roof performs when spring winds arrive.
In this part of the Wasatch Front, asphalt shingles sit in the roughly $350-$600 per square range, while metal roofs run about $700-$1200 per square. Clay tile projects tend to land between $900-$1600 per square, and concrete tile typically sits around $800-$1300 per square. If a homeowner opts for wood shingles or shakes, expect roughly $600-$1000 per square. Synthetic or composite shingles come in at about $650-$1100 per square. These figures reflect the common local housing stock and the way scheduling, material availability, and crew time play out in Clearfield's spring and early summer window.
Storm activity after hail or strong winds often pushes pricing up in Clearfield. The same weather that triggers claims also tightens contractor schedules during the preferred late spring to early fall work season. When hail events are fresh and widespread, crews are busy, arrival times stretch, and material lead times can lengthen. That dynamic can nudge project timelines and, occasionally, unit costs higher if premium crews or expedited scheduling are required. If a job sits in a storm-affected neighborhood, one or two additional days of site setup and protection work can appear in the bill, especially on full re-roofs where sheathing and ventilation are scrutinized.
A full re-roof in this market isn't just shingles. The roof deck (sheathing) and attic ventilation play a critical role in the final price and in performance after winter freeze-thaw cycles. Homes with older or damaged sheathing, insufficient attic insulation, or marginal ventilation will trigger additional scope and costs. This is particularly true after a harsh winter, when contractors verify the integrity of the sheathing and ensure venting complies with local expectations. In practice, plan for a phased inspection of deck condition, ventilation adequacy, and insulation quality as part of the evaluation, since deficiencies found during a full re-roof can add scope that reverberates through labor and material lines.
Clearfield homeowners should benchmark timing to the spring wind season and the risk window around freeze-thaw cycles. If a storm-impacted year hits early, expect longer lead times for materials and scheduling. Conversely, a mild spring can compress the timeline, but still requires careful sequencing: removing old layers, addressing deck and ventilation concerns, and installing a properly lapped, weather-tight system. The best approach is to anticipate a realistic window of several days for setup, tear-off, and installation, with contingency for weather, especially in a year with heavy spring winds or hail risk.
Get a clear picture of your project costs upfront - no commitment required.
Legacy Roofing Utah
(385) 442-6677 legacyroofingutah.com
570 E 1700 S, Clearfield, Utah
4.9 from 587 reviews
CCR Roofing & Exteriors
(801) 603-3927 ccrroofingexperts.com
635 N 1100 W, Clearfield, Utah
4.9 from 42 reviews
For a full re-roof, Clearfield City generally requires a building permit. Submittals are handled through the local Building Department, so the process centers around ensuring the roof is integrated with the home's structure and systems rather than a simple tear-off. A precise set of plans and material details should accompany the permit request, reflecting the chosen roofing type and any ventilation updates. During spring wind seasons and winter freeze-thaw cycles, having documentation that demonstrates proper attachment, wind exposure considerations, and moisture management helps the process flow more smoothly. The Building Department's records will track your project from start to finish, including any re-inspections that might be needed if weather or scheduling slows progress.
Inspections in Clearfield tend to zero in on three critical aspects: ventilation, attic insulation, and roof sheathing. If the design introduces new or altered vent layouts, attic insulation adjustments, or structural changes to support panels and underlayment, those plans and the as-built conditions will be reviewed carefully. The goal is to prevent air leaks, ice damming, and moisture buildup that can worsen during winter cycles. It is common for the review to require confirmation that soffit, ridge, or turbine vents are correctly placed and that attic insulation remains continuous to reduce energy loss. Even for a project that starts as a replacement, the city treats the installation as a holistic upgrade of the roof's performance, not just a cosmetic surface change.
After installation, the city conducts an inspection to ensure compliance with the approved plans and building codes. Final sign-off marks the completion of the permit trail and allows the record to close with the Building Department. From a practical standpoint, expect inspections to verify venting arrangements, insulation depth, and that the roof deck and sheathing are properly secured and weather-tight. In some cases, wind mitigation details may be requested, especially if the project involves higher wind exposure or certain roof geometries. Hearing back promptly on any requested documentation can help keep the project on track and minimizes delays caused by scheduling backlogs.
Schedule the permit review early in the planning window, particularly before spring wind season begins. Have clear ventilation and insulation updates documented in the submittal package. If the project includes changes to roof sheathing or underlayment, ensure those specifications align with the Building Department's expectations. When leaving site, ensure the temporary protective measures are in place to safeguard during winter freeze-thaw cycles and potential spring storms. Keeping a readily accessible record of all permits, inspections, and wind-related documentation helps reduce back-and-forth and supports a smoother final sign-off.
Hail and wind events are the main insurance drivers in this market, so homeowners often need photo documentation, contractor estimates, and adjuster site visits before replacement is approved. After a storm, take clear, wide-angle photos of every slope and vent, plus close-ups of dents, granule loss, and any roof decking or flashing damage. Keep a simple timeline: when the storm hit, when you noticed damage, and when you reported it. This concrete trail helps your claim survive the scrutiny that follows any heavy wind or hail pulse through spring.
The region is not defined by broad statewide insurer pullbacks, but weather-driven claim volume can still affect timing, scrutiny, and coverage decisions on roof work. If a hail event coincides with the spring wind season, adjuster visits can stretch out, and crews may face tighter windows for start dates. Don't assume a quick approval just because the damage seems obvious. Your documentation versus the adjuster's observations should align, and delays often hinge on how well the damage is illustrated and how promptly the site is made accessible for review.
Because winter conditions can worsen existing storm damage, documenting the roof promptly after a wind or hail event is especially important before freeze-thaw and snow obscure the original impact. Snow and ice can hide curling shingles, lifted edges, or compromised underlayment, turning a repair into a larger project down the line. If you wait, you risk higher repair complexity and more extensive interior risk from water intrusion. Schedule a professional assessment while the roof is still visible and before the next freeze cycle.
In spring, Clearfield roofs endure fluctuating wind directions and occasional hail streaks that leave scattered, hard-to-see marks. Acknowledge that not every dent translates to replacement, but every visible impact deserves a documented opinion from a qualified roofer. A cautious approach prioritizes upper and edge areas where hail impact is most common, while keeping a clear record of any staging or temporary protection you install to defer further damage until a formal decision is reached.
Connect with contractors who help homeowners navigate the claims process from damage assessment to final approval.
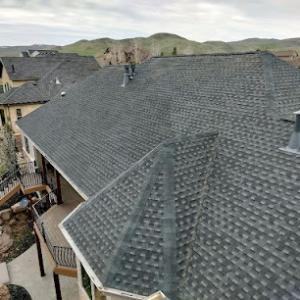
On this market, low-slope sections see more recurring service than the gentler gable runs found on many suburban homes. Snow retention in winter and intense summer sun load make penetrations and transitions more vulnerable. If your home has a flat or nearly flat portion, pay close attention to changes in slope near edges, around parapets, and where roof-to-wall transitions occur. In spring, wind-driven snow can lift under flashing and expose underlayment seams. In mid-summer, heat can creep under flashing and widen gaps where a slope meets a wall or a higher roof line. Schedule a targeted inspection after heavy snow events and after the first hot stretch of the season to catch problems before leaks migrate.
Where low-slope sections meet vertical walls or roof exhausts, flashing plays a critical role. In Clearfield's climate, freeze-thaw cycles can pry at the edges, and wind-driven rain can force moisture under marginal seams. Common weak points include edge metal, transitions at skylights, and around HVAC curbs. If flashing looks blistered, bent, or loose, address it promptly. A practical test is to run a careful hand along suspect seams during dry conditions and look for micro-movements or flapping. Any lift or separation warrants professional reseating or replacement with corrosion-resistant metal and properly sealed joints.
Skylights appear often enough in local contractor specialization to warrant attention, especially where freeze-thaw movement and wind-driven rain can expose flashing weaknesses. Check the curb flashing, underlayment overlap, and the sealant at the skylight flange. Look for staining or wet drywall near the interior ceiling around the skylight, which signals slow leaks. When evaluating, verify that shingle or membrane transitions wrap the skylight adequately and that sealants remain elastic and free of cracks.
After a hailstorm or strong wind event, crawl the attic access if safe and visible from above to check for moisture and roof deck staining. Inspect exterior around all penetrations and at low-slope zones first, then verify interior ceilings and upper walls for damp spots. If any moisture is found, document it with photos and note the time, wind direction, and hail size if recognizable. Quick temporary measures-covering a small breach with a tarp or applying ample sealant to a seam-can prevent further water intrusion while a professional evaluates permanent repairs.
Establish a routine that prioritizes low-slope components during seasonal shifts. Regularly clean debris from drainage paths to avoid ponding, and keep snow guards or retention devices functional to reduce ice dam risks. Schedule proactive flashing inspections in spring and fall, focusing on transitions around skylights and near roof-to-wall connections. In this market, proactive monitoring of these zones is a practical safeguard against expensive surprises when the next storm rolls through.
Find specialists in TPO, EPDM, and built-up flat roofing systems for residential and commercial properties.
American Prestige Roofing
(801) 603-4308 www.americanprestigeroofing.com
2387 S 450 W, Clearfield, Utah
4.7 from 58 reviews


In this market, the emphasis is on replacement, cleanup, and fast storm response rather than niche architectural work. Homeowners should expect crews to handle a complete tear-off when needed and to coordinate a streamlined plan that minimizes disruption while the weather is favorable for roof work. The goal is to lock in a crew that can move quickly from inspection to completion, without sacrificing the quality of the workmanship that the neighborhood relies on.
Cleanup is a major local hiring priority, which matters in established residential neighborhoods where tear-off debris, nails, and driveway protection are visible quality markers. Ask the crew how they protect driveways and landscaping, and whether they haul debris and sweep up nails at the end of each day. Look for crews that show up with magnet sweepers, dedicated debris boxes, and a plan to minimize street or yard mess. A clean site translates to less risk for you and your neighbors during and after the project.
Affordable pricing and quick response are common market signals, so you should balance speed and price against whether the contractor can navigate final inspection milestones, which require solid workmanship and material installation that holds up to spring winds and winter freeze-thaw cycles. Choose a crew that can provide a realistic schedule, provides weather contingency plans, and communicates clearly about any delays caused by wind events or snowfall.
Ask for a detailed scope of work, a visible work plan, and recent local references. Confirm they offer full roof tear-off if needed, proper underlayment installation, and comprehensive debris management. Ensure the crew carries sufficient liability coverage and workers' compensation, and that they leave a clear warranty path for the installed roof. Request a written project timeline with milestone checks so you can verify progress before the wind season shifts again.