Last updated: Apr 19, 2026
Maple Valley homeowners typically target the drier June-September window because the city's wet winters and frequent rain can interrupt tear-off, dry-in, and final scheduling. If a roof is nearing the end of its life and must be replaced, plan the project to start as soon as a predictable stretch of dry weather appears in late spring or early summer. This window minimizes days lost to rain, reduces tracking of mud through the house, and helps the crew complete tear-off, underlayment, and installation with fewer weather interrupts. When the forecast shows a solid week of sunshine and moderate temperatures, lock in the dates with your contractor and align ventilation and attic prep so the roof can move quickly from bare deck to weatherproof.
Late fall through winter projects in Maple Valley are more likely to face weather delays, which matters because exposed roof decks and underlayment are harder to manage during repeated rain events. If a replacement is already underway as colder weather sets in, ensure the crew uses drip edge, tarps, and proper temporary waterproofing to bridge rain gaps. The risk of moisture intrusion increases when a project carries into winter without solid dry spells. Homeowners should recognize that ongoing rain can extend the timeline, complicate roof deck inspection, and create potential for moss-laden shingles to hide weak spots until a warm, dry day allows a careful inspection. If timing slips into late autumn, confirm on-site contingency plans with the contractor for snow or heavy rain days and maintain clear interior access to areas near the attic.
Spring conditions in Maple Valley can combine lingering rain with moss regrowth, making this a common season for homeowners to discover that an aging roof should be replaced before the next wet winter. Moss can obscure defects and lift shingles when moisture is present, so a spring inspection should include an honest assessment of decking integrity and underlayment condition after winter exposure. If the roof has reached a point where replacement is advisable, prioritize converting to a dry-in-friendly sequence that completes before the heavy spring showers return. Early spring allows a measured tear-off while the structure dries, then a careful dry-in that reduces the chance of moisture-driven blisters or tile lift once the rainy season resumes.
Coordinate with the contractor to create a concrete, weather-aware plan: confirm tear-off early in a forecasted dry spell, schedule underlayment and ventilation installation during subsequent dry days, and reserve the final shingle or metal finish for a day with no rain in the forecast. Build in a one- to two-day buffer before the next rain event to address any unexpected deck seepage, nail pop risk, or flashing settlement. If moss is present on the existing roof, plan for a moss treatment or cleaning window before tear-off, but ensure that treatment does not compromise newly installed underlayment. The goal is to finish the project in the driest possible stretch, so the new roof can perform without moisture-related delays through Maple Valley's rainy season.
Winter storms bring a potent blend of heavy rain and wind that can turn small roof weaknesses into active leaks overnight. In this climate, a slow drip month after month can hide hidden rot, moss intrusion, and lift in shingles or flashing. If you notice damp ceilings, staining near exterior walls, or attic condensation during a storm, treat it as an active leak and seal the area temporarily to keep interior damage at bay. Map out the path of any water intrusion from the attic down to living spaces, so you can describe the problem accurately when seeking help.
Washington insurers commonly scrutinize whether damage is true storm damage or ordinary wear, so durable, dated records are essential when a storm event hits. Gather dated photos showing the exterior roof condition before the event, during the storm, and after. Include close-ups of any lifted edges, missing granules, moss pockets, or damaged flashing. Note the roof age, visible sagging, and any prior leaks or repairs. Keep a written timeline: when the storm started, when leaks were first noticed, and when a contractor was contacted. If a contractor estimate exists, ensure it is dated and clearly references the storm's impact on the roof.
Because rain can continue after a storm in this area, temporary protection is crucial. Place tarps or heavy-duty plastic over exposed areas, secure with battens, and cover attic access points to limit further water intrusion. Document the protection steps with photos and dates. Any interior staining or deck moisture that appears after the storm should be photographed quickly, with time-stamped shots of affected ceilings, walls, and ceilings near outer walls. Early documentation prevents interior moisture from disguising the true scope of roof damage and supports a clearer claim.
Once the weather briefly clears, conduct a focused assessment of visible roof vulnerabilities. Check for moss buildup that could be guiding water under shingles, confirm flashing around chimneys and vents is intact, and inspect gutters for overflow during heavy rain events. If any components show signs of wear, call a local roofing pro for a rapid inspection. Insist on a written assessment that clearly ties the observed damage to the storm event, with photos attached and a suggested path to mitigation.
Prepare to share the contractor's estimate, dated photos, the roof age, and the storm timeline with the insurer promptly after the event. Ensure the estimate itemizes what needs replacement or repair and includes a plan for temporary protection if needed. In this climate, a swift, well-documented response reduces the chance of a prolonged claim review and helps prevent further interior damage while the claim is processed. Keep open lines of communication with the insurer and the contractor, and update documentation as new evidence emerges.
Find local contractors experienced in assessing and restoring roofs after hail, wind, and severe weather events.


Kent Roof Repair
Maple Valley, Washington
5.0 from 133 reviews
Kent Roof Repair have been doing business in Kent ever since 2002, and happily assists the 98032 zip code and neighboring regions We provide you with products and services in roofing contractor for the Kent district When you need help in roofing contractor inside Kent district Kent Roof Repair is perfect for you We're headquartered in Washington, in Kent

Fife Roof Repair
Maple Valley, Washington
5.0 from 100 reviews
Fife Roof Repair have been operating in Fife since 2002, and happily assists the 98424 zipcode and adjacent areas We offer products and services in roofing contractor in the Fife region Should you require assistance with roofing contractor in the Fife district then you're in the right place We're operating out of Washington, within Fife We are the top at roofing contractor in 98424 Washington
Kent Roof Installation
Maple Valley, Washington
5.0 from 81 reviews
Kent Roof Installation has been operating around Kent ever since 2004, and proudly services the 98032 zip code and adjoining locations We provide services in roofing contractor in the Kent region If you would like help in roofing contractor inside the Kent region we're the company for you We're headquartered in Washington, within Kent We are the best at roofing contractor in 98032 Washington
Renton Roof Repair
Maple Valley, Washington
4.9 from 131 reviews
Renton Roof Repair have been operating within Renton ever since 2005, and happily assists the 98057 zipcode and surrounding regions Our company offers products and services in roofing contractor in the Renton area When you need help in roofing contractor within the Renton region then you're in the right place We're operating out of Washington, within Renton

Auburn Roof Repair
Maple Valley, Washington
5.0 from 67 reviews
Auburn Roof Repair has been doing business around Auburn ever since 2004, and happily services the 98001 zip code and adjoining locations We supply services in roofing contractor for the Auburn region If you require help with roofing contractor in the Auburn community then you're in the right place We're situated in Washington, located in Auburn We are the best at roofing contractor in 98001 Washington
Federal Way Roof Repair
(253) 201-6304 homeservicesplus.us
Maple Valley, Washington
4.9 from 56 reviews
Federal Way Roof Repair have been working throughout Federal Way ever since 2001, and happily services the 98003 zip code and encircling locations We provide you with professional services in roofing contractor for the Federal Way community If you'd like help in roofing contractor inside the Federal Way community your search is over We're operating out of Washington, located in Federal Way
Tacoma Roof Repair
Maple Valley, Washington
4.9 from 76 reviews
Tacoma Roof Repair have been doing work around Tacoma ever since 2012, and proudly services the 98405 zipcode and neighboring zones We offer expertise in roofing contractor for the Tacoma community Should you require help in roofing contractor within the Tacoma district your search is over We're operating out of Washington, located in Tacoma We're the best at roofing contractor in 98405 Washington
True Blue Roofing & Siding
(253) 655-9898 trueblueroofs.com
18407 Renton-Maple Vly Rd, Maple Valley, Washington
4.8 from 277 reviews
True Blue Roofing was established because we wanted to offer a fair price for a quality product. Our reputation goes before us. Most of our customers are referrals. We don’t have to spend tons of money on marketing and advertisements. So, our costs compared to the big roofing companies are less expensive and our prices are very fair. And with that fair price, we don’t compromise on the quality of what we do. All of our roofers have been roofing for years and are great at what they do. All roofers are certified and trained by the product manufacturer. At True Blue Roofing we install certified roofs with a guaranteed product and a guaranteed labor warranty.
Milton Roof Repair
Maple Valley, Washington
4.9 from 68 reviews
Milton Roof Repair have been operational in Milton ever since 2004, and proudly services the 98354 zipcode and around regions We supply expert services in roofing contractor in the Milton area If you require assistance with roofing contractor within the Milton region your search is over We're headquartered in Washington, located in Milton We're the #1 at roofing contractor in 98354 Washington
High Standards Roofing
(360) 960-8159 highstandardsroofing.com
Maple Valley, Washington
5.0 from 17 reviews
From residential havens to commercial landmarks, we understand the pivotal role a roof plays in safeguarding your investments. That’s why we bring a meticulous attention to detail, cutting-edge technology, and a passion for perfection to every project we undertake. Our team of seasoned professionals is dedicated to delivering roofing solutions that exceed industry standards, ensuring durability, longevity, and aesthetic appeal.
MasterCraft Roofing
(877) 350-1776 mastercraftroofingnw.com
20612 196th Pl SE, Maple Valley, Washington
4.2 from 30 reviews
MasterCraft Roofing, Inc. ownership has 20+ years of asphalt, metal, and flat roofing experience. We provide innovative installation methods, thorough customer service, and long-term, high-quality, roofing solutions. Since 2007, we have helped hundreds of homeowners in the Greater Seattle area protect their homes from the elements, and experience greater pride in their home ownership.

Jorve Roofing
Maple Valley, Washington
3.5 from 22 reviews
Jorve has been serving the roofing needs of people in the greater Seattle and Bellevue area, your local roofing experts in Mercer Island, Redmond, Kirkland, Bothell to Renton, Sammamish to Issaquah and Tacoma for over 20 years. Ask around, we have been your local roofing contractor in every neighborhood from Ballard, Magnolia to Queen Anne and Bainbridge Island to Renton and Redmond. Jorve is now part of Guardian Roofing and has established itself as one of the largest and most successful roofing contractors in Seattle, Bellevue, Tacoma, Washington State and the Pacific Northwest. Expect a roofer that will treat your home as if it were our own. We have a keen understanding of the Puget Sound climate and its effect on roofs.
Maple Valley's wet climate, shaded residential settings create favorable conditions for moss growth that can hold moisture against roofing surfaces. Moss isn't just a cosmetic issue-its presence traps dampness against shingles and underlayment, accelerating deterioration and inviting hidden leaks. In shaded eaves and north-facing slopes, moss can establish itself quickly after a rainy spell and linger well into a pale, damp window. When moss covers large patches, drying becomes sluggish after rain, which keeps the roof deck and flashing consistently damp and more vulnerable to rot, deck-fastener corrosion, and compromised seals around vents and chimneys. The practical consequence is a shorter service life for vulnerable areas if proactive drying and cleaning aren't part of a regular maintenance routine.
Spring moss growth is a noted local seasonal risk, and in Maple Valley it can shorten service life by slowing drying after rain and keeping vulnerable roof areas damp. The combination of lingering shade and damp air creates an ideal harbor for green growth just as the wet season persists into warmer months. When moss thickens in joints, ridges, and near protrusions, it acts like a sponge, soaking up moisture and maintaining higher surface humidity. That persistent wetness can lead to softening of shingles in the least protected zones and can mask tiny leaks that become noticeable only after a long stretch of rain. Regular early-season checks after the first heavy rains help catch moss buildup before it has a chance to spread deeper into the roof assembly.
Roofs in Maple Valley that stay shaded longer after storms are more likely to show moisture-related wear patterns than roofs with better sun exposure and airflow. Areas under overhanging limbs, dormers that block sun, and narrow east-west roof runs that trap shade tend to retain moisture longer. In those spots, you'll notice granule loss, surface darkening, or minor blisters appearing earlier in the season than exposed sections. The takeaway is practical: targeted inspections after storms should focus on shaded facets, valleys, and flashing junctions where dampness persists. When moisture sits, it softens the protective granules and loosens fasteners or sealant joints, inviting slower drainage and potential ice dam risk in shoulder seasons.
After a heavy rain, walk the roof with caution or arrange a professional inspection that prioritizes shaded areas, moss-prone locations, and near where branches overhang. If moss is present, address it promptly with safe removal practices-avoiding aggressive scrapes that can gouge shingles and recognizing that moss can hide micro-cracks in underlayment. Maintain clear ventilation around attic spaces to enhance drying potential, and consider trimming overhanging limbs to reduce recurring shade and debris buildup. A well-ventilated, moss-managed roof dries more thoroughly, reducing the chance that moisture-induced wear accelerates through the next rainy season.
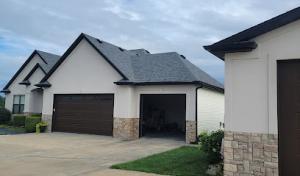
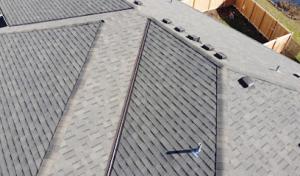
Asphalt shingles are a dominant choice for many homes in this area because they fit the broad reroofing market and a wide range of home budgets. In a climate with long rainy seasons, installation timing becomes a central decision, and asphalt's faster, simpler install can help minimize exposure to wet conditions. Look for a high-quality, laminated or architectural variety with good algae and moss resistance, and ensure proper attic ventilation to manage moisture after installation. When a reroof is planned, choosing a shingle with a strong nailing zone and extended weather warranties can help guard against leaks during the first few wet seasons.
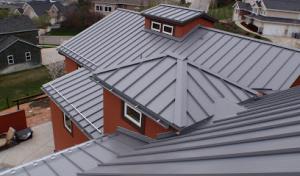
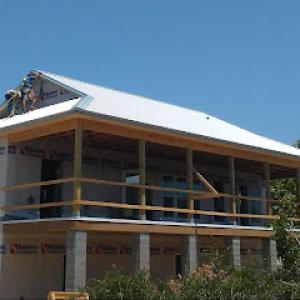
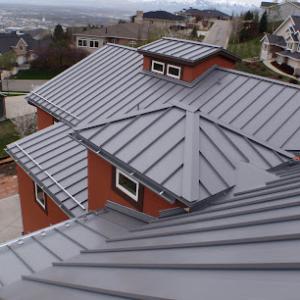
Metal roofing has a meaningful specialty presence and appeals to homeowners seeking robust rain shedding and lower moss retention than rougher roof surfaces. In shaded, moss-prone areas, metal panels can offer longer life with proper installation and underlayment. Pay attention to panel seams, fastener diversity (color-matched screws or concealed fasteners), and an integrated snow and ice strategy for eaves and overhangs. A well-sealed eave detail and valley treatment reduce potential for meltwater backup in persistent drizzle. If moss does appear, regular clearance and reflective coatings help keep roof temperatures down and moisture balanced.
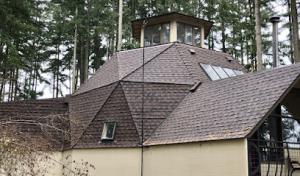
Wood shakes, clay tile, concrete tile, and synthetic products all appear in the local material mix, but the persistent moisture makes installation quality and roof assembly details especially important. Wood shakes require meticulous sealing at fastener points, with careful detailing around chimneys, skylights, and vent pipes to prevent capillary leakage. Clay and concrete tiles demand precise substrate stiffness and proper underlayment to tolerate long wet seasons without cracking or loosening. Synthetic composites can offer improved moisture resistance, but installation must still emphasize a continuous underlayment, staggered joints, and robust hip and ridge closures to prevent water intrusion during heavy rains.
In a climate with extended wet periods, the reroof window should align before the peak rain arrives, while allowing enough time for underlayment and flashing to cure. Regular early-season inspections help catch shingle lift, loose fasteners, or degraded flashings that can become leak pathways under heavy rainfall. For all material types, ensure that valleys, chimney boots, skylights, and vent penetrations are properly sealed and that moss inhibitors or protective coatings are considered where appropriate. Proper attic ventilation and a well-constructed leak barrier system are essential to extend the life of any roof choice in this shaded, rain-heavy setting.
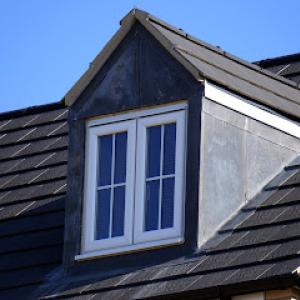
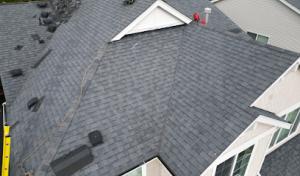
Skylights are a common feature in Maple Valley homes, and their penetrations are a frequent source of leak complaints once the long rains begin. The combination of persistent drizzle, shaded roofs, and mossy edges means flashing around skylights and other penetrations bears extra scrutiny. When roof surfaces stay damp, even small flashing imperfections can become steady drip points. Understanding where those leaks typically start helps you spot trouble early, before it shows up as water inside ceilings or along interior walls.
In this climate, flashing around skylights often succumbs to freeze-thaw cycles and continuous moisture exposure. Look for loose or degraded metal flashings, torn sealant joints, and any staining along the skylight curb. A common issue is flashing that was installed with too much compression, leaving gaps that hold moisture rather than shed it. Around penetrations, the transition from the skylight curb to the roofing surface is where moss, debris, and algae accumulate, which can trap moisture and accelerate deterioration of the sealant. Regular inspection after heavy rainstorms is especially valuable to catch subtle tracking of water before it becomes a visible leak.
Because leak calls often center on localized failures, having a trusted, quick-response roofer is particularly helpful in Maple Valley. When a drip is detected, prioritize immediate assessment of the skylight flashing, curb condition, and surrounding shingles or tiles. A temporary seal or patch can buy time, but the goal is to identify whether the issue is a worn-through sealant, a loose flashing leg, or a compromised kick-out at the drip edge. If the skylight is older, consider whether its curb and flashing were designed for sustained moisture exposure or if a retrofit with continuous flashing and upgraded sealants is warranted. Timely attention minimizes the risk of attic moisture, mold, and further degradation of the surrounding roofing material.
During drier spells or between wet seasons, clean debris from around skylight footprints and ensure moss control around roof penetrations. Keep gutters and downspouts clear so roof runoff doesn't pool near the skylight framing. If maintenance is planned, request a flashing inspection that focuses specifically on the skylight curb, the joints to the roof deck, and any surrounding shingle or tile edge. A small investment in daylighting and moisture management now pays off when the next storm hits, reducing the chance of localized leaks cascading into larger interior damage.
Find contractors experienced in skylight installation, flashing, and leak repairs to bring natural light into your home.
True Blue Roofing & Siding
(253) 655-9898 trueblueroofs.com
18407 Renton-Maple Vly Rd, Maple Valley, Washington
4.8 from 277 reviews
MasterCraft Roofing
(877) 350-1776 mastercraftroofingnw.com
20612 196th Pl SE, Maple Valley, Washington
4.2 from 30 reviews
In this market, typical Maple Valley material pricing runs about $350-$650 per square for asphalt shingles, $700-$1300 for metal, $900-$1700 for clay tile, $800-$1500 for concrete tile, $600-$1100 for wood shingles or shakes, and $550-$1000 for synthetic or composite shingles. When estimating, expect the difference between a basic asphalt overlay and a full tear-off + roof replacement to show up in labor and disposal, but the material spread gives you a solid baseline for planning. Heavier systems such as clay or concrete tile push the total per-square cost higher because the installation demands more crew time, specialized equipment, and deck or underlayment prep as needed after removal. With a forest-edge climate, you'll often see these heavier options used only where the structure can support them long-term, even if the initial price rises.
Pricing can rise during the preferred summer install season because more homeowners try to schedule work in the same dry window. If your project lands in that peak period, you may notice tighter bids or scheduling constraints, which can translate into higher labor rates or rush charges. In contrast, early fall or late spring windows can sometimes yield more flexible timing and modest savings, but weather unpredictability can negate those advantages. For a long rainy season area, it helps to lock in a start window early and align the project with a dry stretch of days to minimize moisture intrusion during tear-off and re-cover.
Costs in Maple Valley are also affected by reroof tear-off scope, moisture-related deck repairs discovered after removal, and the added labor demands of heavier systems like tile. If inspection reveals damaged decking or flashing that must be replaced, expect incremental costs to rise beyond the base material and labor. Full reroofs require careful assessment of the existing roof deck condition to prevent leaks during the wet months, which can extend timelines and add to labor hours.
Get a clear picture of your project costs upfront - no commitment required.

A full reroof in Maple Valley typically requires a permit issued through the local building department. The permit helps ensure the new roof meets current codes for weather resistance, especially important in a wet, moss-prone climate. Before any shingles are lifted, you should have the permit process underway and clearly understood by the crew. The permit protects you if issues arise later and keeps your home compliant during inspections.
For Maple Valley reroof permits, the contractor generally submits the scope of work and roofing materials as part of the application. That means you'll likely see documentation detailing the roof's planned layers, underlayment, fasteners, ventilation, and any required flashing or drainage updates. Having a precise scope helps prevent delays caused by back-and-forth clarifications with the building department. It also sets a clear baseline for what the inspector will expect at each check-in.
Maple Valley reroof projects commonly involve inspections during installation and a final inspection, and both weather delays and department backlog can affect the timeline. During installation, expect at least one rough-in inspection to verify fastener types and underlayment installation, plus checks on roof-to-wall transitions and chimney or penthouse flashing. If moss-prone areas or shaded eaves are addressed with extra moisture management measures, inspectors will note those steps as part of the approved method. Maintaining a tidy job site and accessible access points will help progress smoothly through these checks.
rainy seasons can interrupt progress, so plan for potential pauses. The inspector schedule can extend when weather windows shrink or when the department has backlog due to high volume of permits. Align your crew's workflow to anticipated inspection dates, and build in buffer time for weather-induced delays. If a hold occurs, use the downtime to address debris control, attic ventilation checks, and moss prevention plans so the roof can be finished promptly when rain eases.
At final inspection, ensure all scope items match what was approved and that ventilation, drip edge, and flashing details are complete and visible. Once passed, the permit is closed, and the new roof is formally approved for warranty activation and code compliance. Keep the inspector's notes handy for future maintenance and potential reroof planning.
In Maple Valley, insurers expect you to gather clear photos, note the roof age, and obtain a professional estimate when filing a claim. Photos should show both overall roof views and close-ups of flashing, vents, and any visible defects. Keep a dated log of when you notice issues and how they progress, so the timeline isn't murky if a claim is reviewed weeks later.
Wind and hail claims are common in Washington when storms roll through, but claim outcomes hinge on policy language and whether the carrier sees the condition as covered damage or wear. If the roof is approaching the end of its expected life, some carriers scrutinize whether recent events caused new damage or simply accelerated aging. Knowing your policy's definitions can prevent surprises during the adjustment process.
Because storms in this area often involve rain as well as wind, documenting both exterior damage and interior leak evidence helps establish when loss occurred. Take interior photos of stained ceilings, warped drywall, or attic dampness, and note any dates you first noticed leaks. Keep repair receipts and notes from quick temporary fixes, as they can support the timeline and help you avoid denial due to gaps in documentation.
After filing, respond promptly to requests for additional information and photos. If there's disagreement about coverage, you may want to arrange a second opinion from a contractor who can provide a detailed, timestamped assessment. Clear, organized documentation reduces back-and-forth and helps prevent post-storm delays.
Flat and low-slope roofing is a meaningful specialty in Maple Valley even though the city is largely a pitched-roof reroof market. The rain season stretches longer here, and shade from surrounding evergreens promotes moss and slow drying times. When additions or porches tie into an existing roof, water can linger where planes meet, making detail work around transitions more critical than on steep sections.
A main slope that drops into a lower-slope section often creates a natural water trap. Look for poor transitions where drain paths change grade, and check the edge details around skylights, parapets, and roof-to-wall joints. Pay extra attention to gutters and downspouts at these spots; even small sagging in the lower plane can back up water during heavy rains. On additions, ensure the shared drainage path from the main roof continues cleanly onto the lower portion without creating pockets of standing water.
During a late-fall or early-winter check, walk the entire roof edge carefully. Shine a flashlight along every seam where two planes meet, and note any soft spots or lifted flashing. Inspect around penetrations where the low-slope section meets the main roof, focusing on sealant aging and contractor-installed boot flashings. If moss is present near transitions, remove it and treat with a moss-inhibiting solution, then reseal the edge to prevent future intrusion.
For new work, specify a low-slope membrane that tolerates local rainfall and wood-shaded conditions, with robust edge flashing and a continuous drainage plane. When tying into an existing roof, align the new section with compatible slope, install overlapping flashing, and extend waterproofing beyond the junction to prevent slow leaks. Maintenance should emphasize keeping joints dry during the wet season and scheduling mid-season inspections after heavy rainfall or storms.
Find specialists in TPO, EPDM, and built-up flat roofing systems for residential and commercial properties.
MasterCraft Roofing
(877) 350-1776 mastercraftroofingnw.com
20612 196th Pl SE, Maple Valley, Washington
4.2 from 30 reviews