Last updated: Apr 19, 2026
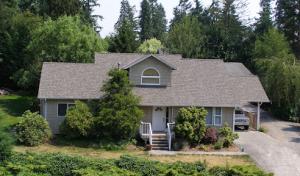
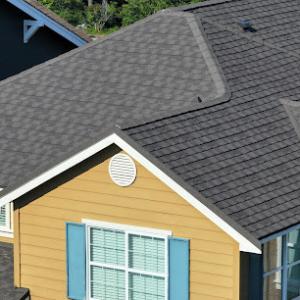
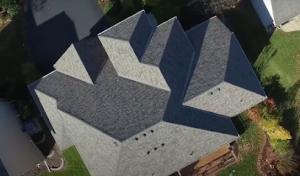
In a coastal Washington climate, extended damp periods outpace heat waves, so moisture retention and slow drying sit at the center of roof aging. Algae and moss become persistent problems, and roofs can stay damp long after rain stops. Shingle granules loosen, underlayment stays saturated, and minor leaks can creep along interior ceilings before you notice. This means that in this area, the big risks are not scorching sun or hail strikes but water working through flashing, seams, and lower-slope details during the soggy months. If your roof looks greener on shaded faces or under tree canopies, that is a red flag you must treat now.
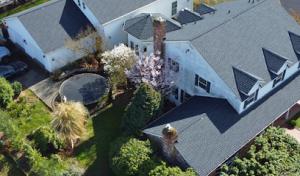
Homes near the waterfront, Port Gardner Bay, and other exposed pockets face wind-driven rain that can push moisture into vulnerable flashing, ridge caps, and wall intersections. When storms slam in from the marine corridor, those details act like the roof's weakest links. Pay attention to any signs of leaks around dormers, chimneys, skylights, and where roof planes meet walls. If you notice staining, peeling paint at fascia, or dampness near penetrations after a storm, treat it as an urgent alert. This is the moment to re-secure flashing, reseal joints, and verify that roof-to-wall transitions shed water effectively rather than channel it toward vulnerable seams.
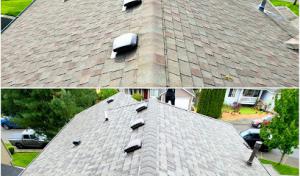
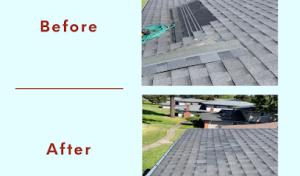
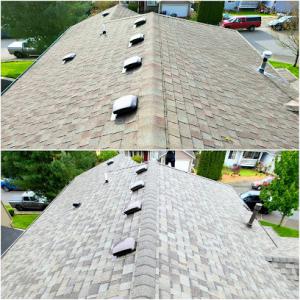
The mild temperatures here keep moss thriving for much of the year, especially on shaded north-facing slopes and under leafy canopies common in older neighborhoods. Moss holds moisture against shingles, speeds deterioration of protective surfacing, and can lift edges, creating tiny gaps for water entry. If you have large shade pockets or mature trees near the eaves, you should regularly inspect for moss growth and address it before it matures into a dense mat. Cleaning moss without removing the protective roof finish or causing damage to granules is essential, and you should consider applying moss inhibitors or installing copper or zinc strips along the ridgeline to slow regrowth.
Crucially, you don't want to wait for a visible leak to start work. The wet season is when preventive maintenance becomes a shield against costly failures. Schedule inspections just before the damp season begins and again after it ends to catch slow-dalling issues before they balloon. Prioritize checking flashing around chimneys, vent stacks, and wall intersections; ensure ridge vents remain unobstructed; and verify that gutters and downspouts drain away from the roof with no backflow. When you find damp patches or moss starting to creep beyond cosmetic boundaries, address them promptly with targeted repairs and protective treatments. A proactive, moisture-focused approach now keeps dry-season repairs-and the risk of interior damage-well in check.
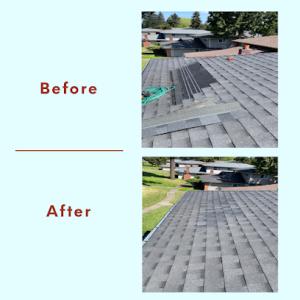
Moisture and moss shape every re-roof decision in this coastal corridor. The long damp season and marine air mean that tear-off and dry-in work are most dependable when the sky offers a solid, dry window. The goal is to complete removal, sheathing inspection, underlayment, and the first layers of roofing before the next rain onset, so the roof can breathe and cure without back-to-back soaking. In Everett, the weather cycle leans toward persistent drizzle and shoulder-season showers that creep into schedules, so planning around dry spells is essential.
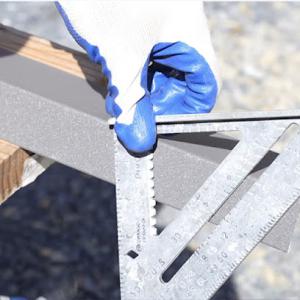
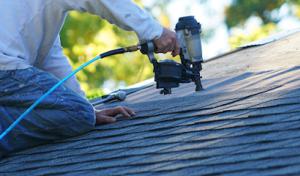
The best time for tear-off is late spring or early fall when a reliable stretch of dry weather is forecast for at least several days. Dry-in should follow immediately after the underlayment is installed and fastened, with a clear, dry forecast for the first few days to allow adhesives, sealants, or storm-resistant underlayment products to set properly. Summer can be workable if a sustained dry spell is forecast, but the heat and sun are less relevant here than the risk of mid-summer marine showers that can surprise a contractor mid-peak season. In practice, aim for back-to-back dry days, not a single dry morning sandwiched between rain events.
Cool, damp conditions can interfere with curing or adhesion for many roofing products. That makes the choice of underlayment and sealants more consequential than in hotter inland markets. Verify product manufacturer guidelines and choose adhesives and sealants rated for cool, humid environments. If a forecast shows a front moving through with light rain, pause only if rain is expected to linger or intensify for more than a few hours. Otherwise, plan for small breathing room gaps rather than back-to-back delays.
Coordinate with a contractor to block a dew-resistant start day, and confirm a continuous work sequence from tear-off through dry-in. Expose only the area that can be safely dried and vented while securing the rest of the job to prevent moisture intrusion into the attic or upper story. If a shower is predicted mid-project, discuss temporary protective measures for exposed decking and underlayment, and whether a short pause is advisable to protect the work already completed. Build a contingency period into the schedule for marine air-driven dew and damp mornings, which can extend adhesive cures and fastening requirements.
A proper dry-in relies on a tight, continuous seal at eaves and hips, plus a reliable underlayment system suited to damp coastal conditions. Dry-in should be completed during a series of dry days, with attention paid to ventilation in the attic and roof deck to minimize trapping moisture. After the final layer is in place, a thorough inspection should confirm fastener pattern accuracy, seam integrity, and flashing continuity before any sustained rain risk returns.
Get a clear picture of your project costs upfront - no commitment required.
Ruiz Roofing
(425) 344-5219 ruizroofing4.wixsite.com
107 77th Pl SW, Everett, Washington
4.9 from 86 reviews
WA Quality Roofing
(425) 552-9707 waqualityroofing.com
7701 Hardeson Rd UNIT 106, Everett, Washington
5.0 from 8 reviews
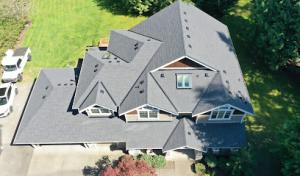
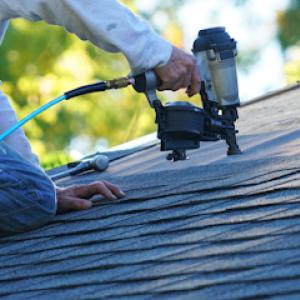
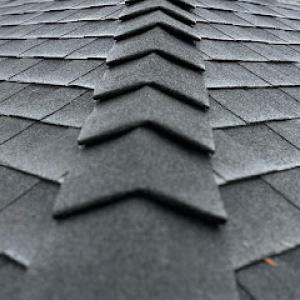
Asphalt shingles remain a dominant choice due to the large re-roofing market, but in Everett they need careful attention to moss buildup and granule wear during the long damp season. You'll want to inspect regularly for moss contact along shingle edges and replace any granule loss promptly to protect the underlying asphalt. Consider algae-resistant or moss-buster options and ensure the installation includes a solid underlayment and proper attic ventilation to minimize moisture-driven wear. In a neighborhood with frequent drizzle, a layered, staggered-seam layout helps shed moisture more effectively and reduces the chances of persistent damp spots.
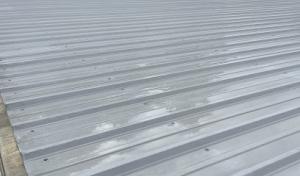
Metal roofing sheds water efficiently in this rainy climate, which makes it a sensible choice for Everett homes facing continuous moisture. The key to long life is detailing at penetrations, edges, and transitions where wind-driven rain can infiltrate. Use corrugated or standing-seam systems with sealed fasteners and concealed clips, and pay special attention to flashings around chimneys, skylights, and vents. A robust overhang and proper roof-to-wall interface reduce splashback onto the fascia, which is a common moisture driver in cloudy marches and damp winters.
Wood shakes and shingles offer regional charm, but Everett's persistent moisture raises the stakes for rot, split shakes, and ongoing maintenance. If you love the look, opt for select, rot-resistant species and employ a high-quality, breathable underlayment to help dry the roof surface between storms. Regular inspections for edge rot, lifting shakes, and moss growth are essential. Treat or seal regional products periodically to slow moisture ingress, and maintain clean roof lines and proper drainage to prevent pooling water that accelerates deterioration.
Tile and synthetic products appear in the market but require attention to roof structure, underlayment performance, and drainage details because sustained moisture is the guiding factor. Ensure the roof deck is sound enough to support heavier tiles or dense synthetic options, and choose a high-quality underlayment with proven moisture resistance. Drainage design should emphasize continuous sloping towards gutters and downspouts, with attention to snow- or rain-driven runoff that can overwhelm overhangs in exposed sections.
Across materials, the common thread is moisture management. Long wet seasons favor systems that shed water quickly, resist moss colonization, and maintain dry attic spaces. Regular moss removal, prompt flashing repairs after wind-driven rain, and vigilant inspection for granule loss or rot will help protect any material choice in the Puget Sound climate.
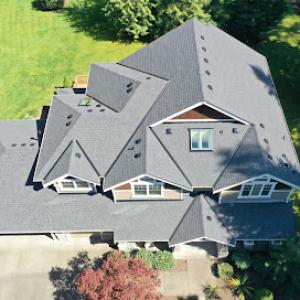
In this market, recurring leak complaints often center on flashing transitions that are stressed by repeated wetting rather than by freeze-thaw extremes. The long marine season soaks overlaps where two different roof planes meet, and small gaps can widen as moisture wicks under flashing. You'll notice that cap flashing, step flashing at valleys, and kick-out details near gutters take the most wear. The consequence is slow, creeping damp inside ceilings, warped trim, and moldy odor that makes you rethink every ceiling stain. Check fastener screws on metal edges and verify sealant bead continuity around vent pipes where the deck is exposed to spray.
Skylights are a focus here, and in a city with frequent rain, failed curb flashing and aged seals can show up quickly once the wet season starts. A skylight that looks sound from the curb can leak during a season's heavy rains if the curb flashing was installed shallowly or if the sealant has become brittle. Inspect skylight domes for glazing crazing and frame for rust or rot, and pay special attention to the seam where the curb meets the roof. If convenience of drainage ledges are missing, water can pool and back up under shingles. Schedule a mid-winter inspection and again after the wet season to catch sealant shrinkage and flashing gaps before they widen.
Chimneys and roof-to-wall intersections deserve extra scrutiny because prolonged moisture exposure can reveal small installation defects that stay hidden in drier regions. Look for mortar cracks, failed step flashing on a chimney chase, and any missing or cracked sealant around the base. In damp months, those minor flaws turn into active leaks with the rhythm of the rain. A probe with a flashlight and a moisture meter at the top plates can catch problems before they drip inside. Consider adding a chimney cricket if none exists, and check crown flashing for micro-cracks that invite drips during heavy rain.
The practical response is proactive, not reactive. When you see peeling flashing paint, loose flashing shingle tabs near a flash, or a skylight that never seems dry after a storm, treat these as urgent. Replacing compromised flashings in time preserves the integrity of the roof deck and the attic. In this climate, routine winterizing of roof penetrations is not a luxury but a guard against ongoing moisture damage. Choose roofing contractor who knows shingle and flashing details, and use a moisture meter during careful tests.
Find contractors experienced in skylight installation, flashing, and leak repairs to bring natural light into your home.
True Shield Roofing
(206) 800-7663 trueshieldroof.com
12321 Hwy 99, Everett, Washington
5.0 from 57 reviews
Ruiz Roofing
(425) 344-5219 ruizroofing4.wixsite.com
107 77th Pl SW, Everett, Washington
4.9 from 86 reviews
Hillside Roofing & Gutters
(206) 362-7663 www.hillsideroofing.com
1111 Hewitt Ave, Everett, Washington
4.9 from 79 reviews
Provided local averages run about 360 to 700 USD per square for asphalt shingles, 600 to 1100 for metal, 750 to 1200 for clay tile, 700 to 1200 for concrete tile, 550 to 900 for wood shingles or shakes, and 500 to 850 for synthetic or composite shingles. Those numbers give a practical starting point when you're comparing bids, but they don't tell the whole story. In this coastal climate, the cheapest option might not be the most durable over a long wet season. A roof that lasts longer with fewer moisture-driven repairs can pay back the upfront premium over time.
In Everett, costs can rise when crews must work around rain delays, replace moisture-damaged decking discovered after tear-off, or sequence work tightly around short dry windows. The weather pattern means projects frequently stall, then compress, which adds labor downtime and mobilization fees. If the roof deck shows widespread rot after the old shingles come off, you'll see a spike in materials and labor for replacement plywood or OSB, plus additional flashing and sealing around penetrations. Expect crews to coordinate multiple crews for weather windows, which can also push daily rates higher.
Pricing can also move with roof complexity common in mixed housing stock, including older homes with chimneys, skylights, and add-on sections that increase flashing labor. The more penetrations and valleys you have, the more moisture paths there are to manage, and the more critical proper underlayment, ventilation, and moss control become. If you are dealing with moss-prone eaves and shaded roofs, you should plan for extra preventative treatments and potential protective coatings, which adds to the total cost but reduces long-term maintenance.
Pricing can be affected by permit processing, inspection scheduling, disposal from full tear-offs, and demand spikes after regional wind and rain events. When a batch of roofs goes down after a storm, contractor teams may adjust crews and rates to handle the surge, and disposal costs for old shingles and damaged decking can climb. Track bid timelines carefully; long gaps between quotes can translate into price volatility, especially in a wet-season-heavy market.
True Shield Roofing
(206) 800-7663 trueshieldroof.com
12321 Hwy 99, Everett, Washington
5.0 from 57 reviews
At True Shield Roofing, Your Protection is Our Priority. ✅ Family-owned and operated for over 20 years. ✅ Certified by CertainTeed & Malarkey. ✅ Licensed, bonded, and insured. ✅ We handle repairs, replacements, and more. ✅ Serving King, Snohomish, and Pierce counties. ✅ Focused on quality, safety, and great service.
PNW Roofing & Crawl Space Insulation
(425) 585-4391 pnwroofinginsulation.com
8633 Valhalla Dr, Everett, Washington
4.9 from 98 reviews
PNW Roofing & Crawl Space Insulation, your trusted roofing company in Everett, WA, excels in residential roofing with expertise in shingle, metal, slate, flat, and green roofing. We prioritize your home's safety and efficiency with top-quality roof repair and replacement services. Also specializing in crawl space insulation, we're GAF-certified and BBB+ accredited, ensuring professional excellence. Benefit from our exclusive 5% discounts for seniors and military members. For expert roofing solutions in Everett, WA, choose PNW Roofing & Crawl Space Insulation Your trusted choice for a safer, more comfortable, and energy-efficient home.

J&J Roof Cleaning Services
(425) 371-6924 jandjroofcleaningservices.com
9730 18th Ave W, Everett, Washington
4.9 from 70 reviews
Since 2011 J&J Roof Cleaning Services, LLC has been helping homeowners with their roof maintenance in Everett and surrounding areas. We’re committed to provide the best quality of service. Cleaning is our passion!
Ruiz Roofing
(425) 344-5219 ruizroofing4.wixsite.com
107 77th Pl SW, Everett, Washington
4.9 from 86 reviews
Ruiz Roofing is a family owned & operated company locate in Everett, wa. Our #1 goal is a satisfied customer Contact us today for a free, NO-obligation quote on your next project! everything from new construction to tear-off's, we do it all! licensed bonded insured 425 515 8337
Hillside Roofing & Gutters
(206) 362-7663 www.hillsideroofing.com
1111 Hewitt Ave, Everett, Washington
4.9 from 79 reviews
Since 1983, Hillside Roofing has been the leading provider of outstanding roofing services in Lynnwood, Everett, and the surrounding areas. Our commitment to excellence and adherence to the highest standards of quality has set us apart from other local roofers. Our family owned and operated company offers a personalized experience ensuring your roofing project meets and exceeds your expectations.
Stellar Roofers Everett
(425) 382-5328 stellarrooferseverett.com
6325 Rainier Dr, Everett, Washington
5.0 from 34 reviews
At Stellar Roofers Everett, we take pride in offering dependable roof repair services to homeowners and businesses across Everett, WA. A roof in disrepair can cause leaks, water damage, and even structural concerns if left unattended, which is why our skilled roofing team provides fast, precise, and lasting solutions. Using quality materials and proven techniques, we ensure your roof is strong, secure, and built to withstand the Pacific Northwest’s weather conditions.From small residential repairs to larger commercial roofing needs, Stellar Roofers Everett is committed to delivering expert workmanship, clear communication, and reliable service that protects your property and gives you lasting peace of mind.
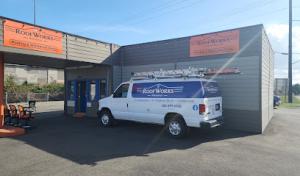
Roofworks Northwest
(206) 718-4931 www.roofworksnorthwest.com
3002 Hewitt Ave, Everett, Washington
5.0 from 32 reviews
Roofworks Northwest - We do Roofs, Waterproof Decks, and Consulting. Please reach out with any roofing questions or needs, we want to earn your business! -Sam
Rain State Roofing
(206) 650-2943 www.rainstateroofing.com
10121 Evergreen Wy STE 25-623, Everett, Washington
5.0 from 23 reviews
Your roof is one of the most important parts of your property. Not only does it protect your building from the elements, it also increases its value. Pacific Evergreen Roofing, LLC offers professional roofing services in Everett, WA. From roof installation services to roof repair services, we can do it all. With over 10 years of industry experience, you can trust us to deliver exceptional results. Schedule an appointment with our local roofing contractors today by calling.
Erie Home
917 134th St SW Suite A7/A8, Everett, Washington
4.9 from 24 reviews
Since 1976, Erie Home has manufactured, supplied, and installed the best-performing roofing on the market. By providing ironclad warranties and convenient financing, we ensure that every homeowner we work with receives top quality service and value for their homes and properties. Erie Home professionals are the roofing company of choice in the greater Everett, WA area. Whether you need roof inspections or roof damage repair services, Erie Home has been the go-to roofing contractor for nearly 50 years because of our attention to detail and dedication to making sure our customers are satisfied with their results. Contact us today for a quote and see why we're the trusted roofing company Everett counts on.
Axiom Division 7
(360) 354-3100 www.axiomd7.net
1220 75th St SW, Everett, Washington
4.6 from 33 reviews
Axiom Division 7 is a large-scale, full-scope commercial and industrial roofing, waterproofing contractor passionate about providing our customers with the highest quality work and customer service. Our roofing and waterproofing contractors provide service, maintenance, and specialize in unique challenging projects. The company’s expertise in low slope roofing is a standout feature, addressing the unique challenges and requirements of this roofing type. Low slope roofs, common in commercial buildings, require specific materials and installation techniques to ensure effective water drainage and prevent leaks. Axiom Division 7 employs advanced technologies and materials to deliver roofing solutions in Everett, Washington.

Smart Roofers Everett
12811 8th Ave W, Everett, Washington
4.6 from 21 reviews
Smart Roofers Everett is your trusted local roofing contractor proudly serving Everett, WA. We specialize in roof installation, roof replacement, roof repair, leak detection, shingle roofing, metal roofing, flat roofing, and emergency roofing services. With a commitment to quality craftsmanship and customer satisfaction, our expert team works 7 days a week to ensure your home or business stays protected. Whether you need a quick repair or a full roof replacement, we offer reliable, affordable solutions tailored to your needs. As Everett's go-to roofing professionals, we use top-grade materials and proven techniques. Contact Smart Roofers Everett today for dependable roofing services you can count on.
WA Quality Roofing
(425) 552-9707 waqualityroofing.com
7701 Hardeson Rd UNIT 106, Everett, Washington
5.0 from 8 reviews
Residential Roofing | Commercial Roofing | Roof Repairs & Maintenance Washington’s unpredictable weather demands a dependable roof. Get yours from the experts who understand the PNW climate! Call us to learn more about our services. Licensed, Bonded, and Insured - WA Quality Roofing. Call for a free quote today!
A full re-roof in Everett commonly requires a building permit through the City of Everett or Snohomish County, depending on jurisdiction. This isn't a simple paint-and-swap job; the project can trigger permit requirements tied to structural changes, drainage paths, venting, or flashing details. The goal is to ensure the roof system will shed moisture effectively during Everett's long damp seasons and won't create unexpected water intrusion in nearby roofs or eaves.
The local process typically includes plan and scope review rather than just an over-the-counter material swap. When drainage or venting details are part of the work, submitting a clear plan helps the inspector understand how gutters, downspouts, roof vents, and attic ventilation will continue to function after the tear-off. In practice, expect questions about how the new roof will manage prolonged moisture, moss control measures, and how penetrations around chimneys, skylights, or roof access will be sealed. Provide a straightforward drawing or description of the proposed snow/ice drainage path and any changes to venting or exhaust outlets.
Inspections are commonly scheduled after tear-off and again at final completion. The sequence usually starts with a tear-off inspection to verify the old roof is removed and the deck is prepared to receive the new system, then a mid-run check if framing or underlayment modifications occur, and a final inspection to confirm proper installation and flashing. Final approval is tied to the building department's sign-off before project closeout, so coordinated scheduling is key. Keep a focused log of any modifications requested by inspectors and address drainage and moss-prevention considerations as part of the effort to avoid moisture-related failures down the line.
In this western Washington climate, roof claims are more often tied to wind and rain events than to hail-driven total-loss scenarios common elsewhere. Long damp seasons promote moss and moisture-related deterioration that can look gradual until a heavy rain event exposes it. Understanding this pattern helps you anticipate where insurers will focus and what evidence to gather.
Insurers typically want clear documentation of prior roof condition, contractor estimates, and photo evidence. After a storm, take wide and close-up photos of shingles, flashing, gutters, and any moss or moisture staining. Keep a dated record showing the roof's condition before and after the event if possible. A simple one-page home-owner note describing roof-related concerns, when they started, and how weather patterns align with observed damage can be valuable for the adjuster.
Adjusters may coordinate scopes of work with roofing contractors, and claim timelines can be affected by regional claim volume after major rain or wind events. When a contractor provides an estimate, ensure it details moss-removal needs, underlayment concerns, and any ventilation or flashing fixes that address moisture ingress. If the adjuster requests a trip to view the roof, arrange access for both photos and a walk-through so gaps, granule loss, or moss-prone areas aren't missed.
Prepare a simple binder with storm date(s), photos, prior-condition notes, and two or three contractor estimates. Request a written scope from the adjuster that matches the contractor's estimate, and verify the scope covers moss control, moisture sealing, and any necessary underlayment replacement. When a claim is approved, follow the agreed schedule closely and document any deviations or weather delays to keep the process moving despite the region's busy rain-season workflow.
Connect with contractors who help homeowners navigate the claims process from damage assessment to final approval.
Roofworks Northwest
(206) 718-4931 www.roofworksnorthwest.com
3002 Hewitt Ave, Everett, Washington
5.0 from 32 reviews
Premier Roofing Everett
(425) 320-5101 www.roofingrepairguy.com
6629 Beverly Blvd, Everett, Washington
5.0 from 3 reviews
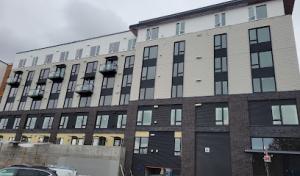
Flat and low-slope roofing is an active specialty in Everett, where frequent rainfall makes drainage design and ponding prevention more critical than in drier inland cities. Wet seasons stretch longer, so seams, penetrations, and drainage pathways face stress from extended moisture exposure. When water sits on a low-slope surface, even small defects can linger and compromise the roof deck, underlayment, and flashing. That slow creep of moisture can become costly repair work years sooner than expected.
In many Everett homes, the most vulnerable spots are where penetrations meet the field of the roof and where drains, scuppers, or edge details converge. Seams and flashing around vent pipes, skylights, and HVAC curb penetrations are common failure points once sustained rain persists. A gradual buildup of debris in gutters and downspouts can mask a creeping ponding problem, letting water linger near edges and transitions. The waterfront influence means exposed wind-driven spray can blow and deposit sediment that clogs critical drainage paths.
When evaluating a low-slope replacement or addition, pay close attention to the slope direction and runoff routes. Ensure drains are sized to handle prolonged wet spells and that scuppers or internal drains have reliable, unobstructed outlets. Look for clean, consistent flashing around penetrations and at perimeters, with seamless transitions where metal meets membrane. Consider a redundant drainage plan for extended wet periods, such as secondary outlets or a siphon-tested internal drain, so a single blockage doesn't leave a section ponding.
Seasonal checks should prioritize clearing gutters and scuppers before the rainy season and after heavy storms. Inspect seams and flashing after long stretches of rain, not just after a leak is noticed. Address any irregularities-soft spots, staining, or pooling-before they expand into larger repairs. In this climate, preventive maintenance keeps low-slope systems from deteriorating under Everett's persistent moisture.
Find specialists in TPO, EPDM, and built-up flat roofing systems for residential and commercial properties.
PNW Roofing & Crawl Space Insulation
(425) 585-4391 pnwroofinginsulation.com
8633 Valhalla Dr, Everett, Washington
4.9 from 98 reviews
J&J Roof Cleaning Services
(425) 371-6924 jandjroofcleaningservices.com
9730 18th Ave W, Everett, Washington
4.9 from 70 reviews
Ruiz Roofing
(425) 344-5219 ruizroofing4.wixsite.com
107 77th Pl SW, Everett, Washington
4.9 from 86 reviews