Last updated: Apr 19, 2026
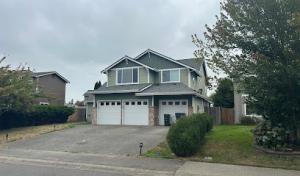
The long rainy season in this area means moisture exposure isn't a seasonal nuisance-it's a chronic condition for roofs. When rain lingers, plywood and underlayment soak up humidity, and small gaps can widen. In a neighborhood with moss-friendly roofs, the problem compounds: moisture encourages moss and algae growth that keeps the surface damp, accelerating decay and hiding leaks behind shaded areas. The risk isn't big hail or wind alone; it's how sustained wetting weakens seals, flashings, and fasteners over years. If you have a roof that spends weeks wet, treat every drip and damp spot as a signal to inspect, not a nuisance to ignore. A leak can start at a seemingly inconspicuous seam and creep along a flat or low-slope section until you notice water staining in the ceiling.
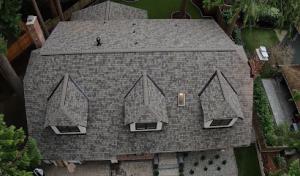
Low-slope roofs are common on additions and modern configurations, and they demand meticulous attention to drainage. Ponding becomes a real problem when water sits on flat or near-flat areas during multi-day storms, especially after a moss bloom blocks gutters or scuppers. Membrane seams are a frequent failure point in these configurations; if a seam has aged or a flashing detail isn't fully integrated with the edge of a parapet, water will find its way through. Seattle homes often rely on skylight adjacencies near these zones, which means every low-slope detail around a skylight needs extra scrutiny. If you notice standing water after a rain, the first suspect should be the drainage path-from gutters to downspouts to the edge flashing-and then the integrity of the membrane itself. Delayed drainage is not a cosmetic problem here; it's a direct route to rot if left unchecked.
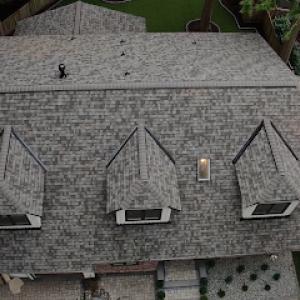
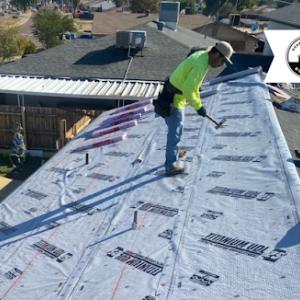
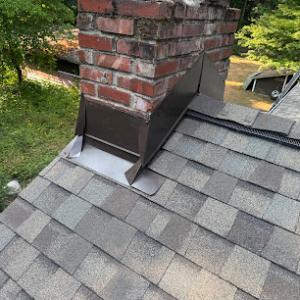
Skylights are a frequent local service category because they sit at the top of damp roofs and become targeted leak points after prolonged rain. Flashing around skylights-particularly where it meets a curb, counterflashing, or base flashing-tends to degrade faster in continuous wet cycles. In shaded Seattle homes, skylight openings can trap moisture against the curb, allowing leaks to migrate under shingles or tile. When a skylight flash is compromised, rain can seep along the curb and into rafters or ceiling cavities. If you're upgrading or replacing a skylight, insist on a robust curb connection, integrated flashing that seals against curb surfaces, and a drainage plan that directs water away from the curb line. Routine visual checks after heavy rains should become a habit: look for damp patches near skylights and test for dampness along the flashing when conditions are persistently wet.
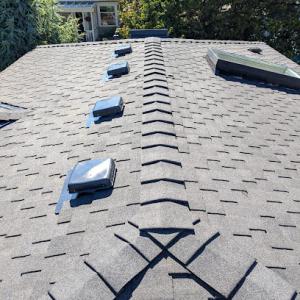
Moss isn't just a cosmetic issue; it signals persistent moisture contact and can lift shingles or reduce the effectiveness of sealants. In shaded spots, moss holds water against the roof, creating micro-pools that accelerate deterioration of granules, seals, and fasteners. Moss can also conceal underlying leaks, so maintenance becomes crucial. Combating moss means more than scraping; it requires improved drainage, proper venting, and a roof assembly that dries out efficiently after rain events. Address moss early and prioritize a cleaning and sealing plan that respects the roof's aging components. If moss cover remains dense, it's not a matter of aesthetics-it's a moisture management failure waiting to become a leak.
After a long rain spell, run a careful exterior inspection focusing on: edge flashing, joints at walls and chimneys, flashing around skylights, and low-slope seams. Check gutters and downspouts for obstructions that create ponding, and watch for damp spots on the ceiling interior near the worst-drained sections. If any area is slow to dry or shows staining, treat it as a leak hotspot and schedule a targeted assessment. In homes with skylights or shaded low-slope areas, prioritize flashing integrity, curb details, and membrane transitions-the next rain cycle will not be forgiving.
King Quality Roofing
(800) 860-5899 kingqualityroofing.com
12628 14th Ave S, Seattle, Washington
5.0 from 193 reviews
Founded in 1998, King Quality Roofing has been providing quality roofing services for over 20 years. Our team has completed a wide variety of projects including commercial buildings, residential homes, and industrial facilities. We pride ourselves on our attention to detail and commitment to customer satisfaction.
Three Tree Roofing
(206) 210-3300 www.threetreeroofing.com
1455 NW Leary Wy, Seattle, Washington
5.0 from 90 reviews
Finding the right Seattle roofer makes all the difference when it comes to protecting your property. At Three Tree Roofing, we bring years of experience, quality materials, and careful workmanship to every project. We know Seattle’s weather can be tough on roofs, so we focus on solutions that keep your property safe, dry, and comfortable year-round. Our friendly crew takes pride in clear communication, honest service, and treating every home like our own. From the first inspection to the final cleanup, we’re committed to making the process smooth and stress-free. With Three Tree Roofing, you get more than just a roof; you get peace of mind knowing your property is well protected for years to come.
Eco Roofing & Roof Replacement
(206) 385-4300 ecoroofingnw.com
10454 8th Ave SW, Seattle, Washington
4.9 from 194 reviews
Eco Roofing & Roof Replacement is your trusted local expert for full-service roofing and gutter solutions in Seattle, Bellevue, Renton, Kent, and surrounding areas. We specialize in roof replacement, roof repair, roof cleaning, gutter replacement, and gutter guard installation, using quality materials and eco-friendly practices. Whether your roof is aging, damaged, or simply needs maintenance, our experienced team delivers dependable service, transparent pricing, and long-lasting results. Protect your home with a company that values craftsmanship, customer care, and sustainability. Free inspections and estimates available.
Andrew & Sons Roof Repair
(206) 590-4460 martinezsonsroofrepair.com
126 S Spokane St suite a, Seattle, Washington
4.8 from 83 reviews
At Andrew & Sons Roof Repair, we measure our success through key metrics that reflect our commitment to quality and customer satisfaction.
Gurr Brothers of Seattle
(206) 627-0982 gurrbrothersroofing.com
Seattle, Washington
4.9 from 108 reviews
At Gurr Brothers of Seattle, we pride ourselves on providing exceptional roofing services for both residential and commercial properties. Our team of experienced professionals are dedicated to delivering high-quality workmanship, fair pricing, and outstanding customer service. Trust us to keep your roof in top condition. Schedule a consultation today!
Omar’s Construction & Removal
(206) 450-6885 omardemoandcinstruction.com
12353 8th Ave NE, Seattle, Washington
5.0 from 65 reviews
Omar’s Construction And Removal has built a reputation as the best roofing contractor in Seattle, WA, trusted for delivering durable roofs and dependable service. We manage roofing projects with precision, whether it’s repairs, replacements, or preventative maintenance, ensuring every roof stands strong against the elements. Our team is dedicated to timely work, quality materials, and clear communication from start to finish. Moreover, we are an expert siding contractor in Seattle, WA, offering installations and repairs that enhance protection, energy efficiency, and curb appeal. Clients value our commitment to dependable results and fair pricing on every project. Hire us today to see visible improvements that add value to your property.

Fenix Roof Service
(425) 344-8709 www.fenixroofservice.com
Seattle, Washington
4.9 from 186 reviews
Fenix Roof Service is a full-service Roof and Gutter company. We specialize in Roof/Gutter installation and Maintenance. We use state-of-the-art technologies during every project to ensure great results. We take the proper steps to preserve your home's integrity.
Mountaintop Metal Roofing
(206) 339-9070 www.mountaintopmetalroofing.com
1455 NW Leary Wy Suite 400, Seattle, Washington
5.0 from 55 reviews
Specializing in standing seam panels and metal shingles, Mountaintop Metal Roofing safeguards Seattle homes with lifetime guaranteed roofing systems built for the Pacific Northwest. Choose from a variety of styles and colors for a beautiful, maintenance free roof that is backed with a lifetime, non-prorated, transferable warranty. Do it once. Do it right.
Washington Sequoia Roofing
(206) 488-0168 washingtonsequoiaroofing.com
Seattle, Washington
5.0 from 81 reviews
Washington Sequoia Roofing is your trusted roofing company in the heart of Maple Valley, WA, proudly serving the surrounding communities within a 50-mile radius. With unwavering dedication to craftsmanship, we've become the local choice for roofing solutions. Our commitment is simple: we deliver results. We understand the unique demands of the Pacific Northwest climate and the importance of a sturdy, reliable roof. When you choose Washington Sequoia Roofing, you're choosing a team that cares about your home as much as you do. Our experienced roofers are skilled in handling everything from minor repairs and siding installation to complete roof replacements.

Phillips Roof Repair
(206) 238-3570 phillipsroofseattle.com
1420 5th Ave suite 412, Seattle, Washington
5.0 from 49 reviews
Phillips Roof Repair proudly serves Seattle with reliable roofing services for residential and commercial properties. Whether you're dealing with a roof leak, missing shingles, or storm damage, our experienced team provides fast, effective repairs using high-quality materials. We specialize in asphalt, flat, and low-slope roofing systems. Trust Phillips for expert workmanship and long-lasting roof protection.
Rainier Roofing Company
(206) 347-8191 www.rainierroofingcompany.com
2104 S Plum St, Seattle, Washington
4.8 from 178 reviews
Rainier Roofing Company provides complete roofing services in the Seattle, WA area.
A Better Roofing Company
(206) 935-1575 www.abetterroofing.com
4126 Airport Wy S, Seattle, Washington
4.8 from 114 reviews
A Better Roofing Company has been replacing roofs across Seattle and the Eastside since 1991. As a locally owned and family-operated business, we specialize in residential roof replacement using high-quality asphalt shingles built for the Pacific Northwest climate. Our experienced crews are known for clean work, expert craftsmanship, and honest service. Serving homeowners in Seattle, Bellevue, Kirkland, and beyond, we’re proud to offer free roofing estimates and industry-leading warranties. Contact us today to schedule your roof evaluation.
In Seattle, fall rain and the recurring winter wet season can push tear-off, dry-in, and inspection timelines out by days or even weeks. If a project starts in late fall, plan for shorter work windows and more frequent weather holds because sustained rain events can stall open ridges, skylight penetrations, and low-slope areas where moisture control matters most. Your contractor will likely track the forecast closely, building buffers into the schedule for rainouts and for frost-free mornings. Expect that roof work may shift to drier spots in the calendar as showers tapers, but be prepared for late-season delays when rain bands linger.
Winter cold and frost can pause roofing work even when storms aren't severe. Frozen decking or ice in valleys slows material handling and fastening, and crew safety takes priority on pitched sections and skylight transitions. If temperatures hover near freezing, anticipate temporary stop events until surfaces dry and temps rise above a workable threshold. This means the project can rebound quickly on mild days, but the overall pace may feel choppier compared with milder stretches. Communicate with the crew about a plan for frost days, including how long a pause lasts and how daily targets get reset when work resumes.
Seattle's dry summer stretch usually offers the fastest installation pace and the best access conditions for full replacements. Heat is less of a concern than moisture management, so a long stretch of dry days translates to fewer weather holds, steadier material handling, and clearer access for stacks, trays, and skylight flashing repairs. Early summer windows are particularly favorable for crews to complete tear-off, dry-in, and full covering before the next seasonal shift. If a full replacement is planned across multiple slopes and a skylight cluster, this is the period to target to maximize consecutive dry days.
Coordinate with the contractor to map a tiered timeline that anticipates wet-season pauses. Establish a primary start date and a backup plan that accounts for rain margins around low-slope transitions and skylight work. Build in contingency days for weather-related delays and a frost contingency for mid-winter weeks. Align inspection timing with expected dry periods so moisture tests, deck checks, and flashing verifications aren't piled onto a single window of weather-sensitive tasks. Clarify ramp-up and ramp-down routines for the crew, so the team can pivot quickly when a forecast shifts.
Low-slope sections and skylight-heavy assemblies demand extra attention to sequencing. Schedule waterproofing tests and membrane accommodations for these zones during the dryest windows available, ideally after a dry-in but before final sealant cures. If moss-prone areas are involved, plan for proactive cleaning during optimal weather slots to minimize moisture retention without exposing the roof deck to rain during critical sealant or flashing work. Keep a clear plan for post-install maintenance checks in the first drying period to catch any slow leaks early, before seasonal rains resume.
Keep a single point of contact who tracks the precipitation forecast, frost advisories, and temperature trends. Request written updates on weather-driven schedule shifts and a revised daily log if screeds of work can't be completed due to rain or cold. By staying aligned with the crew's pragmatic pacing, the project moves through the season with fewer surprise holds and clearer milestones for moisture management milestones.
Get a clear picture of your project costs upfront - no commitment required.
Eco Roofing & Roof Replacement
(206) 385-4300 ecoroofingnw.com
10454 8th Ave SW, Seattle, Washington
4.9 from 194 reviews
Phillips Roof Repair
(206) 238-3570 phillipsroofseattle.com
1420 5th Ave suite 412, Seattle, Washington
5.0 from 49 reviews
A Better Roofing Company
(206) 935-1575 www.abetterroofing.com
4126 Airport Wy S, Seattle, Washington
4.8 from 114 reviews
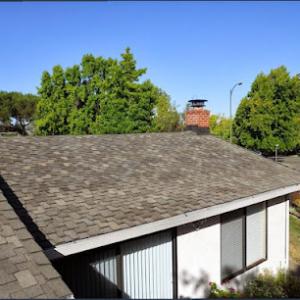
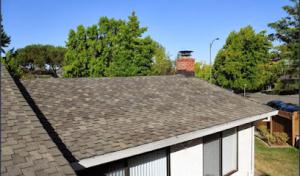
Asphalt shingles dominate the local roofscape, and for good reason: they're familiar, relatively affordable, and familiar with Seattle's damp rhythms. Yet repeated wetting and drying cycles in this climate can accelerate granule loss, curling, and algae or moss-related wear. To keep asphalt roofs aging gracefully, focus on the edges and flashing where moisture tends to strip away protection first. In shaded areas, granules can loosen faster once moss starts to take hold, so consider a weekly wet-dog-season inspection routine during the fall and winter. If moss shows up, gentle mechanical removal paired with a moss-killing treatment that's safe for shingles helps prevent damage from root growth and lifting. Keeping gutters clear and ensuring downspouts move water away from the fascia reduces standing moisture near fascia boards and helps extend the roof's life. Look for a shingle with a robust algae resistance rating and period-consistent sealant performance to withstand Seattle's cycles of wet and dry days.
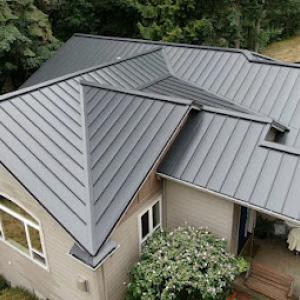
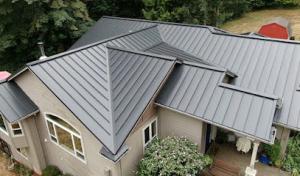
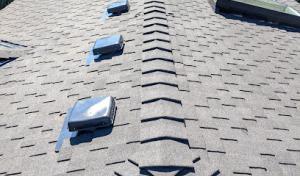
Metal roofing is popular in Seattle because it sheds water efficiently and resists the frequent dampness that characterizes the season. The key to long-lived metal roofs in this climate is detailing around penetrations-vents, skylights, and chimney flues-where moisture can seep and where temperature differentials create condensation. Sealant joints should be upgraded to moisture-tolerant, elastomeric products that maintain flexibility through freeze-thaw-like swings and long, damp stretches. Skylight terraces and flat-bottomed valleys deserve extra attention; flashing must be continuous, with proper counter-flashing and sealant integrity to prevent capillary rise from pooling water. Condensation control matters in the region's damp climate: consider a well-ventilated attic or an internal vapor barrier approach that matches the roof's profile. When moss or lichens appear on exposed metal surfaces, remove them promptly with non-abrasive methods to avoid scratching coatings. Routine inspection of seams, fasteners, and panel laps helps catch slow leaks before they become widespread issues.
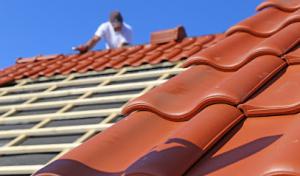
Wood shingles and shakes remain part of the market, especially on older Pacific Northwest-inspired homes with character-rich lines. Their beauty comes with sensitivity to moisture, which means extra maintenance in Seattle's damp environment. Wood faces higher risk from moss-laden shade and persistent rain, which can cause cupping, warping, and rot if drainage around the roof isn't optimal. Regular inspections should target areas under overhangs and near trees, where moisture retention is greatest. Keep the roof's surface clear of debris that traps moisture and fosters fungal growth. When staining or sealing, choose products that resist mildew and allow for some breathability to adapt to Seattle's humidity cycles. Pay particular attention to joints around skylights and chimneys, where wood sealants can fail sooner than elsewhere, inviting leaks. If a section shows curling or softening, address it promptly with careful replacement of affected shingles and re-sealing of the exposed fasteners to prevent further moisture intrusion.
Across all materials, moss-prone areas demand proactive moisture management. In low-slope sections and near skylights, ensure proper pitch and drainage to reduce ponding on flat planes. Moss can trap moisture against roof surfaces, accelerating wear; therefore, a maintenance plan that combines gentle removal, improved drainage, and periodic resealing of flashing leads to longer service life. For each material type, consider a localized maintenance cadence that aligns with Seattle's long wet seasons, focusing on preventive care well before winter rains arrive. Keeping a close eye on shaded corners, flashing integrity, and ventilation will help any roof age well under the clouded skies that define the region.
Moss is less a nuisance than a sign of how slowly a roof dries after rain, a common pattern in this climate. Evergreen canopies keep the roof shaded for long stretches, so the surface stays damp well into the next day or two. The result is a cycle of micro-wetness that slowly ages shingles, tiles, and underlayment where water sits. On low-slope sections, that dampness translates into stubborn moss growth and hidden wear along seams and fasteners. The consequence is a higher risk of hidden leaks, especially where moss roots penetrate shingle overlaps or create micro-dams that back water into valleys. The practical response is meticulous, regular removal of moss in a way that avoids tearing at shingles and a proactive plan to improve drainage where slow drying is chronic.
Organic debris from nearby trees arrives with rain and can clog valleys, gutters, and those low-slope drains that Seattle homes rely on to move water away quickly. When debris backs up, water can back up under roofing materials, lifting edges, saturating underlayment, and accelerating wear around skylight flashing and vent penetrations. The accumulation is not just an aesthetic issue; it is a moisture trap that accelerates rot and weakens sealants. The practical rule is to keep roof surfaces clean of needles, cones, and leaves before the first heavy rain of fall, and to inspect gutters and valleys after storms when debris has likely shifted. A tight, debris-free valley and a well-maintained drip edge are key to avoiding slow leaks that travel unnoticed.
North-facing roof planes routinely stay damp longer than their sunlit counterparts, creating uneven aging on the same home. It is common to see one area of a roof look reasonably fresh while a shady slope exhibits moss, staining, and granular wear. The result is not just an eyesore; it signals differential movement in the roof assembly that can lead to leaks around skylights, dormers, or chimney flashing if left unaddressed. The practical approach emphasizes targeted inspections: test for moisture on the cooler planes after rain, check flashing joints around skylights and vents, and anticipate more frequent maintenance in the shaded sections. Eager prevention here beats reactive repairs, especially in homes with significant shading and multiple low-slope runs.
Replacement costs here reflect a waterfront-wet climate, with roofs that blend steep pitches, low-slope sections, and frequent skylight or chimney penetrations. Labor complexity rises when you're dealing with moss-prone zones, vent pipes, flashings, and gutter work that must stay effective year-round. In practice, expect additional handling time for moisture management details, temporary tarps during rain, and careful sequencing to keep interior spaces dry.
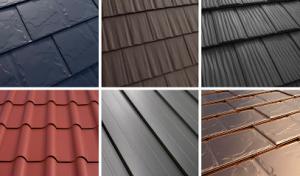
Residential roofs in this market run a wide price gamut because Seattle roofs feature asphalt shingles, metal, wood shakes, tile, and synthetic products. Asphalt shingles are common and affordable, but low-slope areas and skylight-heavy layouts push labor costs higher. Metal offers longevity and low-slope performance but can carry a premium. Tile and wood shakes bring distinct aesthetics and moisture-control considerations; their costs vary widely based on underlayment and attic ventilation needs. Synthetic shingles sit in the middle, with favorable moisture resistance but varying installation complexity.
Wet-weather scheduling pressure compresses the prime summer window for roof work, which can tighten labor availability and push start dates later. Expect contingencies for rain days, additional tarping, and extended drying times for adhesives and sealants. In Seattle, crews often stagger work to minimize exposed underlayment, especially around skylights and chimneys. Build a buffer into your timeline so lingering drizzle doesn't derail the project and lead to moisture-related setbacks.
Low-slope sections require precise installation and enhanced underlayment systems to prevent leaks, which drives up both material and labor costs. Skylight-heavy homes amplify penetrations that demand careful flashing and moisture barriers, adding to the overall price. Steep sections, while reducing weather exposure risk, demand more safety gear and fall-protection measures. Expect a stepwise cost pattern: base material + enhanced moisture-control components + labor for integration with existing flashings and attic ventilation.
From a planning perspective, Seattle-specific pricing spreads reflect the mix of materials and the added complexity of moss-prone assemblies. Use the typical cost ranges as a ceiling and floor, then layer in the extra for skylights, chimneys, and low-slope transitions. Discuss ongoing moss management and roof edge detailing with your contractor to ensure your replacement remains moisture-tight for many wet seasons. Consider staging the project to align with drier windows when possible, and always budget a contingency for rain-induced delays and additional flashing work.
Don't let upfront costs delay a critical repair - these contractors offer payment plans to fit your budget.
Mountaintop Metal Roofing
(206) 339-9070 www.mountaintopmetalroofing.com
1455 NW Leary Wy Suite 400, Seattle, Washington
5.0 from 55 reviews
Interlock Metal Roofing (PNW) Inc. - Seattle
(206) 589-8423 www.washingtonmetalroofing.com
5608 17th Ave NW suite 1574, Seattle, Washington
4.7 from 39 reviews
Archetype Roofing
(206) 312-3242 archetyperoofing.com
255 Lenora St, Seattle, Washington
4.7 from 15 reviews
A full roof replacement in Seattle typically requires a permit through the City of Seattle Department of Construction and Inspections. The process is designed to ensure moisture management practices are built into the design, especially on low-slope sections and around skylights where leak risk is higher. Before any work begins, a permit plan set must be submitted, showing roof assembly details, flashing transitions, and drainage planning that address Seattle's damp climate. Expect a building permit review that may request specifications for underlayment, vapor barriers, and hatch or hatch-adjacent details if skylights are involved.
Seattle roofing projects commonly involve rough and final inspections rather than a paperwork-only process. The rough inspection typically takes place after roof framing and underlayment are installed, or when a complete roof assembly is in place but before finish materials are applied. The final inspection confirms that all penetrations, flashing, skylight curbs, and drainage devices meet code and the project matches approved plans. Because moss-prone conditions and shaded roof planes are common, inspectors will verify proper maintenance of valleys, drip edges, and pitch compatibility with the chosen roofing system to ensure long-term leak resistance.
Scheduling and weather can interact in Seattle, so permit timing and inspection coordination matter more during the rainy season. Plan for potential delays arising from wet periods that slow material installation or hinder safe inspection access. Communicate expected inspection dates with the permit office and the roofing contractor, and build in buffers for back-to-back inspections if large sections of roof are being replaced or if crews must reseal skylight openings.
Your permit package should include accurate roof square footage, material specifications, and details for any moss control or roof-cleaning plans tied to the replacement. If skylights are involved, provide flashing details, curb heights, and drainage considerations to demonstrate water shedding efficiency. Keep a clear line of communication between the homeowner, contractor, and the City's inspector so changes-if any-are documented promptly and align with the approved plan.
After final approval, retain the permit closure documents and warranty information for the new roof assembly. In Seattle's moist climate, ongoing maintenance notes for moss prevention and seasonal inspections help ensure the new system continues to perform as designed, especially in shaded, low-slope areas where leaks are more likely without proactive care.
In this climate, insurance decisions hinge less on dramatic hail events and more on the roof's age, the quality of workmanship, and what can be shown about leaks over time. A homeowner who can prove a roof performed poorly under typical Seattle rain and wind sets the narrative for a claim, not one who points to a single storm.
Detailed before-and-after photos paired with contractor reports carry real weight when the file lands on an adjuster's desk. In practice, it helps to document shingles cupping, moss-laden underlayment, flashing wear, and any observed moisture intrusion near skylights or low-slope seams. Language in photos should align with measurements and observations in the report.
Because the typical failure mode is prolonged moisture intrusion rather than obvious impact damage, the claim packet needs a clear map of how water travels. Note the entry point, trace the channel of leakage through decking or insulation, and show where it appears at ceilings or interior walls. Clear lines between roof features and interior staining are valuable.
Skylight assemblies are common leak sources in Seattle. A claim that highlights sealant failure, flashing gaps, or misaligned curb flashing with photos and a professional verdict stands a better chance of support. Pair skylight findings with assessments of surrounding roof slope and drainage.
Keep a running record of roof performance after wet seasons, save contractor notes, and ensure the file is organized with timestamps. An adjusted, honest depiction of moisture realities helps insurers and keeps expectations grounded.
That means documenting roof age, visible wear, and every sign of dampness in crawlspaces or attic vents. When the file tells a truthful story through photos and clear notes, claim path stays steady even during Seattle's lull.
Find local contractors experienced in assessing and restoring roofs after hail, wind, and severe weather events.
King Quality Roofing
(800) 860-5899 kingqualityroofing.com
12628 14th Ave S, Seattle, Washington
5.0 from 193 reviews
Andrew & Sons Roof Repair
(206) 590-4460 martinezsonsroofrepair.com
126 S Spokane St suite a, Seattle, Washington
4.8 from 83 reviews
Omar’s Construction & Removal
(206) 450-6885 omardemoandcinstruction.com
12353 8th Ave NE, Seattle, Washington
5.0 from 65 reviews
In the wet climate of this area, flashing quality, dry-in practices, and cleanup discipline have an outsized effect on whether a new roof stays leak-free. Look for installers who lay out a deliberate plan for flashing around chimneys, skylights, and transitions before any shingles go on. Ask for a photo log or checklist that shows dry-in steps for low-slope sections and skylight penetrations, and expect a rain-ready phase before final sealing. A practiced crew will protect everything behind the drip edge and use a continuous, corrosion-resistant flashing metal with properly sealed joints. If the crew skips test-fitting soffit and valley components or seals with cosmetic caulk, that's a red flag.
Skylights and valley intersections demand more attention in this market where moss and shade amplify leaks. Insist on a dedicated, fully integrated waterproof detail at skylight bases, with proper underneath membranes and counter-flashing where possible. For low-slope transitions, insist on a proven membrane approach that overlaps with the primary roofing layer and is properly integrated with drainage. The contractor should show you how water shed is controlled during wind-driven rain and how valleys are reinforced to resist leakage over time. A careful crew will also minimize the number of penetrations through the roof deck and confirm that fasteners are correctly set for the deck material.
Warranty conversations should focus on both manufacturer coverage and who is responsible for leak-prone details like skylights, valleys, and low-slope transitions. Ask for a written delineation of who covers each flashing detail and what constitutes a leak caused by workmanship versus material failure. The local market shows meaningful demand for warranty-backed work, reflecting homeowner concern about replacement quality in a moisture-heavy environment. Ensure the contract specifies post-install inspection windows and a clear path for addressing any moisture-related concerns that arise in the first few seasons.