Last updated: Apr 19, 2026
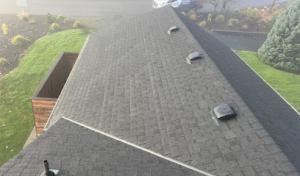
Redmond's wet winters and damp springs mean moss and algae are not cosmetic concerns but ongoing roof health issues. Moss holds moisture against decking and underlayment, which slows drying after rain and can lead to accelerated wear on shingles or tiles. In a neighborhood with dense tree cover, the cool, humid air around the eaves creates especially inviting conditions for moss growth. The first line of defense is a proactive plan: identify shaded sections with persistent dampness, and schedule a retreatment or cleaning cycle that aligns with the shoulder seasons between winter storms and late-spring rain bursts. When you clear moss, do it with care to avoid loosening shingles or lifting underlayment. A soft-bristle brush and approved moss cleaner, applied per product directions, keeps granules and surface texture intact while removing established patches. Pay attention to gutters and downspouts during cleanup; clogged lines trap moisture on the roof edge and perpetuate moss-friendly conditions along the eaves.
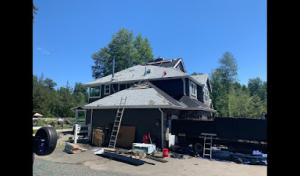
During a re-roof, moisture management becomes a central concern because exposed decking and underlayment are more vulnerable to rain during the long wet season. In Redmond, decking that remains damp between storms can warp or delaminate wood components, and synthetic underlayments may stiffen or fail if they stay wet too long. Plan a reroof sequence that minimizes the window of exposed decking, especially in late fall and early winter. If the weather window is tight, consider coordinating temporary waterproofing measures that protect the deck until full shingle or tile coverage is secured. Pay particular attention to attic-to-ceiling condensation paths; high humidity in the attic can translate into faster deteriorations on the roof plane below if ventilation is blocked or mis sized. A thorough inspection of decking boards for soft spots, cupping, or nail pops helps prevent surprises after the new system is installed.
Attic airflow and moisture management are central to Redmond's roof lifecycle. The replacement process emphasizes decking and ventilation details, so treat attic ventilation as a critical component of any re-roof plan. Start with a balanced intake and exhaust strategy that suits the house layout and attic volume. In practical terms, verify that soffit vents are clear and unobstructed, gable or ridge vents are functional, and any soffit-to-ridge pathways maintain consistent airflow. If the attic has cathedral ceilings or irregular rafters, consider adding baffles or insulated vent chutes to ensure fresh air reaches the deepest corners. Condensation control benefits from a programmable or humidity-responsive vent strategy in rooms with significant humidity loads, such as bathrooms or laundry areas that share the attic space. Remember that poorly ventilated attics trap moisture, which compounds moss growth and accelerates shingle or tile wear.
Homeowners often need decisions timed around prolonged rainy periods because exposed decking and underlayment are harder to manage during winter storm windows. When planning a roof replacement, schedule for a weather lull if possible, and brief all crew members on temporary protection steps for any exposed decking. If an early-year project must push through, insist on rapid decking protection, robust underlayment sequencing, and a clear ventilation plan that remains functional as soon as the first layers are in place. In this climate, a well-ventilated, dry attic is not optional-it underpins the longevity of the entire roof system through the next wave of storms.
NearMe Roofing Company
(206) 487-4380 www.nearmeroofingcompany.com
2727 152nd Ave NE, Redmond, Washington
4.9 from 338 reviews
Near Me Roofing Company, headquartered in Seattle, is a leader in residential roofing services, providing top-tier roof replacements, repairs, and cleaning across King, Snohomish, and Pierce Counties. We pride ourselves on offering the best in terms of pricing, quality, and availability, ensuring that our clients receive exceptional value and superior service every time. Whether you need a quick repair or a full roof replacement, our skilled team is ready to deliver prompt, reliable, and cost-effective solutions.

Emerald Mountain Roofing
(425) 698-3076 www.emeraldmountainroofing.com
Redmond, Washington
5.0 from 65 reviews
Emerald Mountain Roofing, owned by Steve Rose with over 40 years of experience, offers top-tier roofing services in Lake Stevens, WA & all surrounding areas. We provide free estimates and prioritize transparent communication to ensure our clients are always informed. Known for our reliability and punctuality, we deliver on-time roofing solutions for homes and businesses. Our commitment to quality extends to our thorough post-construction cleanup, ensuring your property remains spotless. Trust Emerald Mountain Roofing for professional and dependable roofing services.
Astro Roofing
(425) 380-9560 astroroofingwa.com
Redmond, Washington
5.0 from 60 reviews
Astro Roofing is your premier roofing company in Kirkland WA, Bellevue WA, Bothell WA, and surrounding areas. Specializing in roof repair, replacement, and inspection services in Kirkland WA, we are known for our reliability and excellence in the greater Kirkland area. Our skilled roofers use top-quality materials to ensure durable and aesthetically pleasing results. We take pleasure in our commitment to customer satisfaction, providing transparent communication and timely project completion. Whether it’s a simple repair or a complete roof replacement, Astro Roofing provides skilled work that is customized to meet your requirements. You can trust us with all of your roofing needs in Kirkland WA.
Perry Roofing Services
(425) 332-7091 perryroofredmond.com
8201 164th Ave NE suite 608, Redmond, Washington
5.0 from 43 reviews
Perry Roofing Services proudly serves Redmond with expert roofing solutions for homes and businesses. From minor repairs and leak fixes to full roof replacements, our skilled team delivers high-quality workmanship using durable materials. We specialize in asphalt shingles, flat roofing, and storm damage restoration. Count on Perry Roofing Services for reliable protection, fast response, and lasting results.
First Choice Roof Replacement & Roof Cleaning
(425) 270-1525 firstchoiceroofservice.com
7345 164th Ave NE, Redmond, Washington
4.8 from 206 reviews
"FirstChoice Roof replacement and roof cleaning is proud to have served the Greater Puget sound areas for over 17 years. We have worked diligently and earned our reputation as one of the top roofing contractors one client at a time. At FirstChoice Roof all of our technicians are full-time, certified employees and have extensive roofing experience in both residential and commercial roof systems. Because of our expertise, we take on many roofing projects that other roofing contractors turn away. When you hire FirstChoice Roof replacement and roof cleaning for your installation or repair, you get the best-trained, experienced roofers in Washington. We are friendly, knowledgeable, reliable and our work ethics are second to none!"
Seattle Roof Systems | Shoreline Roofing Company
(425) 996-1386 seattleroofsystems.com
Redmond, Washington
5.0 from 34 reviews
Seattle Roof Systems provides residential roofing services in Seattle, WA, and surrounding areas including Shoreline, Bellevue, Bothell, and Edmonds. The company specializes in roof installation, repair, and gutter maintenance, with a focus on long-term durability and weather protection. Each roof installation includes a lifetime material warranty and a 10-year workmanship warranty. Seattle Roof Systems also offers support with insurance claims, helping homeowners navigate the process from inspection to final repair. Services are tailored to the needs of homes in the Pacific Northwest, with attention to local building codes and climate conditions.
Landmark Roofing & Siding
(855) 908-7663 www.landmarkroof.com
14940 NE 95th St Suite H, Redmond, Washington
4.8 from 187 reviews
Landmark Roofing & Siding is a family-owned exterior contractor based in Redmond, serving residential and commercial properties in the surrounding areas. Since 2005, the company has specialized in roofing, siding, windows, doors, skylights, and gutter systems. The team provides installation, replacement, and exterior upgrade services using durable, high-quality materials and certified installation practices. Work is supported by manufacturer warranties and a transferable lifetime workmanship warranty. Landmark Roofing & Siding focuses on clear communication, accurate assessments, and dependable project execution to deliver long-lasting exterior solutions for homes and businesses.
Mass & Mass Roofing & Repairs
(206) 222-1458 massandmass.com
3970 West LK Sammamish Pkwy NE, Redmond, Washington
4.8 from 21 reviews
Since 2016, Mass & Mass Roofing and Repairs has been the trusted partner for premium roofing and exterior home improvement. Based in Redmond, this premier contractor delivers a complete range of high-quality solutions for homeowners and businesses across Washington. From asphalt shingle and metal roofing to advanced weatherproofing systems, the team ensures exceptional craftsmanship, long-term value, and meticulous care on every project. Specializing in new installations and expert repairs, they provide a simple, stress-free experience. Mass & Mass is dedicated to protecting your investment with precision and integrity, ensuring your home remains secure and beautiful for years to come.

Expert Roofing Contractors
(425) 500-7764 expertroofingwa.com
Serving
5.0 from 21 reviews
Expert Roofing Contractors is a trusted roofing and exterior company serving residential and commercial clients with high quality workmanship and reliable service. We specialize in asphalt shingle roofing, metal roofing, PVC roofing systems, roof replacement, and fast roofing repairs to protect your property year round. Our team also provides professional gutter installation, siding installation, exterior painting, and deck construction to enhance curb appeal and durability. From minor roof leak repair to full roof installation and storm damage solutions, we focus on long lasting results, clear communication, and customer satisfaction.
Bellevue Roof Repair
Serving
5.0 from 82 reviews
Bellevue Roof Repair have been operating within Clyde Hill ever since 2014, and with pride assists the 98004 zipcode and encompassing areas We supply services in roofing contractor for the Clyde Hill area If you would like assistance with roofing contractor inside the Clyde Hill region your search is over We're operating out of Washington, in Clyde Hill
Redmond Roof Installation
Serving
4.9 from 79 reviews
Redmond Roof Installation has been operational throughout Redmond ever since 2008, and proudly assists the 98052 zipcode and around locations We offer expert services in roofing contractor for the Redmond region When you need help in roofing contractor within the Redmond district we're your guys We're situated in Washington, in Redmond We are the number one at roofing contractor in 98052 Washington
During the wet-season grind, winter rains and wind become the weekly test for a roof. Active weather can delay tear-off and lift portions of an ongoing job, leaving vulnerable underlayment and flashing exposed longer than anticipated. That delay multiplies the risk of moisture intrusion mid-project, especially when gusts rip through eaves and expose edge details. If a storm rolls in while work is paused, you need a clear plan: curb the site, protect interior finishes, and maintain open lines of communication with the crew so you're not left chasing leaks after dark. In this climate, the window for safe, uninterrupted tear-off shrinks quickly, and even a short pause can become a multi-day setback.
Late autumn and the winter freeze-thaw cycles deliver repeated wetting, then freezing, which stresses shingles and tile edges. In Redmond, that means curled edges, micro-cracks in asphalt, and edge crimping on tile surfaces after hours of rain-saturated exposure. The result is more frequent weeps along valleys, ridges, and eave lines as insulation and decking sit damp beneath new weather patterns. Proactive attention to edge sealing and flashing fit becomes critical when moisture hides under vinyl soffits or behind gutter lines. If there's already a leak, expect it to chase the fastest path downward, often finding the weakest card in the roof's deck or a previously minor seam and turning a drip into a streak.
The local contractor signal mix shows unusually strong demand for emergency repair and quick response, matching homeowner concern about active leaks during stormy stretches. That means you should plan for rapid triage when a leak is detected: cover the area to stop interior intrusion, document damage for field notes, and coordinate temporary mitigation with the crew to avoid several days of water-in-space exposure. Stock simple, reusable tarps and a few sealant tubes for temporary fixes, and keep pathways clear so responders can reach the roof quickly when rain returns. In tight margins between showers, consider scheduling short, focused repair windows to minimize exposure and keep the roof traffic to a minimum.
In a damp climate, ventilation gets tested as moisture climbs in the attic. Poorly vented spaces trap humidity, which can accelerate condensation beneath underlayment and around fasteners after a storm. Check that ridge and soffit vents are unobstructed, and evaluate if soffit-to-ridge flow remains balanced when a project is paused for weather. If leaks appear near vents or pipe penetrations, sealants and flashing adjustments should be planned for immediate follow-up once the skies clear, not postponed to the next dry season. A proactive stance now helps you ride through the rest of the season with fewer surprises once snow begins to threaten.
Find local contractors experienced in assessing and restoring roofs after hail, wind, and severe weather events.

NearMe Roofing Company
(206) 487-4380 www.nearmeroofingcompany.com
2727 152nd Ave NE, Redmond, Washington
4.9 from 338 reviews
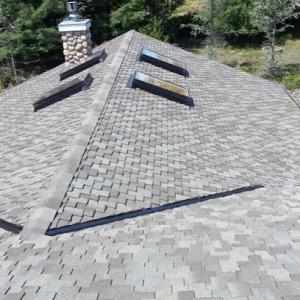
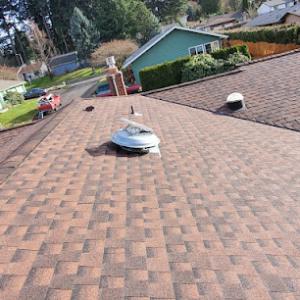
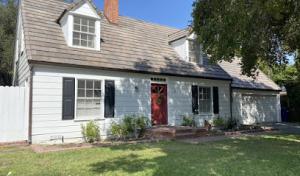
Asphalt shingles are the most common roof material you'll see around town, and that familiarity brings practical advantages in a market that winter-rains for months. The wet season pushes moss pressure, so maintenance and ventilation become visible routines rather than afterthoughts. A well-ventilated attic helps keep roof decking dry and slows the moisture-driven aging of asphalt granules. In practice, that means ensuring soffit vents, gable end vents, or a balanced ridge vent setup stays clear of debris, and inspecting for any attic condensation after heavy rain. If you choose asphalt, you'll want higher-end asphalt blends or architectural shingles that resist wind uplift and offer a denser surface, which can help shed moisture more effectively and reduce moss-friendly crevices. Keep an eye on shading from trees; persistent shade invites moss growth, particularly on north-facing or poorly ventilated sections. Regular cleaning-carefully removing moss with a plastic scraper or a soft brush and rinsing with water-helps sustain life and keeps your shingles sealing well against the wet climate.
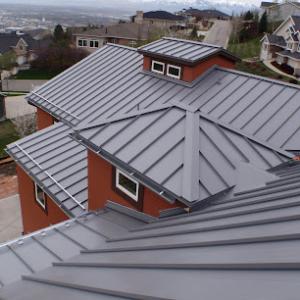
Metal roofs are common here and valued for faster water shedding during long rainy periods. Metal's smooth surface resists moss root intrusion better than highly textured materials, which translates to fewer moss-related moisture pockets. When choosing metal, consider panels with a secure fastener pattern and proper underlayment that accommodates Redmond's damp winters. Metal also accepts venting solutions well, which supports moisture management in the attic. Panels with a light-colored finish can help reflect winter sun and reduce ice dam risk in occasional freeze-thaw cycles, though the latter depends on overall roof design and insulation. If you're weighing metal, factor in roof slopes and drainage plays; clean gutters and downspouts ensure water leaves quickly and moss does not establish on damp, lingering surfaces.
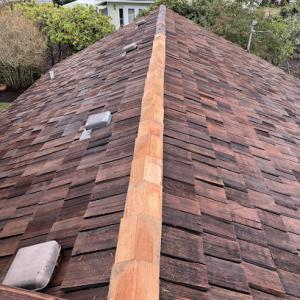
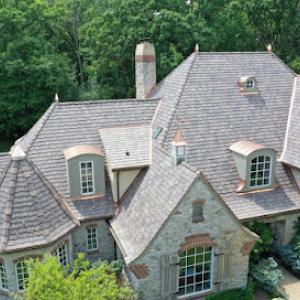
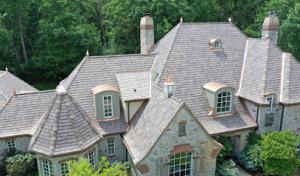
Wood shakes, clay tile, concrete tile, and synthetic options appear in the market here, offering distinct looks and performance. In a wet climate, moisture retention and freeze-thaw exposure become the decisive questions. Wood shakes absorb more moisture and can warp or rot if ventilation and drainage are not well managed; this makes it essential to pair them with robust underlayment, proper in-plane drainage, and continuous venting strategies. Clay and concrete tiles add character and durability in the face of moisture, but their weight requires structurally sound support and careful installation to avoid cracks that invite water intrusion during freeze-thaw cycles. Synthetic or composite shingles often promise lower moisture uptake and easier maintenance, yet the long-term performance hinges on the filler materials and sealants used; some products resist moss better than others, but all benefit from solid attic ventilation and debris-free roofing systems. In practice, select materials that balance aesthetics with a proven track record of moisture management, and plan for occasional moss control where shade and humidity persist.
You will find Redmond homeowners commonly compare asphalt, metal, wood, tile, and synthetic systems across a wide local price spread, with asphalt at 350 to 700 USD per square and metal at 600 to 1100 USD per square. That spread exists because locals weigh longevity, aesthetics, and moisture resistance. Asphalt remains the default when budget matters, but metal buys you lighter weight and better long-term resistance to moss-packed mornings. Tile and wood bring character and durability, yet their costs climb quickly once you add underlayment, decking checks, and possible moisture upgrades.
Wet-season scheduling pressure in Redmond can affect labor timing and project logistics because contractors must work around rain windows and moisture protection requirements. Expect shorter workdays during damp stretches and more contingency in crew rotation. Material deliveries may slip during heavy rains, and temporary shelter or tarps add to the time frame. Plan for an expanded window between start and finish, especially if you are coordinating multiple trades like ventilation upgrades or skylight tie-ins.
Costs in Redmond can also move with material choice and roof complexity, especially when ventilation upgrades, decking repairs, skylight tie-ins, or heavier systems like tile are part of the scope. A simple shingle roof stays economical, but adding ridge vents or a balanced soffit/ventilation strategy helps reduce moisture buildup over the wet season. Heavier systems push the square cost higher, and the need for additional decking or plywood repairs can shift the total well beyond the base per-square price.
When you compare bids, use the per-square ranges as a ceiling and floor, then ask for a breakdown by underlayment, flashing, and ventilation. A fair Redmond job will align the moisture plan, roof slope, and attic ventilation so moss stays under control without overpaying for features you won't use. Focus on bid transparency and the timing that fits the wet season.
Get a clear picture of your project costs upfront - no commitment required.
Emerald Mountain Roofing
(425) 698-3076 www.emeraldmountainroofing.com
Redmond, Washington
5.0 from 65 reviews
Landmark Roofing & Siding
(855) 908-7663 www.landmarkroof.com
14940 NE 95th St Suite H, Redmond, Washington
4.8 from 187 reviews

A full re-roof in Redmond typically requires a permit through the City of Redmond Building Division. This isn't merely a sticker to slap on the file; it acts as the city's checkpoint against moisture intrusion, proper ventilation, and safe installation in a climate that never seems to stop raining for long. The permit process helps ensure that the work aligns with current building codes and the neighborhood's expectations for rain resilience. If a project begins without permitting, the risk isn't just a ticket-red tag removals and required rework can cascade into late snowmelt schedules and staged water damage repairs.
The permit application in Redmond generally requires the roofing scope, roof type, and decking and ventilation details rather than just a simple material swap description. In practice, that means you'll want a clear plan that shows the extent of replacement, the exact materials chosen, and every layer from deck to sheathing to underlayment. Ventilation details matter just as much as the actual shingles, not only to meet code but to address Redmond's damp winters where moss pressure thrives and attic moisture can back up into living spaces. Having diagrams or product datasheets ready helps the reviewer see that the project will perform well through sustained wet seasons.
Redmond inspections occur at multiple stages, including an on-site inspection during progress and a final inspection to confirm compliance. The progress check isn't merely an afterthought; it's an opportunity to confirm decking integrity, ventilation installation, and alignment with the permit plans before the roof is finished. The final inspection validates everything from edge detail and flashing to sewer and vent terminations. If gaps appear between what was permitted and what's installed, expect clarifications or required corrections, which can delay completion and push timelines into wetter months.
In a market where permits govern timing as much as materials, aligning re-roof work with Redmond's typical wet-season windows reduces risk. Start early enough to accommodate the review cycle and potential corrections. Have your contractor provide a staged narrative: what will be installed, how ventilation will be managed to prevent moisture buildup, and where decking access and safety measures will be maintained during rain events. Missing any of these elements can trigger rework or re-inspection, which are particularly painful in a season that never really dries out.
In Washington, homeowners insurers generally remain broadly available, but Redmond homeowners may face higher deductibles or more documentation requests after severe weather events. When storm damage strikes, an insurer will expect a clear link between the event and the roof damage, plus evidence that repairs or replacement are necessary. That means keeping a routine record of your roof's condition, especially after heavy rains, freezes, or moss-driven wear. If a hail or wind event sweeps through, expect to be asked for timestamps of the incident, recent maintenance notes, and a contractor's assessment that pinpoints how the roof was impacted and what repairs are required.
Adjusters handling Redmond-area roof claims commonly expect roof age records, photos, and a contractor scope that clearly documents storm-related damage and repair needs. Start collecting documentation early in the process: take dated photos from multiple angles during dry periods and after storms, note any moss buildup or moisture intrusion, and keep a copy of your most recent roof warranty. Have your contractor prepare a scope of work that separates storm-related damage from normal wear, and include details on flashing, underlayment, ventilation, and any structural concerns. If the roof is in a recession-prone area where moss proliferates, document how remediation or replacement will address moisture control and long-term performance.
Replacement cost coverage is commonly available for newly installed roofs with material warranties, making post-install paperwork especially important after a re-roof. After Redmond re-roofs, ensure that the insurer receives a detailed certificate of completion, a full materials list with quantities, and a written confirmation that the installation aligns with the manufacturer's requirements. Photos of the completed roof, including attic ventilation and soffit intake, help substantiate the claim if future moisture or moss concerns arise. Keeping a tidy, centralized file of all invoices, warranties, and inspection notes reduces friction during claim review and supports the argument for full replacement cost when warranted.
Connect with contractors who help homeowners navigate the claims process from damage assessment to final approval.
Emerald Mountain Roofing
(425) 698-3076 www.emeraldmountainroofing.com
Redmond, Washington
5.0 from 65 reviews
Perry Roofing Services
(425) 332-7091 perryroofredmond.com
8201 164th Ave NE suite 608, Redmond, Washington
5.0 from 43 reviews
Seattle Roof Systems | Shoreline Roofing Company
(425) 996-1386 seattleroofsystems.com
Redmond, Washington
5.0 from 34 reviews
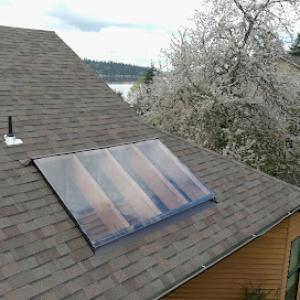
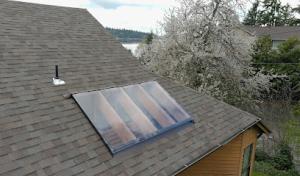
Skylights in this market often become moisture magnets if flashing or curb details aren't precise. When replacing or installing, inspect the curb flashing for splits or lift, especially where the metal flange meets the roofing material. Use a high-quality synthetic underlayment just behind the flashing to deter capillary action from the wet-season-driven roof deck. Ensure the skylight flange sits flush and sealant lines are continuous from edge to edge. In Redmond's rainy climate, consider choosing skylights with laminated glass and a robust drainage channel to move condensation away from the sealant line rather than toward it.
Chimney flashing is a high-attention area because prolonged moisture exposure can turn small defects into recurring leaks. Check step flashing along the chimney for dents, loose nails, or gaps where mortar breathes moisture into the roof. Slope-compatible flashing metal should extend well onto the chimney with a continuous sealant bead at transitions to stop water behind the counter-flashing. For chimney caps, ensure proper venting and clear any obstructions that may redirect moisture to the flashing. Pay particular attention to the intersection of brick and roofing material, where frost cycles and heavy rain can exacerbate seepage.
Low-slope sections on additions, garages, or modern home designs need different drainage and waterproofing strategies than pitched roofs. In these areas, rely on a dedicated low-slope membrane with backwater protection at transitions to higher-slope roofs. Maintain a positive ridge and verify that parapet walls are flashed correctly to prevent wind-driven rain from finding the seam. Regular checks after wet months help catch edge lift or delamination before it migrates into the interior.
Find contractors experienced in skylight installation, flashing, and leak repairs to bring natural light into your home.
NearMe Roofing Company
(206) 487-4380 www.nearmeroofingcompany.com
2727 152nd Ave NE, Redmond, Washington
4.9 from 338 reviews
Emerald Mountain Roofing
(425) 698-3076 www.emeraldmountainroofing.com
Redmond, Washington
5.0 from 65 reviews