Last updated: Apr 19, 2026
During long damp seasons, the roof is constantly battling moisture from rain, dew, and shade from dense tree cover. The roofing calendar is shaped by wet winters and a relatively short drier installation window from late spring into early fall. That narrow dry window forces tight scheduling and careful sequencing to avoid moisture getting trapped inside the roof assembly. When planning a tear-off and re-cover, aim to complete critical steps before the roof deck sits exposed too long in rain. If a dry spell looks uncertain, you may need to adjust by staging work to keep interior spaces dry and avoid prolonged deck exposure.
Extended damp periods in the south Puget Sound raise the risk of trapped moisture during tear-off and underlayment installation compared with drier inland Washington markets. If moisture is already present on the deck or in the attic, consider a temporary barrier strategy that minimizes wind-driven rain intrusion. Use a breathable, high-performance underlayment with a robust nailing pattern and confirm the deck is dry before laying any membranes. In Olympia, even small delays can mean weeks of extra moisture exposure, so build contingency time into the schedule and protect openings with sturdy temporary enclosures. Pay attention to seams, flashing transitions, and any penetrations during the tear-off to prevent hidden moisture pockets.
Moisture control is a central performance issue in this climate, and the local approach to ventilation shows it clearly. Attic intake and exhaust need to work in concert with the new roof system to avoid condensation and ice-dam risk later in the year. When selecting a ventilation strategy, ensure soffit or continuous intake is balanced with ridge or power vent exhaust. In tight, tree-dense neighborhoods, the crawlspace or attic can trap humidity; measure for adequate airflow even when the roof line is lower and the eaves heavy with shade. A well-ventilated system helps drying during rain gaps and reduces the chance of warm, moist air being drawn into the roof assembly.
Flashing performance is a focal point in Olympia's climate. During installation, verify that all step and kick-out flashing transitions are fully integrated with the underlayment and the chosen roofing material. The damp season increases the likelihood of condensation forming behind flashing if the drainage plane isn't continuous. Plan for flush, uninterrupted contact between flashing and the deck, and use corrosion-resistant fasteners. Any penetrations (pipes, vents, skylights) should receive reinforced flashing details and, when possible, temporary seals during rainy spells to prevent water ingress.
A practical sequence in this climate starts with securing the deck and ensuring it is dry and clean before any underlayment goes down. Install ventilation-first where feasible, then lay the underlayment with attention to overlaps and fastener spacing. During re-roofing, the permit review process often checks ventilation and flashing details, so document the ridge, soffit, and drip-edge configurations as you progress. If a dry window is shorter than expected, consider staggered phases that prioritize the most moisture-prone areas first, and have a plan for rapid response if rain returns mid-install.
Beyond the immediate installation window, monitor for hidden moisture risk in the months following completion. Inspect for signs of condensation, warped decking, or rusted flashing after the wet season peaks. In this climate, proactive moisture management-through ventilation, proper flashing, and diligent sequencing-reduces the chance of repeat repairs and helps the new roof maintain performance through Olympia's damp winters.
Autumn and winter in this region bring wind-driven rain that can hammer roofs after just a few hours of wet weather. You'll notice that small issues-loose shingles, uplifted flashing, or clogged gutters-can turn into active leaks once the first cold front rolls in. The damp season stretches out, so lingering moisture in deck boards, underlayment, or attic spaces invites mold and accelerated wear. Pay close attention after every storm: if you see a bead of water on the ceiling or feel damp insulation in the attic, treat it as a priority repair window rather than a nuisance. In these weeks, a delayed fix multiplies the damage and complicates later work.
The Olympia area's autumns dump branches and pine needles onto roofs, while gusty winds patter rain into vulnerable seams. These conditions routinely expose roofs to debris that shifts under shingles and loosens edge details. A missing or misaligned step flash, a raised corner of metal flu-lined flashing, or a seam where two materials meet can become a persistent leak source after a storm. During re-roofing or maintenance, don't assume a visually dry surface means everything is sound. Inspect the entire flashing envelope-around chimneys, vents, and skylights-and pull back a few shingles if you must to verify the underlayment is still intact and properly lapped. If you find moisture-trapped decking or deteriorated sealant, treat it as evidence that a more thorough diagnostic is needed before the next big system arrives.
Regional insurers commonly ask for documentation of roof age, material, and installation quality after storm-related claims in this market. Gather clear photos showing the roof from multiple angles, close-ups of flashing details, attic ceiling conditions, and any visible sag or water staining. Note dates of storms, wind speeds if you have them, and any prior repairs. Keeping a concise chronology helps support timely claims and prevents back-and-forth delays during the settlement process. If there is ongoing interior moisture, document it with dated photos and note affected rooms. This evidence becomes a practical guide for repairs and for discussing next steps with your roofer when the weather window finally opens.
The region's short dry window demands planful action. When you detect moisture intrusion, prioritize triage: stop further water ingress, secure loose materials, and arrange a professional assessment as soon as weather allows. Delays in re-roofing or flashing repair can turn minor gaps into major structural concerns as winter storms resume. Coordinate a contractor who understands moisture management, ventilation, and flashing performance-especially for re-roofing projects-to minimize the chance of recurring leaks when the next series of fronts arrives.
Find local contractors experienced in assessing and restoring roofs after hail, wind, and severe weather events.

Charlie Roofing
(360) 485-9732 www.charlieroofing.com
6001 17th Ave SE, Olympia, Washington
4.8 from 45 reviews
United Roofing Solutions
(360) 915-9116 www.unitedroofs.com
7615 Rainier Rd SE, Olympia, Washington
4.6 from 68 reviews

South Sound Roofing
(360) 771-7637 southsoundroofingllc.netlify.app
6200 Fair Oaks Rd SE, Olympia, Washington
5.0 from 26 reviews
Established in 2020, South Sound Roofing is a local roofing company serving the South Sound region of Washington. We offer a wide range of roofing services, from roof repairs and replacements to new roof installations. Our team of experienced and certified roofers is committed to providing our customers with the highest quality workmanship and customer service.
Allender Construction
(360) 660-0132 www.allenderconstructionwa.com
Olympia, Washington
5.0 from 25 reviews
Allender Construction, a premium exterior remodeling company in Olympia, WA, is renowned for delivering exceptional workmanship and unparalleled customer service. As skilled roofing contractors, expert deck builders, fence specialists, and siding professionals, we bring a comprehensive range of services to transform your outdoor spaces. From sturdy roofs that withstand the elements to elegant decks perfect for entertaining, and durable fences that enhance privacy, to stunning siding that boosts curb appeal – we go the extra mile to ensure your needs are not just met, but exceeded.
RROC Exteriors
(833) 438-7762 rrocexteriors.com
2607 Martin Way E Suite 201, Olympia, Washington
4.7 from 136 reviews
At RROC Exteriors, our story is rooted in over 25 years of experience, built on a foundation of craftsmanship, dedication, and a passion for enhancing homes throughout Washington. As an Olympia roofing contractor, we have earned the trust of homeowners for all their exterior improvement needs. Specializing in roofing, windows, siding, and decking, we prioritize customer satisfaction in every project we undertake. Whether you're considering a roofing upgrade, window replacement, siding installation, or decking transformation, choose us as your trusted Olympia roofing contractor. Our goal is to exceed your expectations with high-quality workmanship and unmatched service, ensuring your home improvement journey is both smooth and rewarding.

Charlie Roofing
(360) 485-9732 www.charlieroofing.com
6001 17th Ave SE, Olympia, Washington
4.8 from 45 reviews
A roofing company that offers services at a residential and commercial level through hard work, commitment, and professionalism. Our 18 years of experience as roofers and 4 years as a team guarantees each one of our jobs to be professionally done.
United Roofing Solutions
(360) 915-9116 www.unitedroofs.com
7615 Rainier Rd SE, Olympia, Washington
4.6 from 68 reviews
United Roofing Solutions is a top-rated roofing contractor in Olympia, WA, proudly serving Olympia, Lacey, Tumwater, and the greater South Sound region for over 15 years. We specialize in both residential and commercial roofing services, including roof repair, roof replacement, new roof installation, and roof inspections. Whether you're dealing with storm damage, planning a commercial flat roof project, or upgrading your home’s roofing, our experienced team delivers results you can count on—even when emergency roof repair services are needed. We also handle skylight installation and repair—including sun tunnels and Solatubes—plus expert gutter installation, gutter repair, and seasonal cleaning. Call today to schedule your free estimate!
Independent Roofing
(360) 790-6900 independentroofingwa.com
Olympia, Washington
5.0 from 14 reviews
We are a family owned business, With 37 years in the industry. Quality service at a great price. We do all phases of roofing. Re-roofs, Repairs, Shingles, Metal, Tile, Shakes, Single Ply, Cleanings.
Evergreen State Roofing
3527 93rd Ave SW, Olympia, Washington
4.7 from 56 reviews
Evergreen State Roofing provides residential roofing, reroofing, and roofing repairs to Olympia, WA, and surrounding areas.
Weatherguard Roofing
(360) 956-9566 www.weatherguardwa.com
3929 Martin Way E suite b, Olympia, Washington
4.5 from 83 reviews
Weatherguard Roofing provides residential and commercial roofing, including re-roofing, new construction installation, maintenance, and roof repairs to the Olympia, WA area.
Black Diamond Roofing
(360) 866-2425 www.blackdiamondroofing.com
7504 Whittaker Rd NW, Olympia, Washington
4.7 from 21 reviews
Black Diamond Roofing INC has been your trusted roofing contractor in Olympia since it was started by Don Morton in 1997. Specializing in top-notch roofing services near you, we pride ourselves on being the premier Olympia roofing contractors, providing unparalleled expertise in new roof installations, roof replacements, and roof repairs. Our dedicated team of experienced Olympia roofers ensures each project is completed to the highest standards. As a leading roofing company in Olympia, we commit to delivering exceptional service and quality workmanship. Choose Black Diamond Roofing INC for your next roofing project and experience the difference a professional contractor makes. Family-Owned and Operated Since 1997.

Lacey Roofing
(564) 203-3802 www.laceyroofing.com
3505 Stoll Rd SE, Olympia, Washington
4.2 from 44 reviews
Since 1977, Lacey Roofing has been a trusted, family-owned provider of comprehensive roofing services in Western Washington. Specializing in new roof installations, re-roofing, repairs, roof cleaning, gutter cleaning, and 24/7 emergency services, they ensure homes and businesses remain protected and visually appealing. With over 40 years of experience, Lacey Roofing is committed to delivering high-quality craftsmanship and exceptional customer service, treating each client as a neighbor and friend.
Aaron Carter Construction
(360) 556-4580 www.aaroncarterconstruction.com
120 41st Ave NE, Olympia, Washington
5.0 from 5 reviews
Our goal is to ensure that our customers receive excellent service from their first phone call to the completion of their roofing project. We strive to quickly respond to customer's requests and complete each job in a timely fashion.
Rodriguez Pro Roofing
(360) 669-6196 www.rodriguezproroofingllc.com
Olympia, Washington
5.0 from 5 reviews
Shingles Metal Leak Repair TPO Roof Cleaning Free Estimates!
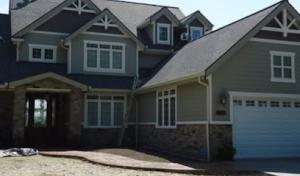
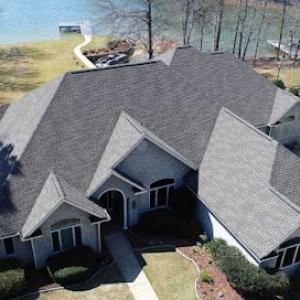
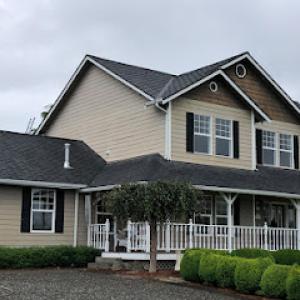
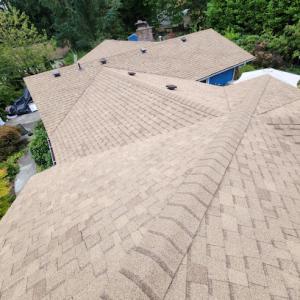
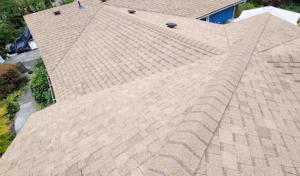
In a city where long damp seasons and dense tree cover are common, asphalt shingles and metal roofing dominate the residential reroof market. Asphalt shingles offer a familiar, relatively forgiving installation that plays well with the region's frequent storms when paired with proper underlayment and venting. Metal roofing stands out for its fast water shedding and robust flashing at penetrations, a real advantage during Olympia's wet spells. Tile and wood systems appear less often, but they still show up in certain neighborhoods or for stylistic choices; they require more careful moisture and structural planning to perform well under prolonged damp conditions. If you're weighing options, think about how your roof interacts with the surrounding trees, gutters, and the attic ventilation that keeps moisture from lingering where it doesn't belong.
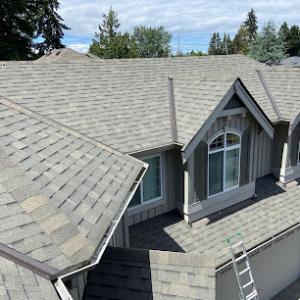
Asphalt remains a practical default for many homes here, especially when paired with a well-designed moisture management plan. The key to success is a cohesive system: a high-quality underlayment, a deck that's sound and dry, and a ventilation strategy that moves moisture out of the attic before it condenses on sheathing. In Olympia's climate, you'll want shingles that resist wind-driven lift and a flashing plan that protects transitions around chimneys, vents, and skylights. Regular attention to attic intake and exhaust ventilation helps prevent ice damming and damp roof decks during the wet months, preserving the shingles and the roof deck underneath. A properly flashed edge, a continuous ridge vent, and adequate soffit ventilation reduce pooling moisture and extend the life of the roof assembly.
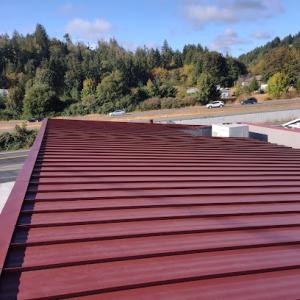
Metal is a strong match for the region's rainy climate due to its rapid water shedding and durability. It shines when installed with robust flashing at penetrations and precise panel alignment to minimize creasing or gaps where moisture can linger. In Olympia, metal roofs benefit from a careful evaluation of roof-to-wall transitions and kick-out flashing to direct water away from siding and foundations. A properly installed metal system also demands solid underlayment decisions and attention to fastener sealing to withstand repeated wet-season exposure. Because metal can be noisier in heavy rain, consider insulation and rafter spacing that quiets impact without compromising ventilation. The combination of fast shedding, moisture-tipping details at penetrations, and thoughtful ventilation makes metal a reliable choice for homes with tall trees casting shade and damp microclimates.
Tile and wood options appear but require extra foresight. Clay and concrete tiles can tolerate moisture when the roof structure is sound and the underlayment choice emphasizes breathability and moisture control. The weight of these systems means a structural review is essential, and the valley and parapet detailing must be meticulous to keep dampness from seeping into the roof deck. Wood shingles and shakes contribute a distinctive look but are particularly sensitive to persistent dampness. Their service life hinges on ventilation, drainage details, and an efficient moisture control strategy that keeps wood from absorbing too much moisture and swelling. If you pursue these materials, plan for an enhanced ventilation scheme and a drainage path that prevents pooled water around any re-roofing area.
Across all options, moisture management hinges on ventilation and flashing performance. A well-sealed, continuously vented attic keeps humidity from migrating into the roof deck, reducing rot, mold risk, and deck deterioration during Olympia's damp cycles. Flashing at every penetration-vents, skylights, chimneys, and transitions-must be continuous and well-sealed to shed water quickly and reliably. In practice, this means coordinating underlayment choices, ridge or soffit venting, and flashing materials that pair well with the chosen roof type. Without these details, even the best-looking roof can struggle in the extended wet season.
Reroofing in this region is tightly linked to the short dry-season window, which compresses demand into late spring through early fall. That tight timing can push material suppliers and crews to full capacity, driving up local pricing compared to off-season periods in neighboring markets. If a contractor spots a late start due to weather delays or site-specific access issues, the schedule can slip, and those delays often translate into higher daily labor costs. You should expect pricing to reflect not just the roof size, but the calendar fit between dry spells and permit coordination that keeps the deck protected during tear-off.
The base price for common roof assemblies is set by material type, yet Olympia-specific factors push the final number higher. Prolonged wet weather can require extra protective covering, slower tear-off sequencing, and occasional rescheduling to avoid exposing decking to rain. When crews must stage multiple weather breaks or extend the project into a second dry window, there is typically a noticeable uptick in labor hours and associated costs. In practice, this can mean material costs are a starting point, with labor and protective measures adding a meaningful margin if the forecast stays unsettled.
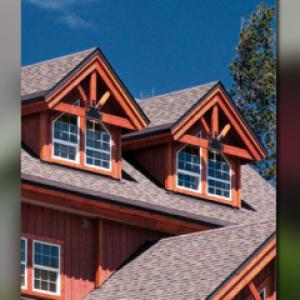
Neighborhoods around Olympia often feature skylights, nuanced flashing at dormers, valley intersections, and steeper rooflines. These features raise labor costs above base material pricing because they demand careful flashing workmanship, precise integration with gutters, and additional safety measures. Concrete tile or clay tile installations can be particularly sensitive to these site conditions, while asphalt and synthetic shingles may show the most noticeable delta when complex layouts are involved. Expect crews to allocate more time for detail work when the roof plan includes multiple tiers, battens, or unusual geometry.
Typical cost ranges in this market reflect both material selection and the dry-season constraint. Asphalt shingles generally run lower, with metal, concrete, and tile options climbing in tandem with complexity. For a practical budgeting frame, consider that a reroof in a constrained window can shift some expenses toward expedited scheduling-or toward added protections against wet conditions. In residential neighborhoods, where steeper pitches and skylight arrays are common, labor can push above the base material pricing. Plan for a buffer that accounts for potential delays and protective measures during the wet period, and align expectations with a contractor who communicates clearly about sequencing and contingency steps.
Get a clear picture of your project costs upfront - no commitment required.
United Roofing Solutions
(360) 915-9116 www.unitedroofs.com
7615 Rainier Rd SE, Olympia, Washington
4.6 from 68 reviews
Rodriguez Pro Roofing
(360) 669-6196 www.rodriguezproroofingllc.com
Olympia, Washington
5.0 from 5 reviews

Capital Roofing & Construction
(360) 789-0351 capitalroofingandconstruction.com
Serving
4.9 from 29 reviews
A full roof replacement in Olympia typically requires a building permit issued through the City of Olympia or Thurston County, depending on jurisdiction. The distinction matters because the review process and the required forms can vary slightly between the city and the county, especially for larger homes or projects that touch shared boundaries. When planning, treat permit timing as part of the project window rather than an afterthought. Start the paperwork early, and coordinate with the contractor to align your replacement schedule with the local dry window and the city's inspection cadence. Rushing through permitting can squeeze the ventilation and flashing planning you need to survive Olympia's long damp seasons.
Plan review is used locally to verify code compliance, with ventilation requirements and flashing details receiving attention during review. A few concrete checkpoints to expect: the reviewer will look closely at attic venting provisions, ridge and soffit intake balance, and how flashing around chimneys, skylights, and wall penetrations is integrated with the roofing material selected. If trees shade your roof heavily, or if your roof line includes complex transitions, document existing drainage paths and any necessary upgrades to gutters and downspouts. Having clear, contractor-supplied sketches and product specifications on hand during the review helps prevent back-and-forth delays. Be prepared for the possibility that the plan reviewer will request additional notes on moisture management strategies tailored to Olympia's wet season.
Inspections are conducted during the project and again at completion to confirm installation quality and roof detail execution. That means the project won't be considered done until the inspector signs off on ventilation performance, flashing integrity, and proper underlayment installation in areas with extended exposure to moisture. In practice, this requires meticulous sequencing: underneath the new roof deck, proper moisture barriers must be in place, ventilation must be open and unblocked, and fasteners must meet the specifications for your chosen material. The presence of dense tree canopy in many neighborhoods increases the importance of sealing and flashing, because moisture lingering along eaves and around dormers can lead to future issues if not addressed in the permit-driven plan. Expect some back-and-forth, but plan for it by maintaining open communication with both the permitting office and your contractor.
In Olympia, the regional insurance environment weighs wind exposure and occasional hail during underwriting and claims review. That mix can tilt decisions on coverage or pay-outs after a bad storm, especially if the roof is older or the installation shows gaps. The market's sensitivity to moisture means carriers scrutinize how a roof behaves during the wet season and how well the flashing, ventilation, and underlayment work together to shed moisture. If a claim is triggered by a leak, the insurer will look for credible triggers-where the moisture entered, how long it's persisted, and whether prior maintenance or repairs address the weak spots.
Claim handling in this market often hinges on clear documentation showing roof age, material type, and installation details. You should maintain a simple, organized file that shows the original roof type, date of replacement, and notes from any professional installation or inspection. Photos archived by season help prove condition over time, especially after wind events or hail near the coast range. Detailed records of flashing materials, valley configurations, and attic ventilation checks can make a meaningful difference if a claim is disputed later. In short, the more you can document about what was done and when, the less ambiguity insurers face when reviewing a claim.
Coverage availability and claim timelines can be influenced by broader Washington market conditions, making pre-loss records especially useful for homeowners. The long damp seasons and dense tree cover in this area elevate the risk of moisture intrusion if flashing or roof-to-wall transitions are compromised. Your emphasis should be on how the roof handles moisture year-round: proper ventilation, continuous underlayment, and robust flashing around chimneys, skylights, and vents. A roof that breathes well and sheds water promptly is less likely to suffer hidden damage that complicates claims later.
Keep a running log after each storm, noting wind gusts, hail size, and any observed edge or shingle damage. Schedule a professional inspection after severe weather, focusing on flashing integrity, valley condition, and attic moisture signs. If you're nearing the end of the typical dry window, coordinate timely maintenance rather than letting a small issue fester into a larger claim problem. These steps don't eliminate risk, but they tilt the odds toward a smoother insurance experience when the next weather event arrives.
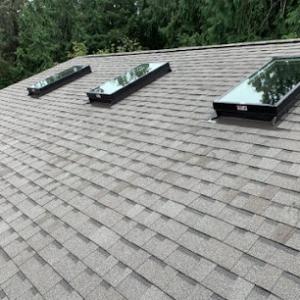
In a city with long damp seasons, low-slope drainage performance and skylight flashing are more consequential than in sunnier climates. Water can linger on flat transitions, and failed flashing at penetrations becomes a chronic headache after repeat downpours. The typical leak pattern centers on where a roof meets a wall, around skylights, vents, and transitions to parapets. Local homes with mature tree cover see more debris and moisture retention near these joints, so the failure points aren't just cosmetic-they're structural in effect if left unchecked.
Because moisture moves in stealthy ways on a flat or low-slope roof, the inspection emphasis must lock onto flashing details. Look closely at step and counter-flashing at penetrations, base flashings around skylights, and the sealant continuity along transitions. In prolonged rain, small gaps become active leaks, and mismatches between skylight curb height and surrounding roofing can trap water. During re-roofing, insist on a continuous membrane with properly integrated skylight flashings and a careful termination at any wall or chimney, not just a patchwork of sealants. The emphasis in Olympia is on moisture control well beyond the visible surface.
Because many contractors in this market advertise skylight and flat-roof work, these are clearly recurring problem areas for property owners. When planning a replacement, coordinate re-roofing and flashing upgrades to maximize compatibility with existing penetrations and anticipated rain exposure. Have a detailed plan for ventilation and moisture management alongside flashing upgrades, so the roof breathes properly during and after the dry window. If a contractor notes a recurring leak pattern around a skylight or transition, push for a tested flashing assembly and a dedicated drainage path that prevents water from pooling near the curb.
Find specialists in TPO, EPDM, and built-up flat roofing systems for residential and commercial properties.
United Roofing Solutions
(360) 915-9116 www.unitedroofs.com
7615 Rainier Rd SE, Olympia, Washington
4.6 from 68 reviews
Weatherguard Roofing
(360) 956-9566 www.weatherguardwa.com
3929 Martin Way E suite b, Olympia, Washington
4.5 from 83 reviews
Rodriguez Pro Roofing
(360) 669-6196 www.rodriguezproroofingllc.com
Olympia, Washington
5.0 from 5 reviews
In this market, re-roofing dominates, with many homeowners seeking replacement and reliable leak response rather than niche new-construction projects. Look for crews that frame their value around fast, durable fixes and a track record of handling moisture-heavy conditions from the first inspection through the final seal. A solid crew will come prepared to address long-term moisture management, not just the immediate shingle swap.
Cleanup and quick response stand out in signals from local contractors. During wet seasons, debris removal, tarp deployment, and prompt containment of leaks matter as much as the roof work itself. Ask how they stage clean-up, how they protect landscaping and gutters, and what their response plan is for any post-installation issues that might surface with heavy rains. A dependable crew will outline a practical timeline, a clear communication method, and a plan for minimizing disruption while rain is imminent.
Long-established, family-owned, and residential-focused firms are common in this area, and buyers often value local tenure and service reliability. When evaluating, consider how many generations have served the neighborhood, whether references include single-family homes similar to your own, and whether the firm has a consistent local presence for follow-up years after installation. Preference tends to go to teams that demonstrate steady scheduling, neighborhood familiarity, and a reputation for handling moisture-related challenges without turning a project into a prolonged interruption.
Start with a focused shortlist of nearby, well-reviewed crews that emphasize re-roofing and moisture management. Schedule on-site assessments to compare not just price but the proposed method for flashing, ventilation integration, and moisture control during the wet months. Ask for a written plan that covers tarp-ready contingency steps, debris containment, and how the crew coordinates with you if a storm moves in during the project. Finally, confirm the crew's process for post-installation checks, ensuring leak testing and a clear warranty path before any work begins.