Last updated: Apr 19, 2026
Northern Alabama sees frequent hail and wind events, and Madison homeowners face elevated roof claim activity compared with lower-risk markets. The area's spring storms can pummel shingles, strip granules, and loosen seams, especially on aging roofs or those with thinner or older overlays. When a nor'easter-like wind or a sudden hail pulse hits, the damage may not be obvious at first glance, but latent failures can appear within days. That means a storm today can drive a rush of contractor traffic tomorrow, and if your roof is already near the end of its life, the result can be a full replacement sooner than expected. Plan for the rapid shift from inspection to documentation to avoid getting bottlenecked in the after-storm lull.
Madison's frequent spring rainfall and storm cycles can damage roofs and also compress contractor schedules at the same time homeowners are trying to document losses. When downpours keep roofs wet, crews slow down, and timing matters for both evaluation and repairs. Insurance adjusters often push for timely photos, measurements, and a clear narrative of impact, yet weather windows can collapse quickly. If a storm has just rolled through and you suspect damage, you need a quick but thorough plan to secure evidence before the next round of weather or before your neighbors' projects crowd the market. Your goal is to establish a solid record while there is still daylight, dryness, and daylight hours to coordinate with a contractor who can deliver a credible scope.
Insurers in this region often expect prompt documentation, timely filing, and detailed contractor information, especially for older roofs or larger replacements. The key is to demonstrate impact with concrete, organized records: dated photos that show both acute impacts (punctures, dented metal, lifted shingles) and signs of wear that could worsen with another storm. Include a simple diagram or notes to show the storm track, hail size if known, and which sections of the roof bore the brunt of wind exposure. Obtain a written estimate from a local, licensed contractor that maps out the proposed scope, including the replacement method and materials-this is a critical piece for the adjuster to review quickly. If the roof has existing disclosures or prior repairs, document those clearly to avoid questions about preexisting conditions. In Madison, adjusters frequently request a detailed contractor contact, license verification, and a clear line of communication for scheduling and direct access during the claim process.
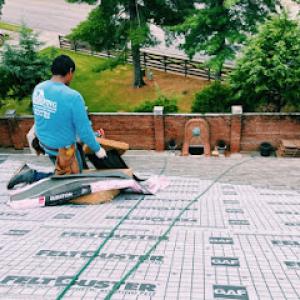
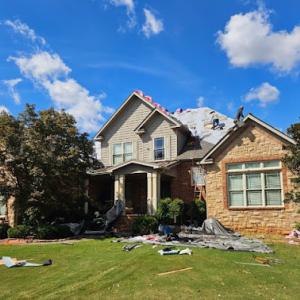
First, after a storm, perform a careful exterior and attic inspection when safe. Look for lifted shingles, granule loss in gutters or around downspouts, and roof decking or soffit signs that moisture entered the attic. Take high-quality photographs from multiple angles, with close-ups of damaged areas and a wide shot that contextualizes the roof's exposure to the storm. If you see active damage or suspect it, call a local roof professional for a rapid, honest assessment and a documented scope. Ask for a written estimate that lists materials, labor, and a projected timeline. Share this with your insurer to anchor the claim; vague notes without a professional estimate tend to slow the process. Keep a dated log of all communications-phone calls, emails, and appointment times-so nothing slips through the cracks as weather windows shift and contractors race to accommodate demand.
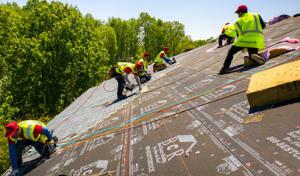
Engage a contractor who understands the seasonal cadence in this market. They should be able to provide both a thorough damage assessment and a credible replacement plan that aligns with typical Madison house styles-sloped profiles, attic venting considerations, and the possibility of oversized or multi-story projects. Ensure they can deliver a written scope, a realistic schedule, and a clear point of contact for the insurer. If your roof has seen signs of hail or wind damage, act quickly to lock in a timeline that protects interior spaces from leaks during the claim window. Acting with urgency helps keep the process from being derailed by spring rain, holidays, or other projects competing for attention in a fast-growing suburb where home stock is continually refreshed.
Many Madison roofing projects are scheduled in spring or fall to avoid peak summer heat and the disruption of summer storm patterns. That dual focus-steering clear of the hottest days and dodging abrupt hail events-helps crews work more efficiently and reduces the chance of weather-related delays. If a project can be planned to start in late February through April or in late September through early November, you're aligning with predictable weather and calmer site conditions.
Spring often brings a mix of residual moisture and the last round of hail-season punchy days. The window after a spring storm can be ideal for re-roofs, because you're not fighting the peak heat yet, and the ground isn't slick from late-wall wet spells. Preparation becomes key: confirm that debris removal and tarp protection on vulnerable areas are in place, and set expectations for a sequence that keeps interior spaces dry as the project advances. A practical plan is to stage material deliveries around forecasted dry spells so crews can peak productivity without repeated weather holds. If a spring storm created noticeable roof damage, use the delay between storms to inspect underlayment and decking, ensuring the new roof baselines are solid before heat and humidity climb.
Hot, humid Madison summers accelerate shingle aging and can slow installation during peak heat windows. Asphalt shingles, which dominate many neighborhoods, become more pliable in the morning and stiffer by midafternoon, complicating nail driving and alignment checks. For a smooth process, aim to start earlier in the day, and plan for more frequent breaks in blazing afternoons. Consider material choices and color impacts on heat absorption to minimize strain on the crew and the home. If a project extends into the dog days, schedule progress targets with contingencies for heat-related slowdowns, especially when premium products or larger roof footprints are involved.
Fall winds and rain and occasional winter cold snaps in North Alabama can interrupt work and affect installation pace and sequencing. Early fall can still offer solid conditions, but as temperatures drop and afternoon gusts pick up, you'll see more delays from protective coverings, venting work, and securing materials against sudden weather shifts. A practical approach is to stagger critical steps-start with decking and underlayment in a stretch of dry weather, then finalize shingle installation when wind speeds are manageable and there's a reliable dry window. If rain is forecast, priority shifts to weatherproofing tasks that protect interior spaces and maintain roof integrity until dry days return.
Plan the project with a clear 2-to-3 week target window for typical home shapes common in the area, allowing flexibility for a few weather days. Prioritize areas most vulnerable to leaks (penetrations, valleys, and skylights) early in the schedule so that any unforeseen delays don't cascade into multiple sections exposed to weather. Communicate a daily weather-oriented work plan with the contractor, identifying backup tasks for days when rain or heat forces a pause. For neighborhoods experiencing frequent spring storms, choose start times that align with the calmest post-storm mornings to maximize uninterrupted days.

Thompson Roofing & Construction
(256) 766-3464 www.256roofing.com
202 Nick Davis Rd, Madison, Alabama
4.9 from 1119 reviews
Thompson Roofing and Construction is a trusted roofing contractor based in Madison, AL, proudly serving Metro Huntsville, the Shoals, North Alabama, and Southern Tennessee for since 2009. Whether it’s a new residential or commercial installation, a re-roof, or a repair, no job is too big or small—we deliver local roof repair & roof replacement near you! As a family-owned, award-winning business founded by proud Alabama natives, we take great pride in our craftsmanship and in giving back to the community we call home. We’ve been committed to providing superior service, premium materials, expert knowledge, and flawless workmanship to every customer we serve. Schedule your appointment today and experience the Thompson difference!
Revolution Roofing
(256) 258-0005 revolutionroofingco.com
9694 Madison Blvd Suite B5, Madison, Alabama
5.0 from 162 reviews
Revolution Roofing is a Locally Owned & Operated Roofing Company that specializes in Roof Replacement and Roof Repair. Call to schedule your Free Roof Inspection.
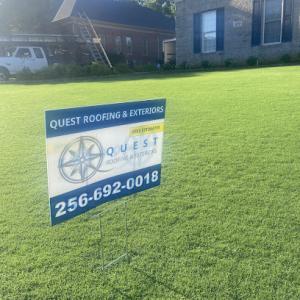
Quest Roofing & Exteriors
(256) 692-0018 questroofingandexteriors.com
3807 Sullivan St, Madison, Alabama
5.0 from 56 reviews
Quest Roofing & Exteriors specializes in Roof Replacement and Roof Repair, Gutter Installation and Gutter Repair, and Attic Insulation.
Complete Roofing
(256) 542-1448 www.completeroofingal.com
131 Teresa Dr, Madison, Alabama
4.9 from 163 reviews
Complete Roofing has provided excellent commercial and residential roofing services in Huntsville, Madison, Harvest, Guntersville, Decatur, Athens, AL & nearby areas since 2009. As a Huntsville Roofing Company and trusted local roofer, our services include residential roofing replacement, gutter installation, home repairs, commercial roofing, and chimney repair services. We help homeowners with tree or hail damage roof repairs and work closely with insurance companies to assist with covering costs. With transparent estimates, clear communication, and a focus on customer service, we aim to meet all your roofing installation and home needs. Don't wait - contact Complete Roofing today for trusted roofing contractors and services!
Best Choice Roofing
(256) 602-3270 bestchoiceroofing.com
26670 Success Dr SW suite g, Madison, Alabama
4.8 from 282 reviews
Best Choice Roofing, an Owens Corning Roofing Platinum Preferred Contractor, is a national roofing company dedicated to providing customers with a variety of exceptional roofing services including roof repair and roof replacement.
B.A. Roofing & Construction
(256) 614-5616 www.baroofingandconstruction.com
Madison, Alabama
5.0 from 65 reviews
B.A. Roofing & Construction provides residential and commercial roofing and gutter services to Huntsville, AL and surrounding areas.
Mighty Dog Roofing
(256) 975-2053 www.mightydogroofing.com
9582 Madison Blvd Suite 9, Madison, Alabama
4.9 from 109 reviews
Mighty Dog Roofing specializes in roofing, siding, windows and gutter services for residential and commercial properties in Madison, AL and surrounding cities. Leaky roof? Our roof contractors will provide a free roof inspection to determine if there is any roof storm damage to file a roof insurance claim or if a new roof is needed. We’ll determine if a roof repair or roof replacement is best for you. Need new siding? We offer quality vinyl siding, aluminum siding, steel siding and fiber cement siding. Need window repairs or replacement windows? A window company that can provide energy-efficient, custom replacement windows. Clogged gutters? Our gutter contractors install 5” and 6” seamless gutters. Keep the leaves out with gutter guards.
McKinney & Sons Roofing
(256) 330-2065 www.mckinney-roof.com
Madison, Alabama
5.0 from 25 reviews
Introducing McKinney & Sons Roofing, a trusted family-owned business serving North Alabama since 2014 as an experienced remodel contractor. We specialize in roofing services and work closely with insurance companies to streamline the process for our customers. Our team is dedicated to providing exceptional craftsmanship and uses top-quality materials for long-lasting results. We take pride in offering the shortest wait times in the industry, from delivery to installation, ensuring a seamless experience. With a commitment to honesty, customer satisfaction, and personalized solutions, we build lasting partnerships. Contact us for professional, reliable, and efficient roofing services that exceed expectations.
Erie Home
9580 Madison Blvd # 6, Madison, Alabama
4.5 from 143 reviews
Since 1976, Erie Home has manufactured, supplied, and installed the best-performing roofing on the market. By providing ironclad warranties and convenient financing, we ensure that every homeowner we work with receives top quality service and value for their homes and properties. Erie Home professionals are the roofing company of choice in the greater Madison, AL area. Whether you need roof inspections or roof damage repair services, Erie Home has been the go-to roofing contractor for nearly 50 years because of our attention to detail and dedication to making sure our customers are satisfied with their results. Contact us today for a quote and see why we're the trusted roofing company Madison counts on.
1 Stop Roofing & Exteriors
(256) 424-2744 www.1stoproofingandexteriors.com
8006 Old Madison Pike Ste 20J, Madison, Alabama
4.7 from 38 reviews
At 1 Stop Roofing & Exteriors, your contracting project will be directed by a team of expert field consultants who are dedicated to working with you, and for you. Implementing a solution that meets the needs of your roofing or siding project is one of our primary goals, and the efforts we put forth to do so reflects our company's mission to provide quality workmanship at an affordable price. The efficiency, respect, and satisfaction you'll experience at 1 Stop is incomparable to other businesses in the field.
Continental Roofing Company
(256) 325-3572 www.continentalroofing.net
8006 Old Madison Pike #4, Madison, Alabama
4.5 from 95 reviews
As a leading roofing company serving Alabama, we take pride in our commitment to delivering exceptional craftsmanship, unmatched expertise, and a seamless experience from start to finish. Whether you need a new roof installation, repairs, or maintenance, we are here to provide top-notch solutions for both residential and commercial roofing. We have been serving the Huntsville, Birmingham, and Dothan markets since 2006 and we are dedicated to providing quality workmanship and superior customer service.
Rocket Man Roofing
375 Lime Quarry Rd suite 1103, Madison, Alabama
5.0 from 10 reviews
Rocket Man Roofing is your trusted local roofing expert, proudly serving our community with top-notch roofing solutions. With years of experience in the industry, we specialize in residential and commercial roofing services, including repairs, replacements, and new installations. Our team of skilled professionals is dedicated to delivering high-quality workmanship and exceptional customer service. We use only the best materials to ensure your roof is durable, reliable, and built to last. At Rocket Man Roofing, we understand the importance of a secure roof over your head, and we work tirelessly to provide timely, efficient, and affordable roofing solutions for your Home or business. You can always trust the Rocket Man
Asphalt shingles remain the most budget-accessible common option, typically ranging from about $350 to $700 per square. This material suits the region's hot, humid summers that can age shingles quickly, and it pairs well with the suburb-friendly homes that dominate many Madison neighborhoods. If your goal is to keep upfront costs reasonable while maintaining a solid, weather-resistant roof, asphalt shingles are the go-to choice. In projects driven by spring storm damage, those numbers may rise modestly depending on the extent of prep work and insulation needs, but the basic per-square range stays in this ballpark.
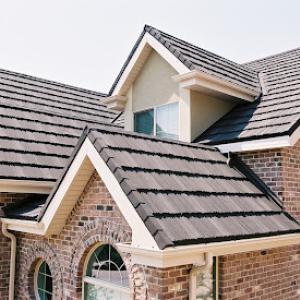
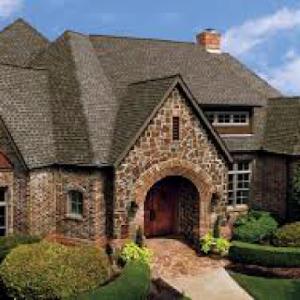
Higher-end systems used in parts of the market, including clay tile, concrete tile, wood shakes, and synthetic/composite shingles, carry materially higher replacement costs and may require more specialized labor. Clay and concrete tile bring distinct long-term durability, but their weight and installation complexity push total project prices upward. Clay typically sits around $1,200 to $1,800 per square, while concrete runs about $1,100 to $1,700 per square. Wood shakes can be in the $500 to $900 per square range, offering a look some homeowners want but with higher ongoing maintenance. Synthetic or composite shingles generally fall between $550 and $900 per square and may provide a middle ground in durability and installation ease compared with natural materials. In Madison, these options are more common on higher-end renovations or newer builds designed to achieve a specific architectural statement or enhanced performance against hail.
Local pricing can rise after spring hail and wind events when demand surges, and permit fees in Madison vary by project value rather than a single flat roofing fee. When a storm creates widespread damage, replacement bids can shift quickly as crews reallocate resources and suppliers chase higher volumes of material orders. For a homeowner weighing material types, this means that the cheapest option today might shift to a mid-range or premium choice after a weather event, depending on availability and labor demand. Planning ahead for a spring-recovery window can help stabilize costs and reduce the risk of delays or price spikes on a planned re-roof.
A full re-roof in Madison typically requires a permit through the City of Madison Building Department. Before any shingles come off or new material arrives, you'll want to confirm your project scope with the permit office, since the review can hinge on the chosen roofing system, venting, attic insulation, and drainage details. The process often starts with a permit application that outlines the proposed work, materials, and timelines. Getting this in order early helps prevent delays when crews are ready to start and keeps the project aligned with local storm-season activity and the City's inspection schedule.
Madison projects commonly involve inspections during and after installation, followed by a final inspection to verify code compliance. During the labor phase, inspectors may check roof deck integrity, underlayment, fastener patterns, and attic ventilation to ensure they meet current code requirements. After the shingles are installed, you can expect a mid-project check to verify that flashing, penetrations, and step or counter-flashing around valleys and chimneys are correctly implemented. The final inspection is essential for confirming that the roof system meets all applicable ordinances and that drainage and ventilation conform to code. Scheduling these inspections promptly helps keep the project moving, especially during the typical spring storm rebuild window when inspections can align with permit timelines and weather windows.
Some Madison homeowners also have to clear HOA approval or other added approvals before work proceeds, depending on neighborhood rules. This means you might need duplicate sign-offs on both the permit side and the homeowners association paperwork. It's wise to contact your HOA early in the planning stage to understand any specific color, material, or installation standards that could affect shingle choice, ridge venting, or skylight restoration. Coordinating HOA approvals with city permits reduces the chance of rework or scheduling conflicts mid-project, which is especially valuable when spring storms push rapid timelines for replacements.
Keep a project diary of permit numbers, inspection dates, and any corrective actions requested by inspectors. In a storm-driven season, having clear records helps communicate with the City of Madison Building Department and your HOA if questions arise about material substitutions or scope changes. If weather compresses the schedule, your permit and inspection log serves as a reliable reference to demonstrate that the project proceeded in a compliant and transparent manner, keeping the rebuild on track and reducing the risk of permit holds.
Madison's dominant residential roofing mix leans heavily on asphalt shingles and metal roofing, with smaller but relevant use of clay tile, concrete tile, wood shakes, and synthetic/composite products. That mix matters because the neighborhood climate and storm history shape how materials perform over time. Asphalt shingles are common for their value and straightforward field installation, but their long-term behavior in hot, humid summers and frequent rain requires careful selection of product lines and installation methods. Metal roofing stands out as a clear alternative in the wake of storm cycles, offering enhanced hail resistance and a different aging profile. Homeowners should recognize that the local contractor base has developed a meaningful specialist presence for metal, reflecting demand for durable, low-maintenance options beyond standard shingles.
The heat of the Alabama summer season accelerates the aging process of shingle systems, especially for lower-end products. Heat aging can lead to brittleness, granule loss, and color fading, which shorten the effective life of a roof if moisture control isn't great. Repeated rain exposure requires North Alabama's shingles to manage moisture effectively-improper ventilation or undersized ventilation can trap heat and humidity in the attic, promoting premature wear on the roofing deck and underlayment. In Madison, choosing a shingle line with robust UV resistance and improved moisture handling can help maintain attic balance and reduce the likelihood of leaks after a heavy storm. If you're considering a switch from traditional asphalt, metal roofing's reflective qualities and sealed panel systems can mitigate heat gain and shed water efficiently, contributing to longer-term performance in this climate.
Asphalt shingles remain a practical, widely available option, but attention should be paid to granule retention and warranty coverage for hail-prone periods. For metal roofing, look for panel systems with concealed fasteners or corrosion-resistant coatings, and verify that the color and coating choices align with local sun exposure to minimize thermal expansion concerns. Clay and concrete tiles bring a heavier footprint and impressive durability under impact, yet require solid roof framing and careful attic ventilation to prevent breakage from hail impacts and to manage temperature. Wood shakes offer a distinctive appearance but demand higher maintenance and moisture control to prevent warping and mold in Madison's humid climate. Synthetic/composite options can blend durability with lighter weight, but it's essential to choose products proven in hail-prone environments and compatible with local installation practices.
When evaluating options, focus on performance under hail and wind exposure, which are central to Madison's storm cycles. Ask contractors about wind-driven rain resistance and impact resistance ratings for each product. Consider the roof's slope and existing deck when weighing tile versus shingle choices, since steeper pitches can influence water shedding and long-term wear differently. Ventilation strategies, underlayment quality, and attic insulation all play pivotal roles in any material's performance in our climate. The goal is a balanced system that handles rapid temperature shifts, moisture movement, and storm-driven debris without escalating maintenance demands in the years ahead.
In this market, hail and wind are recurring triggers for replacement decisions, making impact damage and weather-related shingle loss more important than in milder markets. A single hail event can leave dozens of pinhole dents, loosening granules, and edge damage that aren't always visible from ground level. Over time, repeated hits create weak spots that accelerate deterioration, especially on aging roofs. High wind can lift tabs or strip fasteners, leaving vulnerable underlayment exposed to the next storm. The pattern is less about a dramatic single failure and more about progressive, storm-accelerated wear that quietly pushes you toward replacement when a claim or inspection comes due.
Extended summer heat in this area ages asphalt shingles faster, shortening the practical replacement window once storm damage is added on top. Heat dries out asphalt, making edges brittle and granules shed more quickly, which dulls protection and speeds leaks after hail or wind damage. When a roof has sustained prior damage, the heat cycle compounds the problem, so a roof that might have lasted a few more seasons can reach the point where replacement becomes the more reliable long-term fix rather than patching. If you're weighing timing, consider both the age of the roof and the recent storm history.
Repeated wet periods in spring and weather interruptions in fall make leak tracing and temporary dry-in especially important for homeowners waiting on full replacement. Water can travel along sheathing or behind flashing before you notice, masking the true extent of damage. Quick, careful inspection after a heavy rain or hail event helps identify compromised areas, while a staged dry-in buys you time without inviting hidden rot or mold into living spaces.
Watch for curling or cupping shingles, accelerated granule loss, exposed fasteners, and mismatched patches that indicate patched damage, not a full repair. Loose or missing shingles along roof edges, valleys, and chimneys strongly suggest accelerated wear from wind-driven debris. If flashing around vents and skylights shows corrosion or gaps, moisture intrusion often follows. A cautious, early assessment can prevent small issues from becoming a full replacement surprise.
When you can't wait, these contractors offer fast response times to stop leaks and prevent further damage.
Best Choice Roofing
(256) 602-3270 bestchoiceroofing.com
26670 Success Dr SW suite g, Madison, Alabama
4.8 from 282 reviews
Mighty Dog Roofing
(256) 975-2053 www.mightydogroofing.com
9582 Madison Blvd Suite 9, Madison, Alabama
4.9 from 109 reviews
In this market, older roofs can draw extra scrutiny from insurers. Because North Alabama is a higher-claim hail and wind market, Madison homeowners may see tighter underwriting on roofs nearing or exceeding typical life expectancy. If your shingles show widespread granule loss, curling edges, or signs of previous storm impact, expect more questions and closer documentation requests before a policy renews or a replacement is approved.
Detailed photo records are essential, with date-stamped storm notes and contractor damage documentation added to the file as soon as possible after a storm. Insurers want a clear, traceable history: when impacts occurred, what was found, and what repairs or replacements were performed. Keeping a running, organized album of repairs, re-roofs, and any hail marks helps prevent surprises at claim time and can speed up the adjustment process.
High-value replacements in this area can face closer insurer review, even though broad insurer pullback is not described as pervasive regionally. If the project involves premium materials, unusual roof geometry, or a multi-story, complex installation, expect additional scrutiny. Having independent independent third-party inspections, a straight timeline of damage and repairs, and consistent contractor documentation reduces the chance of delays or disagreements during the claim and payment steps.
Plan for the possibility that an aging roof will be weighed against new storm evidence when a claim is filed after spring hail events. Maintain current, legible records, and engage a trusted local contractor familiar with Madison's storm patterns and wind-driven damage. This approach helps align expectations with the insurance process and supports a smoother transition from damage to a warranted replacement.
Connect with contractors who help homeowners navigate the claims process from damage assessment to final approval.

Thompson Roofing & Construction
(256) 766-3464 www.256roofing.com
202 Nick Davis Rd, Madison, Alabama
4.9 from 1119 reviews
Revolution Roofing
(256) 258-0005 revolutionroofingco.com
9694 Madison Blvd Suite B5, Madison, Alabama
5.0 from 162 reviews

Quest Roofing & Exteriors
(256) 692-0018 questroofingandexteriors.com
3807 Sullivan St, Madison, Alabama
5.0 from 56 reviews