Last updated: Apr 19, 2026
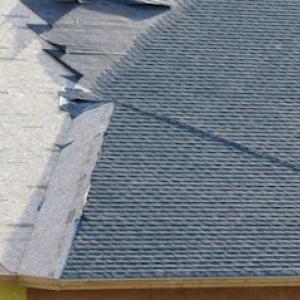
Spring in this Front Range corridor brings concentrated roof-loss events and sudden contractor demand spikes. A claim cannot wait for the first sunny day; your roof's weathered pattern-booted patches, hail pockmarks, and wind-exposed ridges-often shows up in a cascade of small to moderate hits. For faster processing, assemble a tight bundle of evidence: real-time photos during the hailstorm, close-ups of impact marks, and a wide shot that captures downspouts and chimney or vent penetrations. Insurers in this market rely on pre- and post-damage imagery, and the reviewer will compare the two to establish onset. If you didn't document it at the moment of impact, you'll pay a heavier price in delays and back-and-forth requests.
In Golden, the window to initiate a hail claim should not be pushed into a weather lull. Insurers expect timely notice after a storm; delays invite questions about the storm's timing and scope. A rapid notice reduces the likelihood of disputes over the claim's validity and helps secure an adjuster who understands Front Range roof patterns. Plan to confirm that the adjuster will view the roof while the most obvious damage remains visible, rather than after a long dry spell when UV exposure has altered some surface evidence. Quick action also aligns with looming fall wind and winter snow, which can convert visible impact patterns into hidden leaks once freeze-thaw cycles begin.
After the claim is filed, your documentation load should expand, not contract. Create a chronological file: storm date, weather notes, and any interim repairs you authorize or perform to prevent further damage. Keep dated photographs that show the progression from initial impact to any new leaks or staining inside the attic or ceilings. If an adjuster sets an appointment, photograph the roof with the camera square to the slope from different angles, ensuring glare doesn't hide the marks. In neighborhoods with rapid demand spikes, professional drone or ladder-camera shots can reduce back-and-forth and help the adjuster see the full extent of the damage from multiple perspectives.
Delaying hail repairs in this climate invites trouble. Fall wind and winter snow can drive moisture deeper into the roof structure, turning a cosmetic impact pattern into real leak exposure before freeze-thaw cycles take hold. If there is any sign of interior moisture, prioritize emergency temporary fixes to protect insulation and attic spaces. The goal is to preserve the roof's structural integrity while the claim is in progress, avoiding water intrusion that complicates both repair scope and insurance review.
In Golden, contractor demand can spike quickly after a hail event. Secure a trusted local roofer who understands the Front Range exposure, and coordinate their work with the claim timeline. The right approach minimizes repeat visits and ensures all damaged components-underlayment, flashing, and vent seals-are addressed in a single, decisive sequence. Communicate openly with the insurer about proposed start dates and any weather contingencies to prevent surprise delays that stall repairs during the critical early weeks after the storm.
Best Roof & Solar
(720) 445-3978 www.bestroofandsolar.com
14143 Denver W Pkwy Suite 112, Golden, Colorado
5.0 from 169 reviews
If you are looking for the best Golden roofing company, you’ve come to the right spot. At Best Roof & Solar, we are highly experienced in roofing and solar services. Our solar contractors are experts in solar panel and roofing installation, from evaluating your needs to saving you money for years to come. Our residential roofing team can re-roof, replace, repair, and install any roofing material. From shingles to metal roofing, our contractors will keep you and your family safe from leaky roofs and Colorado winters. We provide our customers with transparent conversations, unparalleled service and products, and ongoing support! Located in Golden, we proudly service Lakewood, Arvada, Littleton & the entire Denver Metro area!
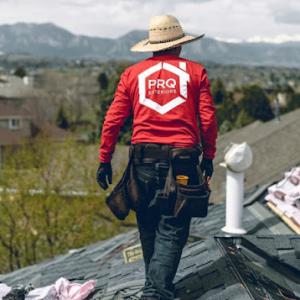
PRQ Exteriors
(720) 696-9473 prqexteriors.com
120 Capital Dr, Golden, Colorado
4.9 from 839 reviews
PRQ Exteriors offers reliable roofing replacement in Golden along with a full range of roofing services, including roof repairs, roof installation, storm damage repairs, and roofing insurance claims. With a focus on quality and innovation, we also provide solar panel installations and storm restoration services to protect and enhance your property. Using durable, weather-resistant materials from trusted manufacturers, we deliver lasting results for both residential and commercial roofs. Our team works closely with homeowners and businesses to ensure every project is completed with precision and care. Contact PRQ Exteriors today to schedule your consultation and ensure your property is well-protected for years to come!
Capital Construction
(720) 254-1883 capital-construction.co
544 Golden Ridge Rd, Golden, Colorado
5.0 from 58 reviews
Serving Colorado since 2008. We’re a family-owned and A+ BBB-accredited roofing company you can rely on. We specialize in roof and gutter replacement. Your roof plays a significant role in your home’s beauty, energy efficiency, and durability—but it also affects property value! Our focus is on delivering high-quality work with a customer first approach, building trust through honest communication and reliable service. We’ll assign a skilled project manager to oversee your roofing service and ensure on-time, under-budget results. We understand Denver’s unique weather challenges and tailor our solutions to meet them. With a commitment to craftsmanship and community, we understand a home should be worry free.

Capitol Roofing & Solar
(303) 323-1036 www.capitolroofers.com
13201 W 43rd Dr Unit 108, Golden, Colorado
5.0 from 54 reviews
Capitol Roofing and Solar is your premier solar, roofing and gutters expert in the West Denver Metro, including Foothills and Summit County. Solar installations and roofing are our specialties. Our extensive experience includes solar panels and shingles, asphalt shingles, steel panels & shingles, and storm restoration.
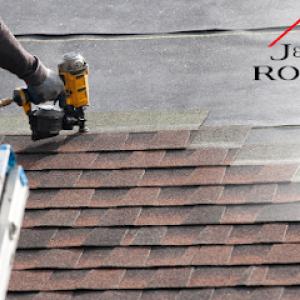
J&K Roofing
(303) 425-7531 www.jkroofing.com
13000 W 43rd Dr, Golden, Colorado
4.8 from 458 reviews
J&K Roofing, Inc. is an innovative roofing company, offering unparalleled customer service, superior work performance, and outstanding product installation. Formed in 1984, our company was built on family values and exceptional quality workmanship. Those foundations remain solidly in place today. Our family-owned and operated company continues to serve the greater Denver/Metro and the Front Range communities, having roofed more than 50,000 homes and commercial properties. At J&K we now offer a wider range of services including; windows, siding, solar panels, and solar roofing shingles.
Cairn Contracting
(720) 670-0265 cairnroofing.com
1455 Normandy Rd, Golden, Colorado
4.9 from 73 reviews
Cairn Contracting, based in Golden, CO, is a full-service contractor offering expert roofing, siding, gutter, fencing, and home improvement services. We specialize in roof repair, replacement, installation, storm damage repair, and historical roof restoration. Our services also include commercial roofing, siding installation, gutter guards, windows and doors, Christmas lights, and holiday lights installation. Additionally, we provide Cairn Coverage Plans for ongoing protection and maintenance. Cairn Contracting delivers durable, high-quality solutions with exceptional craftsmanship and customer service.
Green Slate Roofing & Siding
(720) 537-1149 greenslateroofing.com
12970 W 20th Ave, Golden, Colorado
4.9 from 61 reviews
Locally owned & operated out of the Denver metro area, Greenslate Roofing & Siding has over 15 years of experience specializing in residential and commercial roofing installation and repair. Greenslate serves Denver and surrounding areas with certified manufacturer installers, providing high-quality installation backed with lengthy workmanship/manufacturer warranties. Our experience and outstanding customer service are just a few other qualities that set us apart from other roofing companies in the Denver area. Thousands of customers and businesses owners have trusted Greenslate Roofing and Siding for roof repair and replacement in the Denver metro. We work hard to ensure that you receive the service and results you deserve.

Monarch Construction & Roofing
(303) 981-1265 monarchroofing.com
211 Violet St STE 140, Golden, Colorado
4.6 from 429 reviews
We're your premier, locally owned and operated, roofing company proudly serving Denver, CO and surrounding areas with a focus on customer satisfaction. Our experienced crews are fully insured and we back up our services with a 5 year workmanship warranty. We're fully staffed to handle any residential or commercial project whether it be roofing, gutters or stucco! We work directly with insurance companies and and we also do siding, painting, window replacement, landscaping and more! Call or stop in and see us today for a free quote!

Genesis Total Exteriors
(303) 679-8509 www.genesistotalexteriors.com
15000 W 6th Ave Suite #200, Golden, Colorado
3.9 from 81 reviews
Genesis Total Exteriors is Colorado’s premier contractor for interior or exterior construction and remodeling projects. Capable of tackling projects of all sizes in both the commercial and residential sectors, we pride ourselves on their ability to ensure that projects run smoothly and that they exceed customer expectations! Specializing in roofing, interior/exterior painting, stucco, gutters, windows, siding, bathroom/kitchen remodels, and commercial remodels.
Troost Roofing
(303) 674-4667 www.troostroofing.com
306 S Lookout Mountain Rd Ste 100A, Golden, Colorado
3.7 from 19 reviews
Troost has been a full service roofing contractor since 1972 with experience installing all types of roofing material. We specialize in custom homes, repairs, and roof replacement in Evergreen, CO. Our dedication to quality installation and our customers' satisfaction have been the key to our lasting success. We pride ourselves on enduring relationships with our clients in the mountain communities and surrounding areas.

Pachner Exteriors
(720) 467-6225 pachnerexteriors.com
Serving
5.0 from 97 reviews
Pachner Exteriors is an experienced storm restoration company specializing in windows, roofing, gutters, siding, and garage doors, as well as maintenance services, for home and business owners. We make the storm damage repair process as easy as possible by providing exceptional products and service and working on your behalf to maximize your insurance payout
Rise Roofing
(303) 905-8136 www.riseroofingco.com
Serving
5.0 from 99 reviews
Family owned roofing company with a strong focus on EXPERIENCE and QUALITY. We specialize in working with insurance companies to make the process easy for you when you have hail damage. You need a roofer who is not only a roofing specialist, but who has the abilities/skills/desire to work well with insurance adjustors.
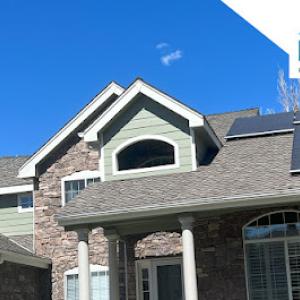
Roofing in this Foothill Front Range area faces sudden hail, blistering sun, and winter freeze-thaw cycles. The dominant replacement mix reflects local housing stock and weather realities: asphalt shingles, metal, clay tile, concrete tile, synthetic/composite shingles, and slate. Dry, sunny summers at altitude accelerate UV aging on some shingles and underlayments, so heat and sun resistance matters more here than in cloudier climates. Heavy tile and slate can handle the sun and hail, but their weight and installation nuance often require extra structural review if the reroof scope includes changes to framing or supports. The goal is to pair a roof that breathes with the slope and exposure of the neighborhood, while preserving the home's architectural character.
Asphalt remains the everyday baseline for many Golden homes. In this climate, choose higher-UV-resistant granule blends and consider a thicker laminate option to maximize life under strong sun. A light to medium color helps reflect heat, reducing peak attic temperatures. When hail or wind is a concern, ensure an upgraded underlayment and properly sealed edges, especially along edge drip zones and chimney detailing. For homes with foothill elevations and variable roof lines, a shingle system that negotiates multiple pitches without visible fasteners offers both performance and curb appeal.
Metal roofs perform well in hail-prone conditions and tolerate the foothill sun without excessive degradation. Standing-seam or panel profiles that shed snow efficiently are advantageous on steeper segments. In neighborhoods with mixed architecture, metal's modern look can blend with tile-inspired forms when color and profile choices echo the surrounding materials. Pay attention to the fastener layout and wall/vent details to prevent heat gain at attic penetrations. Metal also enables a lighter roof mass, which helps when rapid snowmelt or freeze-thaw cycles stress gutters and flashings.
Clay and concrete tiles provide strong hail resistance when properly installed, and their color options remain stable under intense sun. Concrete typically offers broader color and strength variety, while clay emphasizes a classic, durable character. Both require a robust support structure due to their weight; in areas with elevated winds and uneven loads, a structural review is prudent if the reroof involves changes to spans or bracing. For unusual roof shapes or large-span sections, a tile layout that minimizes long unsupported runs reduces the risk of cracking under hail impact or temperature shifts.
Synthetic or composite shingles mimic traditional styles with improved impact resistance and often lighter weight. They can be a good compromise on homes that want asphalt-like installation with enhanced hail tolerance and a longer expected life in the sun. Look for UV-stabilized additives and warranties that acknowledge Golden's sun exposure. Color choices that reflect heat and align with neighborhood aesthetics help maintain curb appeal.
Slate offers standout durability and a refined look, especially for foothill-style architecture. It handles sun well and resists hail when installed with appropriate fasteners and underlayment. The trade-off is weight and cost, plus the need for careful structural assessment when replacing or reconfiguring large roof areas. If the reroof scope includes structural or scope changes, ensure the framing can support slate's heft and that drainage and expansion joints are planned for the local temperature range.
When heavy tile or slate is part of the plan, expect additional review if the reroof scope includes structural changes or unusual material combinations. These systems benefit from meticulous detailing around edges, penetrations, and transitions to walls and chimneys to guard against leaks after hail events and during freeze-thaw cycles.
When planning a roof replacement after a hail-heavy season, you'll find a wide ladder of price ranges depending on material. In this market, asphalt shingles run roughly 350 to 650 USD per square, while metal sits around 700 to 1300 USD per square. Clay tile generally lands in the 1100 to 2100 USD per square band, concrete tile from 1000 to 1800 USD per square, synthetic or composite shingles from about 500 to 900 USD per square, and slate can push from 1500 to 3200 USD per square. These numbers capture Golden's typical housing stock and the Front Range exposure, where hail blitzes and high-altitude sun drive up cost baselines compared to flatter metro areas.
After a severe hail season, the Front Range claim cycle compresses labor availability and pushes reroof demand across Golden and nearby Jefferson County communities at the same time. Contractors may have longer wait times, some crews shift to emergency or higher-priority projects, and material shipments can face delays or rapid resale on short notice. The result is a noticeable lift in scheduling windows and, occasionally, in line-item costs beyond what the typical pre-storm quote would show. Expect some adjustment in both labor rates and material lead times during peak post-storm weeks.
Beyond the hail impulse, the material you select drives the overall expense in a meaningful way. Heavier tile or slate systems not only demand stronger deck framing but also influence overhead costs for installation, underlayment, and exacting roof geometry work. In Golden, where rooflines vary block-by-block and elevation shifts matter, a slate or heavy tile project can tip toward the upper end of their respective ranges. Conversely, asphalt shingles remain the most cost-stable option, though even here you'll notice upward pressure if the project lands during a busy post-storm period.
Document everything you can from the moment the storm passes: hail size, wind direction, and roof damage photos from multiple angles, plus close-ups of impact marks on shingles, vents, and flashing. Create a simple, chronological file noting dates of wind events, any temporary repairs, and communications with the insurance carrier. If an adjuster visits, have your list ready for the meeting and request a written scope of work that includes the final material choices and expected timelines. A well-organized packet helps prevent back-and-forth delays that can compound costs during a crowded post-storm season.
Insurance timing matters in Golden because hail-driven damage can be widespread across neighborhoods. If you suspect widespread impact, contact the carrier early to initiate the claim and secure an adjuster inspection promptly after a storm. Start gathering replacement estimates from reputable local contractors quickly so you can compare scopes of work and ensure the final claim aligns with the chosen materials and roof layout. Once the adjuster completes their assessment, prompt decisions on approval and scheduling help minimize the chance of price drift as demand tightens.
Get a clear picture of your project costs upfront - no commitment required.

Monarch Construction & Roofing
(303) 981-1265 monarchroofing.com
211 Violet St STE 140, Golden, Colorado
4.6 from 429 reviews
Arvada Roofing & Construction
(720) 437-8550 arvadaroofingcompanies.com
Serving
4.8 from 104 reviews
A full roof replacement in Golden typically requires a permit issued by the City of Golden Building Department. The permit process is designed to align with Front Range weather realities, ensuring that critical steps-tear-off, dry-in, and final finish-are documented and inspected. Because hail seasons and freeze-thaw cycles can compress or extend a project window, securing permit approval early helps prevent weather-driven delays. The Building Department relies on accurate scope details, so be prepared to describe the chosen roofing system, underlayment, vents, and any attached equipment in plain terms.
Golden commonly inspects reroof work at rough-in after tear-off and again at final completion, so scheduling and site readiness affect project pace. At rough-in, inspectors verify that the roof deck is structurally sound, the underlayment is properly installed, and drip edges and flashing are in the correct positions before the new roof is layered. The final inspection confirms that all components-shingle or metal panels, coatings, chimney flashing, skylights, vents, and attic ventilation-meet code and the approved plan. Because inspections can cause pauses, align your contractor's arrival windows with the city's typical inspection days to minimize downtime.
If the project includes unusual roofing materials or structural changes, homeowners should expect a short review and keep the permit visibly posted on site. Materials that diverge from standard residential applications or require framing alterations may trigger a quick engineering check or an amended scope. In such cases, plan for extra lead time between tear-off and installation and ensure that the permit display is clearly legible from the street. A visibly posted permit also helps during re-inspections or any required follow-up by the inspector.
Preparation matters as much as the permit itself. Have the approved plan set, product specifications, and any manufacturers' installation instructions on site for the inspector. Clear access to the roof, unobstructed stairways or ladders, and a tidy work zone expedite inspections and reduce the chance of reinspection. Because hail exposure and variable elevations around neighborhoods can influence detailing, confirm that flashing around chimneys, vent stacks, and wall transitions matches the surrounding architecture and local practices before the rough-in check.
After the final pass, ensure all debris is cleared and gutters are reconnected, then request the final sign-off. Once the permit is closed, your project is formally documented with the city, which supports any future resale and provides a verifiable record of compliance with local storm-season demands.
Snowy winters and the frequent freeze-thaw cycles in this foothill terrain push ice and water intrusion risks higher when reroofing is attempted too late in the year. Warm snaps can mislead a project into thinking it's safe, only to be confused by sudden cold snaps that lock materials in place before shingles and underlayment seal properly. When snow lingers on the roof, adhesive bonds struggle, and small leaks from imperfect seals can become larger problems once the thaw begins. This environment makes timely planning critical: delaying a job into late fall or early winter increases the chance of moisture finding its way into the attic or into newly installed seams.
The city's best replacement window often lands in late spring through early fall, because crews avoid the tight timing problems created by snow, cold adhesives, and sudden weather reversals. If you're weighing a reroof, aim for a window with stable temperatures and predictable dry spells. Pushing a project into shoulder seasons raises the odds of weekend weather swings that stall work, leave open penetrations, or trap lingering moisture beneath underlayment. A well-timed project reduces the chance that a late thaw will expose vulnerable eaves, valleys, and flashing to ongoing winter moisture, which is especially painful when you're trying to protect interior spaces.
Foothill and slope exposure around Golden can create uneven snow retention and melt patterns from one property to the next, which affects leak risk at eaves and valleys. A roof that looks uniform from the street may actually be drafting melt differently across its surface, leaving some valleys exposed to standing ice or rapid thaw-driven runoff. That variability demands careful attention to roof ventilation, attic insulation, and the placement of ice and water barriers, especially along eaves and valley lines. When planning a reroof, identify zones that historically see early ice buildup or ice dam formation and coordinate flashing and shingle integration to address those weak points first.
Coordinate with your contractor to secure a dry, wind-resistant workspace before lifting shingles into place. Consider temporary protections for exposed roof edges during transitional weather, and schedule inspections of drip edges and valley flashing immediately after the new roofing material is installed. If a cold snap hits during installation, pause work to protect new seals and allow adhesive-driven bonds to cure under appropriate temperatures. A cautious, well-timed approach minimizes the moisture risk that can follow this Front Range climate, protecting both roof and home from the most damaging consequences of seasonal swings.
Golden's mix of residential and commercial roofs means you'll often find low-slope sections, tricky transitions, and detailed drainage points that aren't just "extra features" - they're regular service items. In homes, those shallow pitches can hide pooling water after a quick storm, while commercial sections may accumulate debris and misdirect runoff at seams. This combination makes careful inspection of transitions between roof planes, edge details, and any parapet or valley features essential, especially after hail or strong wind events.
Quick-change weather in the foothills means a storm can shift in minutes, driving precipitation right where it hurts most: around skylights, chimneys, vent stacks, and roof transitions. Flashing around skylights is a common trouble spot, and small lifts or tears can become leaks when wind-driven rain or hail drives water under insulation and decking. Chimneys and vent pipes often carry multiple penetrations through a single flashing assembly, which can fail unevenly after a hail event. After a storm, a focused check on these areas is warranted, even if the rest of the roof looks intact from the ground.
Golden's contractor market sees steady demand for emergency repair after hail or wind damage, and leaky roofs are treated with urgency. The practical homeowner concern is not only to stop the immediate water intrusion, but to contain damage and protect interior spaces. Tarping promptly over affected zones keeps further water out while you coordinate temporary repairs. If a leak is detected near a skylight, chimney, or a transition, prioritize rapid tarping and a professional assessment within the same week to limit interior damage and mold risk.
Foothill weather can shift unexpectedly, so set up a proactive plan: note high-risk seams and flashings, schedule periodic inspections after major hail or wind storms, and keep a ready-to-deploy tarping kit accessible. You'll reduce the odds that a small flaw becomes a costly, widespread leak when the next storm arrives.
Find specialists in TPO, EPDM, and built-up flat roofing systems for residential and commercial properties.

You're operating in a high-claim Front Range market where hail, wind, and UV exposure lead to more insurer scrutiny than in lower-claim regions. After a storm, expect closer questions about what was damaged versus what aged naturally. Roofs that show random hail impact patterns, along with exposed fascia and attic signs of moisture, tend to trigger faster inspections and more detailed reviews. This is especially true on steeper slopes and homes with mixed roofing materials common in foothill neighborhoods. Knowing that terrain shifts and sun exposure compound wear helps set expectations when the claim starts.
Independent adjusters may be involved in local claims, so homeowners benefit from date-stamped photos, notes on interior leaks, and records of prior roof condition before the adjuster visit. Start with a broad exterior walkaround: capture close-ups of impact marks on shingles, metal flashings, vents, and skylights, plus any granule loss in gutters or surrounding soil. Include a timeline of observed leaks inside the attic or ceiling, noting any stains, mustiness, or condensation. If there were preexisting issues, document them clearly with dated photos. A brief, organized binder of these records helps the adjuster quickly verify the extent of new damage versus preexisting conditions. Stockpiled newspaper or a dated timestamp on the photos can serve as irrefutable proof when the visit occurs.
Colorado-wide insurance dynamics can affect claim timelines and coverage expectations, making prompt documentation and policy review especially important after a storm. Keep all communication in writing when possible, and confirm verbally conveyed details with a follow-up email or text. Preserve receipts for any temporary repairs you authorize, and maintain notes on conversations with the insurer, contractor, or adjuster. If multiple neighbors experienced similar damage, notes about neighborhood-wide patterns-like a hail swath on one side of the street-can support the assessment of generalized damage. The goal is to create a clear, dated narrative that aligns photos, interior reports, and the roof's visible condition for the adjuster's visit.
Connect with contractors who help homeowners navigate the claims process from damage assessment to final approval.
Best Roof & Solar
(720) 445-3978 www.bestroofandsolar.com
14143 Denver W Pkwy Suite 112, Golden, Colorado
5.0 from 169 reviews
Capital Construction
(720) 254-1883 capital-construction.co
544 Golden Ridge Rd, Golden, Colorado
5.0 from 58 reviews