Last updated: Apr 19, 2026
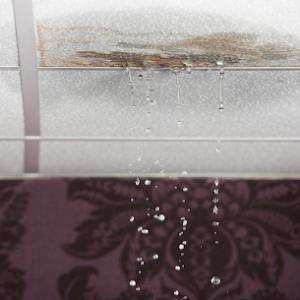
Cold winters in this town bring heavy snow and ice buildup that create one of the most persistent roof stressors you'll face. Ice dams form when heat in the attic melts snow near the eave, which refreezes at the colder roof edge and invites water to back up under shingles. That backflow can leak into ceilings, damage insulation, and deteriorate sheathing. If you've watched ice grow along the gutters after a stubborn storm, you know the risk is real and local. Plan proactively to address this pattern before a mid-wpring thaw turns a moisture problem into stained ceilings and rotted decking. The goal is to keep heat out of the attic and maintain a tight, well-ventilated attic space so snow melts uniformly rather than pooling at the overhang.
The best replacement window in Andover usually runs from late spring through early fall because winter conditions can halt tear-offs and spring thaw can disrupt schedules. For a project to hit that window, you need a clear plan that starts with roof-health assessments and stack-rated ventilation checks as soon as the weather loosens in late winter. Waiting too late invites weather creeping into your schedule, which means delays that push work into fewer available days. If a strong cold snap returns or a late-season storm moves through, crews will stall, and the project can bleed into Thanksgiving-weather territory. The takeaway: align your reroof timing with a consistent stretch of dry, moderate days, not with a fragile hope that a storm will skip your block.
Humid summers in Andover can expose ventilation weaknesses, so replacement timing is tied not just to weather but to how the roof handles trapped attic heat and moisture. In warm months, a poorly ventilated attic can bake under metal or asphalt, accelerating shingle deterioration and reducing the effectiveness of a new roof's warranty. Before you replace, confirm that soffit and ridge vents, baffles, and proper insulation are in good order. A plan that locks in ventilation upgrades alongside the new roof minimizes heat buildup, reduces condensation risk, and helps your new system perform as intended through the dog days of August. If the attic breathes poorly, you may experience accelerated wear that shortens the life of even premium materials.
First, arrange an assessment focused on ice dam risk and attic ventilation. If testing shows compromised insulation or blocked vents, address those issues as part of the reroof project. Second, coordinate with your contractor to schedule a start early in the allowable window-before late spring rains begin and well before the brittle days of late fall arrive. Third, prepare for potential variability in schedule; even within the window, expect weather days to compress your plan. Finally, ensure the selected system matches the local climate: materials and configurations that resist ice dam formation and tolerate Andover's humid summers will serve you longer, with fewer surprises.
Asphalt shingles remain the dominant practical choice for Andover homes. They offer straightforward installation, solid performance in freeze-thaw cycles, and ease of maintenance through the humid summers. For most houses with traditional massing and simple eave lines, a quality architectural shingle provides decent durability and a clean appearance without complicating flashing around valleys and dormers. When choosing asphalt, prioritize a weathered look that signals thicker asphalt mats and better granule adhesion, which helps resist heat buildup during summer and minimizes accelerated wear from seasonal swings.
Metal roofing is especially relevant for homeowners aiming to improve snow shedding and long-term durability. In the Merrimack Valley, snow loads and wind-driven storms can linger or shift quickly, and metal's slick surface helps reduce ice dam formation by promoting faster melt-off at the eave. A metal roof also benefits from a broader color and profile range, which can complement older architectural details found in many Andover homes. If metal is chosen, ensure proper underlayment and integrated flashing around chimneys, skylights, and dormers to manage moisture and temperature differentials across seasons.
Andover's architectural mix includes older New England-style houses that feature wood shingles or shakes. These materials bring authentic character but require careful detailing around flashing and roof-to-wall junctions. Wood products are more sensitive to prolonged moisture, sun exposure, and freeze-thaw cycles, so installation quality matters a lot. Consider rot-resistant wood species, factory-primed components, and a robust ventilation strategy to keep dew points in check. If the existing roof has a textured ridge or decorative eaves, plan for specialty flashings and precise shingle alignment to preserve the curb appeal without creating hidden moisture traps.
Clay tile, concrete tile, and synthetic composites offer high-end options for homes with distinctive massing or historic character. Tiles can provide excellent longevity and a refined aesthetic, but their weight, flashing needs, and expansion gaps demand professional evaluation. Many older or intricately detailed homes require careful sill and valley flashings to accommodate tile profiles and to prevent ice dams at transitions. Synthetic products can reduce weight and simplify installation while still delivering lasting performance in freeze-thaw cycles and humid summers. In complex rooflines, tiles or composites may be a smart choice if the underlayment and venting are designed to handle seasonal moisture loads.
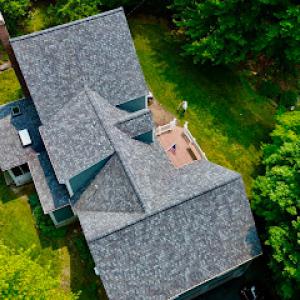
Older homes with architectural details complicate replacement projects. When a roof has dormers, chimneys, eyebrow vents, or decorative gables, flashing must be tailored to those features to prevent leaks. With any material, ensure integrated step or counter-flashing around protrusions and a continuous drip edge at the eaves. Andover homes often present uneven eave lines or multi-level roof planes; in those cases, a careful plan for valley protection, starter courses, and sealant compatibility between materials is essential to avoid premature failures.
The short late-spring-to-early-fall window drives material selection and installation sequencing. In practice, this means coordinating underlayment and ventilation readiness before the first heat spike, and planning for cold snaps that can interrupt work. Material choice should align with the ability to complete flashing, ventilation, and edge details within that window, while still providing a weatherproof roof during early fall storms. For homes with complex detailing or mixed materials, prioritize products and crews with proven experience in New England climates to ensure performance through both snow season and wind-driven fall events. Andover's variety of housing stock means the best roof type often comes down to matching a material's strengths to the house's specific architectural and environmental needs.
Andover cost planning should use the provided per-square ranges, with asphalt shingles at 350 to 750, metal at 600 to 1100, clay tile at 900 to 1700, concrete tile at 900 to 1600, wood shingles or shakes at 450 to 900, and synthetic or composite shingles at 400 to 700. Those figures reflect the mix of aging homes with varied rooflines and the tight spring-to-fall window that dominates scheduling in Merrimack Valley towns. When you compare bids, confirm whether the estimate is per square (100 square feet) and whether it accounts for waste disposal, starter strips, and underlayment upgrades.
Costs in Andover can rise when winter damage compresses the seasonal schedule and more homeowners compete for the same late-spring through early-fall installation window. If a late-winter thaw or an early spring freeze interrupts roof work, crews may charge a premium for rescheduling, expedited material delivery, or extra weather-damage mitigation steps. In practice, that means securing a placement slot as soon as possible after ice dam risks subside and the weather allows safe tear-off and installation. Your project may look cheaper on paper, but the calendar can push labor-hour rates upward when the crew is juggling multiple re-roofs in one short window.
Re-roof pricing in Andover is also affected by tear-off complexity, older home rooflines common in established neighborhoods, chimney and flashing work, and whether hidden moisture damage is found after removal. Many older houses reveal deck rot, compromised sheathing, or corroded flashing around chimneys and skylights once the old shingles come off. Those discoveries push costs beyond the base per-square price and can extend the project timeline. Understanding this ahead of time helps you plan for a realistic budget and avoids surprises if an inspector flags hidden moisture.
Asphalt shingles remain the most budget-friendly route, but the short window makes durability and speed critical. Metal roofs, while pricier, can execute quicker installs with fewer tear-offs in some cases, especially on steeper pitches where wind uplift concerns are present. Tile options-clay or concrete-typically command higher pulls on labor and roof prep, which reinforces the value of early planning. Wood shingles and synthetic/composite options each have their own install quirks; synthetic often offers a lighter fit and faster settlement in marginal weather, but cost per square remains higher than asphalt.
When you assemble bids, think through the year-round implications: the likelihood of compressed schedules, potential hidden damage, and the long-term performance under freeze-thaw cycles. In practice, you'll want to balance upfront material savings with the risk of delays or added scope. A carefully staged plan that aligns with a clear tear-off, repair, and replacement path helps keep Andover projects on track through the region's particular winter-echoed spring window.
Greater Boston Roofing
(617) 941-3901 greaterbostonroofing.com
221 Chandler Rd, Andover, Massachusetts
4.9 from 831 reviews
Greater Boston Roofing provides residential roofing, commercial roofing, and free estimates to the Andover, MA area.
Commonwealth Roofing & Siding
(800) 672-7497 cwroofandside.com
1 Main St Ste 302, Andover, Massachusetts
5.0 from 52 reviews
As a licensed roofing and siding company, you can trust our highly skilled team of professionals to provide you with efficient and effective solutions after a complete evaluation of your needs. Offering the best performing roofing systems and beautifully customized exteriors tailored to your taste and budget that will last years and withstand the test of time and environment.

Nick Tracey Roofing & Exteriors
(978) 581-3528 nicktraceyroofing.com
300 Brickstone Square Suite 201, Andover, Massachusetts
5.0 from 17 reviews
At Nick Tracey Roofing, we specialize in a wide range of roofing services including installation, repair, maintenance, and replacement. Whether you need a small repair or a complete roof overhaul, our team of skilled professionals is dedicated to providing superior craftsmanship and reliable solutions tailored to meet your specific requirements. Asphalt Shingles, Metal Roofing, EPDM Rubber Roofing, and Skylights.
ASAP Roofing & Construction
(978) 662-8974 www.asapconstructionllc.com
Serving
5.0 from 33 reviews
We are ASAP Roofing and Construction, a remodeling and building team serving residential and light-commercial projects with practical, detail-focused workmanship. We handle kitchen and bathroom renovations, basement and garage updates, home additions, and new construction from the ground up. Our scope also includes decks and porches, trim work, doors and windows, plus drywall and metal framing when a space needs a clean reset. We work with a clear process: documenting the plan, carefully preparing surfaces and structures, and finishing with an eye to durability and everyday function. Integrity and straightforward communication guide how we schedule, coordinate, and respond to questions, so projects feel steady, transparent and well-managed.
Nugent Roofing
(978) 987-2998 www.nugentroofinginc.com
Serving
5.0 from 35 reviews
We specialize in asphalt and rubber roofing. Offering free estimates and are fully insured.

Prestige Roofers, LLC. Roofing , Siding & General Construction
Serving
4.8 from 17 reviews
"Specializing in roofing, siding, gutters and general construction we’re the New England area’s trusted contractor. Call or click for a free estimate." flat roofers metal roofers near me metal roofers roofers local roofers roofers contractors near me roofers companies roofers repair near me rubber roofers residential roofers local roofers near me roofers contractors roofers company roofers near me commercial roofers roofers in my area best roofers near me roofers residential roofers near me best roofers roofers recommended roofers near me roofers near me with free commercial roofers
A1 Restoration
(617) 299-1405 a1restorationteam.com
Serving
5.0 from 370 reviews
A1 Restoration of Boston specializes in expertly repairing and restoring properties damaged by water, providing top-notch solutions to safeguard your home from leaks and structural deterioration. With a proven track record of excellence, we're your trusted partners in ensuring a dry and secure living space.
Big Sky Roofing & Restoration
(857) 800-1658 bigskyroofingrestorationllc.com
Serving
5.0 from 11 reviews
Roofing services Siding’s services Metal roofing EPDM robber roof Skylights replace Free inspection Gutter cleaning
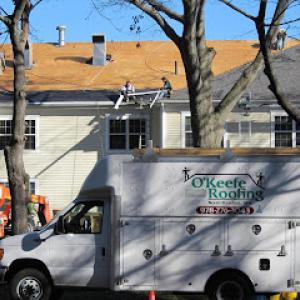
O'Keefe Roofing
(978) 276-3043 www.okeefe-roofing.net
Serving
5.0 from 12 reviews
Over 25 years Experience Your Best Local Residential Roofing Contractor Free Estimates Asphalt shingle expert.
Couto Construction
(978) 404-7607 www.coutoconstruction.com
Serving
4.9 from 52 reviews
Couto Construction is the most-trusted home exterior renovation serving Tewksbury, MA and surrounding areas since 1987. A family-run business they are a one-stop shop for all your home's exterior needs, specializing in roof replacement and repair, siding, windows, doors, gutters, and attic insulation. Their team of certified contractors brings decades of expertise ensuring top-quality results that last. They use only the best materials and back their work with a peace-of-mind 50-year warranty. Get a free inspection and estimate and Couto Construction will work closely with you to understand your needs and budget, ensuring a smooth and stress-free home exterior remodeling experience.
Paradise Remodeling
(781) 732-0203 www.paradiseremodelinginc.com
Serving
5.0 from 34 reviews
Paradise Remodeling is a trusted home improvement contractor based in Methuen, Massachusetts, proudly serving homeowners across the region since 2012. We specialize in roofing, siding, skylights, doors, and windows, offering high-quality craftsmanship and a customer-first approach on every project. As a fully licensed and insured contractor, Paradise Remodeling delivers reliable and efficient service with a strong commitment to durability, energy efficiency, and curb appeal. Whether you’re looking to enhance your home’s exterior, upgrade your roof, or improve natural lighting with skylights, our experienced team brings over a decade of expertise to every job. From the initial consultation to project completion, we prioritize your sati.
Senco Home Services
(978) 647-3626 sencohomeservices.com
Serving
4.5 from 45 reviews
At Senco Home Services, our mission is to use our expertise and experience to give you peace of mind in a comfortable home. We believe that everyone deserves to live in a beautiful and comfortable home, and we are doing our part to make that happen. With high-quality workmanship and affordable finance options, you can have your dream home with Senco. From minor jobs like gutter repair to major projects like roof replacement, we do it all at Senco. We have specialized teams of experienced professionals for every job, so you know that you are always getting the best people for the job. From simple installs to complex repairs, we’ve got your back!
A re-roofing project in this town requires a building permit before any nails go into the new roof. This isn't something you can skip or push to the last minute, especially with the town's busy seasons. In Andover, the roofing contractor typically handles the permit application with the Building Department, rather than placing that burden on the homeowner. That means you'll want to choose a contractor who is organized about paperwork and can commit to submitting on your behalf early in the planning stage. If you're coordinating with a contractor around the short late-spring to early-fall window, confirm up front who is filing, what forms are needed, and the expected turnaround time so there's no last-minute scramble.
Once the contractor submits the permit, the Building Department reviews the plan to ensure the proposed materials, attic ventilation, and installation methods meet local code and the town's expectations for cold, damp winters and potential ice-dam conditions. A complete package typically includes roof material types, shingle or panel product data, underlayment details, venting plan, and a schedule for the tear-off. Plan for a few extra days if the project is near the start of the season or during peak demand, since processing times can slow during busy roofing periods. Your permit becomes the formal green light to proceed and warrants the inspection sequence that follows.
After the crew begins tearing off shingles and exposing the roof deck, a tear-off inspection is performed. This check confirms that the old roof is fully removed to the deck in the planned areas, that the deck shows sound, undamaged sheathing, and that any deck repairs or replacements are executed to code. The inspector may also verify that the roof ventilation and drip edge placement align with the design given the county and town requirements for moisture management and ice-dam risk. Coordinating with your contractor to have the site prepared for inspection time windows helps avoid delays, since weather and access lines can affect when an on-site review happens.
When installation reaches the point where the new roof is fully in place and all penetrations-such as vent pipes and chimneys-are properly flashed, a final inspection is scheduled. The final visit confirms that the new roof is securely installed, venting is adequate for humidity control in the summer months, and that the overall workmanship aligns with permit approvals. If any adjustments are needed, the contractor handles them before the inspector signs off. Because Andover's climate pressures ice-dam risk and snow load considerations, ensure the final inspection verifies proper underlayment, fastener patterns, and flashing details that resist winter moisture and bulk snow loads. Keep in touch with both the contractor and the Building Department to stay aligned on the timeline, especially during the town's busier spring-to-fall window.
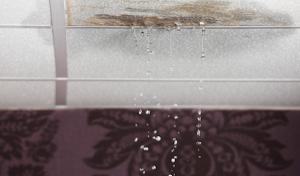
Andover's winters bring real ice-dam stress, while spring rain delays and fall wind events mean damage often crosses between sudden storm loss and long-term wear. When documenting roof trouble, separate instant storm impacts from progressive aging. A clear timeline helps distinguish what failed during a single event from what degraded over multiple seasons. For a homeowner, a careful photo record taken before and after each weather cycle is essential, especially after a harsh winter or a tough fall wind event. Keep pictures that show affected areas relative to nearby features like dormers, valleys, and roof penetrations, so a contractor or insurer can trace the exact path of damage.
Massachusetts insurers serving Andover generally want photos, prior-condition evidence, and a detailed roof diagnosis before approving major roof-related claims. Your documentation should include attic and exterior shots that reveal soffit or fascia deterioration, any interior signs of leaks, and skylight or vent vulnerabilities. A simple, organized binder with dated images and notes from a qualified professional or reputable contractor can prevent misunderstandings during the review. Clarity about whether damage stems from a single storm or cumulative wear reduces back-and-forth and speeds a determination.
After severe weather periods, claims review can become more stringent, making prompt photo documentation and a clear scope of work especially important. If a shingle granule loss or a visible sag appears after a heavy wind event, capture both the exterior roof line and the interior ceiling or wall around the affected area. In Andover, spring rain delays can mask leaks until warmer days reveal them, so follow-up inspections after a thaw or a quick warm spell are prudent. Relying on memory alone is risky; corroborating with dated, targeted images paired with a concise description of observed symptoms will help ensure the claim reflects reality and not a gap in records.
Connect with contractors who help homeowners navigate the claims process from damage assessment to final approval.
Greater Boston Roofing
(617) 941-3901 greaterbostonroofing.com
221 Chandler Rd, Andover, Massachusetts
4.9 from 831 reviews
Skylights and chimneys are among the most active leak points in Andover's typical homes, where aging flashings meet concrete and clay masonry. In the local contractor market, skylight work is common enough to stand out, which suggests many homeowners need repairs where roof penetrations meet flashing systems. Understanding how these penetrations fail helps you spot problems before water follows the path of least resistance.
Skylight flashings are a frequent failure site as valley rain and winter melt pool around the curb. The most common issues are loose or cracked flashing, improper boot seals, and improper edge flashing where the skylight integrates with the shingles. In practice, check for wilted shingles around the base, inconsistent sealant, and any daylight visible from the attic near the skylight. The fix often requires resealing the skirt, resecuring fasteners, and replacing compromised shingles to reestablish a continuous water barrier. For flat or low-slope sections adjacent to skylights, ensure any membrane transitions are sealed with the correct flashing and termination details to handle ice dam buildup.
Chimney-to-roof intersections present a targeted freeze-thaw vulnerability. Brick or stone mortar joints can crack, allowing wind-driven rain to bypass shingles and enter along the chimney throat. The flashing must bridge the chimney and roof with continuous step and counter-flashing, and the chimney cap should be checked for corrosion or displacement. In practice, leaks often show up as staining on interior walls around ceiling joists near the chimney, or in the attic where ridge-vented air cannot dry the joint. Repair work frequently involves repointing masonry joints, resealing flashing seams, and restoring a tight interface between the chimney and roof deck.
Low-slope and flat-roof service is active in Andover, so not all problems are steep-slope shingle issues. Drainage and membrane details matter on additions and certain residential sections. Pay attention to transitions from the main roof to these areas, ensuring continuity of the waterproof membrane, proper termination, and secure edge flashing to prevent ice dam accumulation along vertical penetrations. Regular inspection after heavy snow or thaw cycles helps catch issues before interior damage begins.
Find contractors experienced in skylight installation, flashing, and leak repairs to bring natural light into your home.
Commonwealth Roofing & Siding
(800) 672-7497 cwroofandside.com
1 Main St Ste 302, Andover, Massachusetts
5.0 from 52 reviews

Nick Tracey Roofing & Exteriors
(978) 581-3528 nicktraceyroofing.com
300 Brickstone Square Suite 201, Andover, Massachusetts
5.0 from 17 reviews
Andover homeowners operate within a Massachusetts framework where roof claims typically demand robust documentation beyond a contractor's opinion. The adjuster will expect a detailed factual record that supports the scope of work, not generic statements. In practice, this means a well-organized packet that shows the roof's condition before, during, and after the damage event, with clear links to the policy terms. When a claim centers on ice dam damage, wind-driven rain, or aging shingles, the documentation needs to distinguish what is covered from what is maintenance or wear. Prepare a file that aligns with adjuster workflows: narrative summaries that correlate to photos, measurements, and observed signs of damage.
In Andover, roofs commonly exhibit mixed causes: winter ice-related issues, aging shingles, and wind exposure. Successfully navigating a claim depends on separating covered damage from routine maintenance or preexisting wear. The proof should show sudden or tree-fall-induced impacts, hail impact marks, or moisture intrusion beyond normal wear limits. A contractor's report alone rarely suffices; the documentation must clearly map specific damage to policy-covered events and cite codes or standards that support the assessment. When in doubt, an independent third-party inspection that focuses on cause and chronology can bolster the claim narrative.
Insurance decisions hinge on whether the contractor can deliver a detailed scope, a comprehensive photo set, and precise condition notes that match adjuster expectations. The scope should itemize materials, locations, and exact repair or replacement actions, with labeled photographs that correspond to each line item. Condition notes should document roof slope, attic insulation considerations, flashing details, ice-dam indicators, and any decking or underlayment concerns observed. The clearer the alignment between the report and the adjuster's questions, the smoother the claim review process.
Avoid vague language such as "damaged roofing" without context. Include dates of events, weather conditions, and observable findings that support causation. Ensure photo sequences cover exterior angles, eaves, vents, valleys, and interior attic evidence like dampness or staining. If a claim is denied or partially settled, review the adjuster's written rationale and check whether the scope addresses all covered elements and any exclusions that may apply to ice-dam mitigation or wind-related damage.
Connect with contractors who help homeowners navigate the claims process from damage assessment to final approval.
Greater Boston Roofing
(617) 941-3901 greaterbostonroofing.com
221 Chandler Rd, Andover, Massachusetts
4.9 from 831 reviews