Last updated: Apr 19, 2026
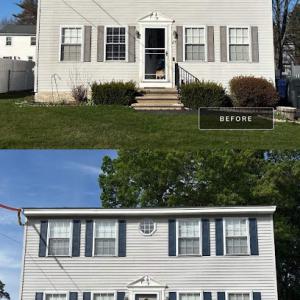
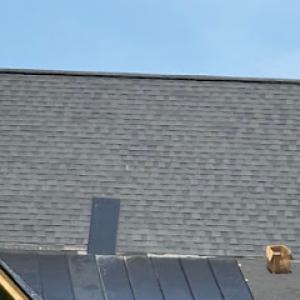
Cold winters in this area bring repeated freeze-thaw cycles that shove ice dam formation to the top of every homeowner's risk list. The roof edge becomes a battleground where melting snow refreezes into a dam, backing water up under shingles and flashing. When the attic isn't properly ventilated or insulation is lacking, heat leaks drive this cycle, and the damage spreads from the eaves upward. You will notice shingles curling or lifting, interior staining, and ceilings that suddenly show damp spots after a thaw. In Dracut, where homes sit under heavy winter loads and older roofs still bear decades of weather, these stresses arrive with predictable regularity and demand immediate attention.
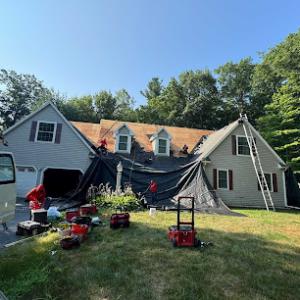
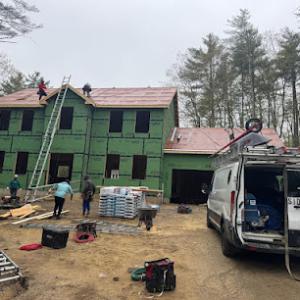
Replacement and major repair work slows to a crawl once the calendar turns toward winter, and for good reason. Snow, ice, and persistently cold sealing conditions complicate roofing work and create hazardous conditions for crews. In practice, that pushes critical, large-scale projects toward late spring through early fall. If an ice dam incident occurs during winter, the goal is to stop the intrusion fast and protect the interior, not to pretend the roof issue can be fully resolved before the season breaks. Planning for the spring window now can prevent the last-minute scramble when storms loom and crews are scarce. This is especially true for pitched residential roofs that dominate the local housing stock, where even a small delay can mean weeks of ongoing leakage and interior disruption.
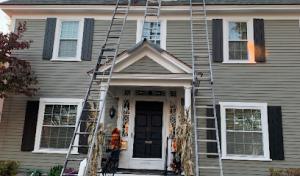
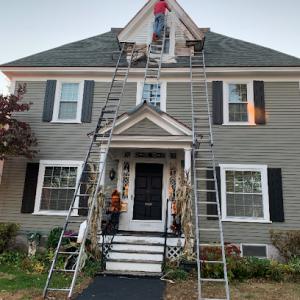
Emergency roof repair demand spikes in this market because winter intrusions cannot wait for a perfect weather day. If the attic is warming enough to melt snow on a sunny winter day, yet the eaves stay snowbound and leak shows up inside, action is needed immediately. Ice dams can form quickly after a heavy snowfall followed by a warm afternoon, and rapid response helps minimize interior damage and downstream rot. Local contractor signals reflect this reality: homeowners who call for urgent leaks tend to get connected with crews who can be on site within hours, not days. If multiple signs appear-wet ceilings, stained drywall, or buckling paint near soffits-respond without delay and coordinate a plan that channels winter mitigation toward a solid spring replacement plan.
Begin with a cold-weather assessment: safely inspect attic insulation levels and ventilation to ensure warm air isn't migrating into the roof sheathing, which fuels ice dam formation. Clear gutters and downspouts, ensuring they are free of debris so roof melt can drain away rather than back up. If you detect active leaks, place a tarp over the affected interior area to limit further water intrusion while you arrange professional help. For immediate exterior protection, use a roofing contractor who specializes in emergency leak response and who understands how to minimize further damage while shoveling or removing snow from the roof's edge. In preparation for spring, schedule a full roof assessment that targets improving insulation, sealing, and ventilation, so the next freeze-thaw cycle won't push damages into costly repairs mid-winter.
A resilient Dracut roof recognizes that ice dam risk isn't a one-season problem. Prioritize solutions that address heat loss at the roof line, proper attic ventilation, and a surface that can shed meltwater efficiently. When you're ready to repair or replace, set expectations with contractors about a detailed plan: prioritize rapid temporary mitigation during winter, and schedule a thorough, weather-permitting installation in the spring or early fall. A well-timed, well-executed project minimizes disruption to daily life and reduces the chance of repeated winter damage in the years ahead.
Spring storms and nor'easters are a key local hazard in Dracut, bringing the combination of wind-driven rain and uplift pressure that often exposes weak shingles, flashing, and ridge details. After a windy event, shingles may lift at edges, flashing around chimneys and vent stacks can separate, and venting and valley areas can reveal water intrusion paths. The typical housing stock in this area leans toward pitched roof re-roofs, so fast leak response and cleanup matter to homeowners. The practical approach is to think in terms of how the wind pushes on the roof surface, how rainwater finds seams, and where small failures can become bigger leaks within hours or days of a storm.
The Massachusetts insurance environment around Dracut is generally stable rather than in statewide retreat, but carriers commonly want photos, damage documentation, and contractor estimates after wind events. When a storm hits, your first priority is safety, then securing any exposed areas to prevent further damage. From there, plan a quick documentation run: take wide and close photos of the entire roof area, focusing on shingles that have curled, missing sections, flashing gaps, and any new daylight visible near ridges or valleys. Create a dated record of conditions and note the exact location of damage on your home's structure. Keep copies of the roof's prior condition if available, and obtain a written assessment from a local contractor that highlights what needs repairs and why.
Storm-damage and insurance-claims specialties are both active in the local contractor market, indicating that homeowners here regularly seek help connecting roof damage findings to claim documentation. A practical path is to have a contractor provide a scope of work that aligns with typical wind-damage indicators: loose or damaged shingles, compromised underlayment, damaged flashing around roof penetrations, and any ridge-line issues caused by uplift. Ensure the report clearly links each finding to a potential coverage item, and request the contractor to include photos, a simple annotated diagram, and a repair timeline. This makes it easier to present a cohesive claim packet that can cross-check against insurer expectations after a Nor'easter hit.
After a storm, conduct a cautious exterior review from ground level; never climb onto a slippery roof without proper safety gear and a second person. If you identify signs of leakage, capture a short sequence of weather conditions and timing, then contact a local roofer who regularly handles storm claims. Ask the contractor to provide a claim-oriented assessment that highlights damage type, affected areas, and recommended mitigation steps. If the insurer requests estimates, ensure the roofer's numbers reflect the scope needed to restore the roof's performance and to prevent recurring vulnerabilities during freeze-thaw cycles typical of the region. In practice, a coordinated, document-rich approach reduces delays and helps translate roof findings into a clear claim narrative.
Find local contractors experienced in assessing and restoring roofs after hail, wind, and severe weather events.
Ab-Tec roofing & Home Improvement
48 Stone St, Dracut, Massachusetts
4.9 from 35 reviews
Manny's Roofing
(978) 703-3167 www.mannysroofing.com
1480 Bridge St, Dracut, Massachusetts
4.9 from 32 reviews
Olympic Roofing
(603) 203-3071 www.olympicroofing.com
1633 Bridge St, Dracut, Massachusetts
5.0 from 2 reviews
Ab-Tec roofing & Home Improvement
48 Stone St, Dracut, Massachusetts
4.9 from 35 reviews
ALL TYPES OF SLATE AND COPPER ROOFING AND GUTTERS SNOW RAILS painting carpentry AND HOOKS.rubber roofing and repair s. Asphalt shingle replacement. Chimney repairs.
Manny's Roofing
(978) 703-3167 www.mannysroofing.com
1480 Bridge St, Dracut, Massachusetts
4.9 from 32 reviews
Commercial or residential, Manny’s Roofing is the number one roofing company in Massachusetts. Our experienced team provides superior roof replacement services and roof repairs, gutter replacement, skylight installation, and siding repair and replacement. You can rely on our fully licensed and insured professionals to provide exceptional work. With vast experience in many areas, Manny’s Roofing assists in several aspects of your roofing project. We save our customers both time and money by providing a multifaceted service while keeping your project on track. Contact us today for a FREE estimate.
Georgoulis Construction
(978) 453-4242 georgoulisroofing.com
96 Arlington Ave, Dracut, Massachusetts
4.3 from 8 reviews
Georgoulis Construction, Inc. is a full scale Commercial and Residential contractor providing New England with the highest degree of craftsmanship, integrity and quality.
Olympic Roofing
(603) 203-3071 www.olympicroofing.com
1633 Bridge St, Dracut, Massachusetts
5.0 from 2 reviews
Olympic Roofing & Construction is your local expert for roofing, siding, painting, and flooring. For over 50 years, homeowners and businesses have trusted us for quality craftsmanship, honest pricing, and jobs done right the first time. We handle roof replacements and repairs, vinyl and fiber cement siding, interior and exterior painting, and durable, stylish flooring to completely transform your property’s look and value. Our team shows up on time, communicates clearly, and treats your home like our own. Call today for a free estimate and see why so many customers rely on Olympic Roofing & Construction for all their exterior and interior renovation needs.
Michael's General contractor
(978) 332-6126 www.michaelsgc.com
Serving
5.0 from 46 reviews
Michael's General Contractor is a leading provider of comprehensive construction solutions, specializing in general contracting services with a distinct focus on roof repair. With a wealth of experience and a commitment to quality craftsmanship, we deliver tailored solutions to residential and commercial clients alike. Our expert team ensures every project is executed efficiently, meeting the highest industry standards. Trust Michael's General Contractor for all your construction needs.
Top Notch Roofing
(978) 328-6134 topnotchroofingma.com
Serving
4.8 from 19 reviews
Top Notch Roofing is a specialized roofing contractor providing residential and commercial roofing solutions across Massachusetts and New Hampshire.
Joe's Roofing Lowell
(603) 952-1684 joesroofingconstruction.com
Serving
4.9 from 136 reviews
Joe's Roofing handles roof repairs, replacements, and exterior work throughout Middlesex County. Based in Lowell since 2023, our licensed team serves Billerica, Chelmsford, Tewksbury, Dracut, Tyngsborough, Westford, Andover, and Bedford. We fix leaks, replace roofs, install siding and gutters, repair skylights, and respond to storm damage. All roof inspections are free with no obligation. We help with insurance claims—documenting damage and working directly with adjusters to get you covered. Emergency service available 24/7 for urgent repairs that can't wait.
Quality Expert Roofing
(978) 221-1415 qualityexpertroofing.com
Serving
4.9 from 17 reviews
We specialize in providing top-tier residential and commercial roofing services, always prioritizing quality and customer satisfaction. Our dedicated team ensures that every project is handled with care, precision, and expertise. Whether you need minor repairs or a complete roof replacement, you can trust our skilled professionals to deliver exceptional service tailored to your unique needs.
JM Exteriors Roofing Siding
(978) 635-6536 jmroofingsiding.com
Serving
5.0 from 143 reviews
🏠 JM Exteriors Roofing Siding is your go-to expert for top-quality roofing and siding services in Lowell, MA, and nearby areas. We combine experience, professionalism, and attention to detail to protect and beautify your home. From roof repairs to siding installations, we ensure durable results with exceptional care and craftsmanship. Let us bring your vision to life! Call today for your FREE estimate and experience the difference of working with a dedicated team.
Rangers Roofing & Services
(978) 726-0171 rangerservicesincma.com
Serving
5.0 from 37 reviews
Rangers Roofing & Services is a trusted roofing contractor in Lowell, MA serving homeowners and businesses throughout Greater Lowell. With 10+ years of experience, our licensed & insured team delivers residential roofing and commercial roofing: roof repairs, roof replacement, new roof installation, storm damage restoration, flat roofing, asphalt shingles, flashing, ventilation, leak detection, and roof inspections. We also install siding and seamless gutters. Need help with an insurance claim? We document damage with detailed photos, provide a clear repair quote, and can be on-site with the adjuster. Bilingual service: English & Español. 24/7 emergency roofing available. Local roofing company - free estimates. Call now for fast service.
Jcr Pro Winner Construction
(978) 726-8003 jcrprowinnerconstruction.com
Serving
5.0 from 35 reviews
Welcome to JCR Roofing! Your comprehensive destination for home protection and improvement At JCR Roofing, we take pride in offering a complete range of services to strengthen and beautify your home. Discover what we can do for you: Roofing From quick repairs to complete installations, trust our roofing expertise to provide you with maximum durability and style. We protect what you love most with superior quality roofs. At JCR Roofing, our commitment is to provide you with: -Proven industry experience - High-quality materials - Trained and professional staff -Customized solutions for every customer Trust us to strengthen and beautify your home. Contact us today for a free inspection and find out how we can make your home
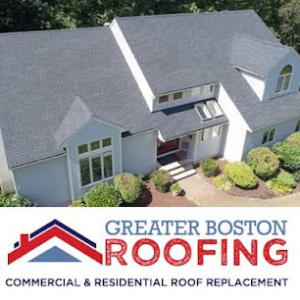
Greater Boston Roofing
(617) 941-3901 greaterbostonroofing.com
Serving
4.9 from 831 reviews
Greater Boston Roofing provides residential roofing, commercial roofing, and free estimates to the Andover, MA area.
Asphalt shingles remain the dominant practical choice for the typical Dracut home, especially on large residential re-roofs that need predictable performance with cost-controlled replacement. The local mix of snow, ice dams, and freeze-thaw cycles makes a steady, well-understood material appealing. Asphalt shingles provide reliable shedding of occasional ice buildup when paired with proper attic insulation and ventilation, and they're familiar to local roofers who handle quick leak response and cleanup after winter storms. If winter reliability and straightforward installation matter most, asphalt shingles keep things simple while still offering a broad range of colors and styles to suit your home's look.
Metal roofing is present locally and can appeal in Dracut because snow shedding, durability, and resistance to repeated freeze-thaw exposure are meaningful performance considerations. Metal panels or standing-seam systems tend to move water and snow more predictably off the roof surface, which can reduce ice dam risk at the eaves when the attic is well-insulated and vented. In a climate with frequent Nor'easter exposure, metal can perform well under repeated moisture and temperature swings, minimizing the chance of surface cracking or pinholing that sometimes accompanies long, cold winters. Installation quality matters here, since improper fasteners or underlapping can negate the long-term benefits. A metal roof that's properly installed can offer excellent resilience for a homeowner who values lower long-term maintenance and faster winter cleanup-and it can look sharp too, especially on homes with a modern or traditional aesthetic.
Clay tile, concrete tile, wood shakes, and synthetic/composite products exist in the market but are more specialized choices in this market. Winter loading and moisture exposure become bigger considerations with these materials. Clay and concrete tiles are heavier and require a solid roof structure plus careful fastening to withstand snow loads, which is a practical concern in colder seasons. Wood shakes bring a distinct look but demand meticulous maintenance to prevent moisture infiltration and frost-related warping over time. Synthetic or composite shingles can offer a balance of appearance and performance, with improved resistance to moisture and some flexibility in installation. In practice, these options are best suited for homes with the right structural support and a willingness to invest in careful installation and ongoing maintenance to handle the region's winter conditions.
When evaluating materials, prioritize how well the system can handle ice dams, moisture, and freeze-thaw stress. Asphalt shingles deliver straightforward performance with widely available local experience and rapid leak response if needed. If snow burden and long-term durability are top priorities, metal roofing provides a compelling combination of shedding efficiency and resilience, provided it's installed by a crew with metal-roof expertise. Specialized materials can be appropriate for specific aesthetic goals or structural capabilities, but their winter behavior requires careful assessment of roof framing, underlayment, and edge detailing. In all cases, the chosen material should align with a well-ventilated attic and robust insulation to mitigate winter moisture and ice-dam risk.
Typical Dracut pricing runs about $350 to $550 per square for asphalt shingles, $700 to $1100 for metal, $1200 to $2100 for clay tile, $1000 to $1800 for concrete tile, $600 to $900 for wood shingles or shakes, and $450 to $750 for synthetic or composite shingles. Those ranges reflect a local market that expects quick leak response and solid cleanup after a storm, not just a price tag on the shingles themselves. When you're comparing bids, the lowest price on material can hide a bigger bill once tear-off, disposal, site protection, and post-job cleanup are added in. Understand that the base material price is only one piece of the final total.
Costs in Dracut can rise when winter damage creates urgent scheduling pressure, because local demand spikes after storms and emergency leak situations. If a thaw followed by a deep freeze creates ice dam problems, a contractor may be juggling several urgent jobs at once. That pressure can push scheduling and crew time up, which translates into a higher overall cost even before any premium for faster service. If you're negotiating after a storm, expect some premium for the expedited start, weekend access, or after-hours work, and plan for a tighter window between estimates and completion.
The local market strongly signals affordability, re-roofing, and cleanup as homeowner priorities, so pricing comparisons in Dracut should account for tear-off, disposal, site protection, and post-job cleanup rather than material price alone. A fair bid will itemize tear-off and disposal by square, put protective measures around landscaping and driveways, cover chimney and vent openings, and specify how gutters and downspouts will be managed during the project. Cleanup should include debris removal, nail sweep, and restoration of any temporary protection. If the contractor leaves before thorough cleanup, you're paying for a second trip later.
Ask for a full written scope that includes tear-off if needed, disposal, site protection, and cleanup. Request a project timeline that accounts for potential winter delays and priority shifts after storms. Compare bids on a like-for-like basis so you're not surprised by hidden costs in the small print. Finally, verify that the chosen option aligns with the local realities-ice-dam risk, frost-thaw stress, and a housing stock built for fast leak response-so you're ready to act without breaking the bank when winter recurs.
Get a clear picture of your project costs upfront - no commitment required.
Manny's Roofing
(978) 703-3167 www.mannysroofing.com
1480 Bridge St, Dracut, Massachusetts
4.9 from 32 reviews
Olympic Roofing
(603) 203-3071 www.olympicroofing.com
1633 Bridge St, Dracut, Massachusetts
5.0 from 2 reviews
In this area, most full re-roofs require a building permit through the town Building Department before work begins. If you hire a contractor, they may handle the filing, but you should verify who is responsible for pulling the permit and submitting the necessary paperwork. Operating without a permit risks stop-work orders, failed inspections, and delays that can stretch into the busiest parts of winter when leaks feel extra painful.
The permit submission in Dracut typically includes the roofing scope and plans, whether filed by the contractor or the homeowner. Concrete, practical details matter: your plan should specify the roof's size, the chosen material, anticipated underlayment, and any ventilation changes. If you are upgrading attic vents or adding ridge venting to address ice dams and freeze-thaw stresses, include those details in the submission. If the contractor is handling the paperwork, ask for copies of the submitted documents so you can review them ahead of time.
Dracut inspections are commonly scheduled at rough-in and final, and the department may ask for confirmation that ventilation and roofing materials comply with local code expectations. Rough-in inspection helps ensure structural components, underlayment, and ventilation pathways meet code before shingles go on. Final inspection verifies that installed materials, flashing, and attic ventilation align with the approved plan and that no leakage points were introduced during installation. Expect a quick turnaround if work proceeds smoothly, but be prepared for questions or minor adjustments if the inspector spots gaps between plan and reality.
Coordinate closely with the Building Department early in the process so your schedule aligns with inspection windows, especially during the winter season when ice dams and freeze-thaw cycles stress roof systems. Keep a clean, accessible site and maintain clear egress routes for inspectors. If ventilation or material choices diverge from the approved plan, address it before the final inspection to avoid a redo and extended exposure to winter conditions. Remember: a thorough permit and compliant inspections protect you from costly rework and help ensure the roof holds up against Merrimack Valley winter demands.
Skylight installations and repairs are a notably active specialty in Dracut, so the surrounding flashing transitions around roof penetrations matter as much as the skylight itself. When inspecting, check the step where the skylight meets the roof deck and where the curb or framing sits against the asphalt or metal surface. Look for gaps, loose nails, or cracked sealant along the flange. In winter, ice and snow can back water up at the seal, so pay special attention to any signs of staining, peeling flashing, or granular loss near the skylight. If sealant shows age or cracks, plan a targeted reseal or flashing upgrade rather than a full replacement.
Chimneys remain a frequent leak point on older New England-style homes in this area, where brick or stone joints meet the roof deck. Inspect the chimney base for cracked mortar, deteriorated flashing, or rusted condensation metal. Backed-up water from freeze-thaw cycles can seep under shingles where flashing channels meet the chimney chase. When leaks appear, focus first on the step-flashing and counter-flashing along the chimney sides, then on the crest flashing over the roof edge. If the masonry shows frost damage or spalling, addressing it early saves broader roof deck intrusion.
Dracut winters tighten the window for reliable flashing. Sealants age quickly under repeated thaw and freeze, especially around skylight flanges and chimney step-flashing. During a warm spell, check for soft or puckered sealant and dried-out caulk. After heavy snow or a thaw, re-check seams and re-apply compatible sealant as needed to prevent ice dams from driving under flashing. Regular, targeted resealing around penetrations is typically more effective than broad, uniform coating.
Find contractors experienced in skylight installation, flashing, and leak repairs to bring natural light into your home.
Ab-Tec roofing & Home Improvement
48 Stone St, Dracut, Massachusetts
4.9 from 35 reviews
Manny's Roofing
(978) 703-3167 www.mannysroofing.com
1480 Bridge St, Dracut, Massachusetts
4.9 from 32 reviews
Olympic Roofing
(603) 203-3071 www.olympicroofing.com
1633 Bridge St, Dracut, Massachusetts
5.0 from 2 reviews
Flat-roof work is a recognized niche in the area, but it remains a secondary focus compared to steep-slope residential roofing. This means you'll likely encounter it on additions, porches, garages, and small commercial properties rather than on the main house. If your project involves a low-slope section, consider a contractor who understands both traditional low-slope assemblies and how they tie into your existing pitched roof. The goal is a seamless integration that preserves curb appeal while delivering reliable water shedding.
In this climate, snow, ice, and spring rain patterns make drainage control on low-slope portions especially critical. Pay attention to balcony doors, porch transitions, and garage openings where water can accumulate and back up. Ensure your drainage plan includes properly placed scuppers, internal drains where appropriate, and tested under-roof slopes that avoid ponding. Timely snow and ice removal from low-slope areas reduces freeze-thaw stress that can compromise membranes and flashing along seams.
Summer humidity affects adhesives and some synthetic components, which matters more on low-slope assemblies where seams and membrane details do the waterproofing work. Select membranes and tapes with proven performance in humid environments and ensure proper cure times during hot, muggy days. When installing or resealing low-slope sections, consider heat- and moisture-tolerant products, and verify that flashings are fully integrated with the adjoining steep-slope roof to prevent differential movement.
For additions or detached garages, schedule semi-annual inspections that focus on drainage outlets, edge details, and seam integrity. After heavy winter and spring cycles, check for signs of ponding, lateral movement in edge flashing, and any fastener corrosion. Promptly address any bulging or blistering on low-slope membranes, and keep debris out of drainage paths to maintain reliable water control through the thaw and after the last snowmelt.
Find specialists in TPO, EPDM, and built-up flat roofing systems for residential and commercial properties.

In Dracut, wind and winter ice can test a roof far beyond typical wear. When a repair or replacement happens, you should keep a clear trail of what was done: dated photos showing before and after, invoices, and installation records. This is not just for memory's sake; insurers often request precise documentation after a storm or wind event. A well-organized folder makes it easier to prove that workmanship or materials were up to the promised standard when a claim comes due.
Local contractor signals show warranty offerings that matter where weather-driven wear is a fact of life. Look carefully at what each warranty covers-material defects, workmanship, and patchwork after wind events-and how long coverage lasts. If a contractor stands behind both the product and the install, that accountability can save headaches later when a repair is needed after a nor'easter. Keep notes on who did the work and when, so you can compare promises against what actually happened over time.
Building Department attention to ventilation and material compliance is real in this area. Retain permit and inspection records alongside warranty paperwork, so you have a complete story if questions arise about roof performance years down the road. When you know you have both solid materials and solid workmanship, and you can document both, you're better positioned to navigate ice-dam season and the inevitable freeze-thaw cycles with fewer surprises.