Last updated: Apr 19, 2026
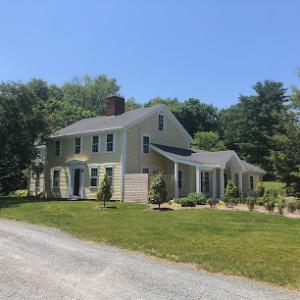
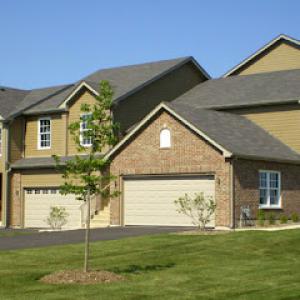
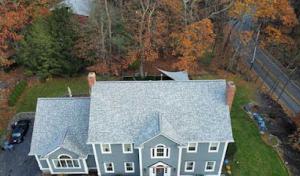
Beverly's position on the North Shore puts roofs squarely in the path of coastal wind, salt air, and Nor'easter rain that can push water into vulnerable flashing and roof-wall transitions. Strong gusts slam against ridge lines and parapets, lifting loosened shingles and forcing moisture into joints where roof meets chimney, dormer, or vent pipes. In this climate, even a seemingly minor gust can drive spray under flashing that was fine for milder conditions, creating a slow bleed that invites rot, mold, and interior damage. If your home has a visible mismatch between flashing and wall siding, or if you notice rusted once-tight metal edging, treat those signs as urgent red flags. The risk isn't just occasional leakage-it's accelerated deterioration through salt-laced moisture that travels along the underlayment and into the attic air channels.
Older Beverly housing stock commonly features complex rooflines, dormers, chimneys, and partially finished attics. Those features create irregular intake and exhaust paths, which makes achieving balanced ventilation a tricky puzzle. Uneven attic temperatures high in the eaves melt snow unevenly, creating hot spots that accelerate ice dam development. When intake vents are tucked behind a dormer or cut off by a chimney chase, cold roof sections still leak heat into the attic, but the air can't circulate to carry meltwater away quickly. In practical terms: a roof with multiple ridges, valley intersections, and irregular eave lines behaves very differently from a simple gable. If you have layered insulation that looks compressed or lifted in spots, air leaks are a warning sign that ventilation is not doing its job. In Beverly, where older homes predominate, it's common to have a mismatch between the attic's actual temperature and what the solar heat gain and chimney flues expect. This misalignment is a direct invitation to ice damming and interior leaks during freeze-thaw cycles.
Essex County winters bring repeated freeze-thaw cycles that turn snowmelt into a cascading problem at the eaves. When insulation is uneven or attic temperatures rise, meltwater refreezes at the roof edge, forming ice dams that back up water behind them. Coastal winds can push warmer indoor air toward roof edges, amplifying the problem at joints and along roof-wall transitions. If gutters are clogged or downspouts are undersized, meltwater has fewer pathways to escape, increasing the chance that water will back up under shingles and into soffits, fascia, or ceiling cavities. The regional cadence of storms means quickly identifying symptoms-softened drywall near the ceiling, staining around chimneys, or a damp attic-becomes an urgent priority rather than a late-season hassle. In short, Beverly faces a predictable cycle: wind-driven moisture, uneven attic warmth, and recurring ice dam formation that demands a proactive, not reactive, approach.
First, inspect attic ventilation with a critical eye toward balance. Look for a clear, unobstructed path from soffit vents to ridge vents, and verify that dormers and chimney chases aren't pinching the airflow. If you see sagging insulation or compressed batts around the eaves, consider re-foaming or re-insulating to restore an even temperature gradient along the roof edge. Second, assess flashing and roof-wall transitions where the chimney, dormers, and marginal walls meet the roof. If flashing appears aged, loose, or torn, plan for targeted repairs before winter's pressure builds. Third, clear gutters and downspouts, ensuring water has a robust escape route during melt episodes. Finally, consider roof improvements that support durable ice dam prevention: enhanced ventilation combined with high-performance underlayment, and, where appropriate, upgraded eave trims or heat-traced elements in critical locations to minimize backflow.
Treat every observed water staining near ceilings or along interior wall joints as a potential ice dam signal, not a cosmetic issue. Prioritize projects that restore balanced attic airflow, stabilize attic temperatures, and seal the most vulnerable roof-wall junctions. After any storm, recheck flashing around chimneys and dormers; even small gaps can become major leakage paths under sustained winter rain and wind. When planning repairs, align the chosen roofing system with reinforced ventilation strategies and durable edge protection to address Beverly's distinctive coastal and architectural realities. The cost of inaction compounds quickly as salt-laden air accelerates deterioration, and storms drive moisture deeper into existing weaknesses. Act decisively to reduce ice dam risk before it starts.
In Beverly, the North Shore exposure means your roof faces wind-driven coastal storms and regular freeze-thaw cycles. Those forces stress shingle sealing, underlayment, and flashing more than in inland towns. Attic ventilation plays a pivotal role here: good airflow helps reduce ice dam risk and keeps decking dry during repeated freeze-thaw transitions. The combination of salt air and coastal winds also means fasteners and metal edges need attention to prevent corrosion and wind uplift over time. The practical takeaway is to scrutinize how the roof assembly handles moisture movement, not just the surface look.
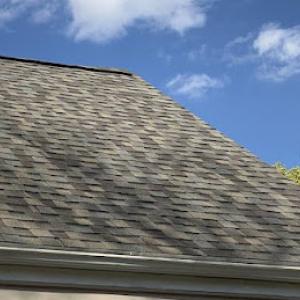
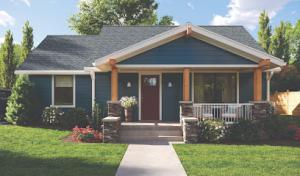
Asphalt shingles are the dominant practical choice when you're evaluating day-to-day performance near the water. But wind exposure near the coast and repeated freeze-thaw movement make shingle sealing, underlayment, and flashing quality especially important. Look for shingles with good wind resistance ratings, and pair them with a high-quality, stress-tacked underlayment and continuous flashing at valleys, chimneys, and along the eaves. In older homes, roof decks may be uneven or have residual damage from past freeze cycles, so extra attention to nailing patterns and fastener security helps prevent nail pops and leaks after a harsh winter. A well-sealed edge detail can make the difference between a dry attic and an ongoing drip, even with a seemingly modest storm.
Metal roofing has a stronger niche in Beverly than in many inland towns because homeowners value snow shedding, wind resistance, and long service life in a salt-air environment. If you're weighing metal, concentrate on panel profiles that minimize wind uplift and ensure proper sealing at fasteners and seams. Snow tends to shed more predictably from metal, but the attachment system must be designed to handle seasonal snow loads and potential salt exposure. A hidden-fastener or exposed-fastener system should be evaluated for corrosion resistance, especially near the coast, and flashing at penetrations must be continuous and well-sealed to prevent ice dam intrusion in colder months. In older massing styles, metal can visually complement period details if selected with a mindful profile and color that harmonizes with historic shingles and trim.
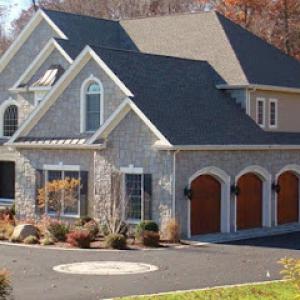
Clay, concrete, wood, and synthetic products appear in the market, but Beverly's older framing and varied historic-style homes mean roof weight, structural capacity, and visual fit matter more than on newer suburban subdivisions. Heavier tiles demand careful load assessment and may require structural reinforcement or supplementation, particularly on older rafters or decking. Wood shakes or shingles deliver a traditional texture but require diligent maintenance and higher upfront care to endure salt air and freeze-thaw cycles. Synthetic options can punch above their weight in terms of maintenance and installation ease, yet still need appropriate attachment methods and ventilation strategies to prevent moisture accumulation in attic and roof bays.
When choosing between materials or considering a retrofit, prioritize system-wide performance: attic ventilation, proper underlayment, and robust flashing details take precedence over superficial curb appeal. For older framing with mixed historic influences, ensure the selected roof type respects weight limits and visual rhythm while delivering reliable wind and ice-dam resistance. If you're renovating or reroofing, coordinate with a local contractor who understands how coastal exposure changes fastener longevity, sealant choices, and the nuances of Beverly's seasonal patterns.
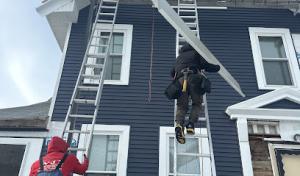
Spring nor'easters on the Massachusetts coast commonly test Beverly roofs at skylights, chimney flashings, valleys, and roof penetrations before summer repair schedules fully open up. If a skylight seals poorly or its flashing is aged, rain finds a way in where the sun won't reach to dry it out. The wind-driven spray that comes with coastal storms can push water under loose shingles and around sealant lines, slipping through gaps that refrigeration cycles and quick weekend fixes never fully address. Check around skylights after each major storm: look for condensation on the interior ledges, staining along linings, or damp spots that don't match the pattern of a typical rainstorm. If leaks appear at the skylight perimeters or flashing, treat it as an urgent signal to reseal or replace the flashing before another front arrives.
The local contractor signal mix shows unusually strong demand for skylight work and emergency repair, which aligns with leak-prone transitions on older North Shore homes. Valleys and roof penetrations are premium targets for wind-driven rain, especially when surrounding shingles sit in serviceable condition but the flashing has aged or pulled away from siding or chimney joints. In Beverly's climate, freeze-thaw cycles exaggerate hairline cracks in metal flashings or bitumen joints, allowing water to migrate downward and sideways. After Nor'easters, inspect valley intersections, step flashing along chimney lines, and boot flashings around vent pipes. If moisture is detected behind drywall or inside attic penetrations, treat the area as a potential pathway for ongoing leakage until a qualified roofer can reseal or replace compromised flashing and reseal joints.
Homes near the waterfront and exposed streets can see wind-driven rain enter at flashing details even when the main field of roofing still appears serviceable. Coastal exposure means that flashing along roof-to-wall interfaces bears the brunt of storm energy, while satellite features like dormers, skylights, and ridge vents are additional openings for intrusion. After a Nor'easter, pay particular attention to attic access hatches, soffit-to-wall transitions, and the intersection where the roof meets the chimney or dormer. The first sign is always interior staining around flashing seams or a musty odor near attic zones. If any of these indicators show up, prioritize a flashing audit rather than waiting for a full roof replacement, because delaying can allow moisture to travel deeper and cause structural rot.
Document damage with photos from multiple angles, focusing on skylights, chimneys, and flashing seams. Keep a running log of storm dates and observed interior symptoms, such as damp spots, peeling paint, or warped trim near rooflines. Schedule an urgent roof and flashing inspection with a local contractor who understands Beverly's North Shore wind patterns and salt exposure. Ask specifically for a flashing-focused assessment, including chimney and skylight sealants, valley integrity, and boot replacements where needed. If leaks are confirmed, isolate the affected zones in the attic to minimize further water intrusion and prepare for targeted repairs that address the primary leak paths before the next storm cycle begins.
Find contractors experienced in skylight installation, flashing, and leak repairs to bring natural light into your home.

A.C. Castle Roofing
100 Cummings Center Ste 113E-5, Beverly, Massachusetts
4.7 from 61 reviews

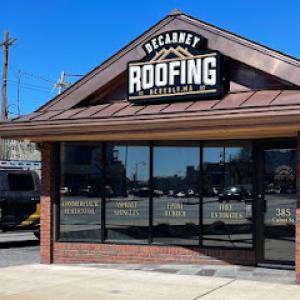
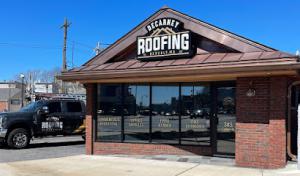
Decarney Roofing
(978) 304-6147 www.decarneyroofing.com
385 Cabot St, Beverly, Massachusetts
5.0 from 316 reviews
DeCarney Roofing is the North Shores leading Roofing specific contractor. Founded by Mario DeCarney a third generation roofer in 2017. We Specialize in Asphalt shingle and EPDM Rubber new roof installations & repairs. We look forward to protecting your home from all the weather New England has to offer!
D&G Exteriors
(781) 328-4063 www.dandgexteriors.com
100 Cummings Center Suite 109D, Beverly, Massachusetts
5.0 from 106 reviews
D&G Exteriors is a residential and commercial roofing contractor, gutter installer, siding contractor, window and door installer and deck builder. We specialize in full replacements and large residential projects. Proudly serving the greater Boston area with the best in customer service, integrity and professionalism, from the North Shore to the South Shore. Insured and licensed.
A.C. Castle Roofing
100 Cummings Center Ste 113E-5, Beverly, Massachusetts
4.7 from 61 reviews
A.C. Castle Roofing proudly serves the North Shore with over 40 years of expertise. Led by owner, Brian LeBlanc, we deliver only top-quality roofing solutions. Our A+ BBB rating reflects our commitment to safety, quality, and customer satisfaction. Trust us for expert installations, competitive pricing, and unmatched industry knowledge.
Shea Roofing Company
(978) 745-7313 shearoofing.net
Beverly, Massachusetts
5.0 from 8 reviews
At Shea Roofing Company, roofing isn't just a service - it's a family legacy. Our locally owned roofing company has served the North Shore area since the 1950s and passed from one generation to the next. Today, the business is led by a seasoned expert with over 25 years of experience in the industry. When you partner with us, expect us to take a personal, hands-on approach. With a loyal crew and high standards, we deliver superior workmanship you can count on. Reach out to us today to see what we're all about.
Roofer of Beverly
(978) 307-6626 roofer-beverlyma.com
125 Colon St, Beverly, Massachusetts
4.4 from 7 reviews
Roofer of Beverly is a professional roofing company that offers top-notch roofing services to residential and commercial properties in the Beverly area. With a skilled and certified team of roofers, they provide exceptional workmanship and customer service. Their services include roof repair, installation, replacement, and maintenance, using only the best quality materials and techniques. They are committed to customer satisfaction, providing transparent communication and keeping clients informed throughout the entire process. Call us now for estimate!

A&A Services Home Improvement
(978) 613-8232 a-aservices.com
Serving
4.9 from 520 reviews
A&A Services Home Improvement in Salem provides reliable roof replacements tailored to the North Shore’s coastal weather. Our team specializes in helping homeowners protect their properties from heavy winds, harsh winters, and moisture issues common throughout Salem and surrounding areas. We deliver professional roof installation, replacement, and exterior improvements designed for long-lasting performance. As trusted roofing contractors with decades of local experience, we’re committed to quality workmanship and dependable service on every project.
WJZ Construction
(781) 469-3726 lynnroofingservices.com
Serving
4.8 from 41 reviews
WJZ Construction is the top choice in Lynn, MA, if you are looking for home remodeling services. We understand the importance of sticking to a budget while still providing high-quality craftsmanship. Our team will work closely with you throughout the project to ensure that the results exceed your expectations while staying within your budget constraints.
Osgood Roofing, Siding, & Guttering Company
(978) 768-7077 osgoodroofing.co
309 Dodge St, Beverly, Massachusetts
5.0 from 1 review
Osgood Roofing, Siding, and Guttering Company has years of experience replacing and repairing roofs for property owners in Beverly and Marblehead, MA and surrounding areas. We take pride in doing quality work that will stand the test of time. We pride ourselves on getting projects done promptly without sacrificing quality or safety. Whether you need roofing, siding, or guttering services, call us today to book!

US Roofing
Serving
4.9 from 58 reviews
Our goal is to continue to provide the same kind of superior customer service with quality, experience, and integrity that our customers have come to expect. We are committed to continually improve on the quality offered to our customers and the communities we service. Our name reflects our pride in this country as well as family pride. We are proud of what we do and pledge to continue to honor our father’s legacy of quality and service. It is our mission to see that US Roofing continues to be the trusted and respected roofing company that he built.
MIK Construction & Remodeling
(978) 972-9500 www.mikremodeling.com
Serving
5.0 from 22 reviews
MIK Construction takes pride in its attention to craftsmanship and quality. We place tremendous value on our customers’ satisfaction, and we create lifelong partnerships with them to ensure their property is maintained in a quality manner.

Over The Top Roofing
(978) 854-3418 overthetoproofing.pro
Serving
4.9 from 179 reviews
Serving both residential and commercial clients in Peabody, Salem, Beverly, Marblehead, Clifton, Danvers and nearby. Over The Top Roofing excels in high-quality roofing solutions, including metal, slate, rubber, and shingle installations. As your premier roofing contractor in Peabody, MA, we offer comprehensive services such as gutter installation, siding, and custom carpentry. With years of expertise, we've been recognized with the Super Service Award in 2019 for our commitment to excellence. Benefit from our referral program and earn a $250 check for each successful recommendation. Trust us for reliable, top-tier roofing services that safeguard and enhance your property.
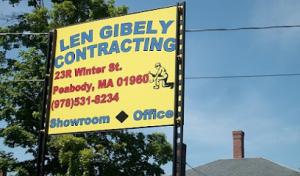
Len Gibely Contracting
(978) 531-8234 www.lengibelycontracting.com
Serving
5.0 from 125 reviews
Full service contractor specializing in exterior residential construction.
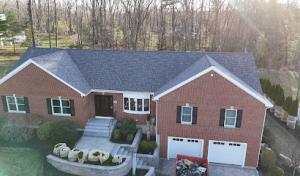
Bevery's mix of older, cut-up rooflines and exposed coastal winds pushes costs higher from the start. More irregular shapes mean additional edge work, more flashing labor, and more carefully sequenced tear-offs. Each segment or valley demands precise flashing and waterproof transition details, which slows crews and raises material and labor pull-through. Asphalt shingles stay common here, but the extra labor on complex layouts is a real price amplifier compared to a simple, uniform roof.
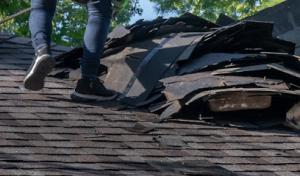
The North Shore climate is hard on roofs, and the tear-off process in this area often runs into tighter timelines and heavier disposal needs. Because coastal exposure increases wind-driven debris and edge exposure, crews spend more time stripping, cleaning, and resealing roof lines. That translates to higher crew-hours, more waste handling, and, consequently, higher per-square costs especially for older homes with multiple roof planes. When a roof has multiple ridges and hips, expect both labor and disposal to push costs up from the baseline.
Replacement timing compresses into late spring through early fall. Winter conditions and spring storms disrupt scheduling, so you'll see tighter calendars and, occasionally, premium crews booking out earlier. If a gut job is needed after a late-season snow, you may face higher demand-driven pricing as crews shuffle to fit in urgent work before winter sets back in. Plan for a window that lets you align weather, material deliveries, and crew availability to avoid premium push.
After regional storm events, labor availability across Essex County tightens and pricing for tear-offs, emergency dry-ins, and disposal can rise quickly. If a storm has recently affected nearby towns, expect bidding to tighten and lead times to slip. This is especially true for projects that require rapid ice-dam mitigation, wind-damage repair, or quick-in installations to prevent further interior damage. Factor in potential surge pricing when forecasting the project timeline and budget.
Get a clear picture of your project costs upfront - no commitment required.


A full roof replacement normally requires a building permit reviewed through the local building department before work begins. Before you sign a contract, verify that your chosen roofing contractor will submit for the permit in a timely manner and that the plans reflect the scope of work, including ventilation, decking condition, and disposal procedures for removed materials. The building department will typically check that the project meets current code requirements for attic venting, insulation, and flashing, as well as egress considerations for any attic access or crawlspaces affected by the tear-off. Because older homes in the area often have layered repairs and altered attic spaces, the permit review can be especially important when ventilation or decking conditions change during tear-off. If the contractor proposes a new intake or exhaust vent configuration, expect the plan to be scrutinized for potential condensation risks and ice-dam prevention effectiveness.
The city schedules inspections during and after the project, with attention to installation practices, venting, and proper disposal of removed roofing materials. An inspector will typically visit mid-project to verify decking integrity, underlayment installation, and flashing details around chimneys, dormers, and roof-to-wall transitions. A final inspection confirms that ventilation adequacy is met, nails and fasteners are correctly placed, and all vent collars and exhaust outlets are properly sealed. For homes with older soffit designs or unusual rooflines, inspectors may pay close attention to any alterations in attic space that could affect airflow, such as reconfigured soffit vents or changes in ridge ventilation. Plan to have access to attic spaces during inspections so the inspector can verify that ventilation paths remain clear and that insulation is not compacted by the new decking.
Because many Beverly houses dating back generations carry layered repairs, the permit and inspection process can surface discrepancies between what exists and what is proposed. If the tear-off reveals rotten decking, unexpected chimney flashing conditions, or compromised attic ventilation stops, the project may need additional approvals or scope adjustments. Stay prepared for adjustments to ventilation strategies if attic spaces are regraded or if old baffles, rafter vents, or built-in soffit channels are discovered to be incomplete or blocked. Clear communication with the building department and the contractor helps ensure that changes are documented and inspected, reducing the risk of rework or noncompliance once the roof is in place.
Massachusetts insurers have shown stricter underwriting on older roofs, and that matters in this area because much of the housing stock predates modern roofing assemblies. When a claim headline hits, the insurer may question the overall condition of an aged roof beyond the visible damage from the last storm. If the roof is a few decades old, expect closer scrutiny of its historical maintenance, ventilation, and flashing. This isn't about denial so much as finding a clear line between preexisting wear and a recent event, which can influence how the claim is paid and how quickly a settlement moves.
After coastal storms and winter damage, adjusters may ask Beverly homeowners for prior photos and a roofer's written assessment to separate sudden storm loss from long-term wear. Having well-organized records helps a claim stay on track. If you've been through a season of freeze-thaw cycles, gather evidence of past repairs, attic ventilation, and any signs of ice damming from previous winters. A professional assessment that clearly differentiates new damage from cumulative aging can prevent dispute over causation, which is a common sticking point in this climate.
Higher deductibles and closer scrutiny of aging roofs can influence whether owners choose spot repair, partial replacement, or full replacement after a claim event. A small leak on a roof that's close to the end of its intended life may tempt a quick patch, but the adjuster's lens may recommend more extensive work if age and prior wear contribute to failure. Conversely, documenting a comprehensive plan-covering upgrades to ventilation, flashing, and insulation-can support a strategy for longer-term reliability, even if the initial claim covers only the most visible damage. In a neighborhood with older homes and enduring exposure to wind and salt spray, a thoughtful, well-documented approach often proves more resilient than a piecemeal fix.
Connect with contractors who help homeowners navigate the claims process from damage assessment to final approval.

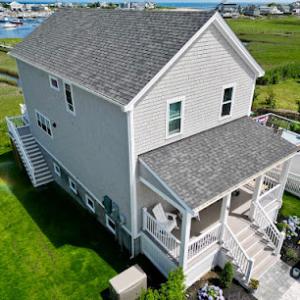
Beverly's mix of multifamily and mixed-use buildings often hides low-slope rear sections, porches, and additions that drain differently from the main pitched roof. Those sections can connect directly to leak-prone wall flashings and older additions, making membrane maintenance a recurring task. Freeze-thaw cycles push water into seams and fasteners, and pooled water on a low-slope surface amplifies the risk of ice dam development at the wall line. In this climate, those pockets of water don't just sit - they push moisture into attic and wall assemblies if the drainage isn't kept clear.
Start with a walk-around after a thaw or rain to spot standing water, especially on porches and rear sections. Check field seams, edge detailing, and any transitions where the membrane meets wall flashings or vertical penetrations. Look for rust, lifted edges, or blistering that suggests moisture is wicking under the membrane. Pay attention to connected additions: even small, older expansions can harbor imperfect flashings. Inspect interior ceilings near exterior walls for discreet stains that signal a slow leak. Keep a calendar for seasonal checks, prioritizing after freeze-thaw events when issues are most likely to show up.
Keep drains clear and extend scuppers or perimeter drip edges to direct water away from wall flashings. If pooled water persists, consider a low-profile drain or a membrane detailing that enhances slope to the scupper. When repairs are needed, ensure the patch matches the existing membrane system and seals cleanly against wall flashings. For affected additions, treat the membrane as a connected system rather than a standalone surface to minimize mismatch and leakage paths. Regularly re-seal at penetrations and flashings to maintain a continuous barrier.
Find specialists in TPO, EPDM, and built-up flat roofing systems for residential and commercial properties.
Decarney Roofing
(978) 304-6147 www.decarneyroofing.com
385 Cabot St, Beverly, Massachusetts
5.0 from 316 reviews
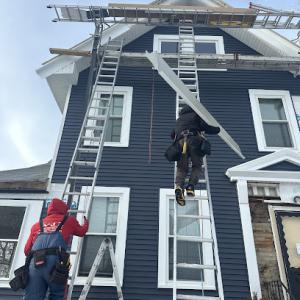
Local hiring patterns in Beverly strongly favor contractors known for quick response and cleanup, reflecting the city's active emergency repair market and dense residential neighborhoods. When a leak or wind-driven shingle loss hits, homeowners expect crews to arrive quickly, protect interior spaces, and leave the site tidy once work is finished. This practicality matters more here than fancy touts about new-construction capabilities.
Re-roofing is a core service in this market, so homeowners are often comparing established crews on responsiveness, site cleanliness, and experience with older homes rather than only on new-construction capability. A proven Beverly crew understands the typical roof lines, chimney terminations, and masonry intersections that show up in long-standing neighborhoods. Ask for recent before-and-after photos in older-house settings, and verify how crews protect landscaping and driveways during lateral deck or overhang work.
Chimney-related work appears frequently in the local market signals, which fits older homes where masonry intersections remain a common source of roof leaks. When evaluating bids, homeowners should emphasize flashing details around chimneys, shoulders against brickwork, and the integration of chimneys with parapets or dormers. A contractor with a track record of careful flashing repairs can prevent recurring leaks behind crown mouldings and interior ceiling stains.
Attic ventilation is a practical priority in older stock, where freeze-thaw cycles tighten up attic decks and vent pathways. Expect recommendations that address baffles, ridge ventilation, and crawlspace access to minimize condensation and ice dam risk.Choose crews that can document a straightforward plan to improve attic airflow, reduce attic temperature swings, and pair ventilation improvements with effective attic insulation.