Last updated: Apr 19, 2026
Salem's exposed North Shore location means roofs endure wind-driven winter storms and Nor'easters that can force water under shingles and flashing. In a chest-deep freeze, gusty northeasters push sea air inland, lifting and sliding shingles while driving spray under edge details. Older Salem homes often carry steeper pitches, multiple chimney legs, and layered transitions where flashing sits past its prime. That combination creates eager paths for moisture to slip into the attic or between living spaces if the roof deck isn't defending properly. When a Nor'easter hits, preparation must be decisive: seal up potential entry points, clear debris from gutters and scuppers, and keep a close eye on eave lines during thawing periods.
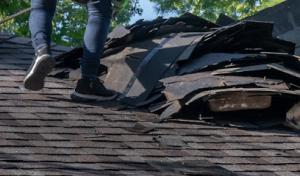
Cold, snowy winters followed by freeze-thaw swings increase the likelihood of ice dam formation along eaves on older roofs. Water can back up behind dammed ice and push under shingles at vulnerable corners, valleys, and along chimney flashings. In Salem, where historic housing stock preserves intricate roof edges, a single warm-up day can melt rooftop snow and refreeze at the eave, creating a stubborn dam. Once a dam forms, meltwater seeks its own path, often traveling laterally across underlayment or between layers before dripping inside. The result is not always immediate or obvious; water can travel along valleys and around chimney transitions, then surface in a tucked closet, behind a plaster crown molding, or along a historically delicate ceiling.
Dense older neighborhoods complicate leak tracing because water often travels around chimneys, valleys, and layered roof transitions before showing indoors. In many cases, interior stains appear far from the actual breach. Look for moisture within flat ceiling planes beneath roof hips, or along interior walls that align with the roof's perimeter rather than directly under the roof edge. Inspect attic insulation for dampness and look for signs of ice backing away from the eaves after a thaw. When you see brownish staining near a chimney breast, don't assume the leak starts there-the true entry could be several feet away, routed by the roof's historic geometry. Time is critical: the longer moisture sits, the more the structural members and plaster or lath can suffer.
If a winter storm is imminent, install temporary improvements to protect vulnerable eaves and flashing, such as securing loose metal with roofing cement and adding water-tight sealant along the eave edge. After a storm, perform a cautious exterior inspection from ground level or a safe ladder position for loose shingles, lifted flashing, or ice buildup along cornices and valleys. Inside, set up a quick daily check for new stains or damp patches; early detection keeps damage from spiraling. If a leak is detected, minimize interior exposure by moving valuables away from the affected area and placing a bucket or tarp to manage drips while you arrange professional assistance. In historic districts, specialist roofers with experience preserving traditional details can assess the condition of complex ridge lines, chimney flashing, and valley transitions where older assemblies are prone to fail after a harsh freeze-thaw cycle.
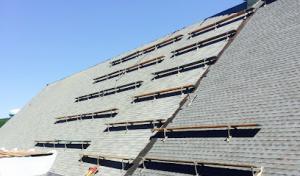
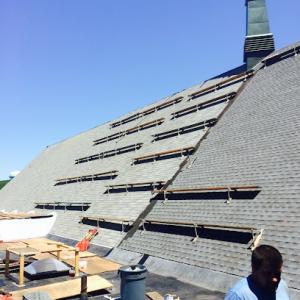
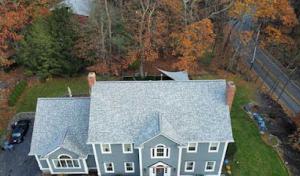
Salem has a high concentration of older and historic-era homes where steep roof geometry, dormers, and masonry chimneys create more flashing points than newer subdivisions. Each peak, valley, and dormer throat acts like a potential leak trap, especially after a heavy winter freeze or a coastal storm. When a roofline carries multiple angles and transitions, standard flashing details can fail where materials meet at irregular planes. A careful assessment focuses not only on the visible shingles, but on the intersections where metal, vent stacks, and chimney humps converge. If a roof is preserved in place with its original chimney and dormer configuration, the flashing must be tailored to the exact geometry rather than relying on generic, one-size-fits-all hardware.
Chimney intersections are a recurring concern locally because many Salem homes still have prominent masonry stacks that age differently than surrounding roofing materials. Over decades, lime mortar can crumble, bricks can spall, and the flashing around a chimney may detach or sit too high relative to newer roofing underlayment. The result is a quiet but persistent pathway for water to migrate into attic spaces, wall cavities, or even interior rooms. When a re-roof is undertaken on a historic property, expect more time spent on coordinating chimney sidelighting, copper counter-flashing, and step flashing that matches the house's character. Cutting corners here rarely saves money in the long run and can compromise structural framing, attic insulation, and plaster or wood throughout the upper levels.
Winter ice dams are a constant reminder that coastal weather and freeze-thaw cycles collide with attic insulation weaknesses. In older homes, attic floors often don't reach the same level of insulation as modern builds, making warm roof areas and heat leakage more likely to form ice dams at eaves. The result can back up under shingles, rot roof decking, and push water toward interior corners where a dormer meets a main roof plane. Damage from coastal storms compounds these issues: wind-driven rain can pry at vent boots, rake-edge detailing, and the first line of defense installed along chimney crickets or hips. The consequence is not just a wet ceiling; it can be rot behind plaster, mold in wall cavities, and visible staining around crown moldings once leaks travel.
When planning repairs or replacement on visibly historic properties, the goal is to preserve architectural character while addressing modern performance needs. Start with a thorough leak-diagnosis map that highlights chimney intersections, dormer flashings, and valley lines. Reinforcement should emphasize compatible flashing materials-copper or corrosion-resistant alloys where appropriate-and matched profiles that respect the original roof language. In many cases, a meticulous, custom-fitted flashing plan reduces recurring leaks more effectively than a quick seal. Keep in mind that even diagnostics can require careful access strategies to protect decorative details, trim, and masonry. The outcome should be a roof that remains faithful to its heritage without sacrificing long-term resilience against Salem's winter and coastal climate.
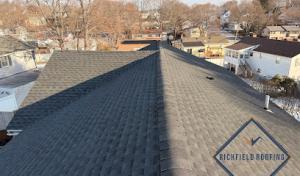
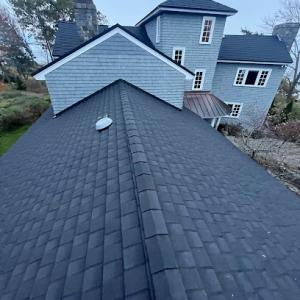
Asphalt shingles remain a practical fit in Salem because they are common, comparatively affordable, and widely used on the city's older pitched residential roofs. In a coastal climate with salt air and winter cycling, they hold up when installed with proper underlayment and ventilation. They're forgiving on steep profiles often found on historic homes, and repair work blends well without altering the roofline. For ice dam-prone winters, emphasis should be on a solid drip edge, effective attic insulation, and a roofing system that can shed snow reliably. When choosing asphalt, prioritize laminated or architectural styles that resist wind uplift and provide ample surface area for a snow-shedding pattern typical of this shoreline area. A Salem roof experience often hinges on careful flashing around chimneys and dormers, plus close attention to valley protection where runoff concentrates.
Metal roofing is especially relevant in Salem's coastal setting because wind exposure and repeated snow shedding are major performance considerations near the shore. A metal panel or standing-seam system offers the potential for quicker shedding after storms and can reduce ice dam buildup when paired with solid attic sealing and an appropriate deck. Its durability against salt-laden air is a key plus, but corrosion resistance matters, especially in areas with tight salt exposure or sanding from winter storms. Installation details matter: ensure a proper seal at protrusions, careful integration with existing chimneys, and a roof pitch that matches the panel profile to minimize panels' exposure to salt spray. For historic homes, think about color and profile choices that respect the roof's historic rhythm while delivering modern performance.
Wood shingles, synthetic products, and tile-style systems need to be evaluated against Salem's salt air, winter moisture cycling, and the structural realities of older homes. Wood shingles can offer a warm, traditional look, but they demand excellent ventilation and a maintenance plan to prevent rot in damp, salty summers. Synthetic and composite shingles provide durability with less maintenance, yet require attention to color stability and expansion in freeze-thaw cycles common here. Tile-style systems, including clay or concrete, offer long life but can impose heavier loads and require a reinforced deck and careful flashing around chimneys and dormers. In coastal settings, salt exposure and freeze-thaw cycles can influence how well these options perform over time; careful assessment of attachment details, sealants, and knock-out details around edges is essential for a long-lived, preservation-conscious roof.
Flat and low-slope roofing matters in Salem because the city includes multifamily buildings, rear additions, porches, and mixed-use structures where drainage is less forgiving than on steep roofs. In these layouts, ponding water, ice buildup, and debris accumulation can sit for days, especially after a nor'easter or coastal storm. The goal is to keep water moving toward proper outlets and away from seams, transitions, and parapets that were not part of the original, steeper roof design.
Older housing stock in the area often features transitions between steep primary roofs and later flat-roof additions. Those junctions are a frequent leak point when flashing details or edge terminations weren't aligned during a retrofit. Look for failed sealant joints at parapets, improper termination of interior gutters, and mismatched flashing around chimney connections where the old roof line meets the newer low-slope section. In addition, flat sections on rear additions or porches can hide daylight drips that don't show up until a freeze-thaw cycle stretches them.
Snow and ice buildup are a bigger operational issue on low-slope sections because winter debris removal and ponding risk can delay repairs. Keep a clear path for meltwater to flow off the roof, not into a wall or interior ceiling. For flat roofs, ensure scuppers and internal drains are open and free of obstructions, especially after heavy snowfall. Regularly sweep away aggregated pine needles, leaves, and salt-damaged debris from low-slope areas so water has an uninterrupted path to drains. Packaged ice- and water-shedding details should be evaluated during the shoulder seasons to prevent ice dams from forming at transitions.
When plans involve tying an older steep roof to a newer flat addition, pay close attention to the interface. The most fragile points are where flashing stops and starts, and where edge metal meets a parapet. Use continuous membrane or properly taped seam systems at these joints, with corrosion-resistant fasteners and backer materials that can tolerate freeze-thaw cycles. Verify that the roof's slope, even if minimal, meets the membrane manufacturer's requirements for drainage and warranty acceptance.
Perform targeted inspections after major storms or rapid thaw periods. Check for pooled water near scuppers, drain outlets, and along parapet edges. If any damp spots appear on interior ceilings close to the flat section, treat it as a priority leak path and uncover the area to confirm flashing and seam integrity. In older buildings, schedule a professional evaluation of transitions between the steep roof and any flat additions to prevent small issues from becoming widespread leaks.
Find specialists in TPO, EPDM, and built-up flat roofing systems for residential and commercial properties.

J B Kidney Co Inc Roofing & Sheet Metal
(978) 744-2875 jbkidneyroofing.com
41 Osborne St, Salem, Massachusetts
4.4 from 7 reviews
Professional Roofing Contractors
(978) 744-6888 www.proroofingboston.com
11 Franklin St B, Salem, Massachusetts
4.3 from 6 reviews
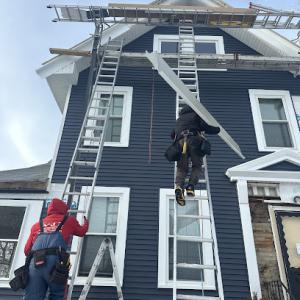
Replacement costs in Salem are rarely driven by raw square footage alone. Costs go up quickly when the roof has a steep pitch, dormers, chimneys, or tight access around older in-town homes. Maneuvering materials and staging equipment adds labor time and risk, which pushes the price up more than you'd expect from a simple plan.
The weather cycle matters. Coastal storms and winter freeze-thaw cycles can compress schedules after a big wind event, limiting crews and delaying orders for complex materials. That timing pressure tends to raise labor costs and can introduce short-term price spikes for popular products.
Material choice matters sharply. Asphalt Shingles remain the entry-price option, but for historic-style rooflines with multiple angles and delicate details, metal, clay tile, and concrete tile quickly become costly. Wood shingles or shakes and synthetic options sit between in price, yet their look can influence long-term value and maintenance.
Cost ranges by material reflect that reality. Asphalt shingles commonly fall into roughly 350 to 700 USD per square, depending on slope and access. Metal roofing generally ranges from 800 to 1500 USD per square. Clay tile 1000 to 2000, concrete tile 1000 to 2000, wood shingles 600 to 1100, synthetic 650 to 1100.
For historic homes with steep pitches and multiple roof lines, planning ahead matters. Contractors often price by the project phase-tear-off, disposal, underlayment, flashing, and finish work-so you'll see caps or adjustments if chimneys or dormers require custom flashing or copper details. A careful, itemized estimate helps avoid surprises when winter storms loom and crews tighten schedules.
In practical budgeting, you should request an apples-to-apples comparison that includes tear-off, disposal, underlayment upgrades, ventilation, and roof-to-wall flashings. For historic areas with dormer valleys and chimneys, ask for copper or zinc valleys where appropriate, even if they add cost. Schedule weather windows with a contingency for a late-winter snap, and discuss staging options that minimize work in tight alleys or overhangs. Choosing a contractor with Salem experience helps maintain control during busy months.
Get a clear picture of your project costs upfront - no commitment required.


MGS Construction
(603) 237-1011 www.mgsconstructionllc.com
224 Main St Suite 3A, Salem, New Hampshire
5.0 from 526 reviews
MGS Construction provides roofing, siding, windows, and decks, to all of NH and MA.

A&A Services Home Improvement
(978) 613-8232 a-aservices.com
115 North St, Salem, Massachusetts
4.9 from 520 reviews
A&A Services Home Improvement in Salem provides reliable roof replacements tailored to the North Shore’s coastal weather. Our team specializes in helping homeowners protect their properties from heavy winds, harsh winters, and moisture issues common throughout Salem and surrounding areas. We deliver professional roof installation, replacement, and exterior improvements designed for long-lasting performance. As trusted roofing contractors with decades of local experience, we’re committed to quality workmanship and dependable service on every project.
Professional Roofing Contractors
(978) 744-6888 www.proroofingboston.com
11 Franklin St B, Salem, Massachusetts
4.3 from 6 reviews
The leading roof repair and roof replacement contractor in Greater Boston for over 50 years. Specializing in Commerical, Slate, Copper, Rubber, EDPM, Shingle, Steeple.

Sea Coast Roofing & Siding
(781) 851-3766 www.roofinglynn.com
Serving
5.0 from 13 reviews
Welcome to Sea Coast Roofing and Siding based in Lynn, Massachusetts! We are an experienced team dedicated to providing top-quality roofing and siding services. With over 75 years of combined experience, we have built a solid reputation for excellence and reliability. We offer a wide range of services to cater to all your home exterior needs, including installation, repairs, and maintenance. Our team of skilled professionals uses only top-quality materials to ensure that your project is completed to the highest standards, on time and within budget. Contact us today for a free estimate and let us help you protect your home with our top-quality roofing and siding services.

Over The Top Roofing
(978) 854-3418 overthetoproofing.pro
Serving
4.9 from 179 reviews
Serving both residential and commercial clients in Peabody, Salem, Beverly, Marblehead, Clifton, Danvers and nearby. Over The Top Roofing excels in high-quality roofing solutions, including metal, slate, rubber, and shingle installations. As your premier roofing contractor in Peabody, MA, we offer comprehensive services such as gutter installation, siding, and custom carpentry. With years of expertise, we've been recognized with the Super Service Award in 2019 for our commitment to excellence. Benefit from our referral program and earn a $250 check for each successful recommendation. Trust us for reliable, top-tier roofing services that safeguard and enhance your property.
Len Gibely Contracting
(978) 531-8234 www.lengibelycontracting.com
Serving
5.0 from 125 reviews
Full service contractor specializing in exterior residential construction.

US Roofing
Serving
4.9 from 58 reviews
Our goal is to continue to provide the same kind of superior customer service with quality, experience, and integrity that our customers have come to expect. We are committed to continually improve on the quality offered to our customers and the communities we service. Our name reflects our pride in this country as well as family pride. We are proud of what we do and pledge to continue to honor our father’s legacy of quality and service. It is our mission to see that US Roofing continues to be the trusted and respected roofing company that he built.

JN Construction & Improvements
(978) 728-8120 jnconstructionboston.com
Serving
5.0 from 202 reviews
JN Construction & Improvements offers expert roofing, gutter, and exterior construction services across Lynn and surrounding Massachusetts areas. With 20+ years of hands-on experience, founder Ruben Nolasco has built a reputation for reliability, quality workmanship, and affordability. As a proudly immigrant-owned business, we are committed to raising industry standards and delivering durable, client-focused solutions for every home or building.

Melo's Construction
(978) 375-1958 melosconstruction.com
Serving
4.5 from 21 reviews
For over three decades, our roofing contractors have been dedicatedly serving the Northshore/Boston area, building a reputation for excellence and reliability. Our extensive experience in the industry positions us as a leading choice for both residential and commercial roofing needs. If we included the work we have done in the past 30 years, we could fill up a few dozen pages. Melo's Construction is hands down the longest-running roof contractor in the area, which means we can outmatch the competition in experience alone. So, if you want the best roofing contractor in Peabody and the most reliable roofing, get in touch with our representative now.
WJZ Construction
(781) 469-3726 lynnroofingservices.com
Serving
4.8 from 41 reviews
WJZ Construction is the top choice in Lynn, MA, if you are looking for home remodeling services. We understand the importance of sticking to a budget while still providing high-quality craftsmanship. Our team will work closely with you throughout the project to ensure that the results exceed your expectations while staying within your budget constraints.
FJM Construction
(781) 731-4757 fjmconstructioninc.com
Serving
4.8 from 18 reviews
Fjm construction offers Roofing contractor services in Lynn, MA and surrounding areas.
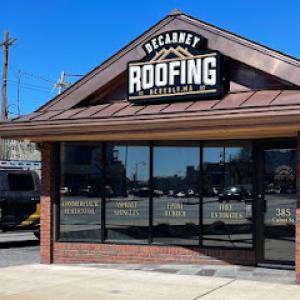
Decarney Roofing
(978) 304-6147 www.decarneyroofing.com
Serving
5.0 from 316 reviews
DeCarney Roofing is the North Shores leading Roofing specific contractor. Founded by Mario DeCarney a third generation roofer in 2017. We Specialize in Asphalt shingle and EPDM Rubber new roof installations & repairs. We look forward to protecting your home from all the weather New England has to offer!
In this city, a building permit is typically required through the Building Department for a full roof replacement. The permit process reflects the mix of historic housing stock and coastal exposure, so crews should anticipate coordination with local inspectors who understand steep, older rooflines, chimneys, and preservation-sensitive details. The permitting focus is on safety, setback compliance, and the integrity of roof penetrations, rather than on a lengthy design submittal.
For standard re-roofs in Salem, permit submissions generally include basic project details and do not usually require a full plan review. A straightforward scope-roof type, square footage, and anticipated work sequence-often suffices. When dealing with historic homes or roofs with unique features, provide clear notes on flashing around chimneys, skylights, valleys, and any cornice or ornamental details. Keeping the Department informed about material choices and weather precautions helps prevent delays caused by weather-related concerns common to the North Shore.
Inspections are scheduled during the project as work progresses. A typical sequence follows framing or sheathing, underlayment installation, and finally roof covering. With icy winters and coastal salt exposure, inspectors pay close attention to underlayment protection, ventilation, and proper shingle or panel attachment in exposed locations. Ensure access for the inspector to attic spaces, eaves, and roof penetrations, as these checks are crucial for long-term performance given Salem's freeze-thaw cycles and storm exposures.
A final inspection closes out the permit. This visit confirms the roof is installed per code and complies with any local historic preservation considerations. If the project involves preservation-sensitive details, be prepared to show alignment with applicable historic guidelines and, when relevant, any approved deviations. Once the final sign-off is posted, the project can be closed in the system, allowing the property to resume normal use without regulatory hold-ups.
Massachusetts insurers increasingly scrutinize roof claims after severe winter storms and high-wind events, a reality that hits coastal exposure zones like this area especially hard. The mix of historic homes, steep older rooflines, chimneys, and preservation-sensitive detailing means damage can be subtle, localized, or hidden under snow and ice. When a Nor'easter or wind event blows through, carriers may question whether observed issues are truly storm-driven or pre-existing wear from years of freeze-thaw cycles. Expect a more cautious, inventory-driven approach from insurers and adjusters.
Salem homeowners should expect insurers to request photos, contractor estimates, and documentation distinguishing new storm damage from pre-existing wear. Start gathering recent images that show lifted shingles, wind-driven debris, ice dam effects, or moisture intrusion near flashings and chimneys. Keep a dated log of what happened during the storm and any immediate, visible changes inside attics or ceilings. If there are visible ice dams or attic condensation issues after a storm, photograph them promptly from multiple angles. Having clear, timestamped evidence helps separate immediate storm damage from long-term deterioration common on historic, steep-roofed homes.
Adjuster site visits are common before replacement is approved, so documenting conditions immediately after a Nor'easter or wind event is important. Clear access to the roof for photos, and avoid delaying measurements or disclaimers that could complicate the assessment. If scaffolding or temporary tarps are used, document their placement and condition as part of the storm-related narrative. Because historic details matter, show how any damage intersects with chimney transitions, dormers, or ornate trim, so the damage record reflects both structural and preservation-sensitive considerations.
In the days after a storm, perform a careful exterior and attic check while keeping safety in mind. Note any ripple or sag in decking, missing shingles, or dislodged flashing around chimneys. Preserve signage or notices from the insurer and contractor communications, and coordinate any temporary measures that protect the interior from further water intrusion. The goal is to build a precise, storm-specific file that helps a claim move forward without getting tangled in pre-existing wear or ambiguous causes.
Connect with contractors who help homeowners navigate the claims process from damage assessment to final approval.

On Salem's older roofs, skylights are higher-risk details because they are often retrofitted into aging roof assemblies rather than built into new construction. In historic homes, the original roof structure may not have anticipated a large opening or the weight of modern skylight units, leading to mismatched flashing, compromised underlayment, and subtle transitions that invite moisture intrusion. Freeze-thaw cycling, paired with wind-driven coastal rain, stresses skylight penetrations differently than other roof penetrations, making flashing around the perimeter a frequent failure point. The result is leaks that don't always appear at the skylight frame; water often travels along rotted or compressed sealant, then shows up at the opening or along nearby transitions.
Tracking the flashing detail around a skylight is essential in this climate. Salem's windy fronts can peel up edge flashing, while freeze-thaw cycles widen microcracks in sealants. Pay close attention to step flashing where roof field meets the skylight curb, and verify that the top flashing is integrated with a waterproof head flashing that sheds water away from the curb. The skylight curb should sit on a continuous, back-vented roof deck with properly lapped underlayment, not on a single layer of membrane. If the skylight sits behind a chimney or near a dormer, those surrounding transitions demand extra scrutiny because water can funnel along hidden channels into the opening.
Skylight leaks in this area can be misdiagnosed because water may enter at nearby flashing or transitions and appear at the skylight opening. Start with a careful parallel check of adjacent flashing, hip or valley intersections, and the sealant joints along the skylight flange. Inspect for signs of ice dams or wind-driven rain pooling around a curb, which can back up under shingles and pool atop the flashing. When examining the interior, trace moisture to the nearest roof transition rather than assuming the skylight itself is at fault. A temporary interior test, using a controlled shower or a hose with a wide spray, can help locate the true source before costly repairs are pursued.
Find contractors experienced in skylight installation, flashing, and leak repairs to bring natural light into your home.

MGS Construction
(603) 237-1011 www.mgsconstructionllc.com
224 Main St Suite 3A, Salem, New Hampshire
5.0 from 526 reviews

A&A Services Home Improvement
(978) 613-8232 a-aservices.com
115 North St, Salem, Massachusetts
4.9 from 520 reviews