Last updated: Apr 19, 2026
Wakefield's cold winters and repeated freeze-thaw cycles make ice-dam formation a primary roof threat during snow season. When snow sits on an old, heat-leaking attic, the sun or daylight warmth melts it from below. The melted water refreezes at the eave, forming a dam that pushes back under shingles and into the roof deck. In neighborhoods of older New England houses, this pattern is all too common and demands immediate attention as temperatures drop.
Many homes in this area carry uneven attic insulation and aging ventilation that trap heat and melt roof snow from below. This is especially true around the perimeter where soffits meet the attic floor and along valleys where roof planes meet. Leak points in this market often cluster around eaves, valleys, dormers, and chimney intersections after snow refreezes at the roof edge. The result is a slow drip that can travel along rafters before you notice it inside, often long after a storm has passed.
Check attic insulation depth and distribution; gaps or compressed spots near the eaves reduce protection where heat rises to melt snow. Look for ventilation-both soffit and ridge vents-paired to move air continuously through the attic. If warm air leaks into the attic from your living spaces, seal it with gasketed covers and weatherstripping at attic hatches and rim joists. Outside, inspect the roof edge for soft or missing shingles near the eaves, damaged flashing around chimneys and dormers, and any cracks in sealant at valleys. If you can see daylight through the attic hatch or through gaps around chimneys and dormers, that space is contributing to heat loss and ice dam risk.
Prioritize improving attic insulation and sealing air leaks before heavy snows arrive. A tight attic reduces the heat that bleeds to the roof, cutting the melting cycle that creates dams. Improve ventilation by ensuring soffit vents are clear and ridge vents are unobstructed to promote a continuous air path across the attic. Maintain and repair flashing at chimneys, dormers, and roof valleys; missing or cracked flashing invites water to back up under shingles when the ice dam forms. For roofs already bearing ice dams, a careful, temporary removal of accumulated snow from the roof edge can reduce dam size; never chip ice with force from the ground-use a roof rake from the ground with a long handle, staying clear of gutters and downspouts.
Set a pre-winter inspection with a qualified roofer to evaluate insulation levels, attic ventilation balance, and flashing integrity. Schedule a mid-winter check after significant storms to confirm dams aren't backing up along eaves or near intersections. Keep a clear path along the roof edge for estimated snow slides and ensure downstream gutters and downspouts are free of ice and debris to prevent backups. In homes with long-standing dam issues, consider upgrading attic insulation to a higher R-value and recalibrating ventilation to ensure steady air movement even during cold spells.
If you notice recurring leaks after a storm, visible ice buildup along eaves, or damp spots on interior ceilings that track toward a roof edge, contact a local roofer promptly. Ice dams can cause hidden structural damage and ceiling failures if left unchecked, especially on older houses with decades of wear around chimneys and dormers. Quick professional assessment can pinpoint whether insulation, ventilation, flashing, or a combination of these factors is driving the problem-and guide effective, lasting fixes.
Winter in this part of Massachusetts brings heavy snow, ice dams, and periods of rapid thaw followed by cold snaps. Summer humidity can push ventilation and underlayment performance to the foreground, especially on older Wakefield housing stock that relies on attic ventilation to keep roof systems dry and shingles from becoming brittle. Asphalt shingles dominate because they balance cost, ease of installation, and repairability, but the wins are not automatic. Proper attic ventilation, a well-sealed underlayment, and careful flashing around chimneys and vents matter more here than in many milder climates. When evaluating a roof's durability, think about how a long Maine-style winter can stack snow on a low-slope area near a dormer or chimney, and how a hot July afternoon will test underlayment and sealant joints. The surrounding wetlands and Lake Quannapowitt influence moisture paths inside the attic, so ventilation effectiveness and air sealing become practical edge cases for Wakefield homes.
Asphalt shingles remain the dominant practical choice for typical Wakefield housing, especially on cap-and-truss roofs with standard pitch. The practical path is to pair asphalt with an appropriately rated underlayment and an attic ventilation plan that includes intake and exhaust strategies sized for the attic volume. For winter, focus on sealing eave edges and ensuring fascia boards do not create gaps that let cold air travel into the attic, which can fuel ice dam formation. The fasteners, starter courses, and valley details should be chosen with attention to how melt water from snow accumulations will channel toward gutters and downspouts. Chimney flashing deserves careful attention; ice can back up around flashing if the underlayment does not shed water efficiently. In humid summers, ensure the shingles are not shadowed by nearby trees that trap heat and moisture against the roof plane, which can accelerate aging. Ventilation and underlayment compatibility with the chosen shingle type are key to minimizing winter leak risk.
Metal roofing provides a meaningful upgrade path for homeowners focused on snow shedding and longer service life through Massachusetts winters. In Wakefield, metal can reduce the duration of ice dam risk by promoting faster snow shedding and by offering robust flashing around chimneys and roof-to-wall transitions. If choosing metal, pay attention to panel fasteners and sealants at hips, valleys, and skylight penetrations, since these are common failure points in snow-driven climates. A standing-seam system, in particular, can resist wind-driven moisture and help mitigate leaks in older detailing where ridge vents and attic air flow are less than ideal. Consider the weight and structural implications for the existing roof frame; some older homes may require reinforcement or careful deck design to accommodate the load and expansion movements in Massachusetts winters. Maintenance remains straightforward: keep snow cleared from critical sections and inspect seals around penetrations after heavy snowfall events.
Tile and wood products exist in the market but are less common fits for many Wakefield homes because structural loading, detailing complexity, and maintenance expectations can be higher than with standard shingle systems. Clay and concrete tiles demand a strong roof deck and precise flashing around chimneys and eave lines, which can be a challenge on older stock without substantial retrofit. Wood shingles or shakes bring a distinct exterior aesthetic but require more regular maintenance and moisture management, especially if attic ventilation is not optimal. In practice, these materials are best pursued when the structure has the capacity for the added load and when the homeowner is prepared for a higher maintenance cycle to keep long-term performance reliable through freeze-thaw cycles and humidity fluctuations.
Across all options, the recurring maintenance emphasis is on ventilation, flashing integrity, and proper underlayment. For Wakefield homes, a proactive stance on attic airflow minimizes condensation, ice dam formation, and winter leaks. Routine inspection after heavy snow events and seasonal checks before winter sets in help maintain performance. Ensure that chimney flashing, vent collars, and valley transitions remain sealed, and verify that heat cables or insulation strategies aren't inadvertently directing meltwater toward vulnerable seams. This practical approach aligns with Wakefield's unique combination of snow load, ice dam risk, and a damp climate around Lake Quannapowitt.
The most popular roofing material in the US. Find pros who install, repair, and replace asphalt shingles.
Ralph J Burke Roofing
(781) 245-1110 ralphburkeroofing.com
8 Sheffield Rd, Wakefield, Massachusetts
5.0 from 17 reviews
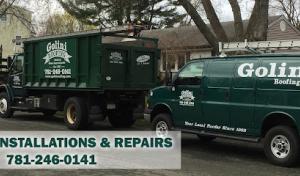
Golini Roofing
(781) 246-0141 goliniroofing.com
46 Nahant St, Wakefield, Massachusetts
5.0 from 13 reviews
Kingdom Roofing & Construction
(617) 230-6239 www.kingdomconstructionma.com
Serving
5.0 from 13 reviews
Spring storms and heavy rainfall in this area raise leak risk both during active installation windows and on roofs with winter damage that was not caught earlier. Snow melt and thaw cycles can reveal hidden failures in flashing around chimneys, skylights, and vent stacks, especially where ice damming damaged underslating or controlled drainage paths. If there was a winter hit-shingle lifting, lifted flashing, or granule loss-spring rain will push water into those weak spots quickly. You should inspect after a thaw or heavy rain, focusing on attic moisture, ceiling stains near exterior walls, and any new exterior drips that appear during rain events. Immediate attention to exposed nails, fasteners, and sealant lines around vents can stop a small drip from turning into a large leak before the next storm arrives.
Fall wind-driven storms can expose shingle edges, ridge areas, and debris-prone sections before winter weather arrives. Wind can peel tabs, lift ridge caps, or shove leaves and pine needles into gutters and valleys, creating channeling points for meltwater. On older homes with mixed materials or mismatched flashing, fall is the time to address compromised seams and clogged drainage that will otherwise pressurize during freeze-thaw cycles. Pay particular attention to any previously repaired seams or flashing that looks fatigued. If a fall storm leaves damaged shingles or exposed nail lines, plan a targeted repair now-not later when snow is on the roof.
Massachusetts insurance claims in this area are more often tied to wind and occasional hail than to major coastal hurricane destruction. That reality translates into a practical approach: treat early spring and late fall as critical windows for proactive fixes. Use daylight to your advantage for inspections, especially after storms when debris accumulates on the roof and in the gutters. Look for loose granules, lifted edge shingles, and irregular flashing joints. If ice damming was an issue last winter, check the eaves and soffits for ice buildup remnants and ensure proper insulation and ventilation are addressing the root causes.
Start with a targeted walk-around after any significant storm and again before the heat of summer or the first hard freeze. Check around chimneys, dormers, and vent stacks for any gaps or discoloration that signals moisture intrusion. Keep gutters and downspouts clear so water can exit cleanly away from the fascia. Remove yard debris that can wash onto the roof and into valleys, blocking drainage. If you notice recurring damp spots in the attic or exterior staining after a rain, call a local roofer for a focused diagnostic-prioritizing areas that were damaged during winter and may be exacerbated by spring storms or fall winds.
Find local contractors experienced in assessing and restoring roofs after hail, wind, and severe weather events.
Golini Roofing
(781) 246-0141 goliniroofing.com
46 Nahant St, Wakefield, Massachusetts
5.0 from 13 reviews
Kingdom Roofing & Construction
(617) 230-6239 www.kingdomconstructionma.com
Serving
5.0 from 13 reviews
Golini Roofing
(781) 246-0141 goliniroofing.com
46 Nahant St, Wakefield, Massachusetts
5.0 from 13 reviews
Golini Roofing, located at 46 Nahant Street in Wakefield, MA, is your premier choice for top-notch roofing services. As a trusted local roofing contractor with over 40 years of experience, we specialize in roof installation, roof replacement, and comprehensive residential roofing solutions. Our expert team is dedicated to delivering unparalleled craftsmanship and uses high-quality materials for long-lasting results. We also offer professional gutter installation and repair. Serving communities including Beverly, Burlington, Melrose, and more, Golini Roofing is committed to providing personalized service and lasting solutions. For reliable roofers near you, contact Golini Roofing today!
Holland Homes Roofing
(781) 864-2525 www.roofwithhh.com
Serving
5.0 from 41 reviews
Welcome to Holland Homes Roofing, where we specialize in quality residential roofing you can see. We understand that roofing repairs are among the most formidable repairs for homeowners. A roof is a costly investment, and you don’t want to leave repairs to just anyone. You want a residential roofer that is experienced, reliable and affordable. For that, you need Holland Homes Roofing, your local Owens Corning Preferred Contractor based in Carver, MA. We have decades of experience in the residential roofing industry and our team has been serving the area for many years. If you need a roofing repair or installation, gutter work or any other roofing-related services for your home, anywhere from Carver to Billerica, contact us today!
Kingdom Roofing & Construction
(617) 230-6239 www.kingdomconstructionma.com
Serving
5.0 from 13 reviews
At Kingdom Roofing & Construction, Inc., we take pride in offering premier roofing services to the greater Boston area, From Lowell to Westford, North Reading, Chelmsford, Newton, and Billerica. As a leading roofing contractor, our expertise spans metal and shingle roofing, new roof installations, and comprehensive roof replacements. We specialize in leak detection and repairs, storm damage restoration, and energy-efficient roofing options that enhance your home's durability and performance. Beyond roofing, we provide siding and painting services, decking and porch construction, as well as home renovation and remodeling. Trust Kingdom Construction, Inc. to deliver quality craftsmanship and responsive service tailored to your needs.
Grimes Roof & Leak Repairs
(781) 680-8002 grimesrooflynnfield.com
Serving
5.0 from 28 reviews
Grimes Roof & Leak Repairs provides trusted, professional roofing services throughout Lynnfield, MA. Our experienced team specializes in roof inspections, accurate leak detection, shingle and tile repairs, complete roof replacements, and ongoing maintenance. We work exclusively with high-grade materials and proven techniques to ensure lasting, weather-resistant results. Whether you're addressing storm damage, aging roofing systems, or planning an upgrade, we offer honest assessments and transparent pricing with no fluff. Clients in Lynnfield benefit from responsive scheduling and a strong dedication to customer satisfaction. For reliable roofing care backed by workmanship you can trust, choose Grimes Roof & Leak Repairs.

Gilmore Roof & Leak Repairs
(781) 742-9066 gilmoreroofrepair.com
Serving
5.0 from 17 reviews
Gilmore Roof & Leak Repairs delivers reliable and professional roofing services to homeowners and businesses throughout Reading. Our experienced team specializes in leak detection, shingle repair, full roof replacements, and preventative maintenance. Using high-quality materials and industry-tested techniques, we ensure long-lasting results built to withstand the elements. Whether you're dealing with storm damage, water infiltration, or normal wear and tear, we provide clear assessments and transparent estimates—without fluff. With prompt scheduling and a commitment to craftsmanship, clients in Reading trust Gilmore for dependable, expert roofing care.

Caesar's Roofing
(781) 860-0800 www.caesarsroofing.com
Serving
5.0 from 8 reviews
Founded in 1974, we are a family owned and operated residential, commercial, industrial roofing & general contracting firm. With over 45 years in business, Caesar's Roofing is recognized throughout New England and nationally for its unparalleled and consistent craftsmanship and customer service. Caesar Sr. and Caesar Jr. are involved in all day to day operations.
Ramirez Painting Corp | Roofing & Remodelling
(617) 275-2682 www.ramirez-painting-corp.com
Serving
5.0 from 29 reviews
At Ramirez Painting we make a concerted effort to provide exceptional service at incredibly affordable rates. Our ability to set employ th latest innovations in the industry has made us a leader in the industry. Don’t believe us? Call now… Our services include: → Painting → Carpentry → Masonry → Roofing → Gutter Cleaning
Peak Quality Roofing
(781) 650-7458 peakqualityroofing.com
Serving
5.0 from 98 reviews
Peak Quality Roofing, based in Melrose, MA, specializes in roofing, siding, and gutter services for homeowners throughout the area. We provide high-quality roofing, expert siding installation and repair, and reliable gutter services to protect your home from the elements. Founded by industry professionals, our company was built on the belief that homeowners deserve fair pricing without sacrificing quality. Our team is committed to exceptional craftsmanship, clear communication, and complete customer satisfaction on every project. Whether you need a new roof, siding replacement, or gutter installation, Peak Quality Roofing delivers durable, long-lasting solutions tailored to your needs. Contact us today for a free estimate.
Johnny's Pro
(781) 519-9025 www.johnnyspro.com
Serving
5.0 from 30 reviews
Johnny’s Pro is a trusted roofing contractor serving MA, CT, RI, and NH. We specialize in full roof replacements, including homes with existing solar systems, as well as siding and gutter upgrades. With over 17 years of experience and 7,000+ homes completed, we’re known for quality, transparency, and results that last. As Owens Corning Preferred and CertainTeed Certified installers, we follow manufacturer standards and offer extended warranties. If you’re going solar and unsure about the roofer recommended by your provider, reach out to us. Our scopes are clean, our process is smooth, and our work is built to last.
FRG Contractor Corporation
(781) 851-4202 www.frgcontractor.com
Serving
4.9 from 31 reviews
For over 20 years, FRG has provided our residential and commercial clients throughout the greater Massachusetts area with top-quality contracting services. No matter the size of the project, we are committed to delivering quality workmanship and competitive pricing. We prioritize safety standards and customer service. Our team is OSHA trained and certified to complete every job properly. FRG Contractor is also fully licensed and insured, so our clients can rest assured knowing that we are reliable and reputable. We also offer free estimates on all our services, including roofing, siding, gutters, remodeling, snow removal, general contracting, and more. Many of our services include installation, replacement, repairs, and maintenance.
McGilley Roofing & Construction
(781) 520-9086 www.mcgilleyroofing.net
Serving
4.9 from 49 reviews
McGilley Roofing & Construction has served Saugus and surrounding communities since 2004, backed by over 30 years of roofing experience. We specialize in roof installations, roof repairs, siding replacements, siding repairs, gutter installations, and gutter repairs for residential and commercial properties. As a GAF Certified contractor, we offer top-tier materials, strong warranty coverage, and honest workmanship. We provide free estimates, maintain clean job sites, and prioritize every customer’s peace of mind. Family-owned, fully insured, and built on trust.
Peter Ryan & Son Roofing
377 Lowell St, Wakefield, Massachusetts
2.9 from 10 reviews
Revamp your property with a little help from Peter Ryan and Son Roofing We offer roofing, siding, window work, and more in the Wakefield, MA, area.
A full roof replacement in Wakefield normally requires a building permit through the local Building Department. Before any work begins, confirm whether your project needs a permit on the town's website or by stopping by the counter in Town Hall. In practice, many aging homes near Lake Quannapowow and adjacent wetlands warrant a permit due to their structural age and the potential for snow load and ice dam concerns. Plan for the permit to be issued in the homeowner's name and to require a project address, structural notes, and the contractor's credentials. If the job involves altering ventilation paths or replacing underlayment, the permit review will scrutinize those choices for compliance with local expectations.
Permit applications may need material and ventilation details, reflecting local attention to underlayment, fastening, and attic airflow performance. When you file, be prepared to list the roof covering type, underlayment type and installation pattern, and the fastener schedule for the chosen roofing system. Since many Wakefield homes sit on older framing, the inspector may look closely at how the attic space is vented and how soffit, ridge, and turbine vents will work together to prevent condensation and ice-related issues. If the plan includes a roof venting upgrade or insulation adjustments, include these details to demonstrate that attic airflow has been considered alongside snow drainage and heat loss concerns. Having stamped drawings or installation catalogs from your chosen product can help speed the review.
Inspections are typically scheduled during and after installation to verify items such as underlayment, nailing, and venting before the job is considered complete. Expect a rough-in check once underlayment and initial nailing are in place, with a final inspection after the shingles or panels are fully installed and flashing around chimneys and skylines has been completed. Because ice dam risk and winter leakage hinge on proper detailing at eaves, valleys, and chimney lines, the inspector will specifically verify correct underlayment laps, nail patterns, and proper venting connections. If any deficiencies are found, a re-inspection will be required after corrections are made. Keeping a clear line of communication with the Building Department and your contractor helps avoid delays and ensures the new roof performs well through Wakefield winters.
When planning a replacement, use local per-square ranges to ground expectations. Asphalt shingles typically run about 420 to 900 per square, metal 900 to 1400, clay tile 1200 to 1900, concrete tile 1100 to 1800, wood shingles or shakes 700 to 1400, and synthetic or composite shingles 600 to 1100. These bands reflect Wakefield's mix of aging homes near Lake Quannapowitt and the varied roof footprints that come with older construction. Material choice matters not just for upfront price but for long-term performance in snow load and ice dam risk.
Costs rise on older structures when tear-off reveals deck repairs, ventilation upgrades, or complex flashing around chimneys and dormers. In Wakefield, stubborn ice dams and winter leaks are common where attic ventilation is insufficient or where retrofits reveal rotted decking. If the original roof deck is sound, a straightforward overlay might be possible, but most older homes end up needing some decking work or new ventilation paths. Expect ballast in your budget for these contingencies, especially with chimneys that require careful flashing and back-dedication to prevent leaks.
Scheduling often works best from late spring through early fall, which aligns with milder weather and cleaner job sites. Pricing can tighten when contractors balance peak re-roofing demand with storm-related repair calls. If you can secure a firm window during shoulder seasons, you may see steadier availability and more predictable completion times. In practice, you'll often find the most cost-stable windows by planning well in advance of winter, when the risk of ice dam-related repairs spikes.
Ice-dam prevention hinges on proper ventilation and robust flashing detail around chimneys and dormers. Even a well-priced shingle upgrade can overrun the budget if uncovering hidden flashing failures or replacing compromised gutters becomes necessary. In Wakefield, expect additional attention to insulation and attic venting alongside the roof itself, since these factors drive long-term performance against snow load and winter leakage.
Get a clear picture of your project costs upfront - no commitment required.
Wakefield homeowners should expect insurers to request photos, damage documentation, and sometimes a professional roof certification when replacement is tied to a claim. Clear, dated evidence helps insurers see the scope of damage, especially on older homes where ice dams and wind impact may create uneven wear. Having a concise narrative that ties the photos to specific events can prevent questions about causation or coverage.
Adjusters in this market review whether the new roof installation and materials align with policy requirements and workmanship expectations. They look for compatibility with existing decking, ventilation, and flashing details that are common on local homes near Lake Quannapowitt. Documentation that demonstrates proper installation and material compatibility can smooth the path toward approval, particularly on partial repairs that might be considered before a full roof replacement.
Because claims here are typically tied to wind and occasional hail rather than catastrophic coastal loss, documentation quality can strongly affect whether partial repair or full replacement is approved. Insurers weigh the reliability of specifications, compatibility with existing ventilation, and how well flashing around chimneys and dormers has been addressed. High-quality records reduce ambiguity about whether the damage is covered and how best to restore performance.
Build a chronological file with dated storm reports, contractor invoices, and before-and-after photos showing roof lines, flashing, and ice-dam evidence. Include notes on attic ventilation effectiveness and any signs of interior leaks that correspond to exterior damage. If a professional roof certification is requested, secure a licensed roof certifier to assess and document the roof's condition and expected remaining life.
Avoid blurry or indoor-only photos that hide critical details. Don't submit partial damage without context or a clear link to the triggering event. Skipping documented expert input when certification is possible can stall decisions. Ensure every image or document ties back to a specific claim event to minimize back-and-forth with the adjuster.
Connect with contractors who help homeowners navigate the claims process from damage assessment to final approval.

Skylight service is a common recurring repair issue during freeze-thaw cycles and heavy rain periods in this area. When a skylight edge sits on a curb, the surrounding shingle integration matters as much as the curb itself. In wakeful attention, inspect the flashing around the skylight at the start of winter and again after the first big thaw. Look for loose, bent, or split flashing and for any gaps where old sealant has failed. If shingles adjacent to the curb show cupping or curling, schedule a proactive reseal and re-flash to keep water from wicking under the flashing and into the roof deck. A durable sealant should be compatible with aging asphalt or composite shingles and tested for winter performance.
Chimney flashing remains a top trouble spot on older stock here, especially where mortar joints have settled or cracked. A reliable approach is to check the counter-flashing where the chimney meets the roof and verify that the step flashing is continuous up the side. Ice dams form at these joints when warm attic air melts snow near the chimney, then refreezes at the cold edge. If metal flashing shows loose fasteners or lifted edges, secure or replace promptly to prevent water intrusion into the eaves and attic. Prioritize any sign of rust, cracking, or slipped mortar as these predict more leaks after storms.
Flat and low-slope sections are prevalent on porches and additions, and these areas demand careful attention to edge detailing and drainage. Ensure roof-to-wall transitions are flashed correctly and that any surface membrane isn't showing wear from foot traffic or foot-heavy seasonal use. When a low-slope roof feels soft underfoot or shows pooled water after rains, plan for a professional evaluation of the membrane, drainage, and any penetrations. In winter, check for ice buildup along the drip edges and around penetrations, addressing deficiencies before they expand into leaks.
During mid-winter audits, prioritize skylight curbs, chimney flashing, and low-slope seams. Document any loose fasteners, lifted shingles, or degraded sealants, and schedule timely resealing or flashing replacement. Proper integration of flashing with surrounding shingles reduces the risk of winter leaks and evaporates the need for repeated emergency repairs on aging Wakefield homes.
Find contractors experienced in skylight installation, flashing, and leak repairs to bring natural light into your home.
Ralph J Burke Roofing
(781) 245-1110 ralphburkeroofing.com
8 Sheffield Rd, Wakefield, Massachusetts
5.0 from 17 reviews
Kingdom Roofing & Construction
(617) 230-6239 www.kingdomconstructionma.com
Serving
5.0 from 13 reviews